![]()
Creating a Private Windows 10 and Ubuntu Workspace Image
V1.0 – November 2023
| Version | Author | Description |
|---|---|---|
| V1.0 – 2023-11-09 | Wisley da Silva Paulo 00830850 | Initial version |
Objective
This document aims to collect and formalize the information required for implementing the creation of private images in the IMS service to be used in the Huawei Cloud Workspace service.
Creating a Windows 10 image
-
Download the Windows 10 ISO image from the Microsoft website.
-
Download the packages as shown in the link (https://support.huaweicloud.com/intl/en-us/usermanual-workspace/workspace_06_0507.html) and add them to a bucket to facilitate transfer to the machine at the time of installation.
-
After downloading the Windows 10 ISO image and all the packages, perform the procedure in the link (https://support.huaweicloud.com/intl/en-us/usermanual-workspace/workspace_06_0508.html) to add drivers to the ISO file.
-
Start the installation and configure the driver as shown in the link (https://support.huaweicloud.com/intl/en-us/usermanual-ims/en-us_topic_0146474784.html).
-
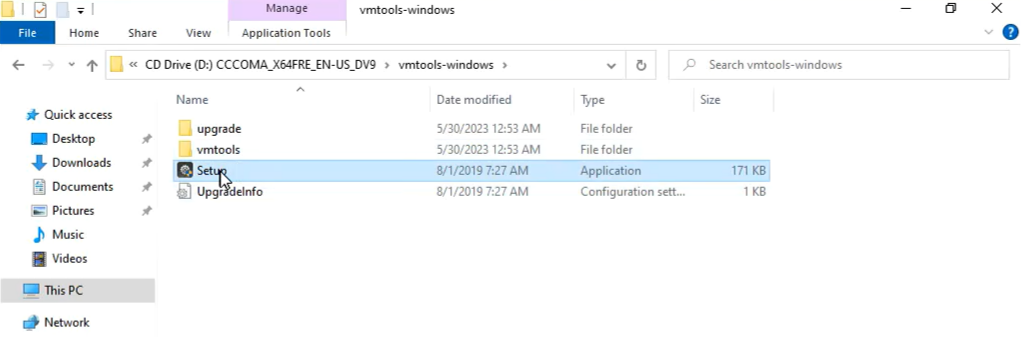
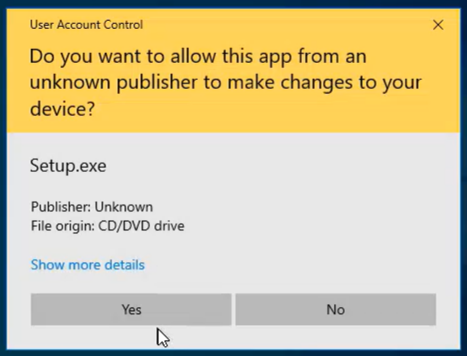
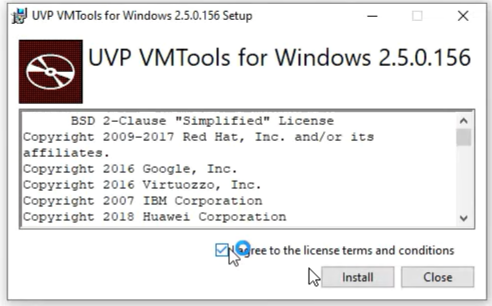
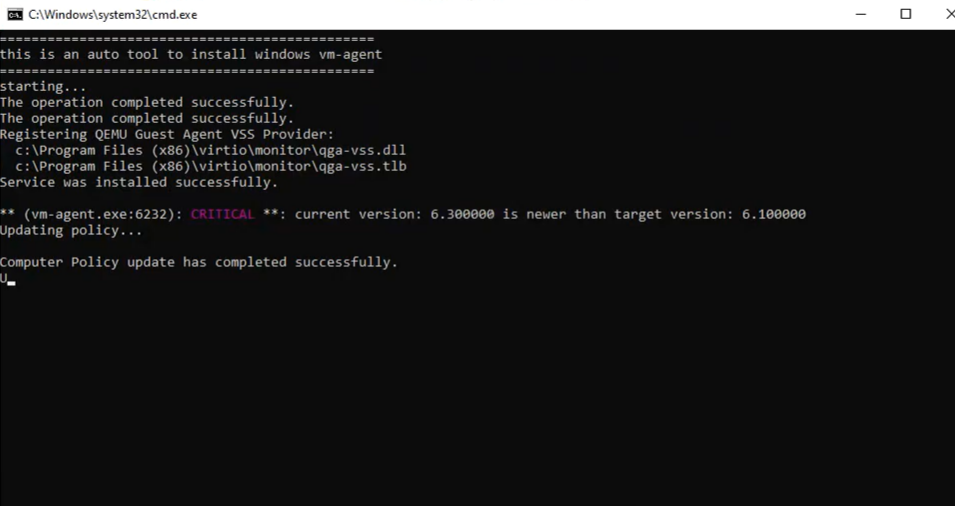
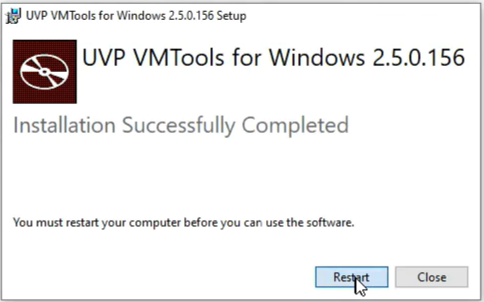
Access the CD, open the vmtools folder that was added to the ISO, and install vmtools.
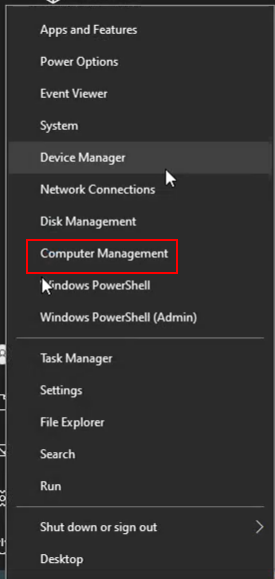
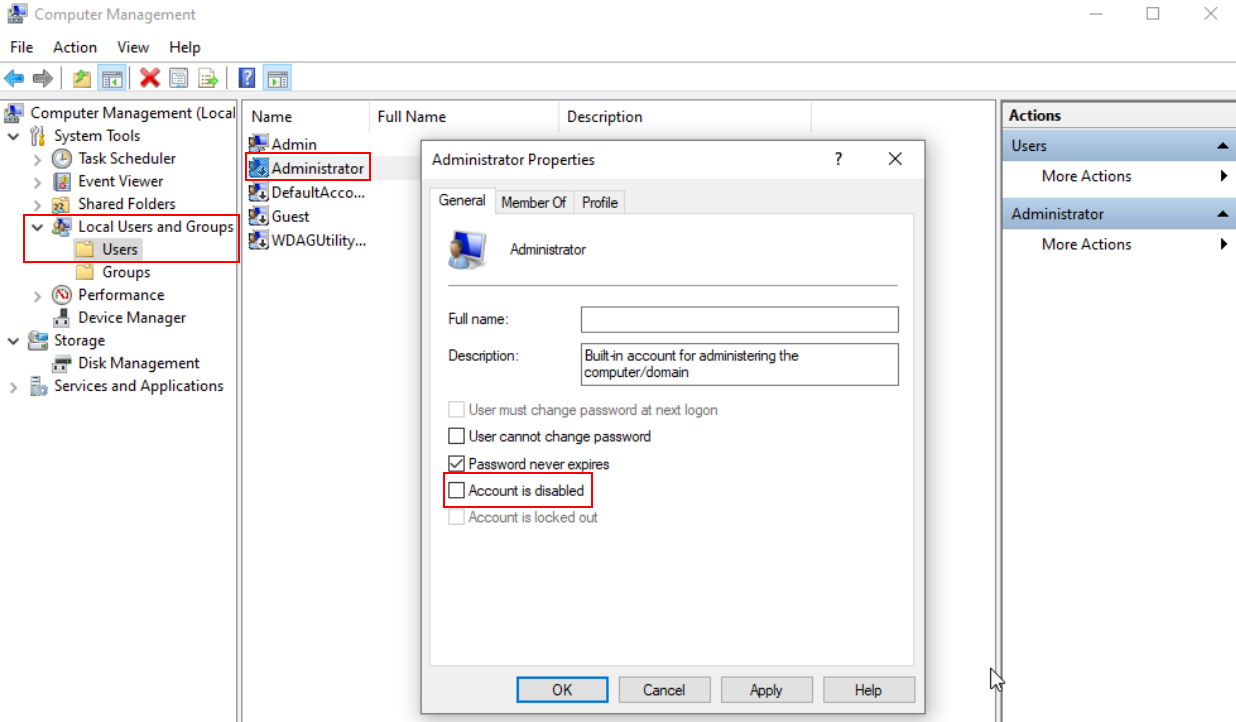
Activate the Administrator user by right-clicking on the start button, accessing the “Computer Management” option, accessing the “Local User…” option, then “User”, right-click on the Administrator user, properties and then uncheck the option to disable the user. Repeat the procedure to access the user and set a password for the user. Log off with the current user and log in with the Administrator user.

Make the settings indicated in the link (https://support.huaweicloud.com/intl/en-us/usermanual-workspace/workspace_06_0510.html) up to item 56.

Ignore the item marked in red in this item.
You can ignore items 40 to 49
Items 50 to 56 are just checks (adjustment is rarely required).
Install the software listed in the link (https://support.huaweicloud.com/intl/en-us/usermanual-workspace/workspace_06_0510.html) from item 57 onwards.
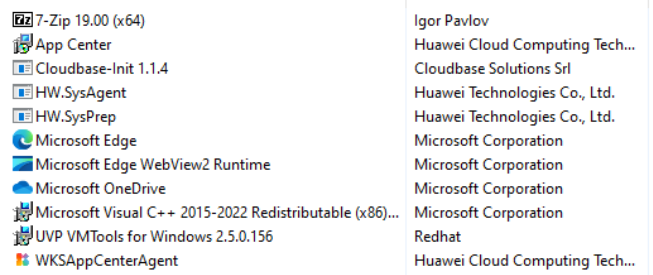
Check in the control panel if the programs have been installed
Before installing the latest tool (Workspace_HDP_WindowsDesktop_Installer) make sure that all operating system updates have been performed, otherwise you may receive the error:
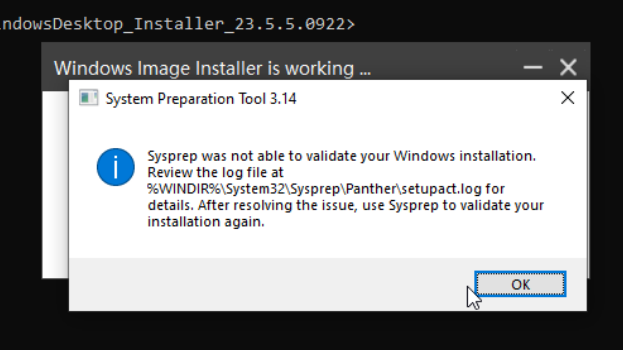

This command has an error the marked word is missing a letter “n” the correct command is: run_silent.bat –passive –environment_type 2 –nocheck –noshutdown
When initializing, Administrator access will be unavailable. Log in with the user created during installation and set a new password for Administrator. Log in with Administrator to complete the procedure.
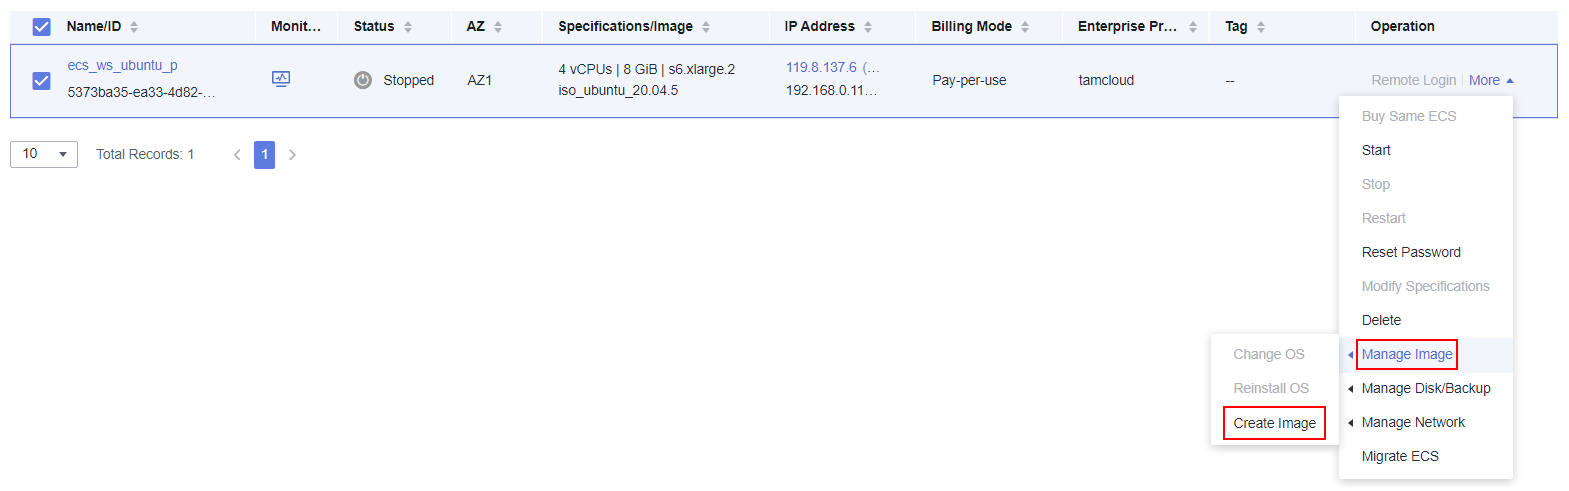
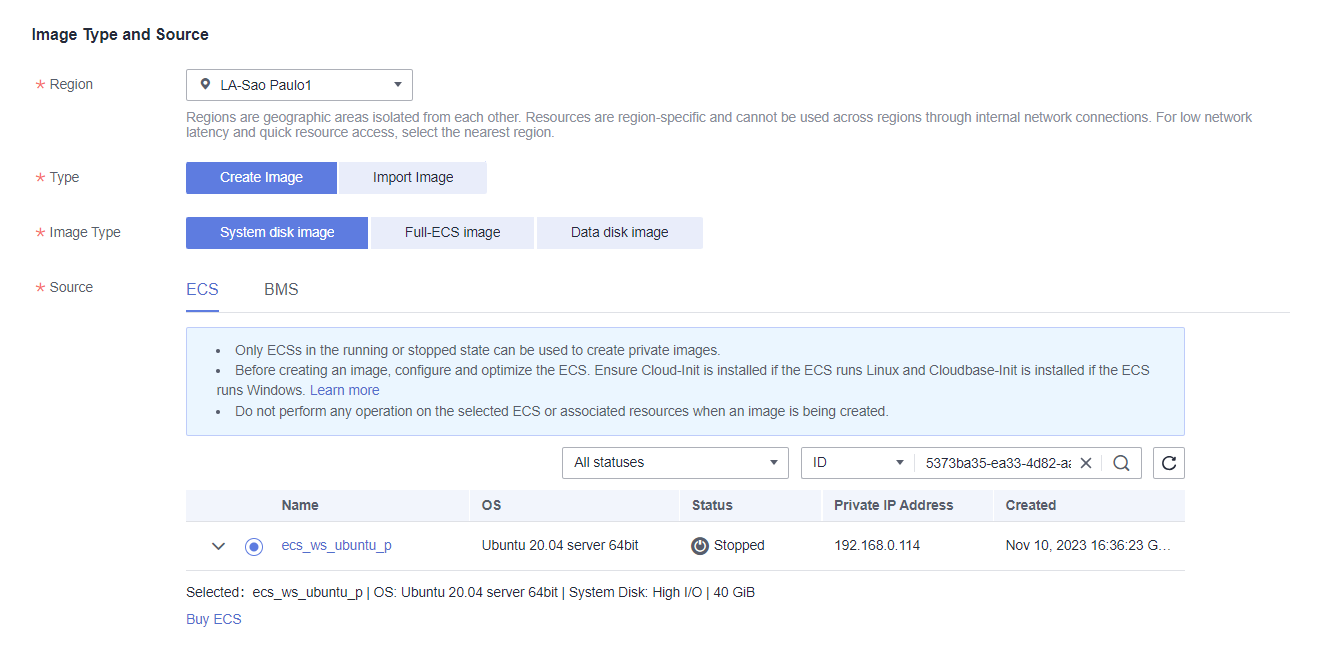
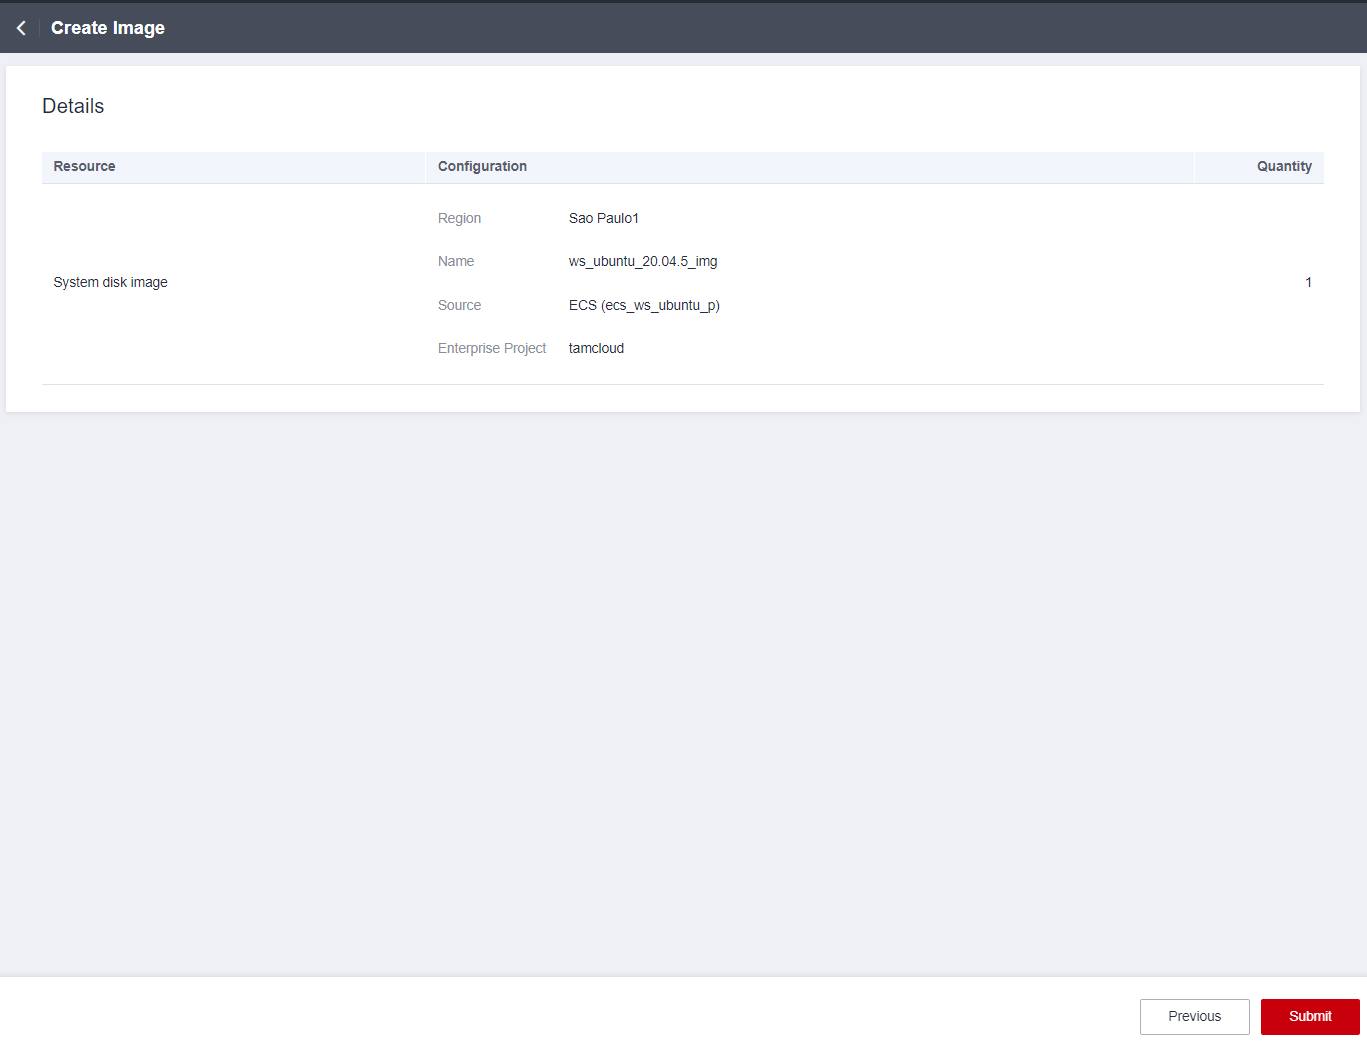
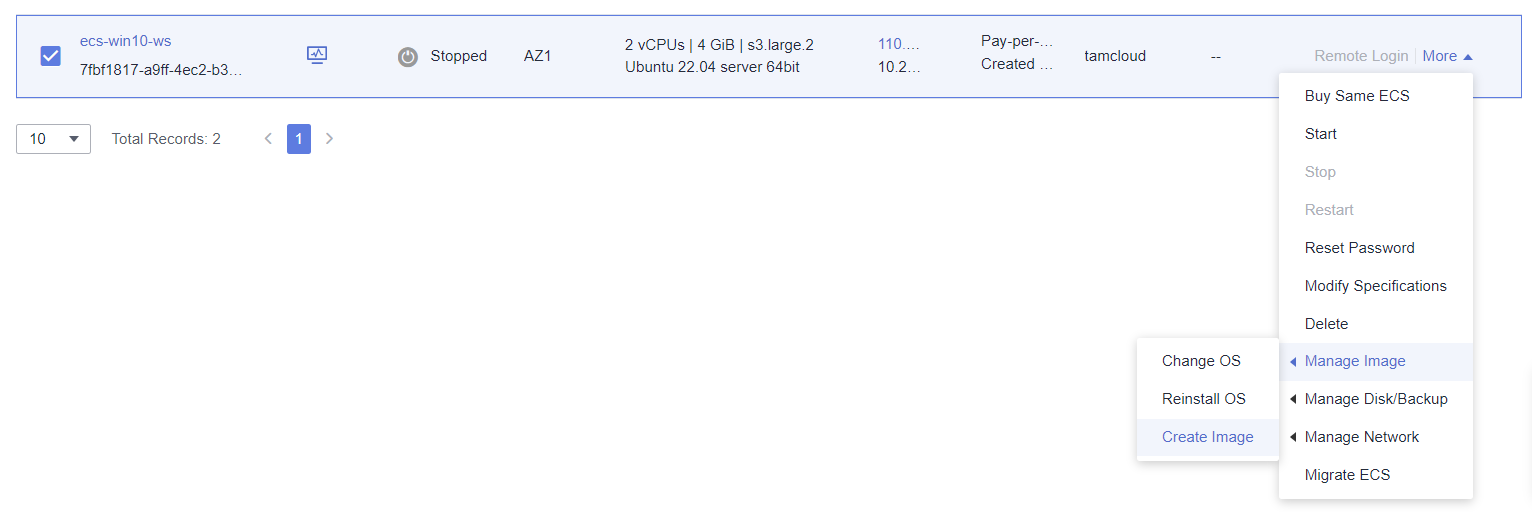
With all the instance adjustments made, we now use ECS to create the image. Just stop ECS and in the more option select “Manage Image” and then Create Image.
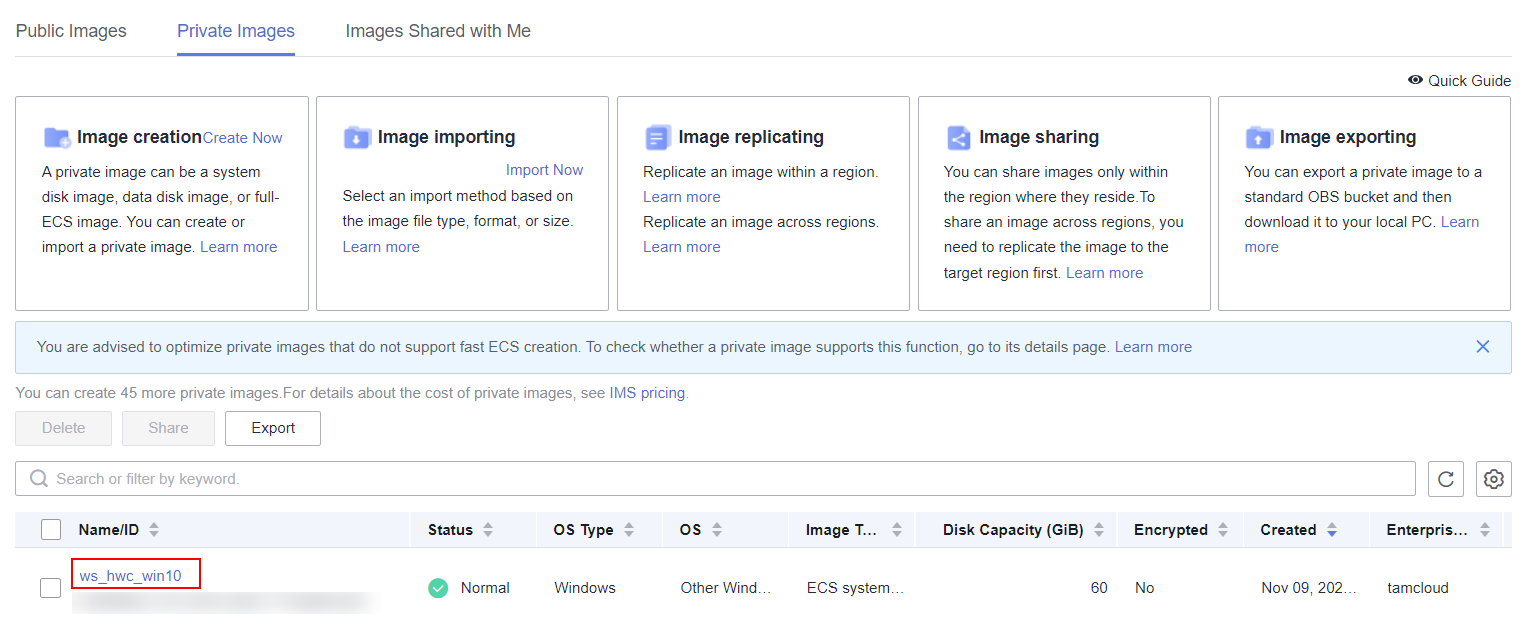
With the image created and appearing in the IMS service, it is now available to be used in the Workspace service.
Creating Ubuntu image
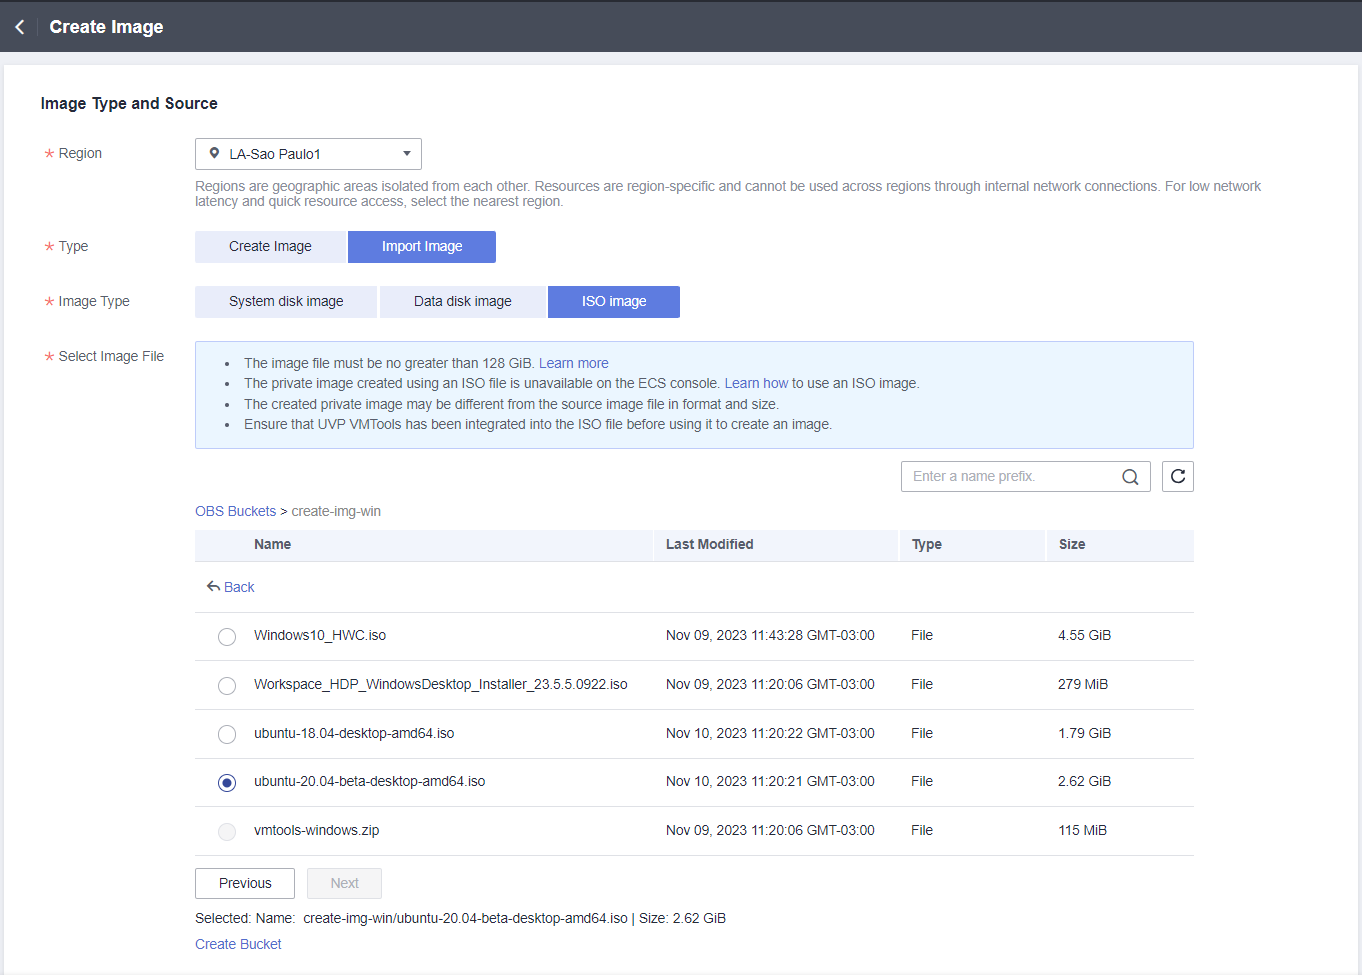
Download the Ubuntu Desktop ISO image (supported at the time of writing are 18.04.5-desktop-amd64 or ubuntu-20.04.5.0-desktop-amd64 - https://mu.releases.ubuntu.com/20.04.5/ - https://old-releases.ubuntu.com/releases/18.04.5/) and upload it to OBS.

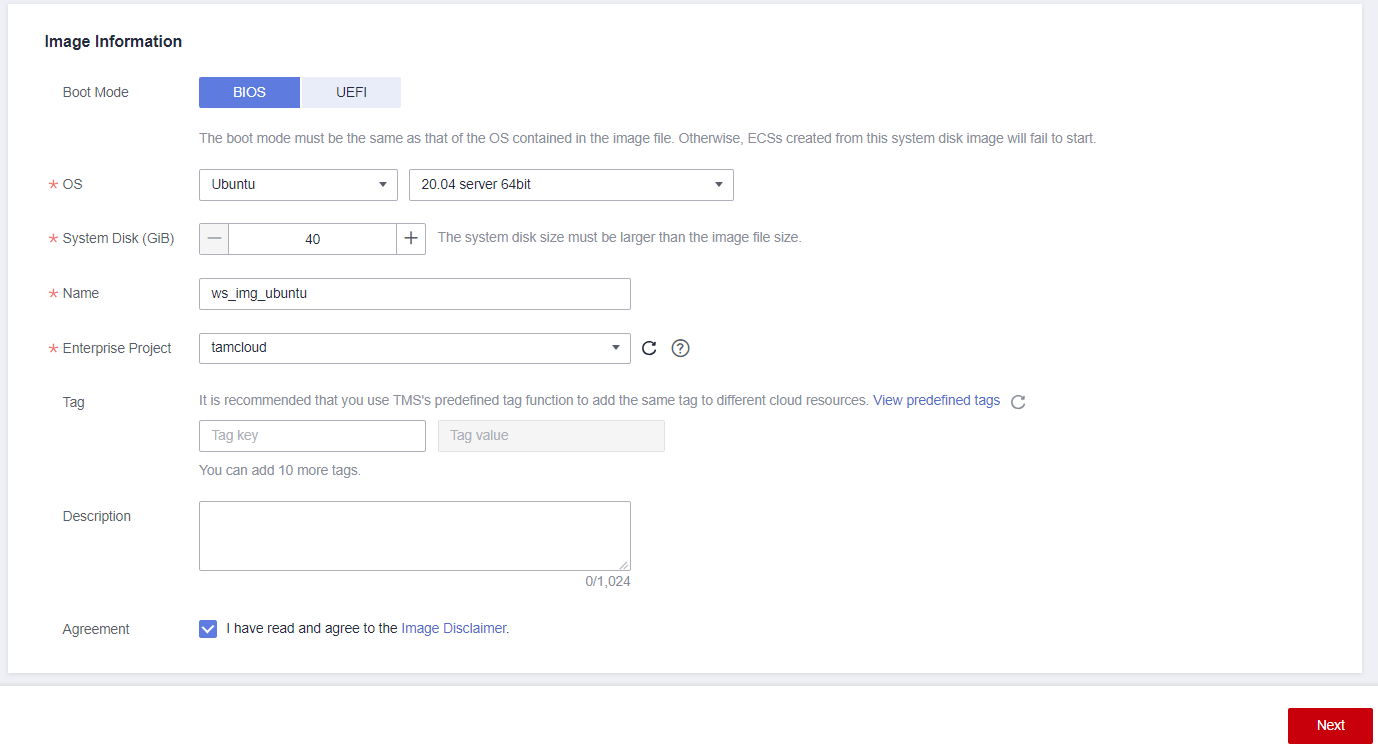
Import the Ubuntu ISO image into the IMS service.
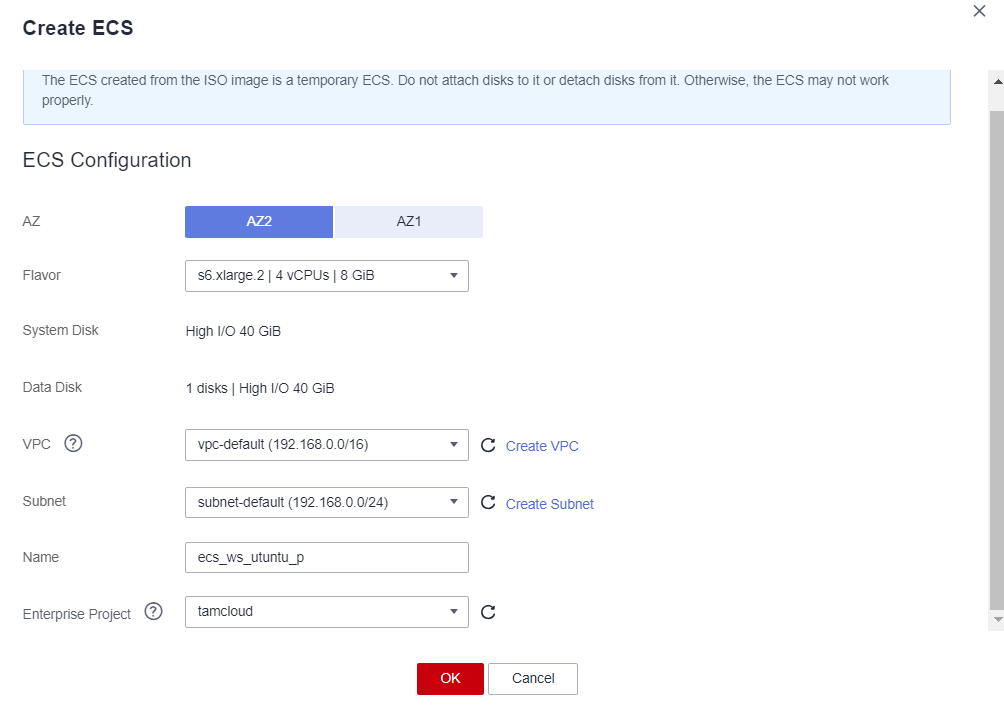
Create an ECS using the image created by importing the ISO image.

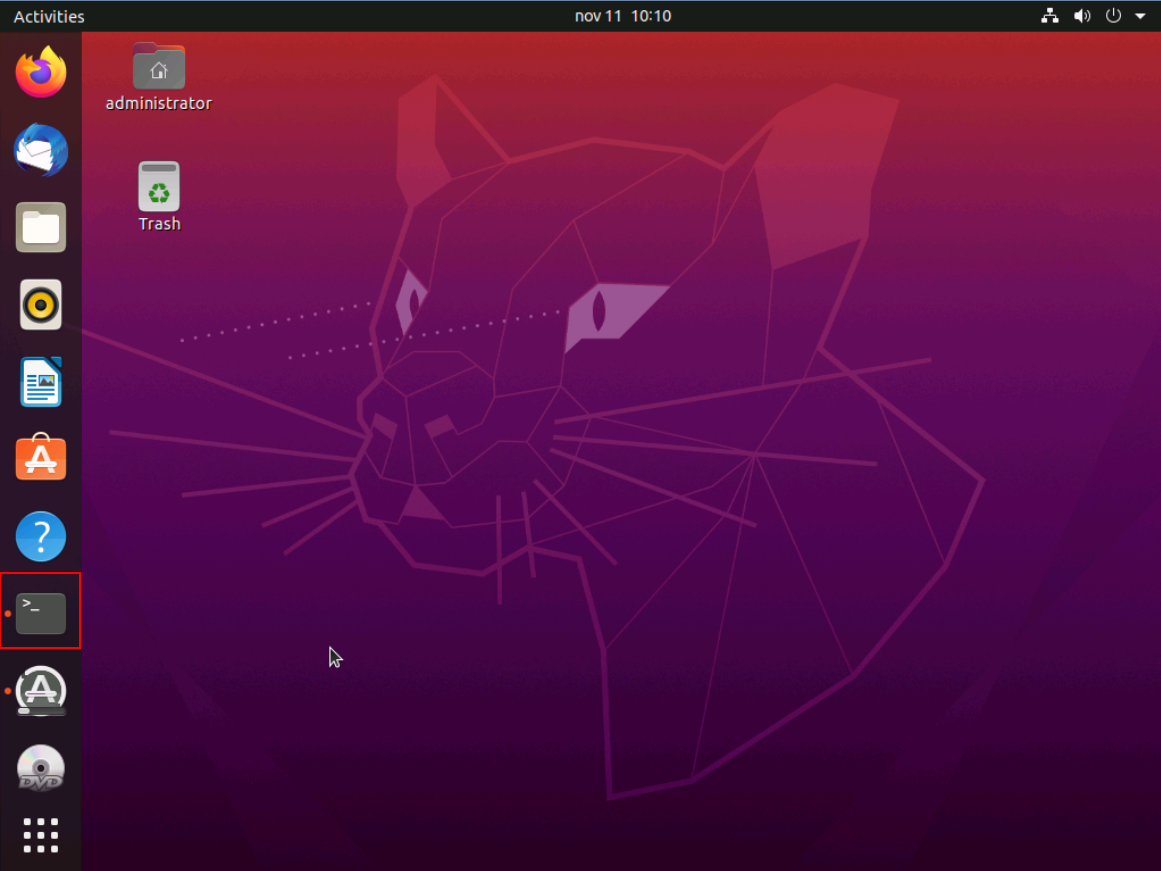
Access the instance and open the shell terminal

Install the libxcb-xinerama0, gawk packages
sudo su
apt update
apt install libxcb-xinerama0 -y
apt install gawk -y
Install the Linux Kernel (For Ubuntu 20.04 Only)
apt install linux-image-5.15.0-72-generic -y
apt install linuxheaders-5.15.0-72-generic -y
apt install linux-modules-extra-5.15.0-72-generic -y
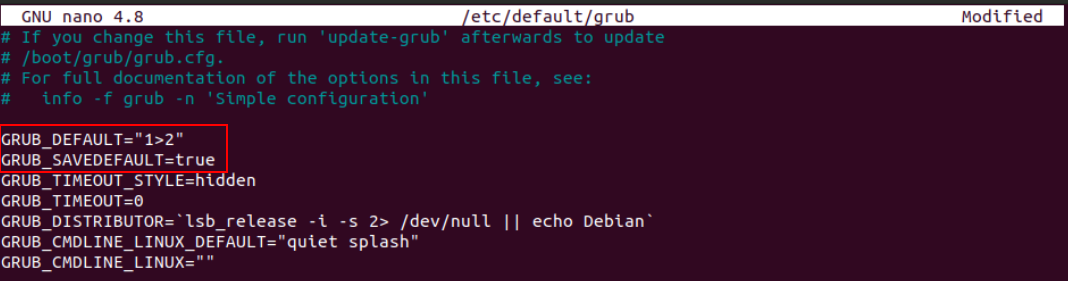
grep menuentry /boot/grub/grub.cfg
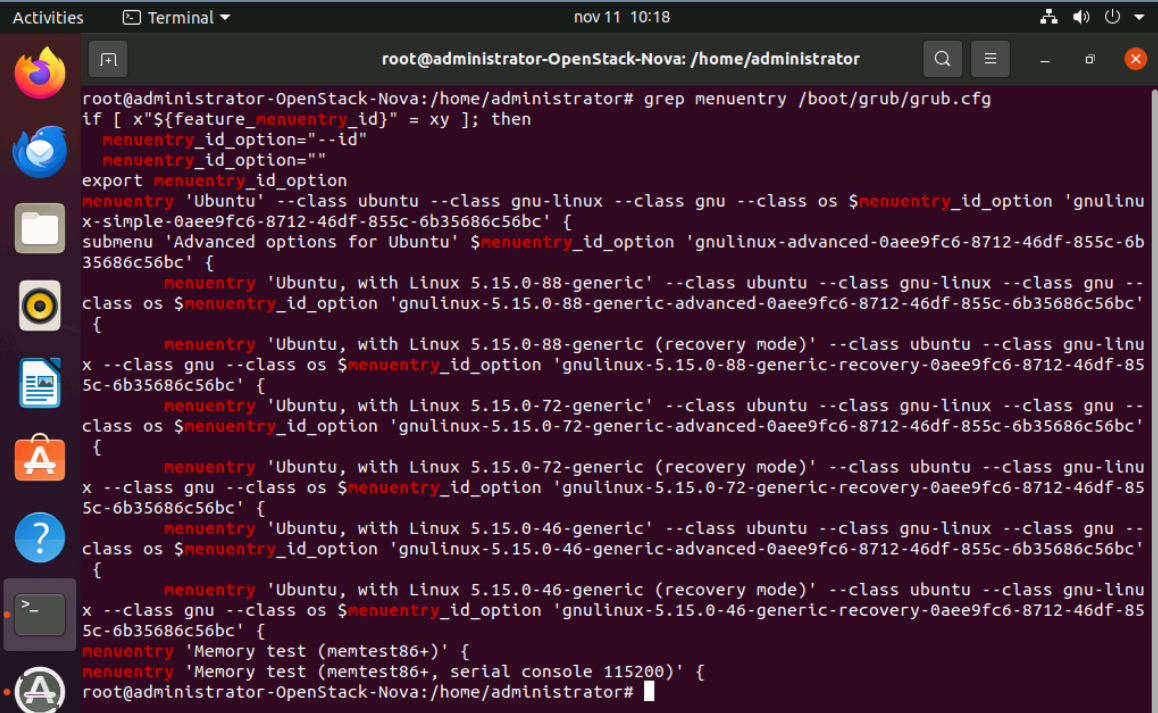
Record the location of version 5.15.0-72, as shown in the kernel figure:
sudo nano /etc/default/grub
Install and start openssh
apt update
apt install openssh-server -y
service sshd start
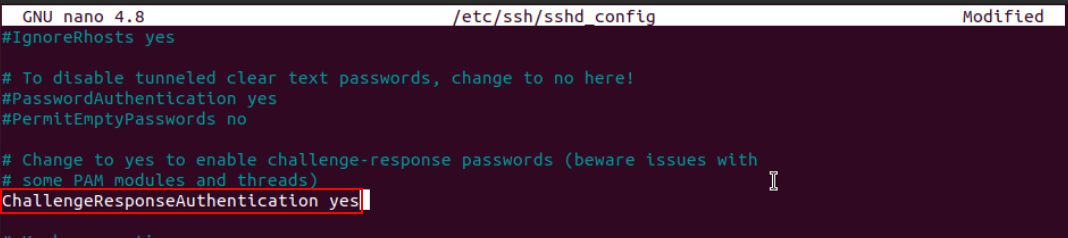
Configure sshd.conf
nano /etc/ssh/sshd_config
Install python 3
apt install python3 -y
python3 --version
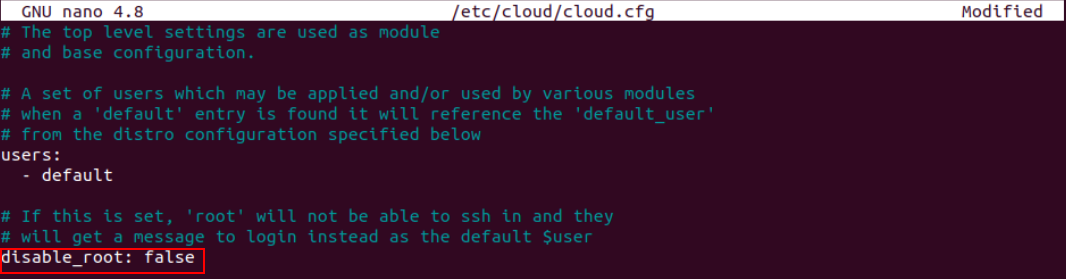
Install and configure cloud-init
apt install cloud-init -y
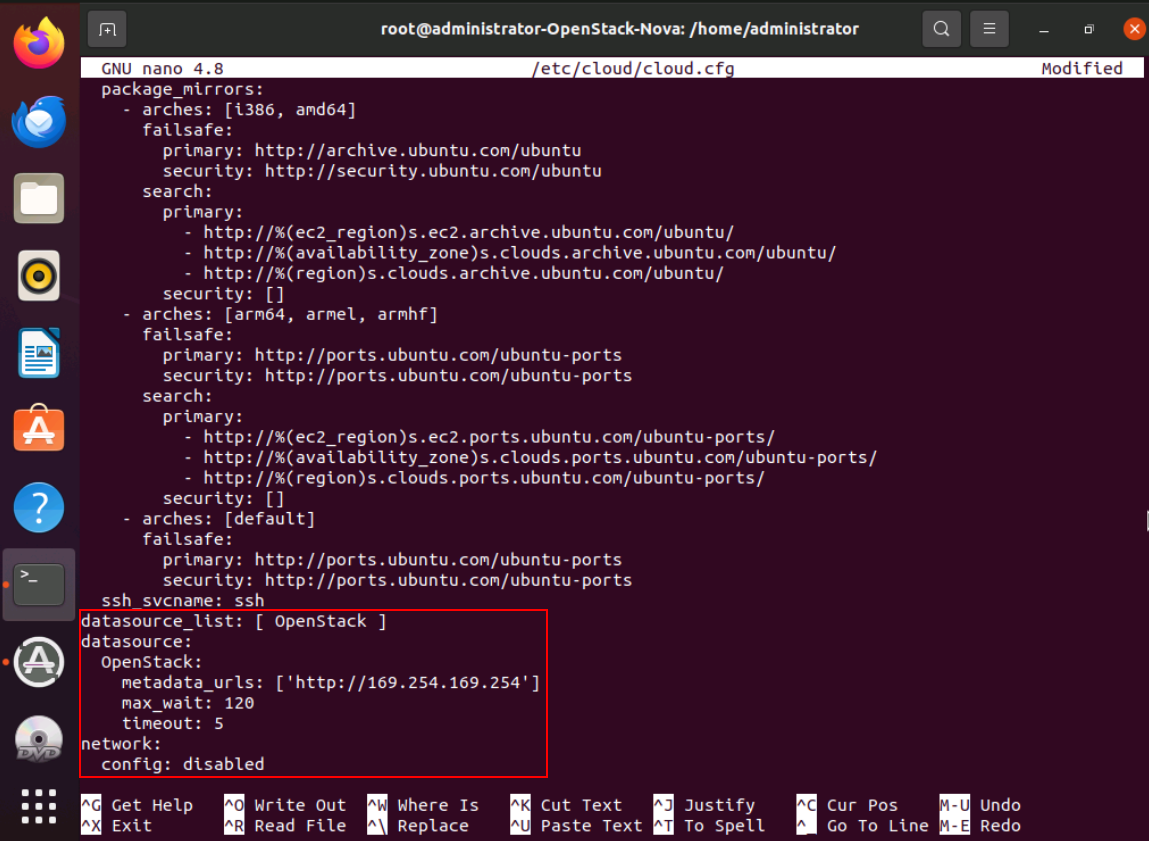
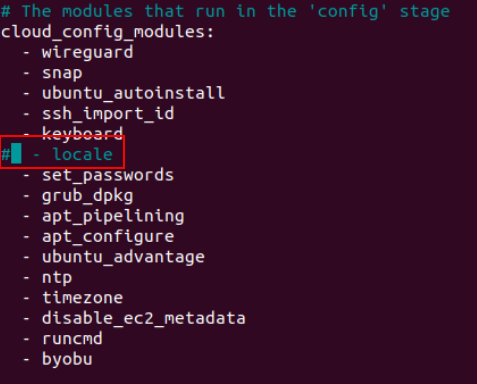
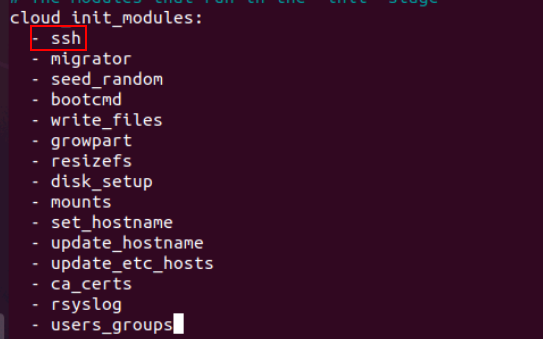
nano /etc/cloud/cloud.cfg
Change the disable_root parameter to false, add the lines at the end
of the file, adjust the config modules by commenting out the “locale” line, in the initialization module list place ssh as the first item:
datasource_list: [ OpenStack ]
datasource:
  OpenStack:
    metadata_urls: ['http://169.254.169.254']
    max_wait: 120
    timeout: 5
network:
  config: disabled
Check cloud-init, if any error occurs try restarting the instance and run the command again:
sudo cloud-init init --local

Install KVM
Add the virtio drivers to the file: “/etc/initramfs-tools/modules”:
nano /etc/initramfs-tools/modules

virtio_blk
virtio_scsi
virtio_net
virtio_pci
virtio_ring
virtio

update-initramfs -u

Download the HDA package
wget https://workspace-hdp-gray-cn-east-3.obs.cn-east-3.myhuaweicloud.com/WorkspaceHDP/HDPAgent/23.05.5/Workspace_HDP_LinuxDesktop_23.5.5.0922.iso
cp Workspace_HDP_LinuxDesktop_23.5.5.0922.iso /tmp
Install HAD
mount /tmp/Workspace_HDP_LinuxDesktop_23.5.5.0922.iso /mnt
cd /mnt
/bin/bash autorun.sh

# The system will restart

rm -rf /tmp/Workspace_HDP_LinuxDesktop_23.5.5.0922.iso
cat /usr/local/hdpserver/version.txt
sudo apt-mark hold `uname -r`
Clear cache
cd /usr/local/hdpserver/hwsysagent/scripts20
bash cleanCache.sh

touch /usr/share/glib-2.0/schemas/19_mysettings.gschema.override
nano /usr/share/glib-2.0/schemas/19_mysettings.gschema.override

sudo glib-compile-schemas /usr/share/glib-2.0/schemas
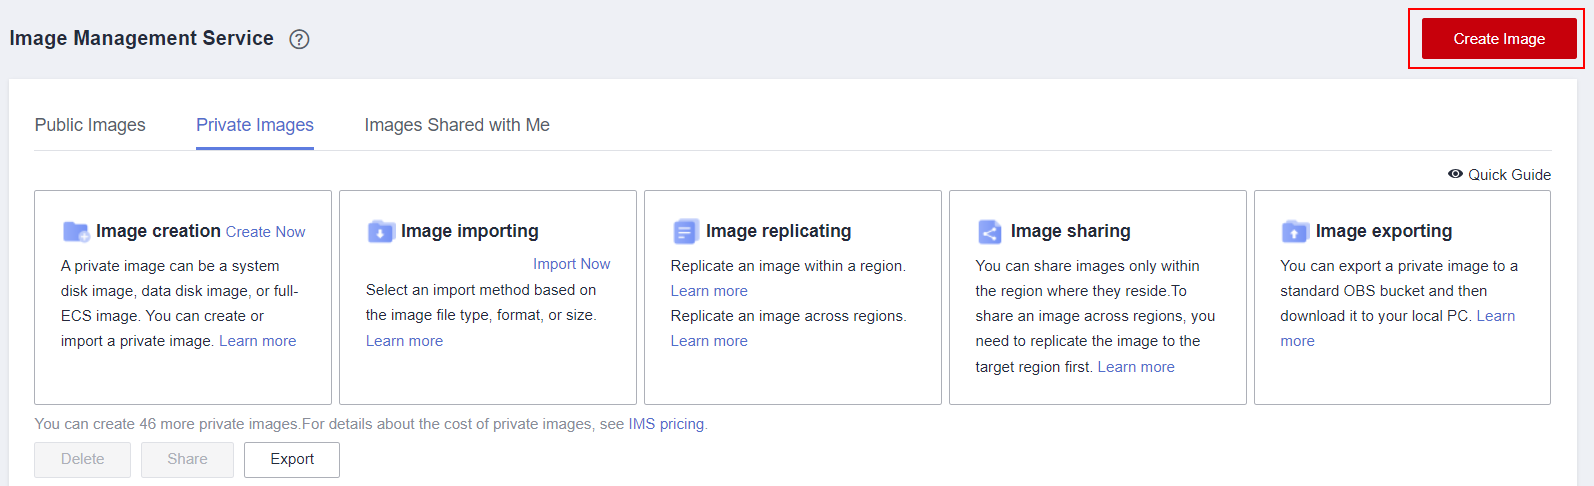
Stop the instance and create the image