![]()
User Federation with Keycloak (SAML 2.0)
V1.0 – October 2024
| Version | Author | Description |
|---|---|---|
| V1.0 – 2024-10-25 | Diogo Hatz d50037923 | Initial Version |
| V1.0 – 2024-10-25 | Wisley da Silva Paulo 00830850 | Document Review |
Objective
This document aims to present the procedures required to implement identity federation configuration in Huawei Cloud (Service Provider) through an identity provider (IdP), such as RedHat SSO or Keycloak. In this example, the protocol used for identity federation will be SAML 2.0, mapping users from the identity provider to IAM users in Huawei Cloud.
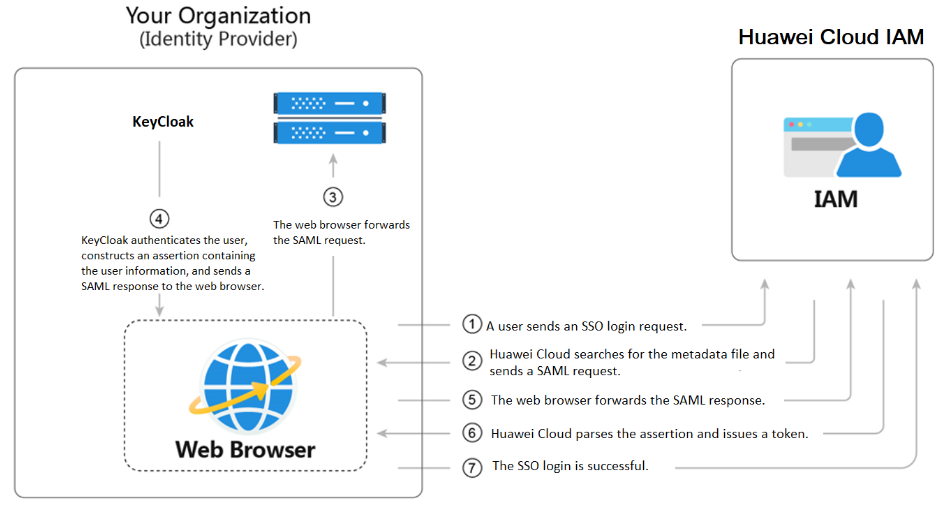
The diagram below shows the flow of the authentication process in Huawei Cloud using an IdP.
Keycloak Endpoint
To integrate Huawei Cloud with an Identity Provider, you must first obtain the XML configuration file for the protocol to be used from the Identity Provider.
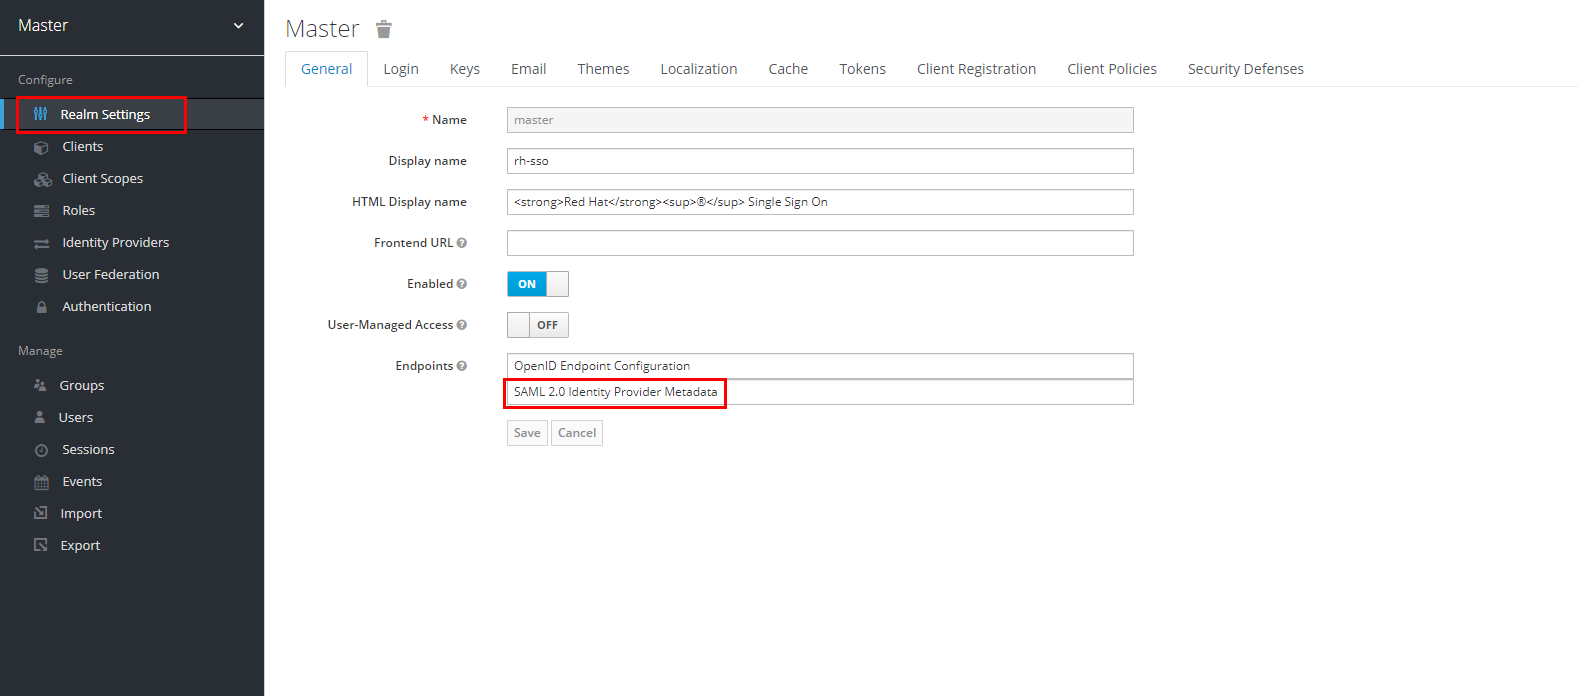
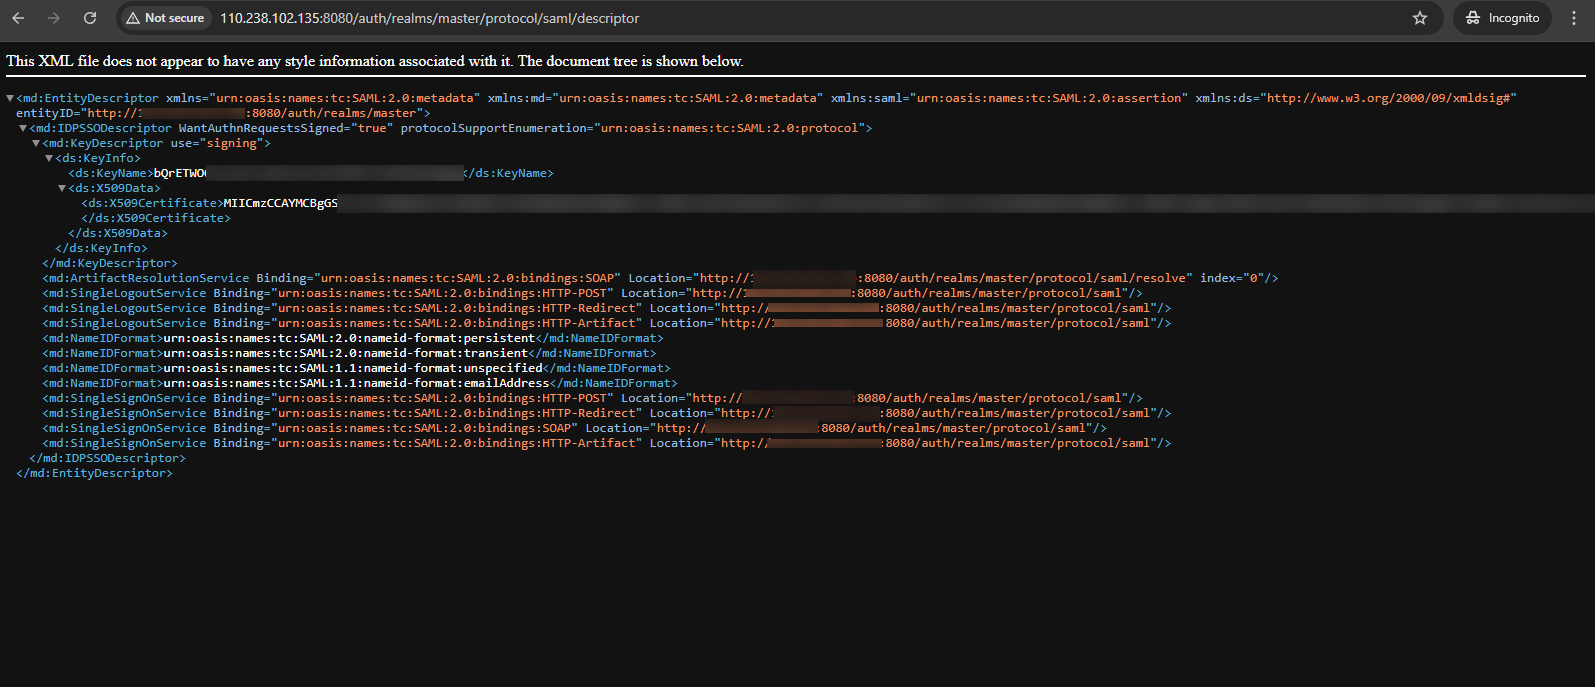
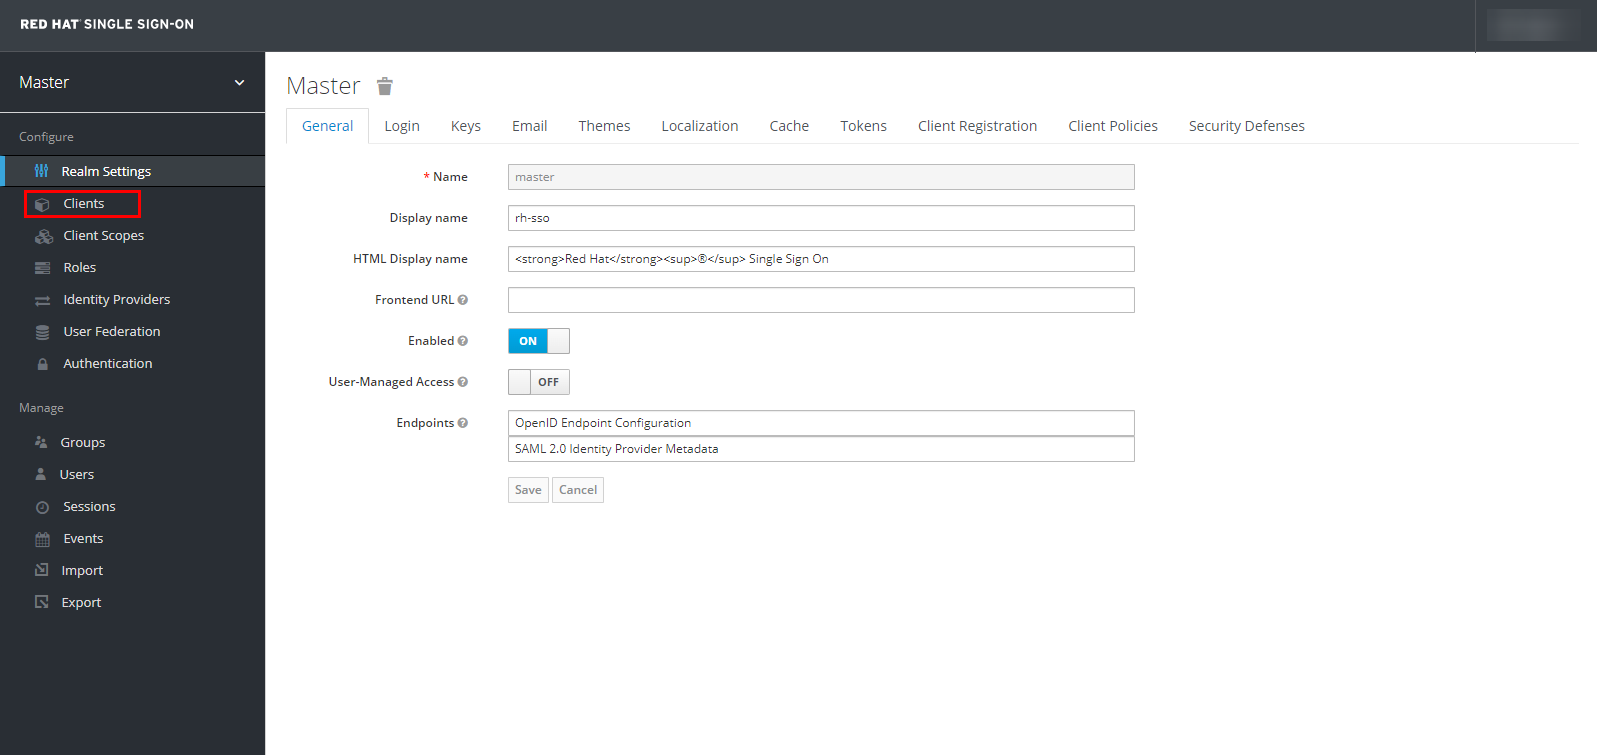
Access the Keycloak portal and navigate to the “Realm Settings” section. Click “SAML 2.0 Identity Provider Metadata” in the “Endpoints” subsection, and save the opened web page locally as an XML file.
IIC
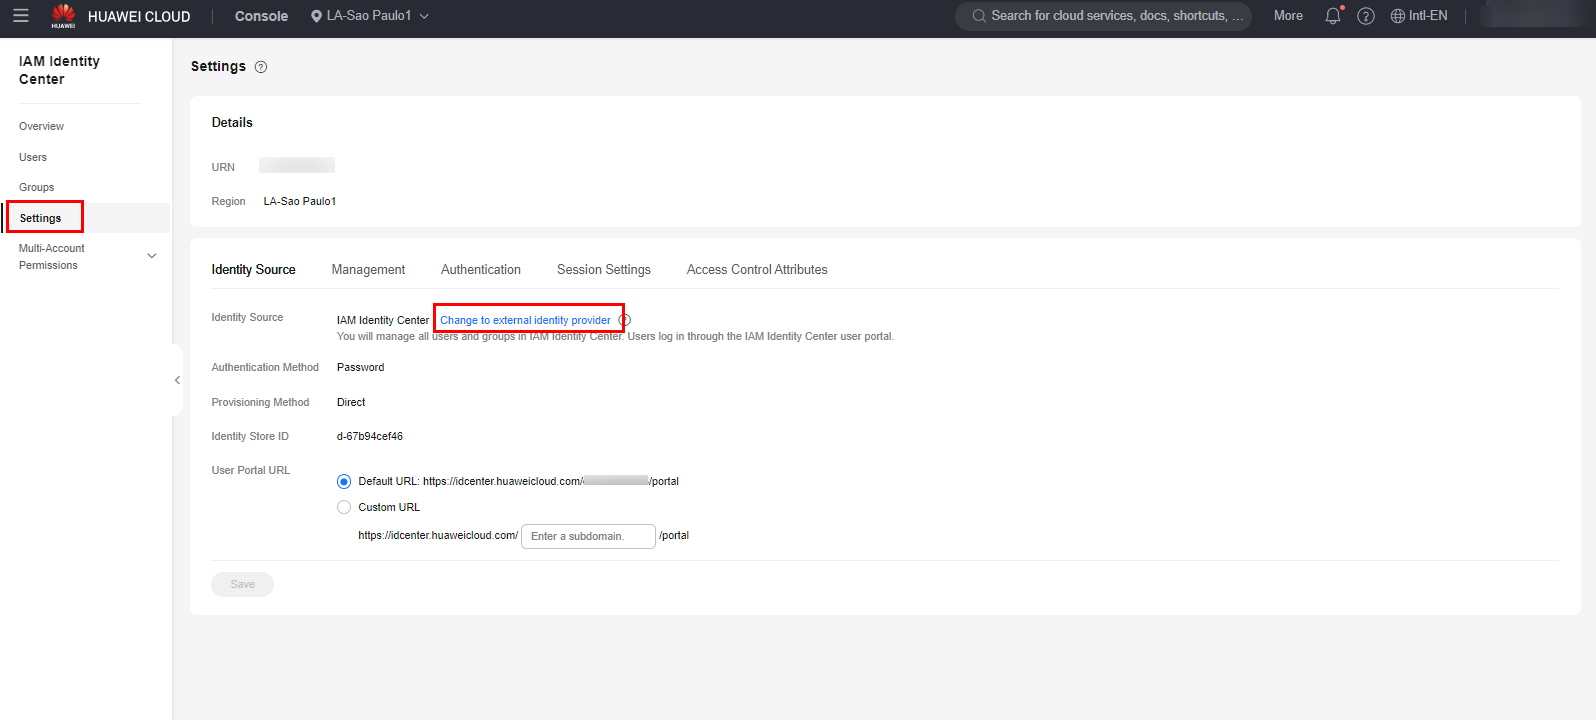
External Identity Provider
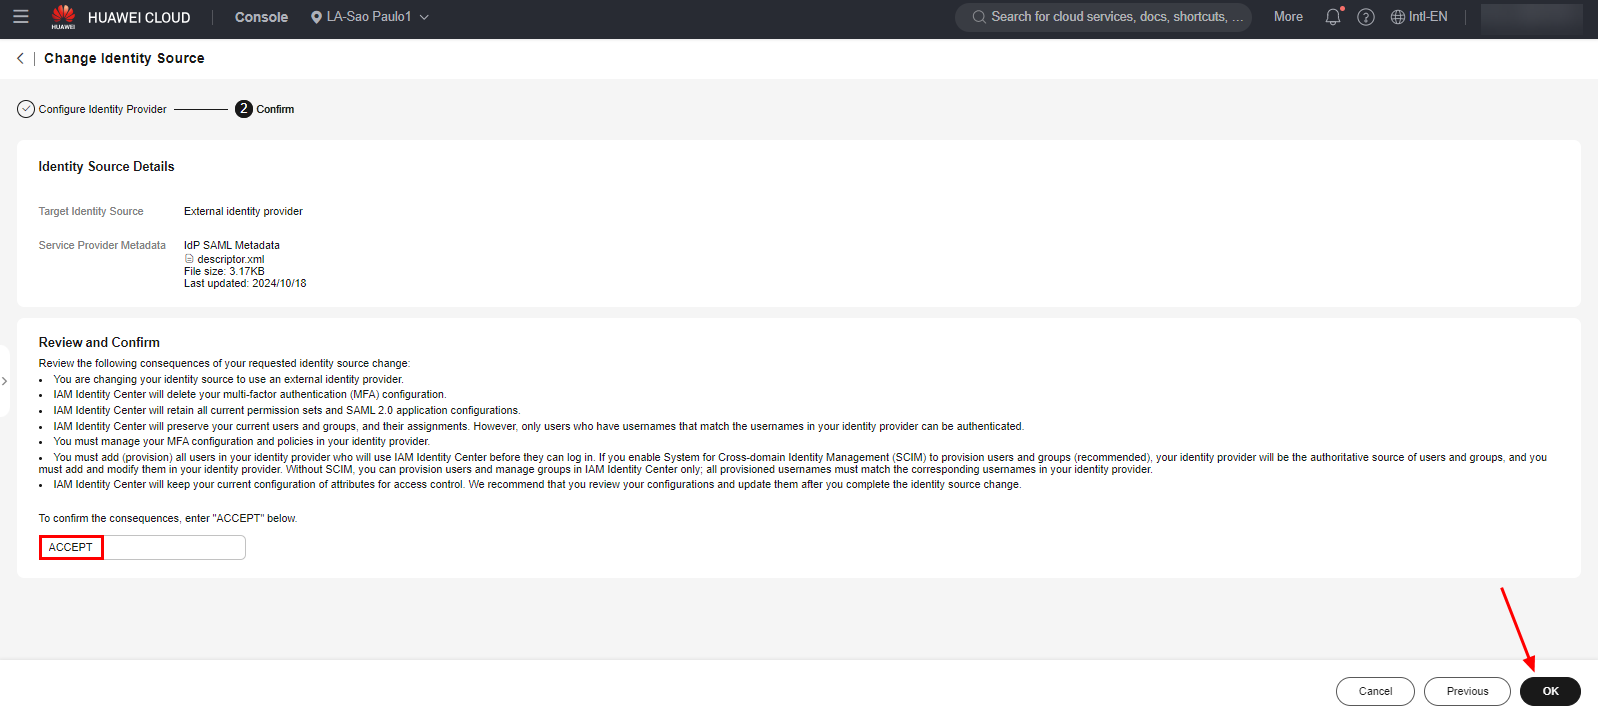
Access the IIC service in the Huawei Cloud console and navigate to the “Settings” section. Click “Change to external identity provider” to create an identity federation configuration.
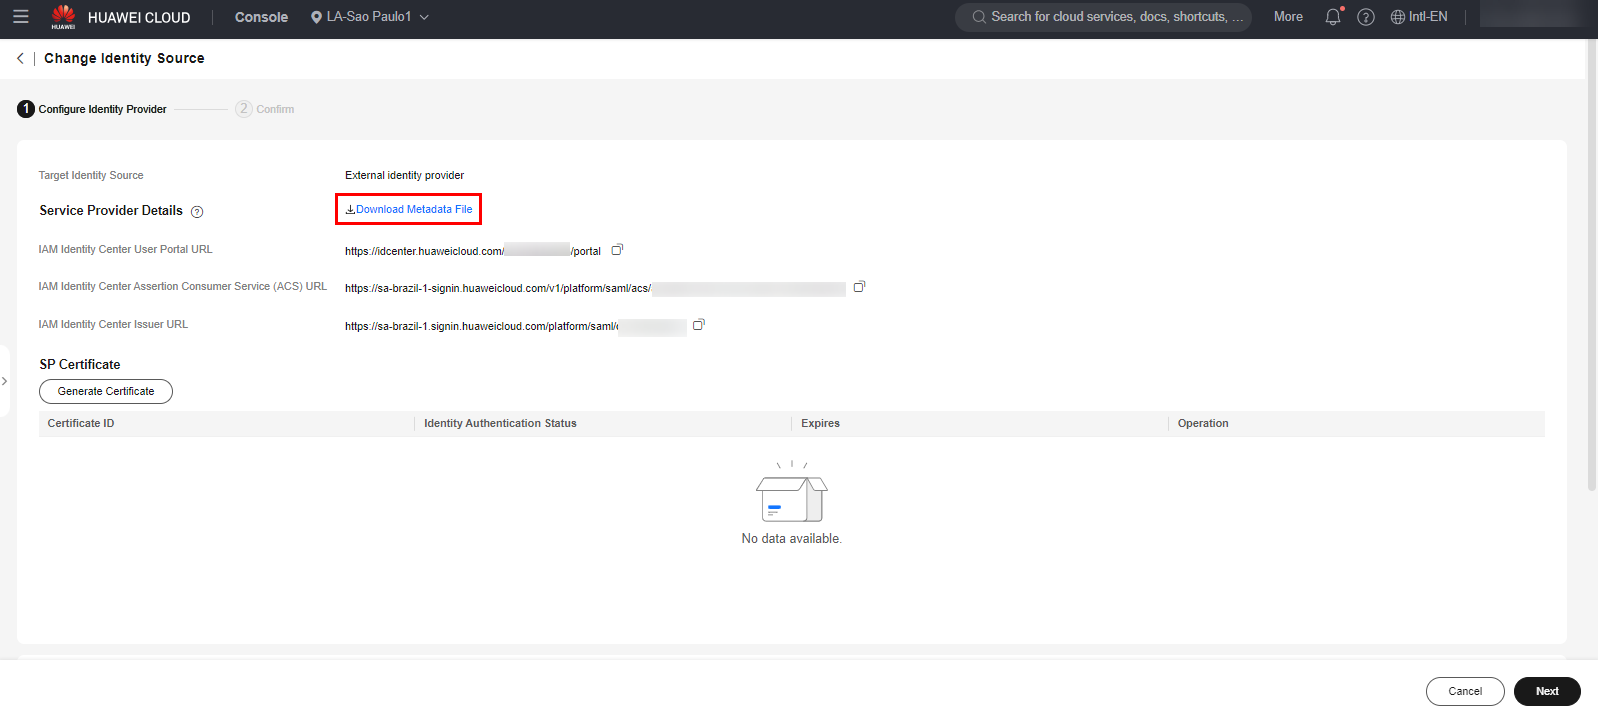
Click “Download Metadata File” to download the XML configuration file of the protocol to be used (SAML 2.0) of the Service Provider.
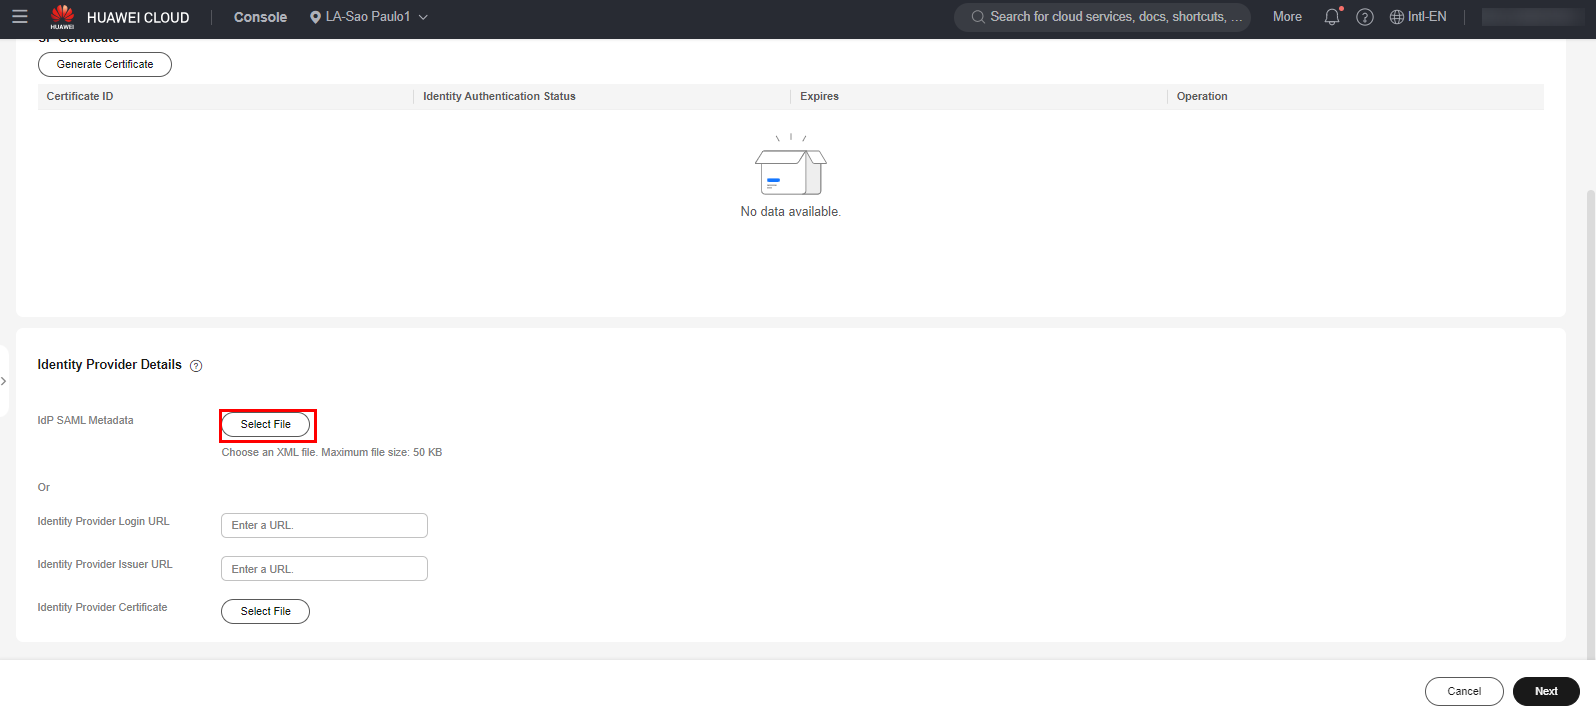
Click “Select File” in the “Identity Provider Details” subsection and select the XML file downloaded in item 2.0 of this document.
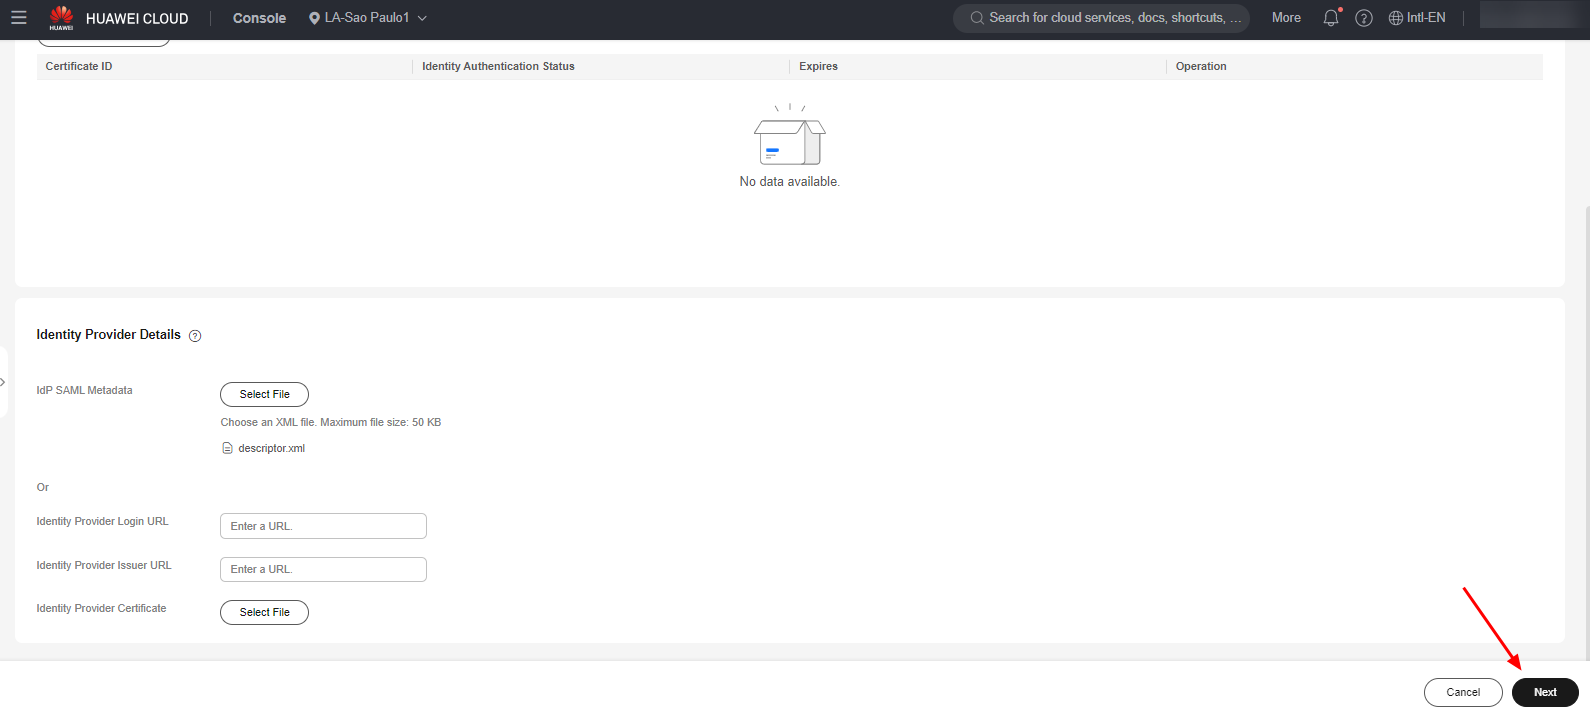
Once done, just click “Next” followed by “OK” to finish the configuration.
Note: The next three subsections (3.2, 3.3 and 3.4) are related to user, group, permission set and Organization account configurations. If these configurations have already been configured, ignore the aforementioned subsections.
Users and Groups
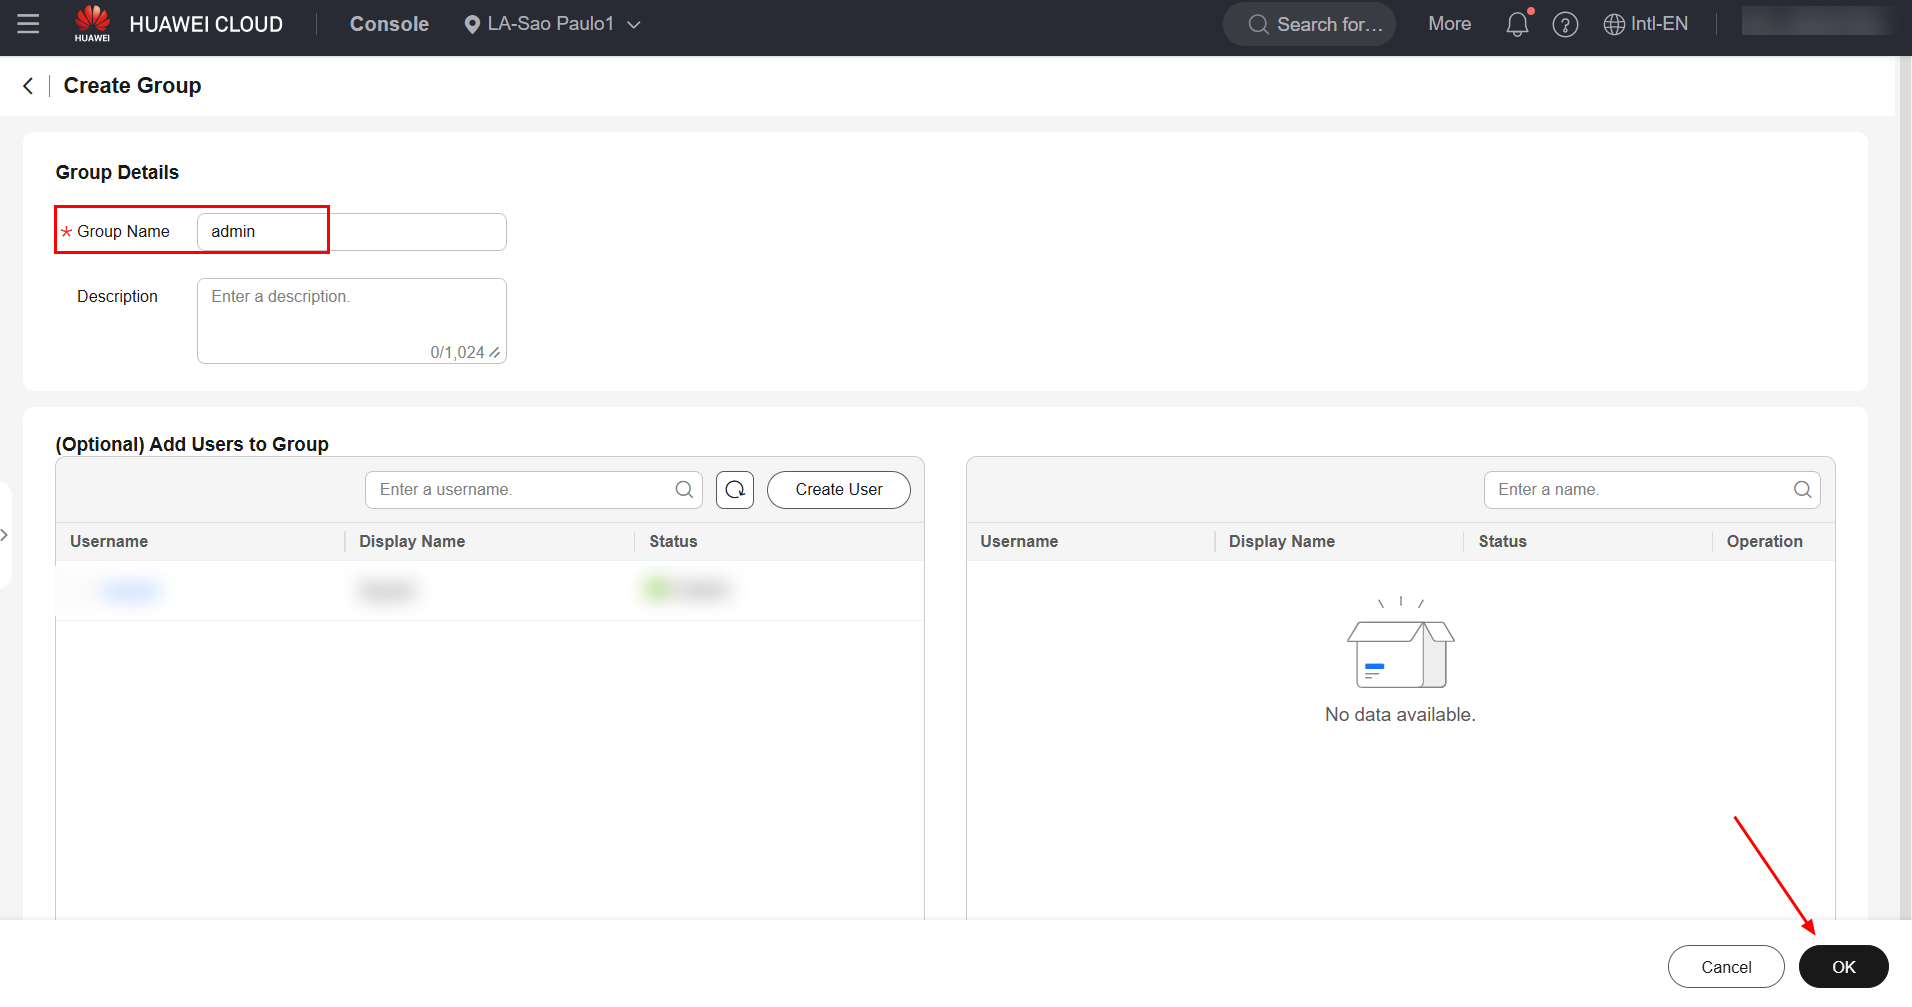
To perform identity federation using an Identity Provider, users and user groups must be created in the Service Provider. To do this, select the “Groups” section and click “Create Group” to create a user group.
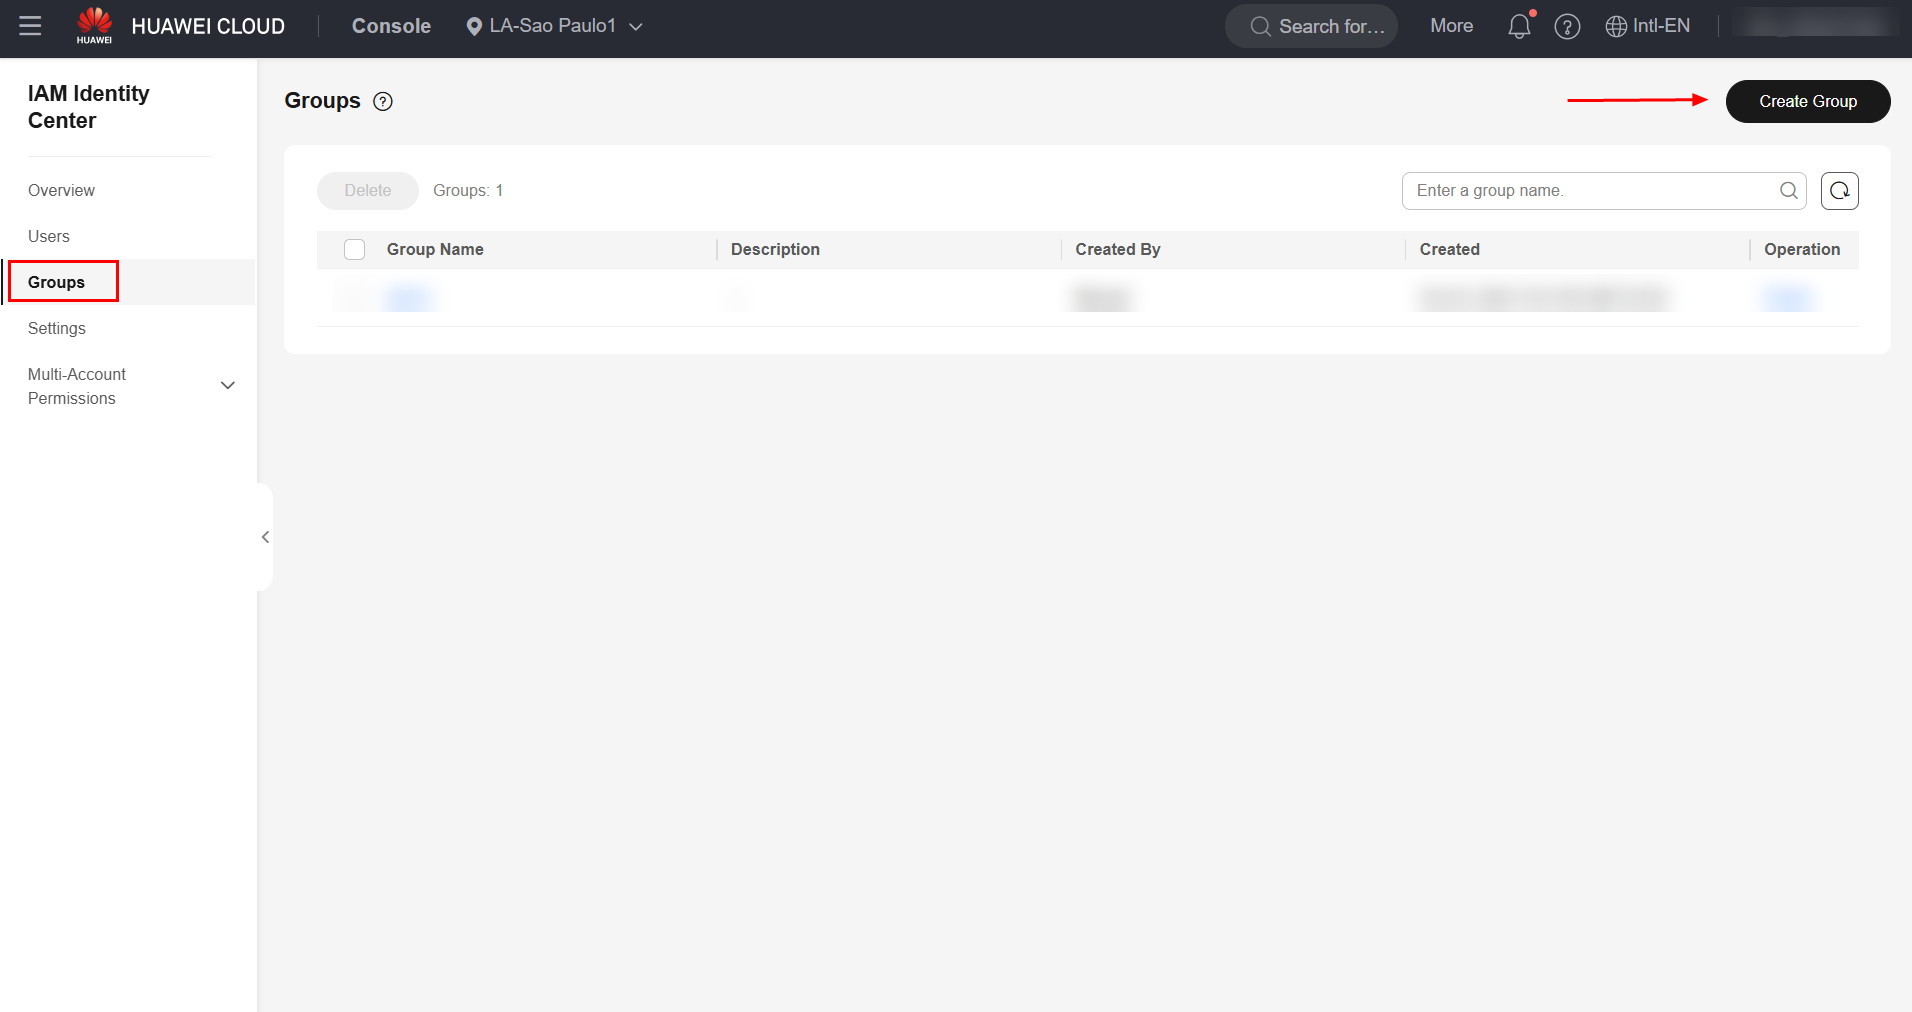
Give the group a name and select “OK” to finish creating the user group.
To create users, access the “Users” section and click “Create User”.
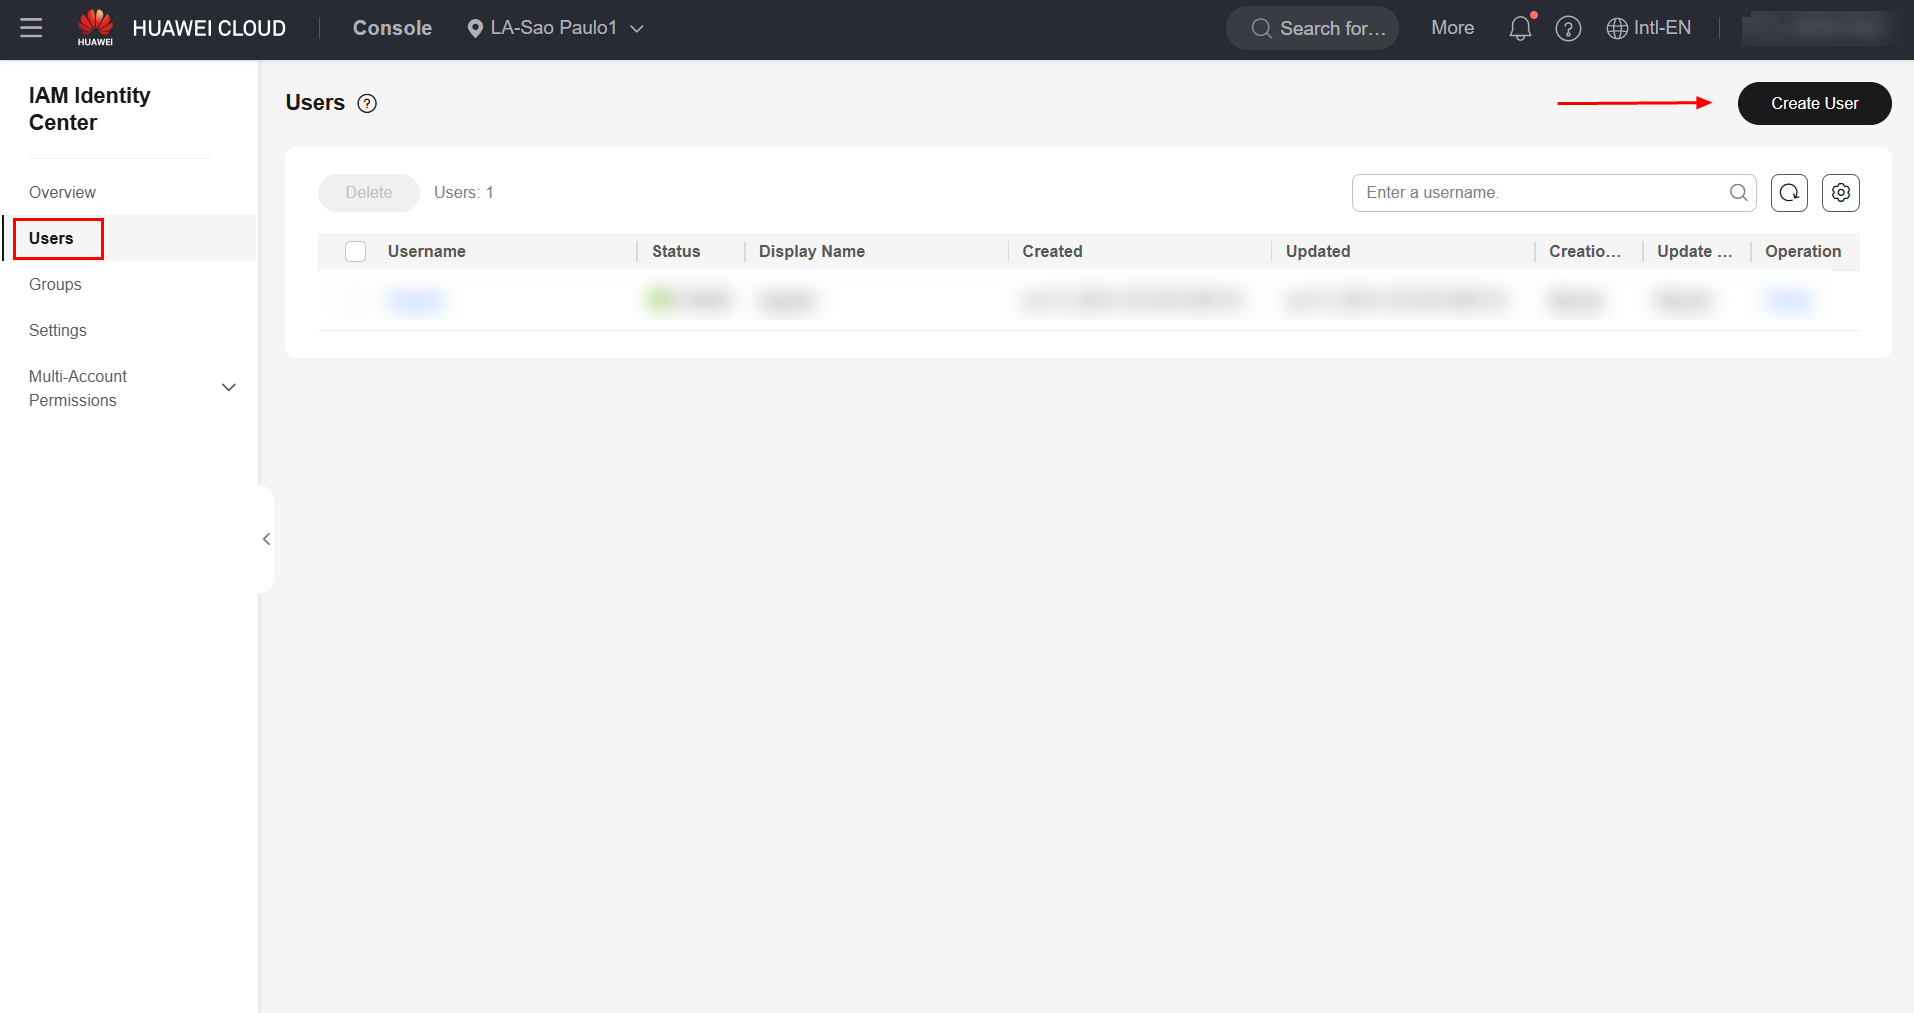
Fill in the relevant user information, such as username and email, and click “Next” to proceed.
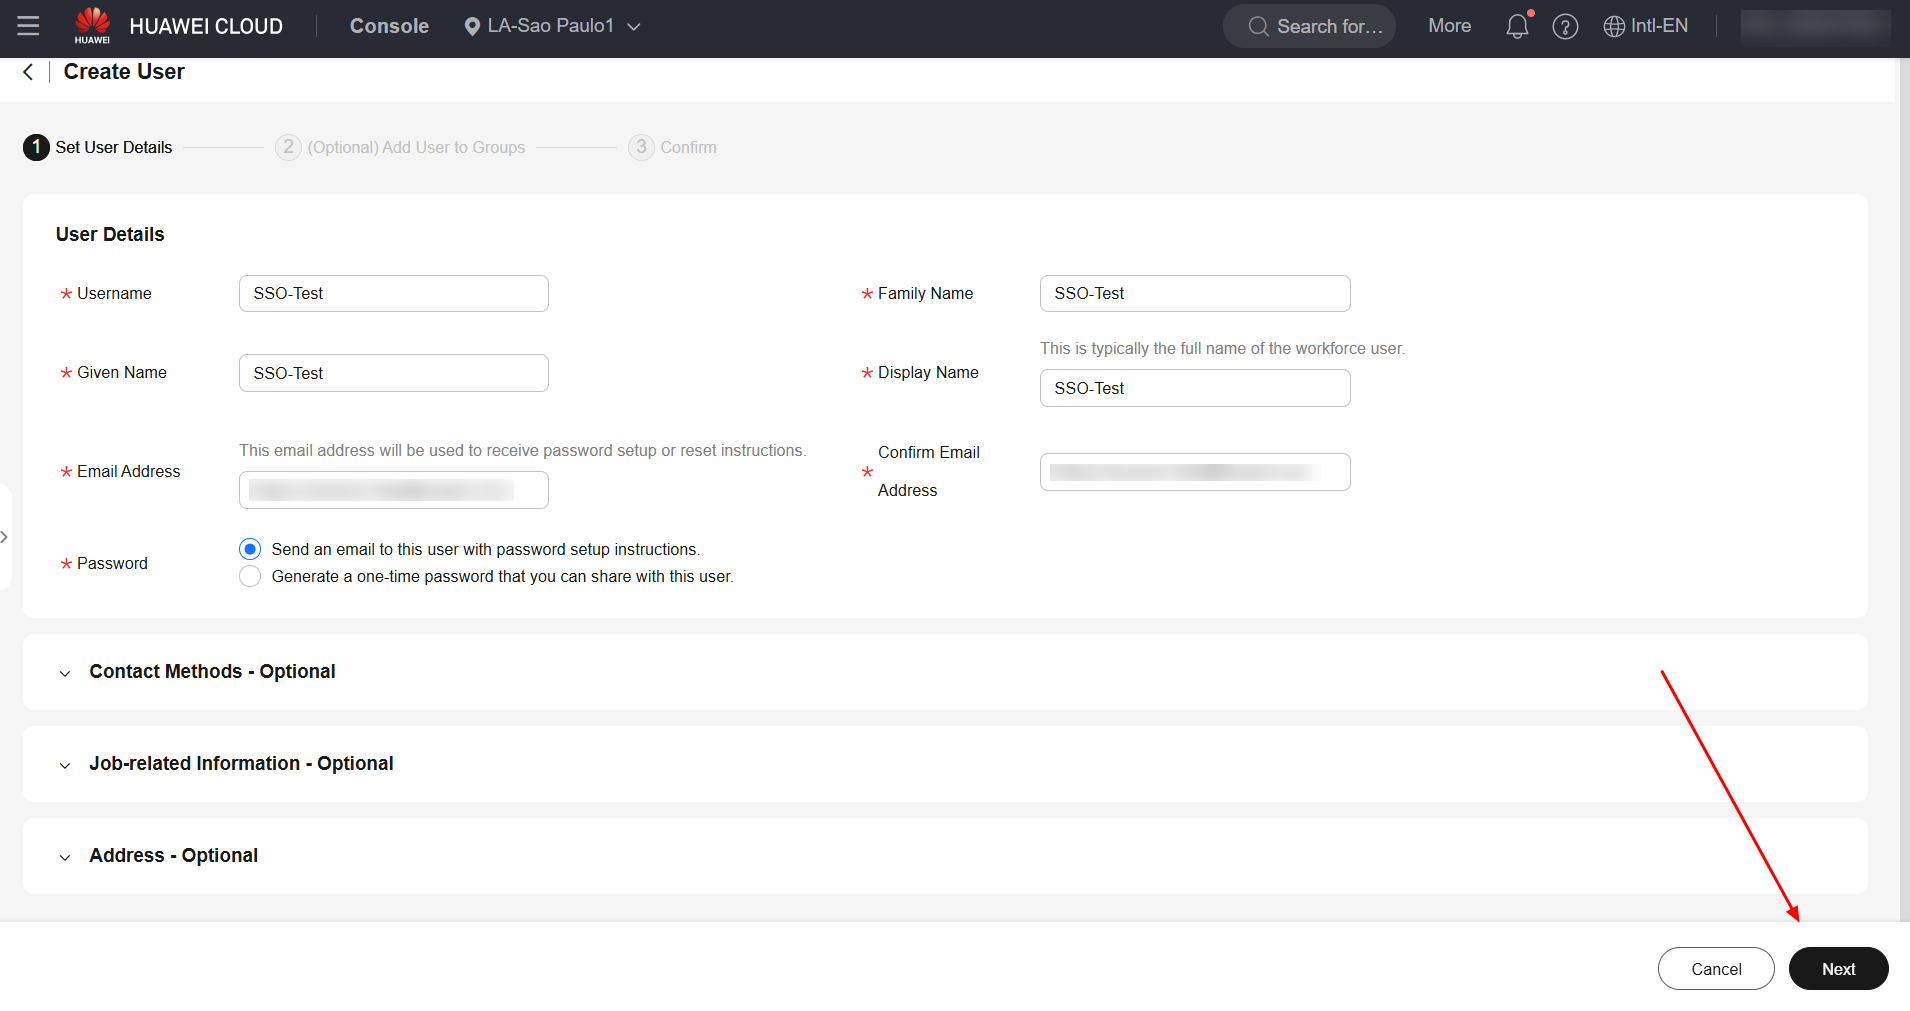
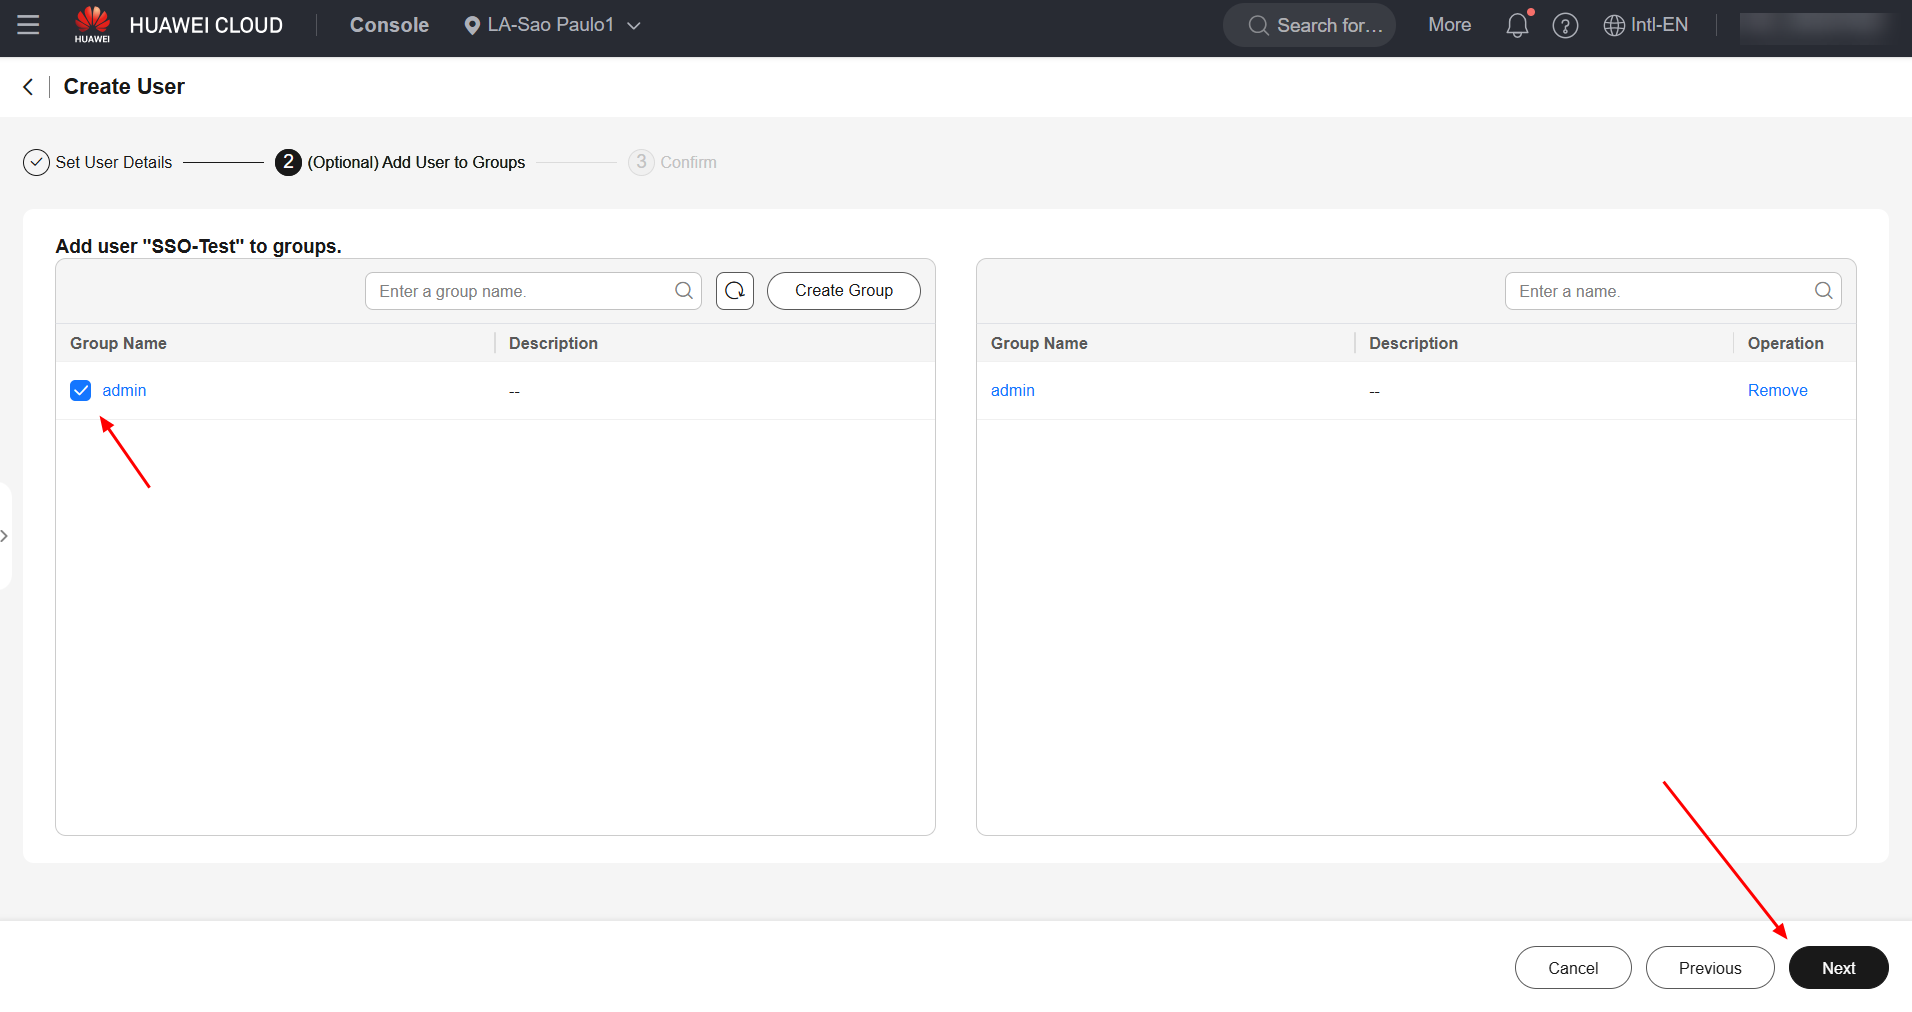
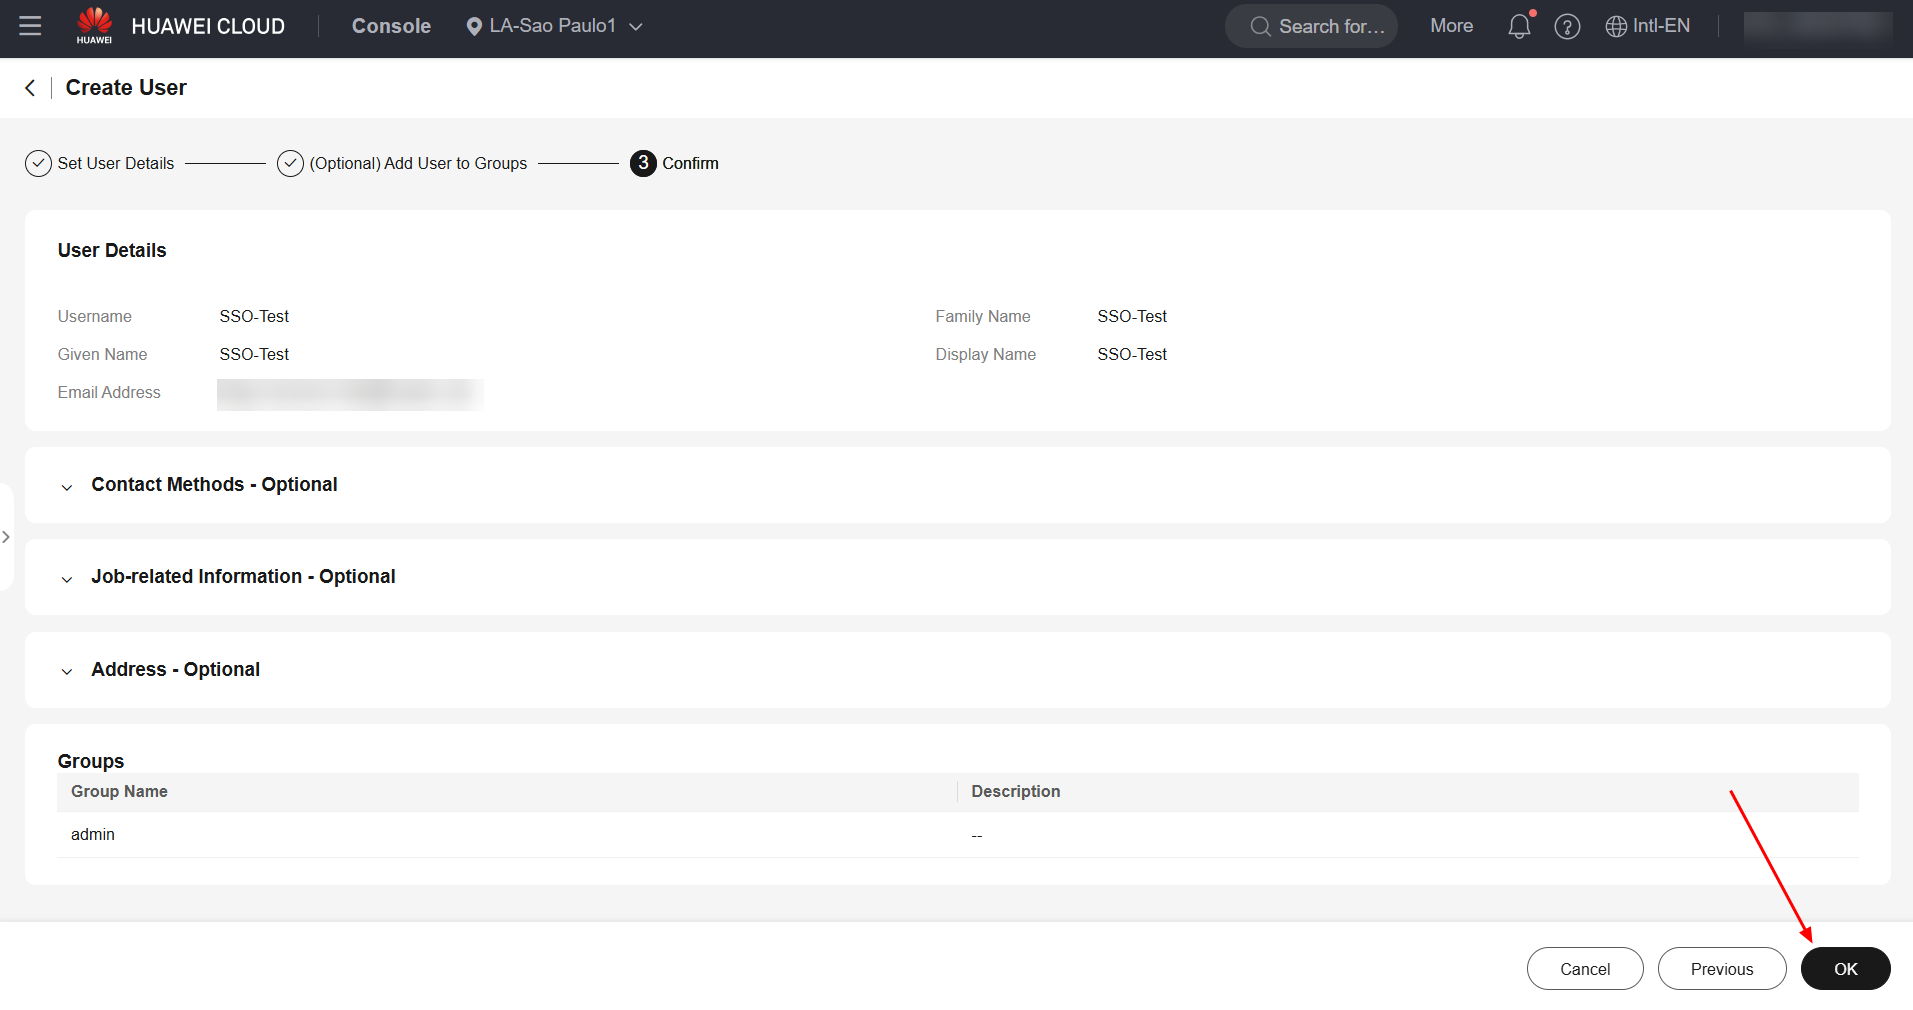
Select a user group to which the user will belong and click “Next” followed by “OK” to finish creating the user.
Permission Sets
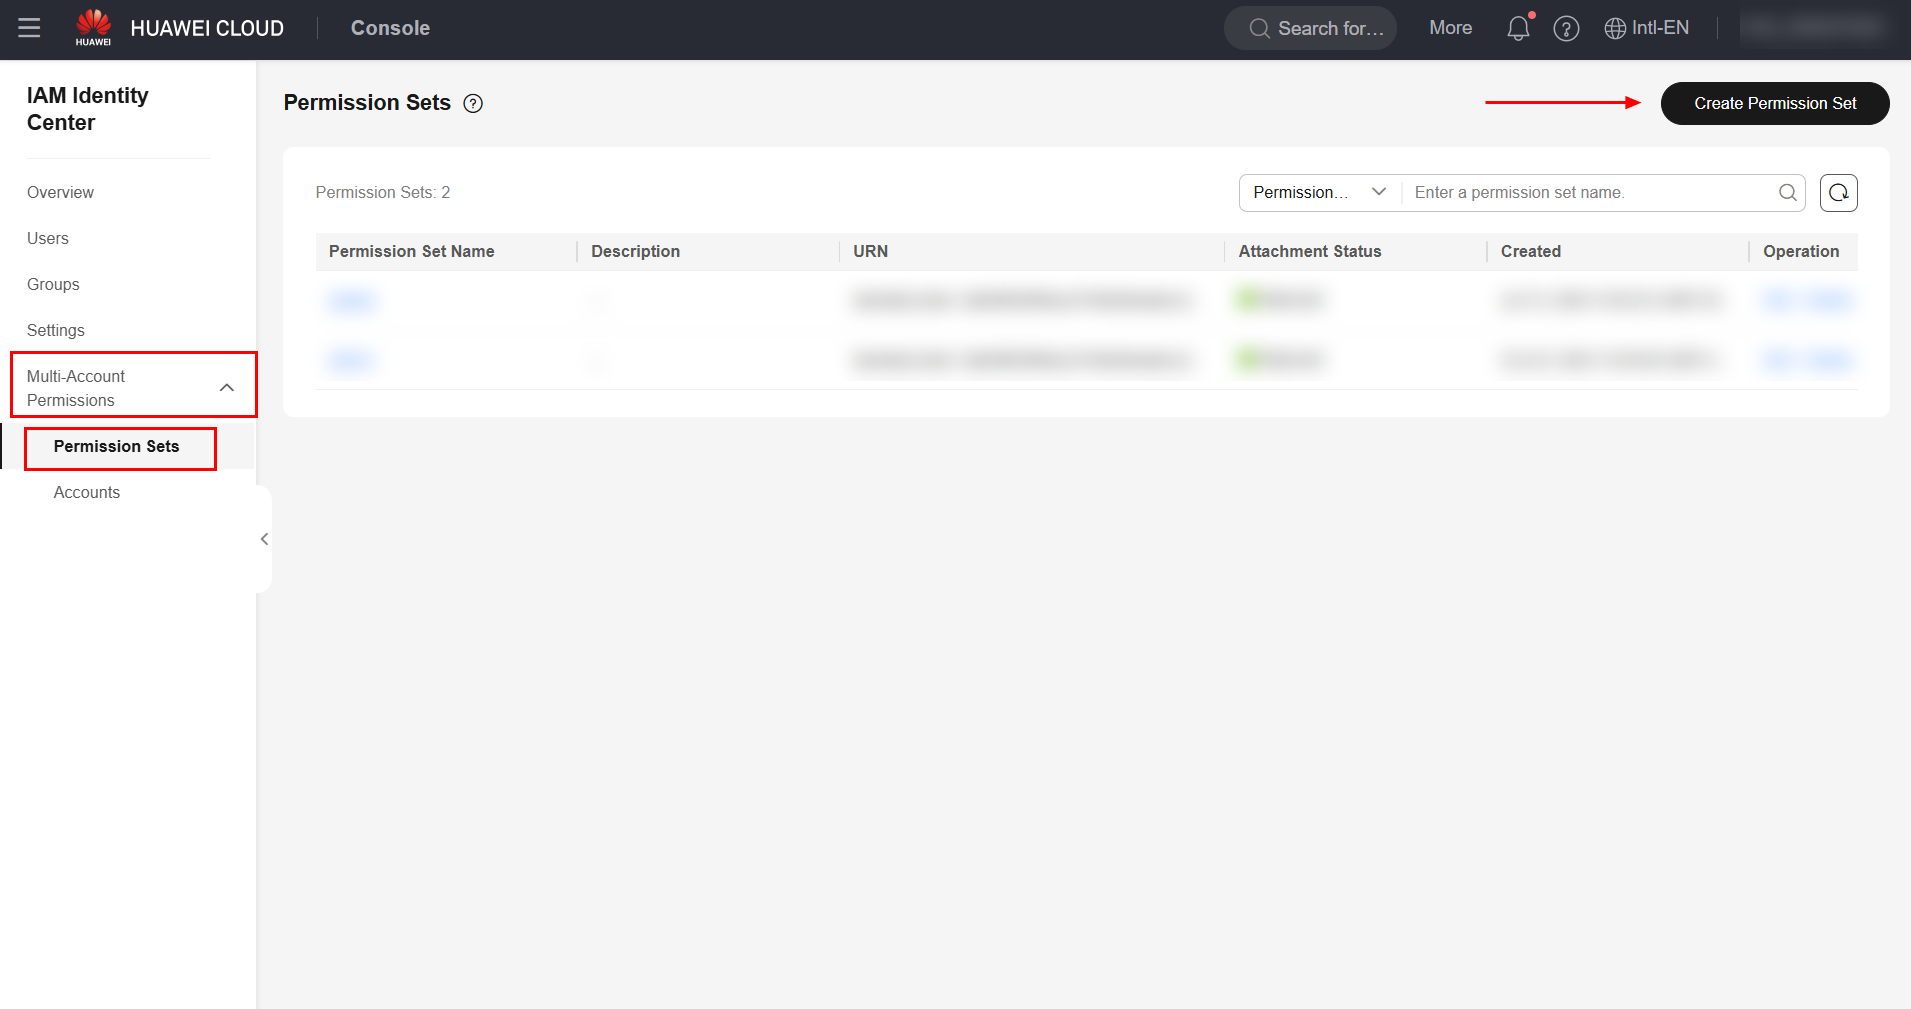
In addition to users and groups, permission sets are also required to delegate permissions to the users created. To do this, navigate to the “Permission Sets” subsection in the “Multi-Account Permissions” section, and click “Create Permission Set”.
Fill in the fields related to the user’s session time and the permission set name and click “Next” to continue.
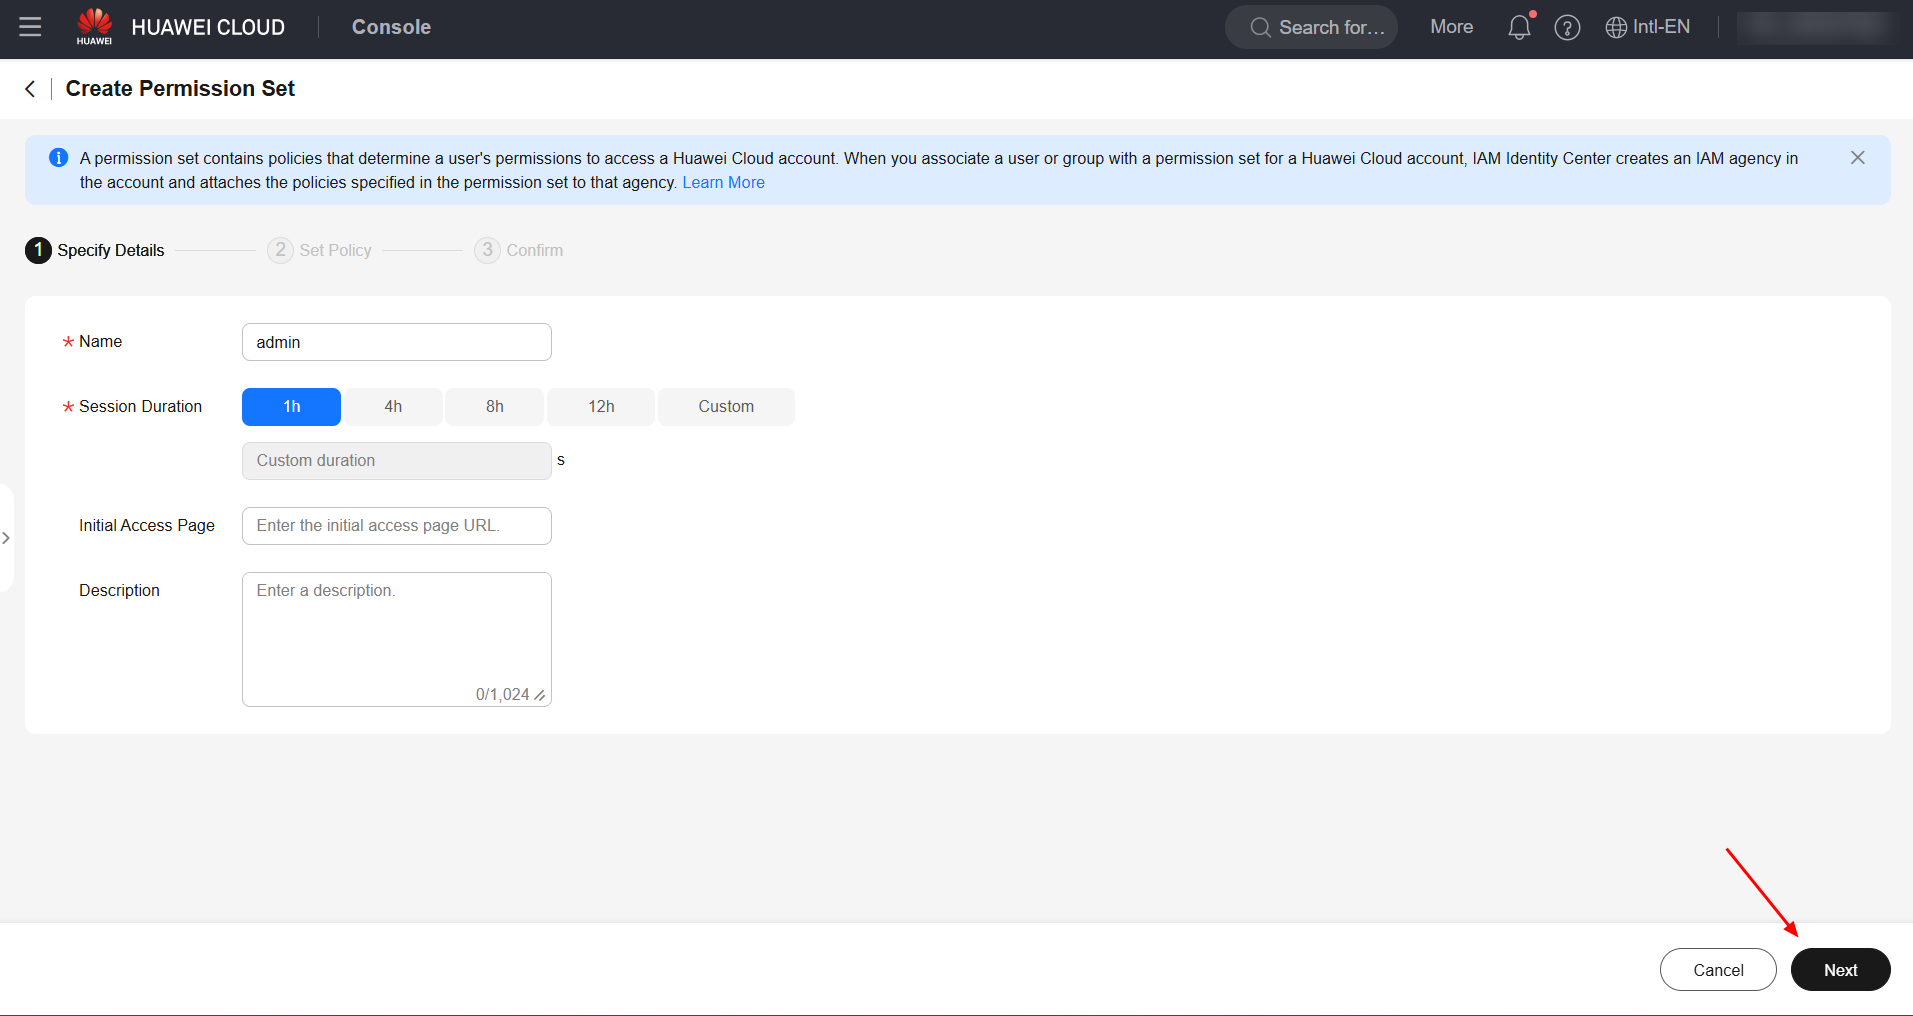
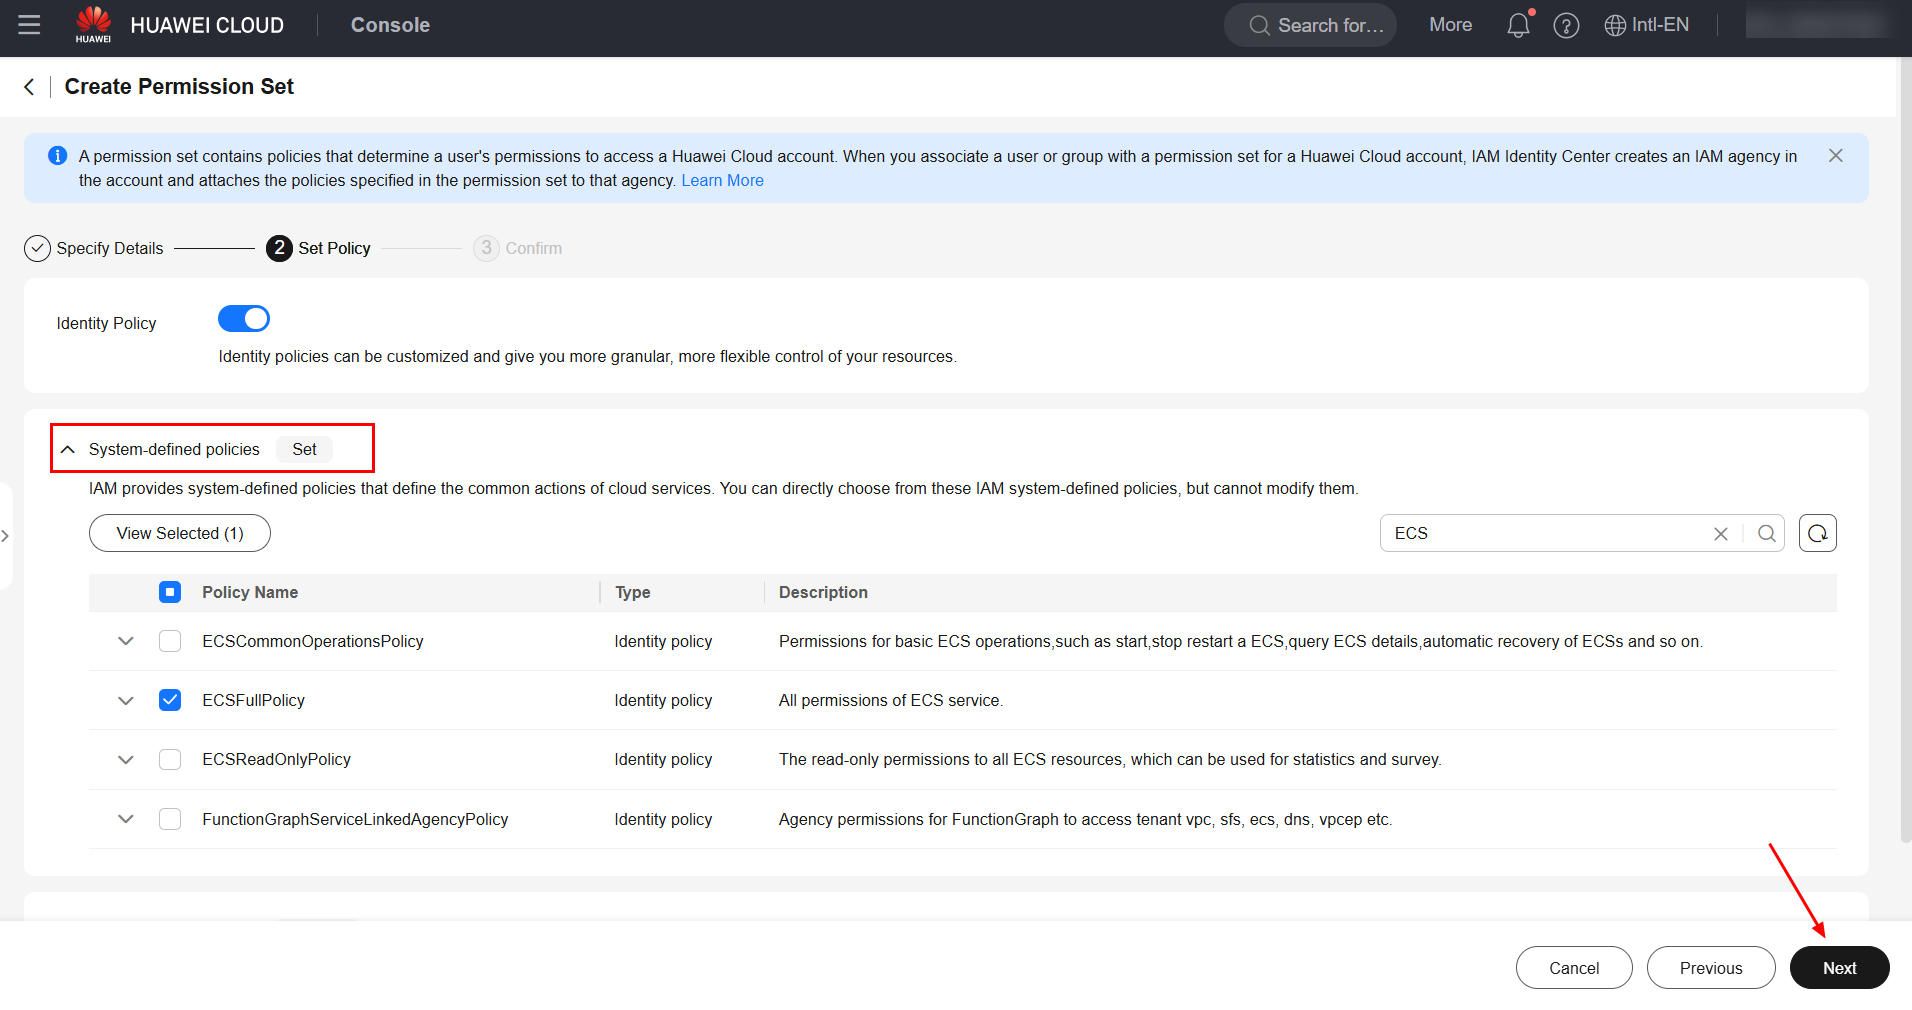
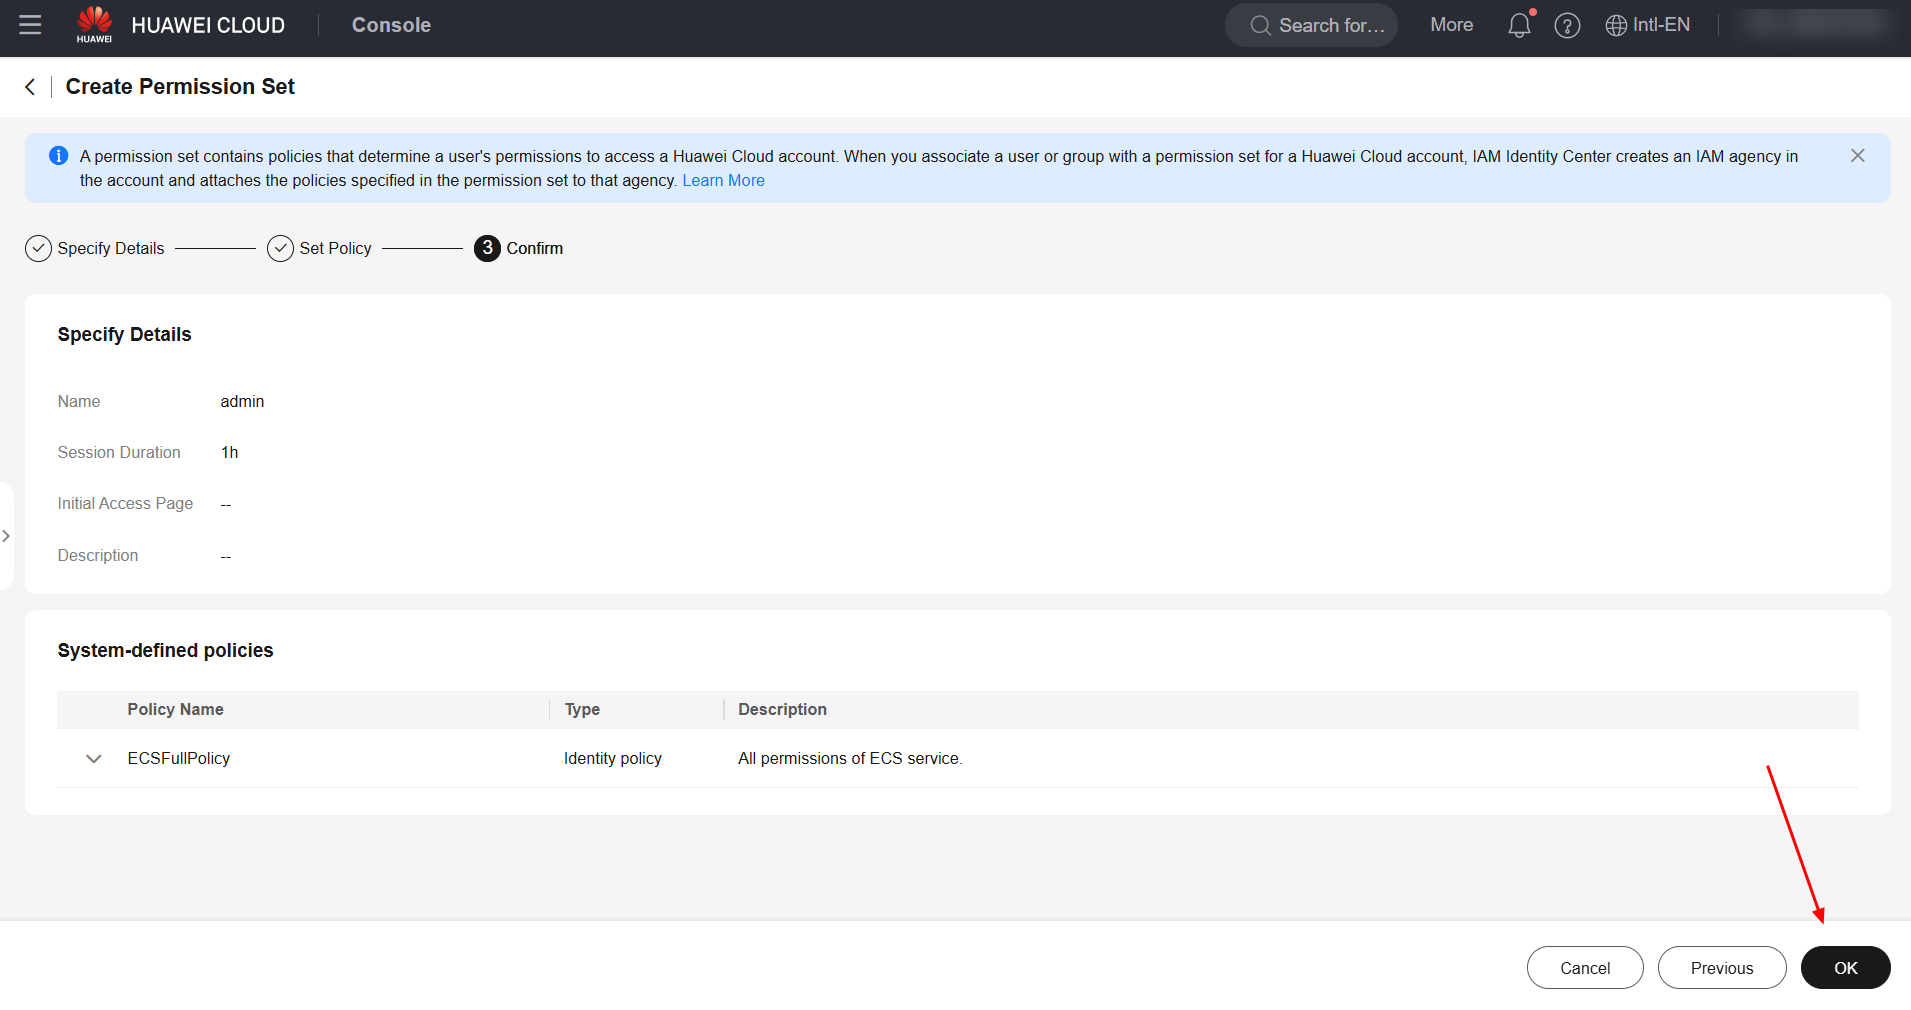
Select the permissions that the permission set will have and select “Next” followed by “OK” to finish creating the permission set.
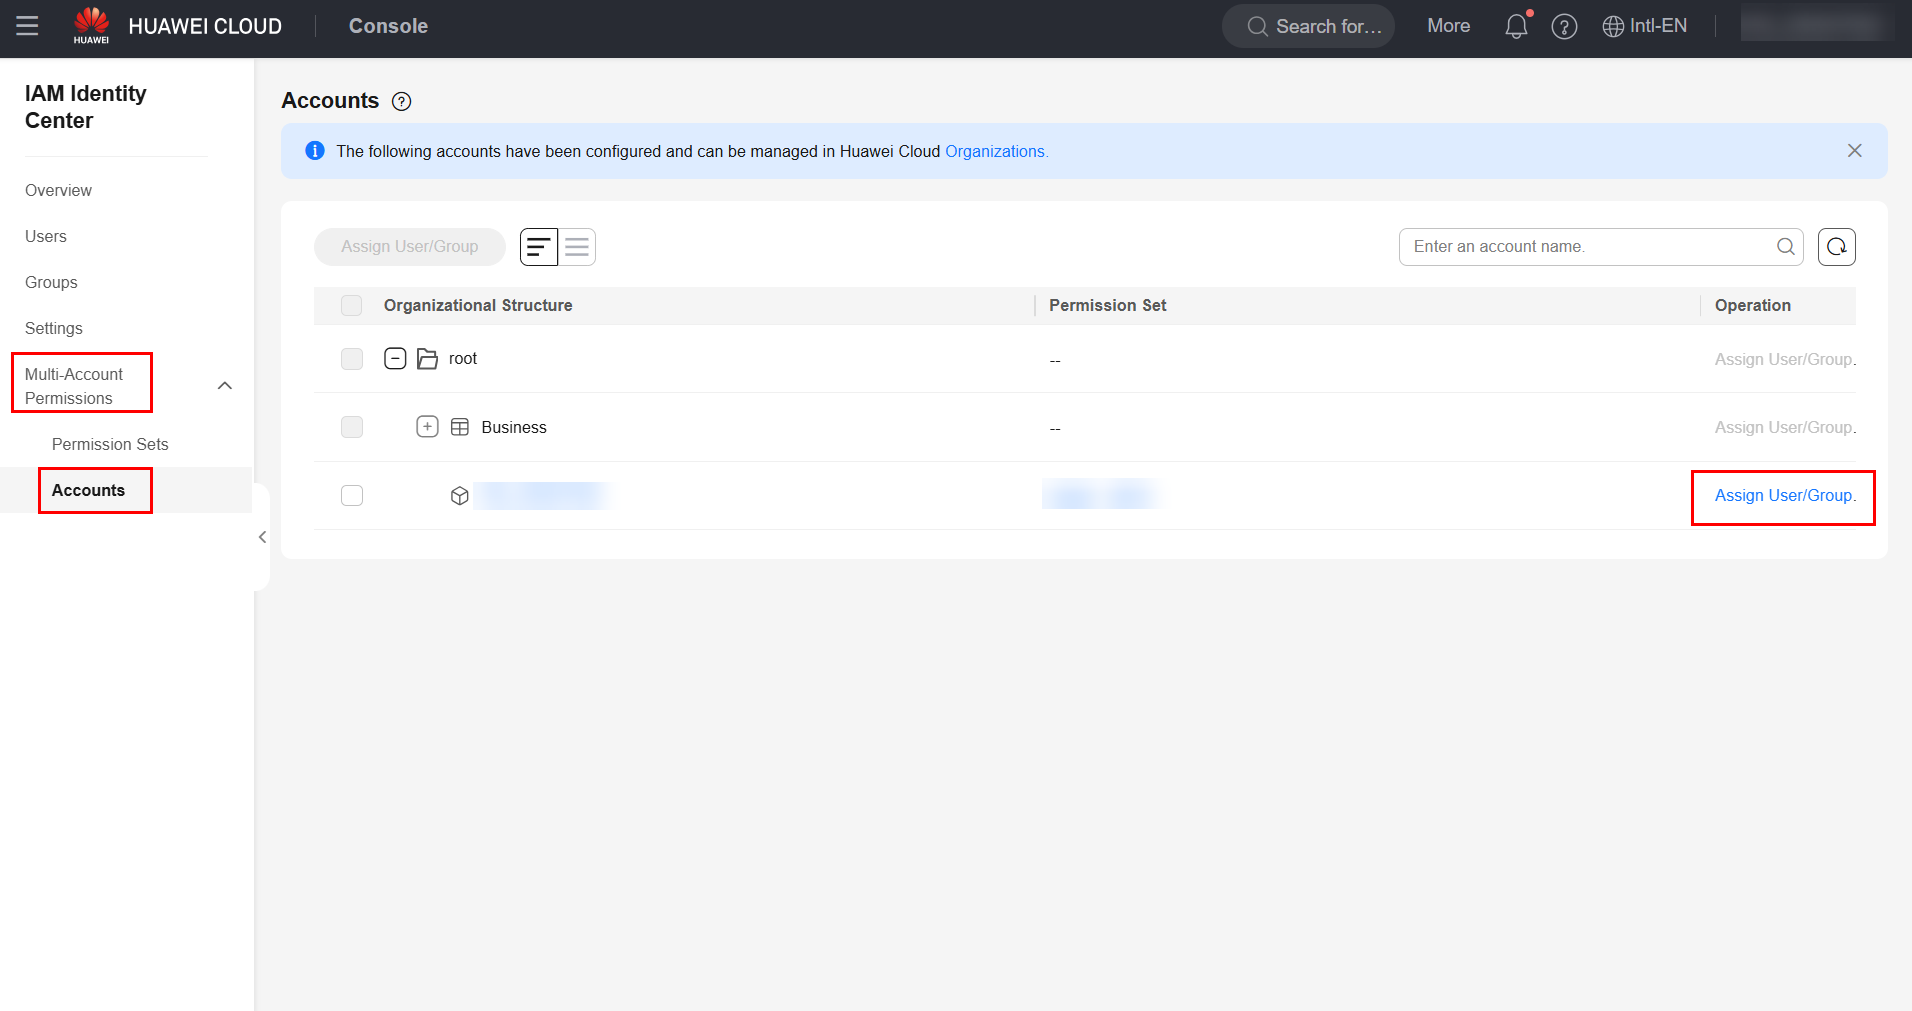
Accounts
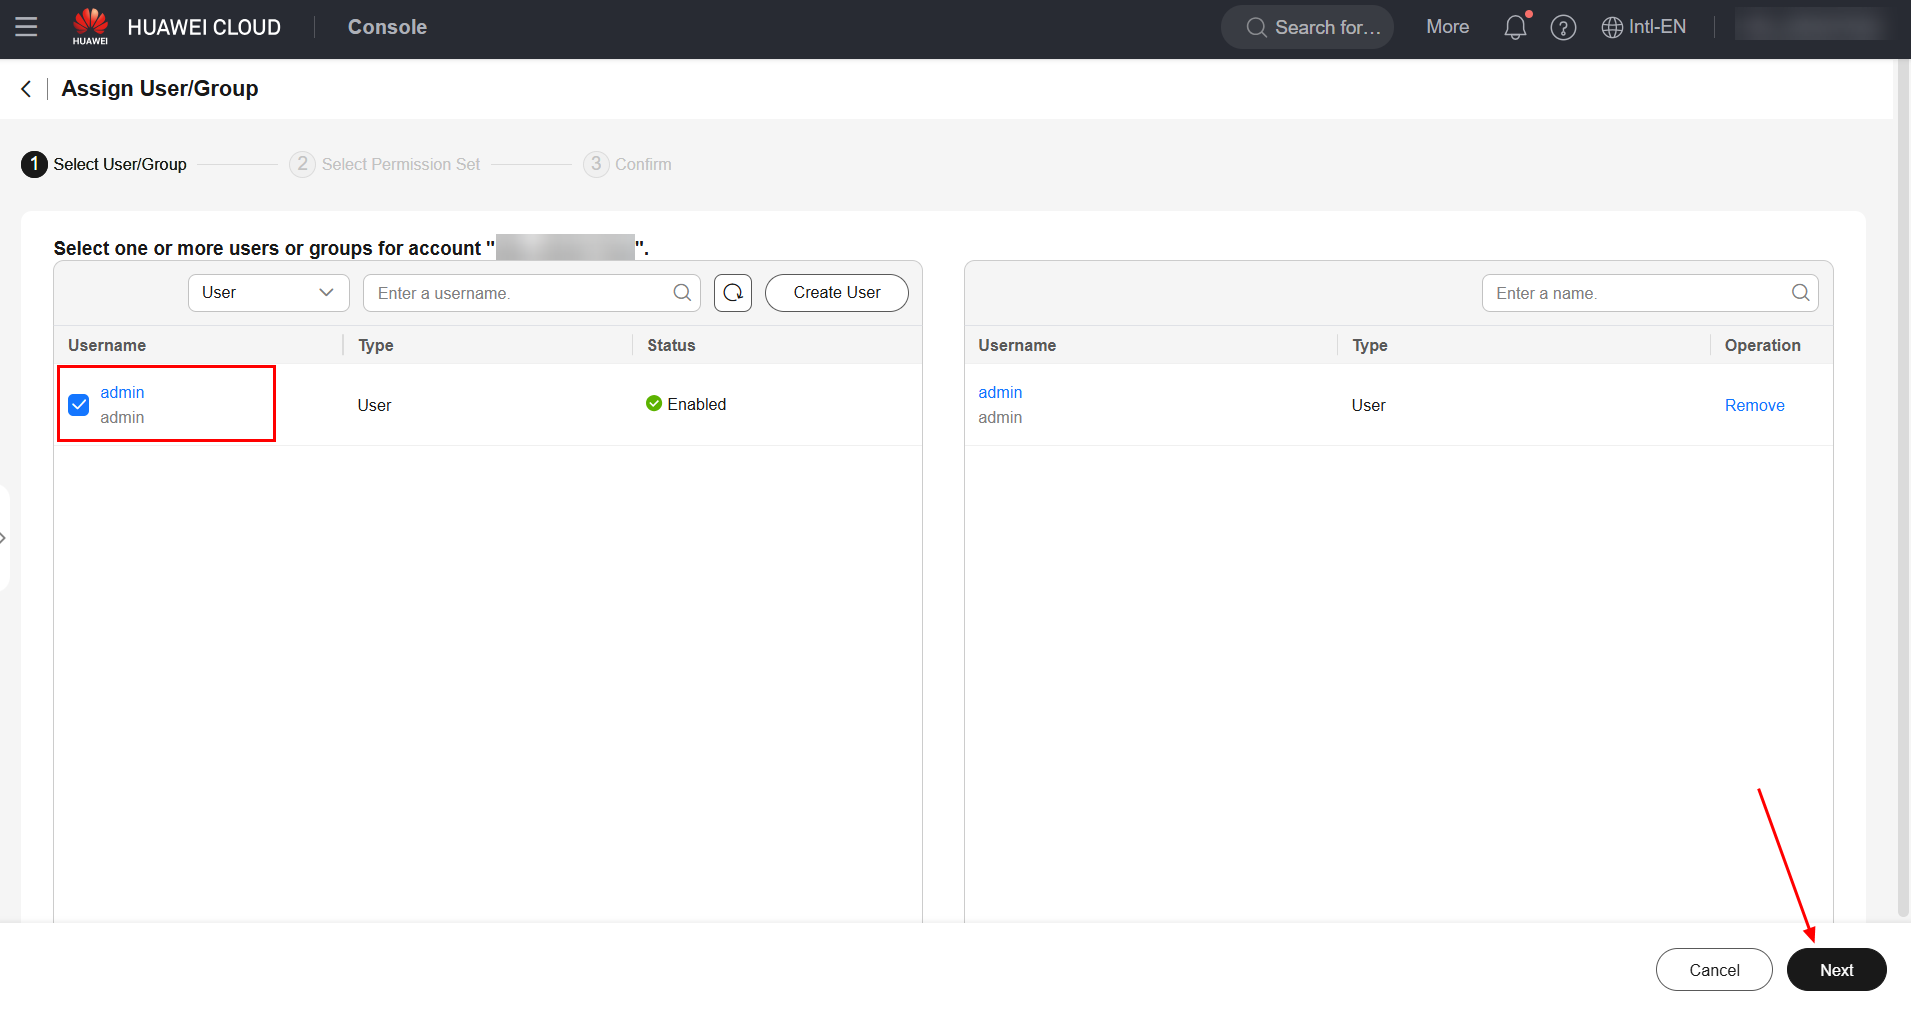
Finally, you will need to configure a triple for the user, permission set and account, in order to delegate permissions to users to specific Organizations accounts. To do this, navigate to the “Accounts” subsection in the “Multi-Account Permissions” section, and click “Assign User/Group” for the desired account.
Select the users that will have access to the selected account and click “Next” to proceed.
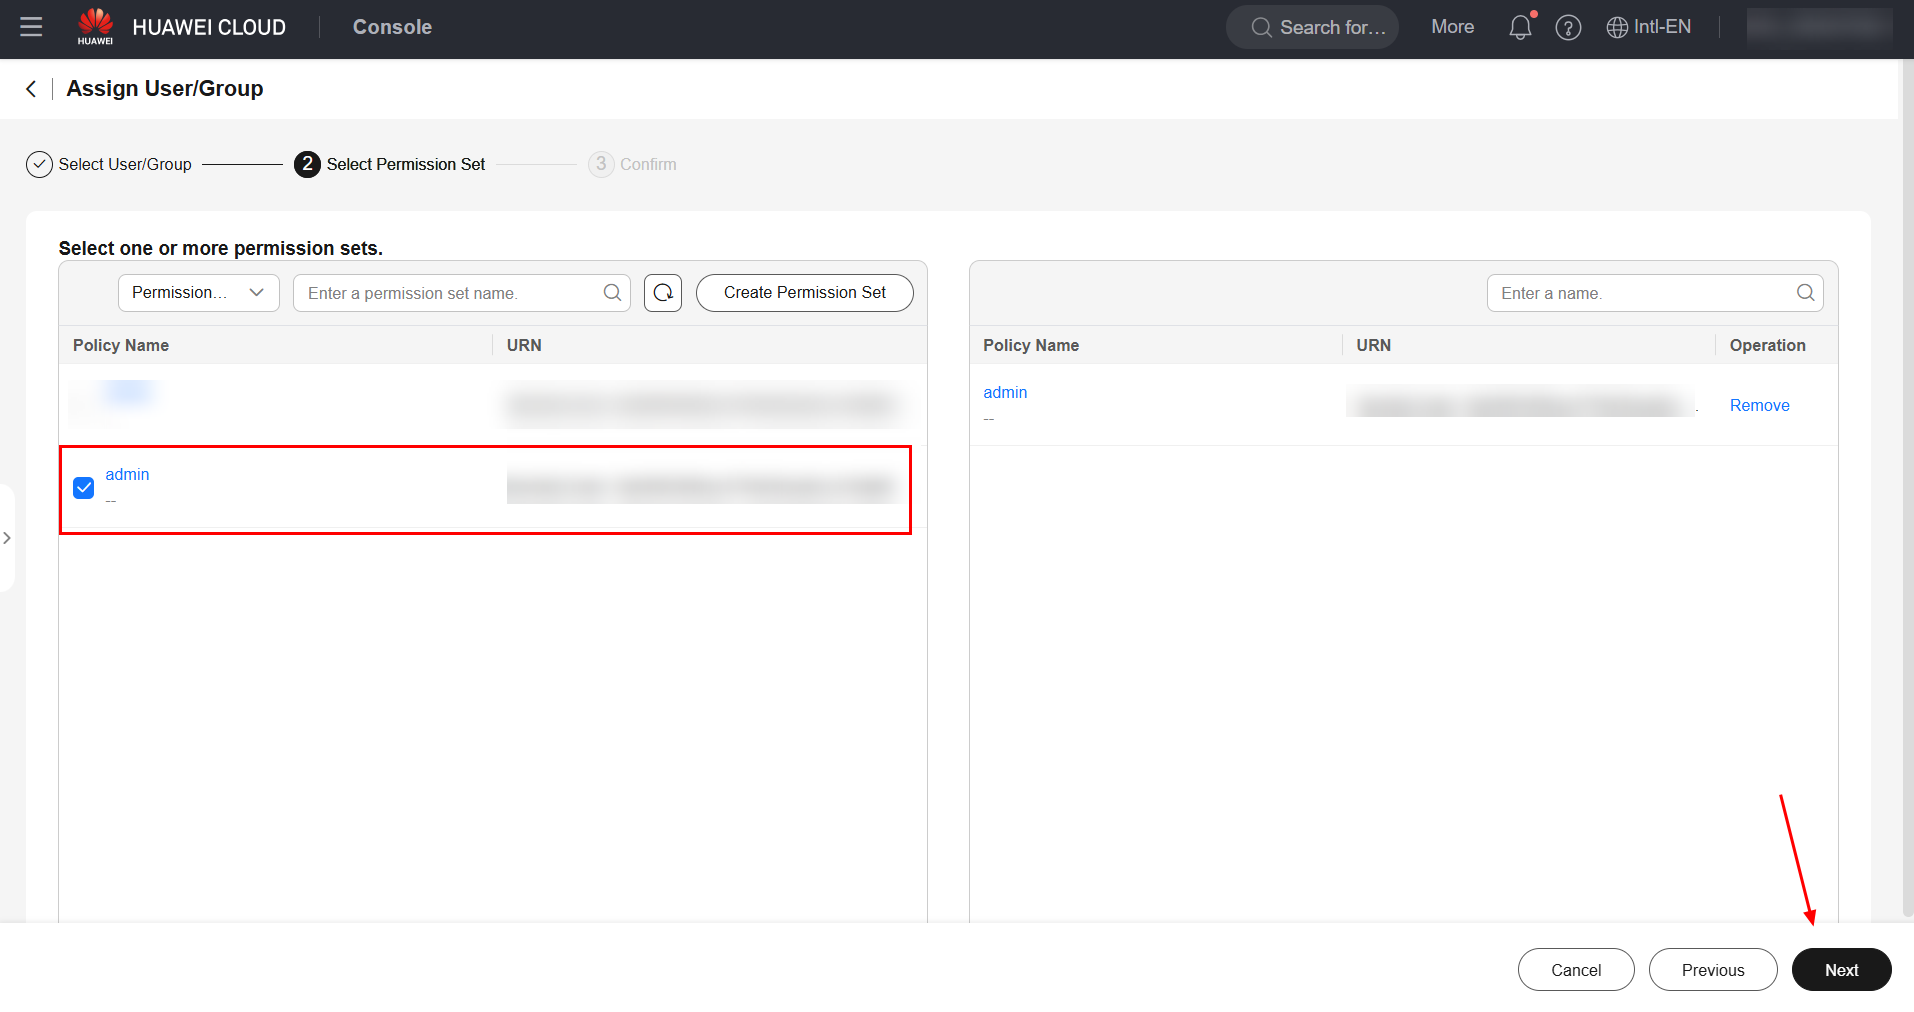
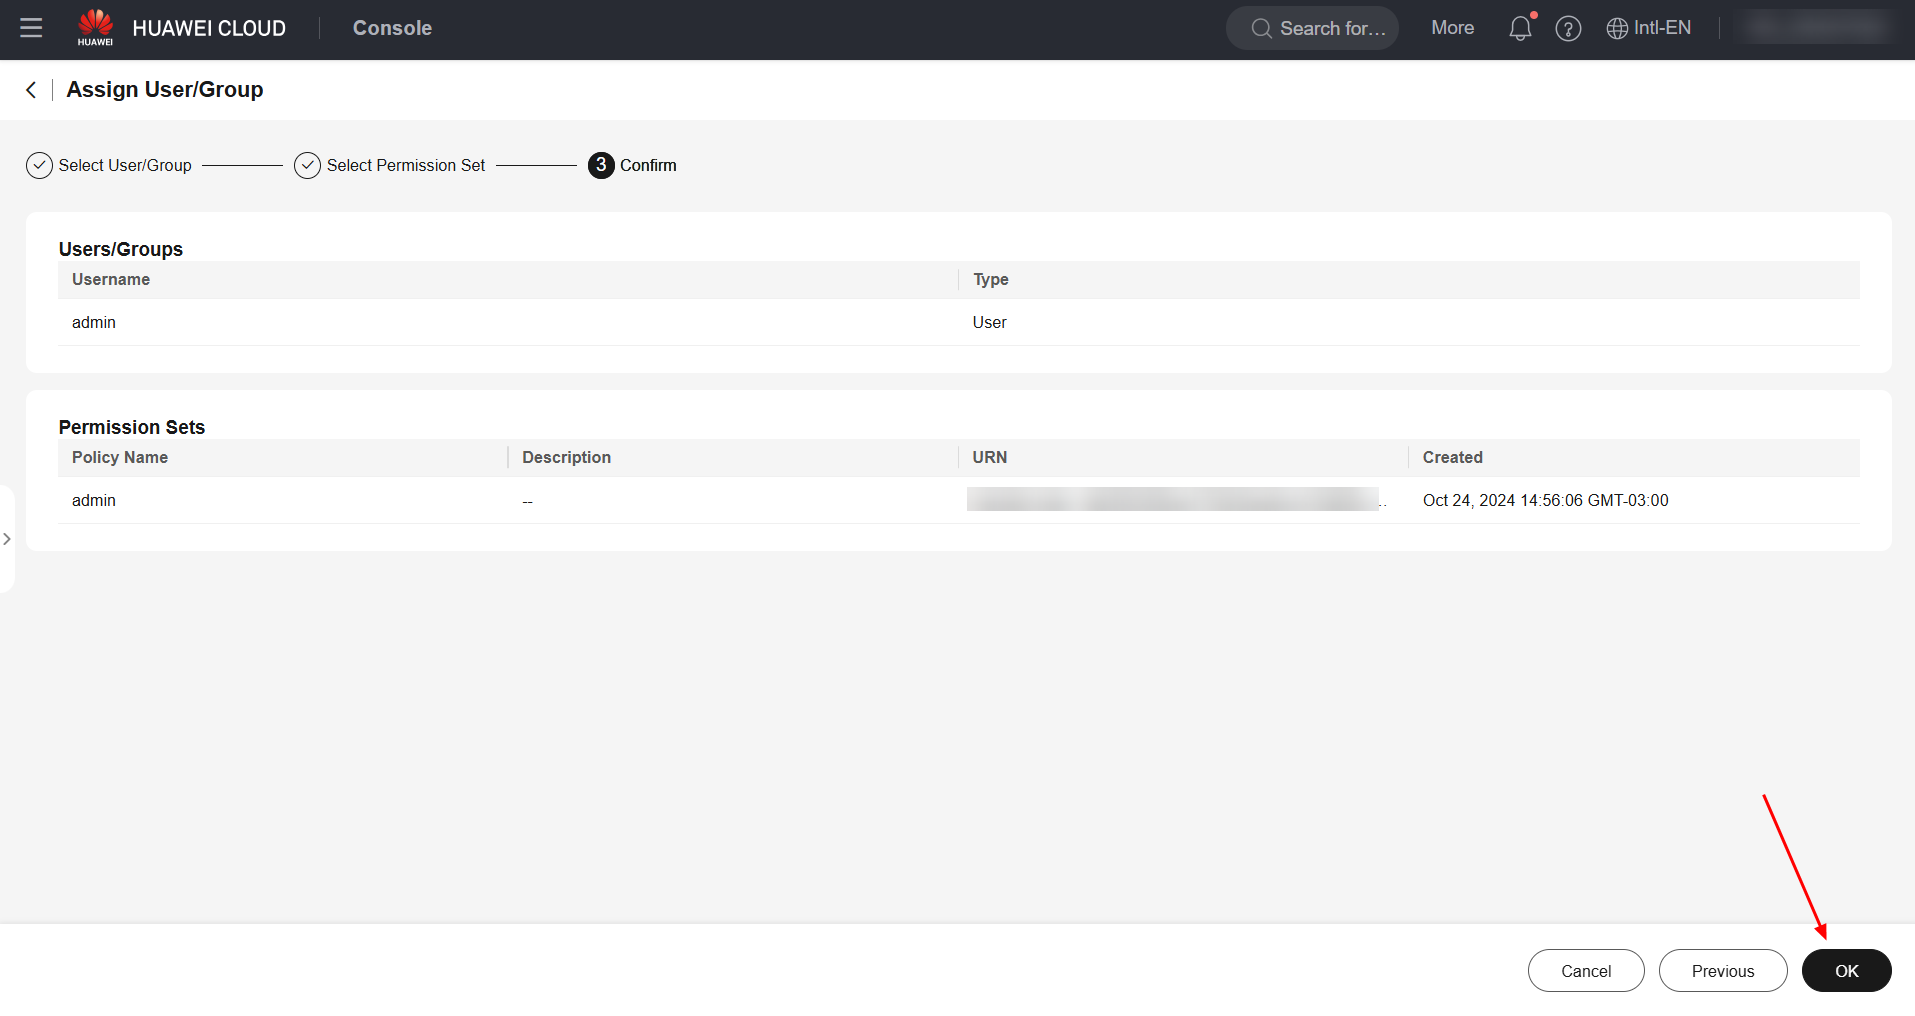
Select the permission sets that the aforementioned users will have access to in the selected account and click “Next” followed by “OK” to finish delegating permissions to users.
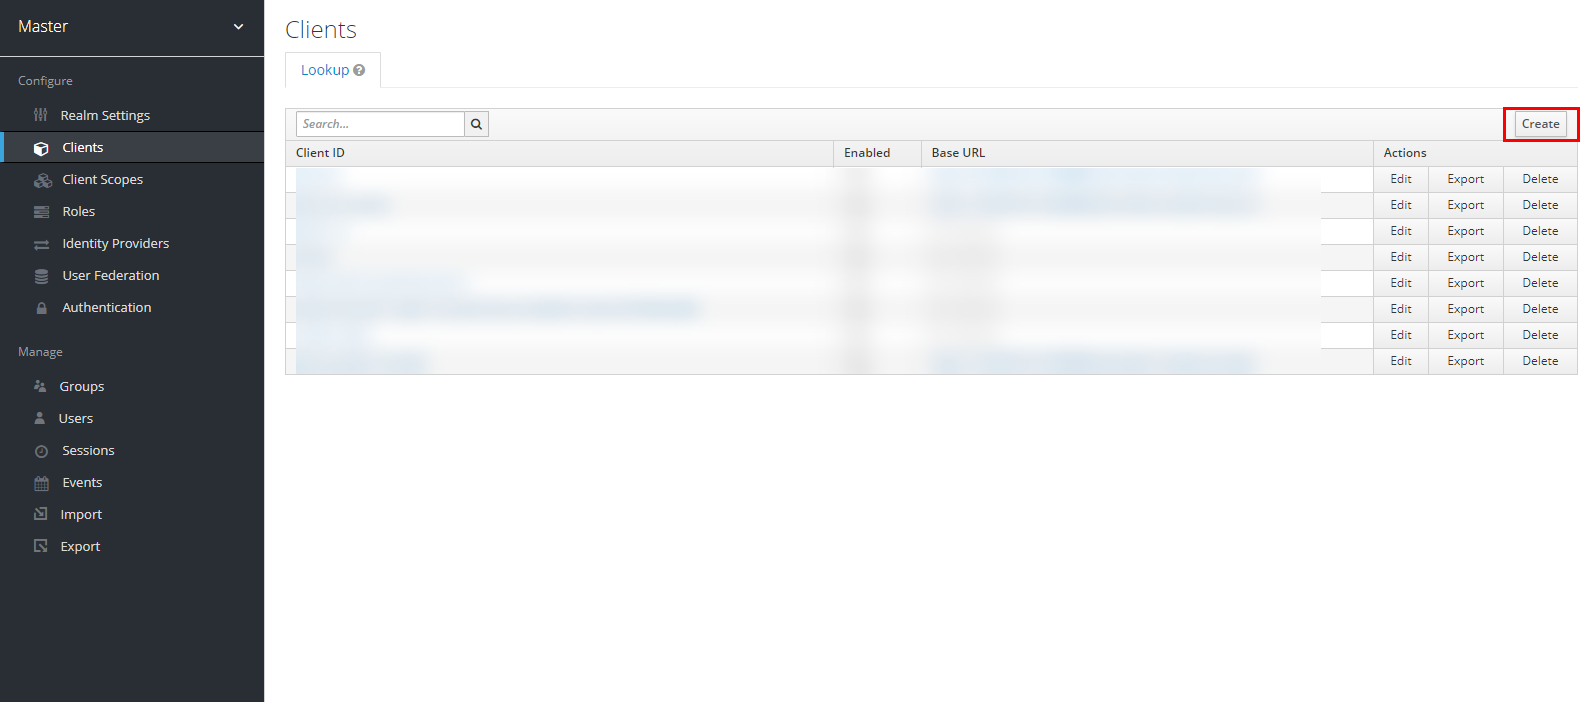
Keycloak Client
To integrate Huawei Cloud with Keycloak, you must first create a Client in the IdP. To do this, go to the IdP (Keycloak) settings page and navigate to the “Clients” section. Click “Create” to create a new client.
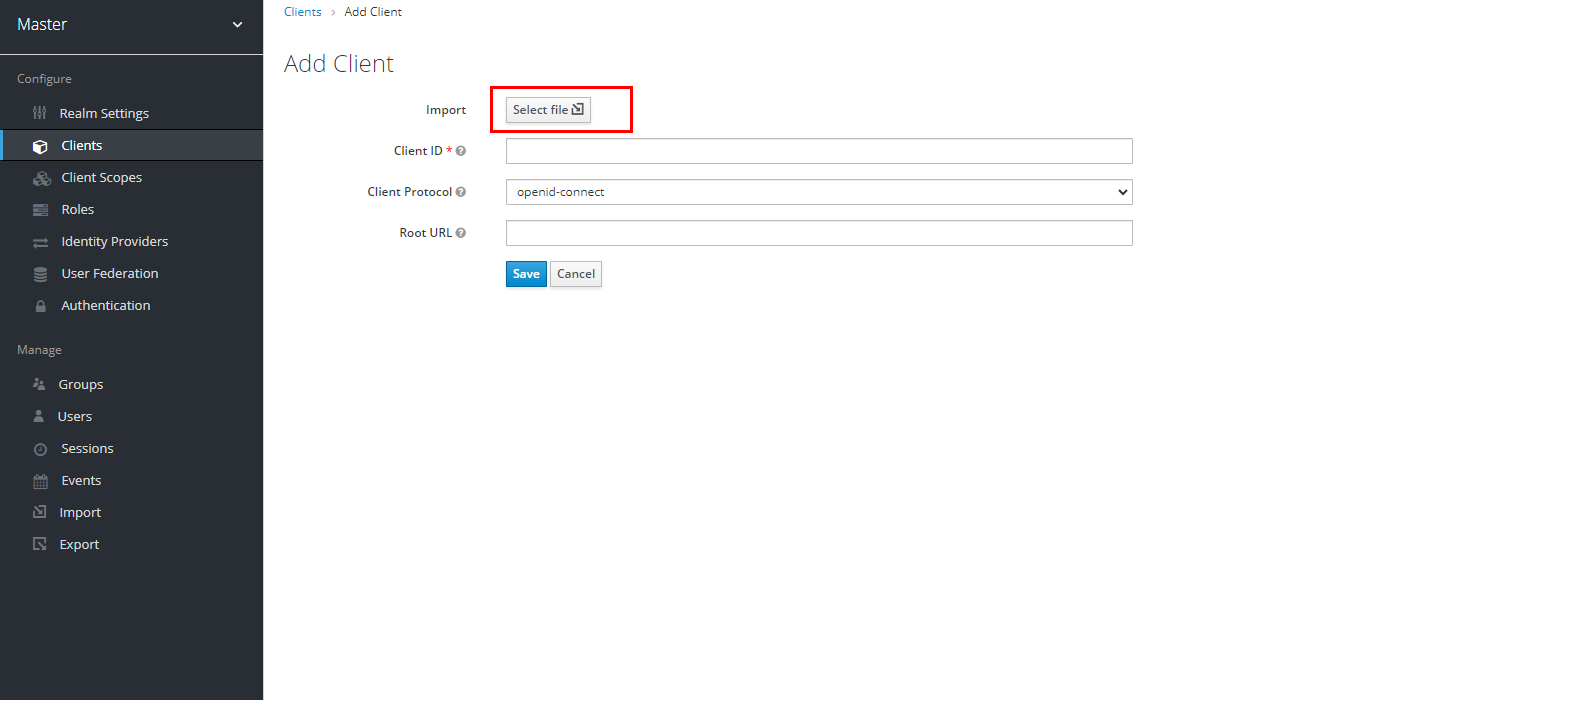
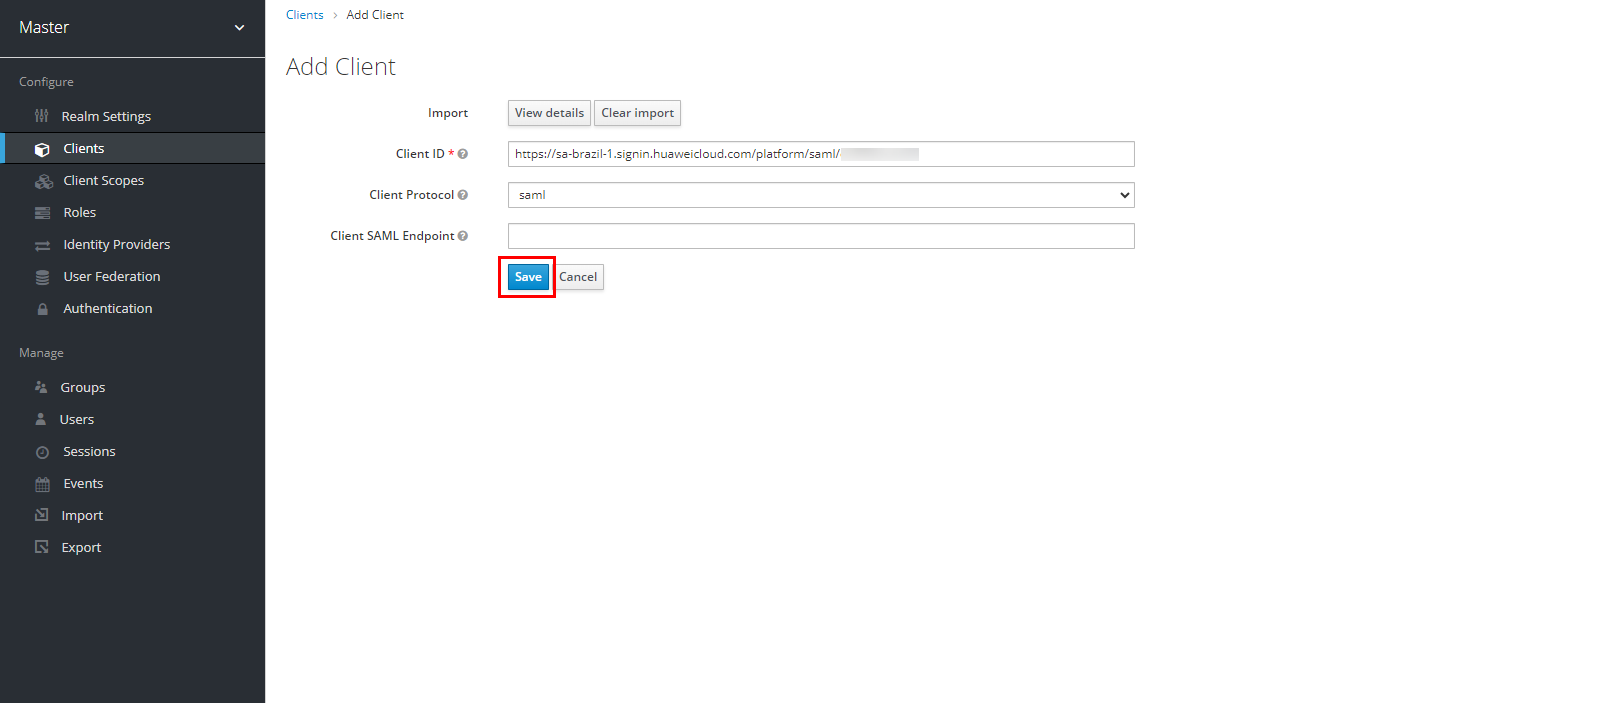
Click “Select file” to import the Huawei Cloud XML configuration file saved in item 3.1 of this document, and click “Save”.
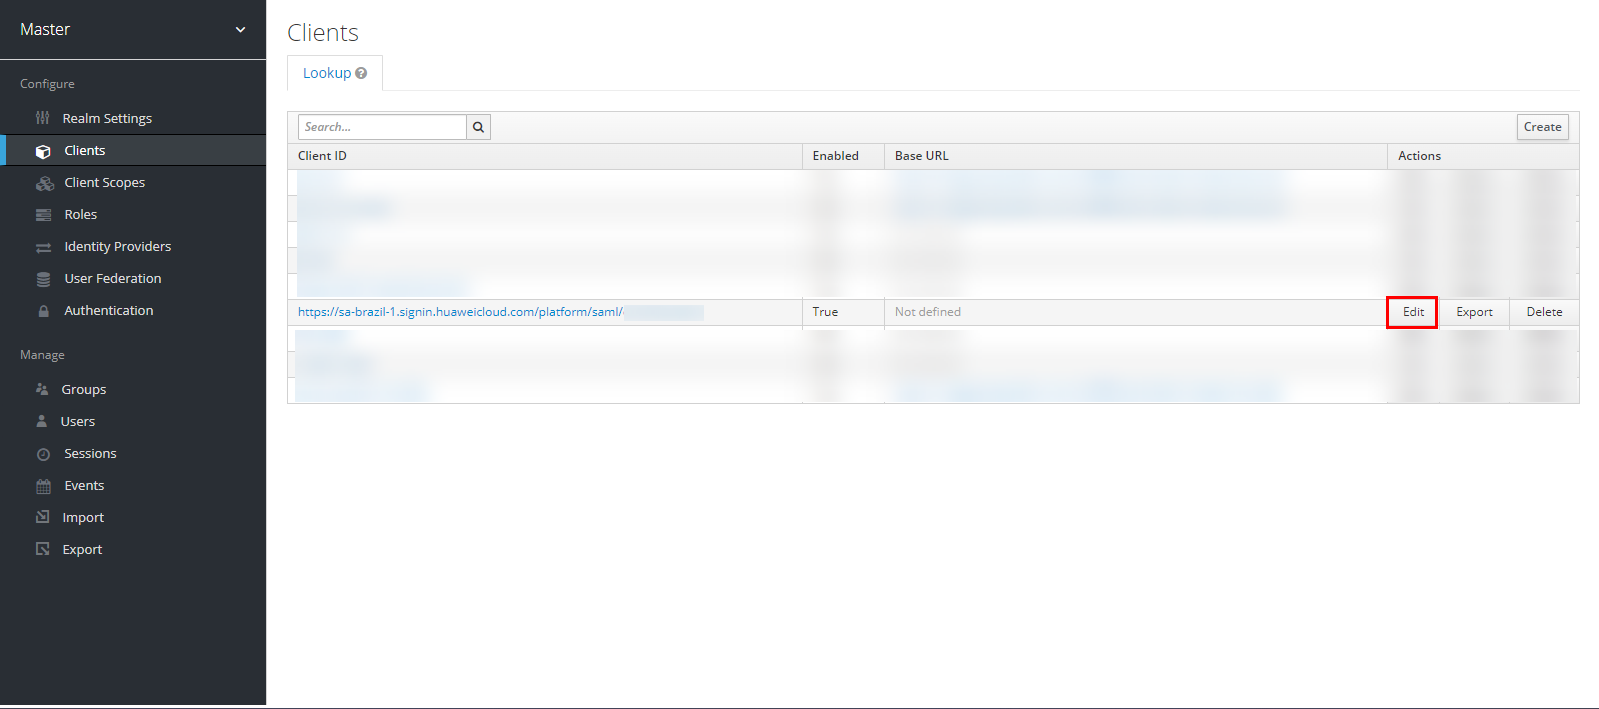
Navigate to the Huawei Cloud client you created and click “Edit” to edit the client settings.
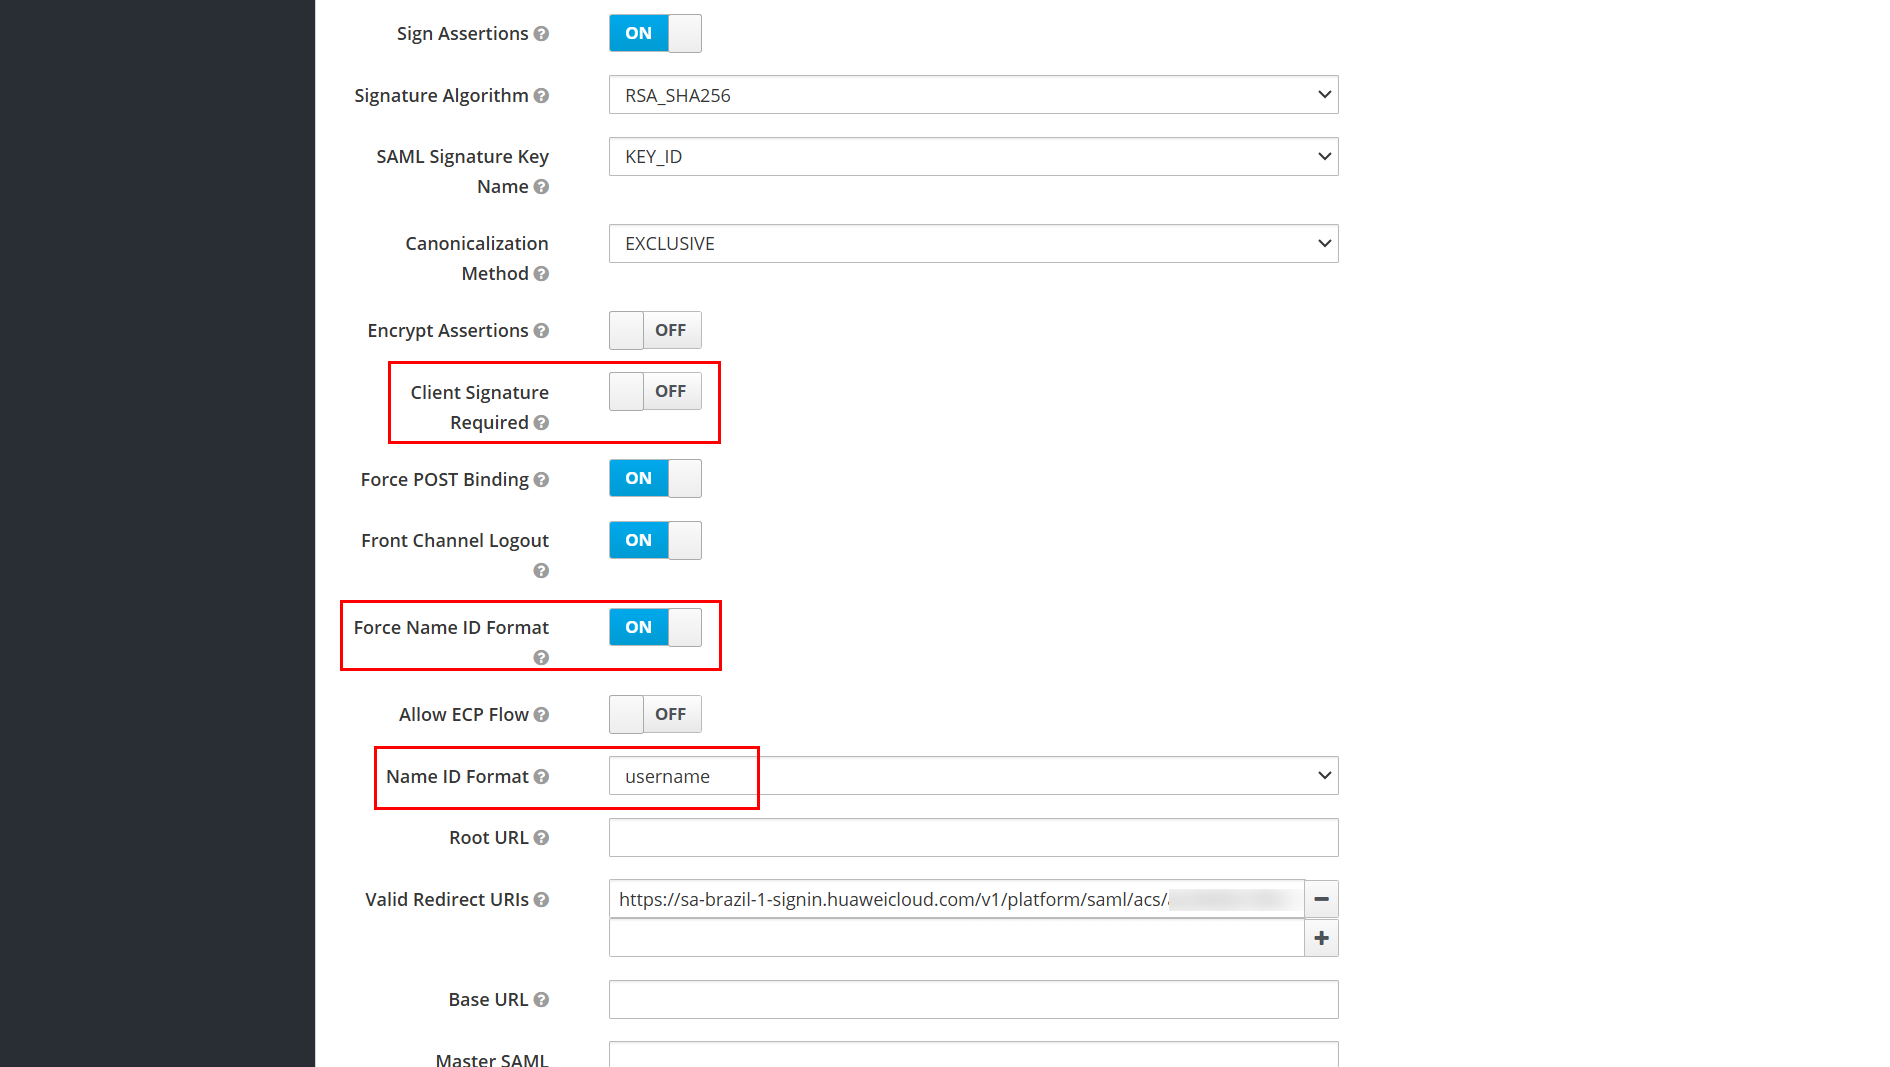
Turn off the “Client Signature Required” option, enable the “Force Name ID Format” option, select the “Name ID Format” field as “username” and click “Save” to save the changes made.
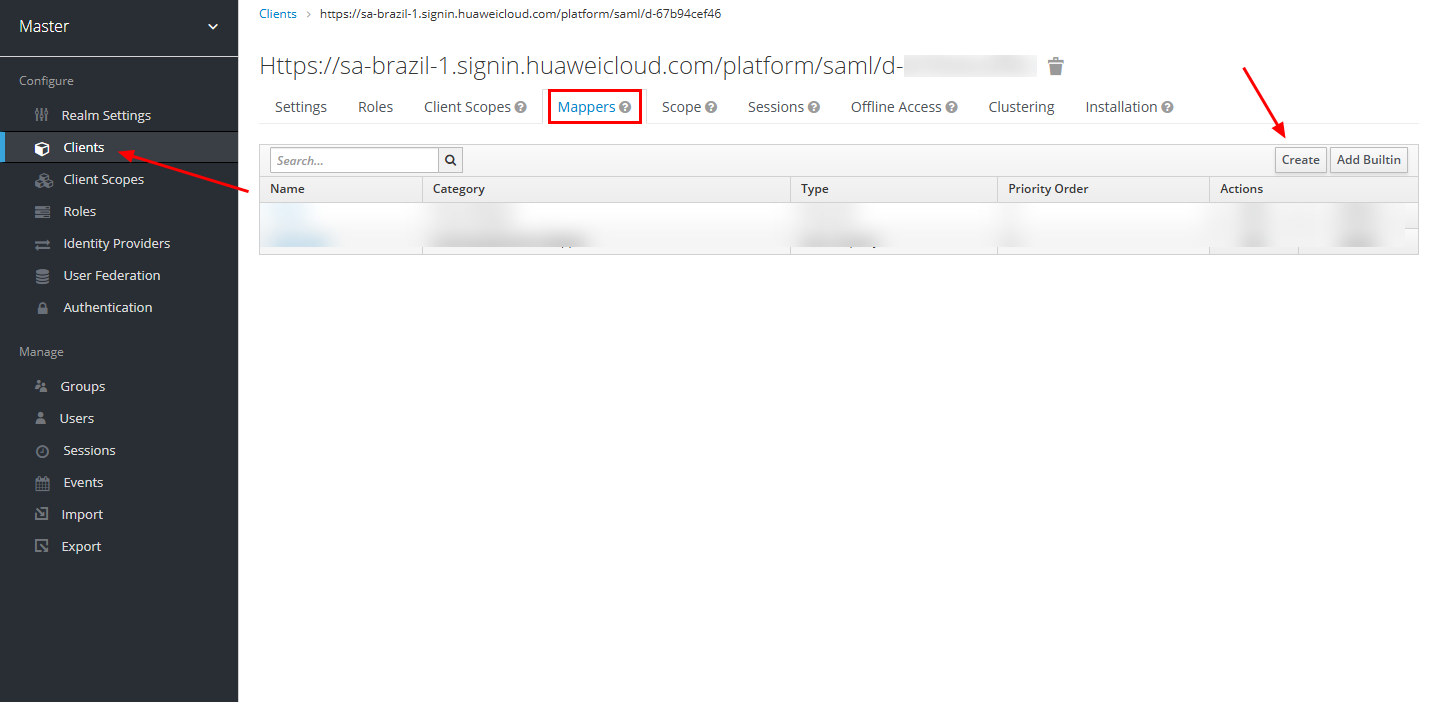
Navigate to the “Mappers” section, still in the Huawei Cloud client settings, and click “Create” to create a mapper for the username.
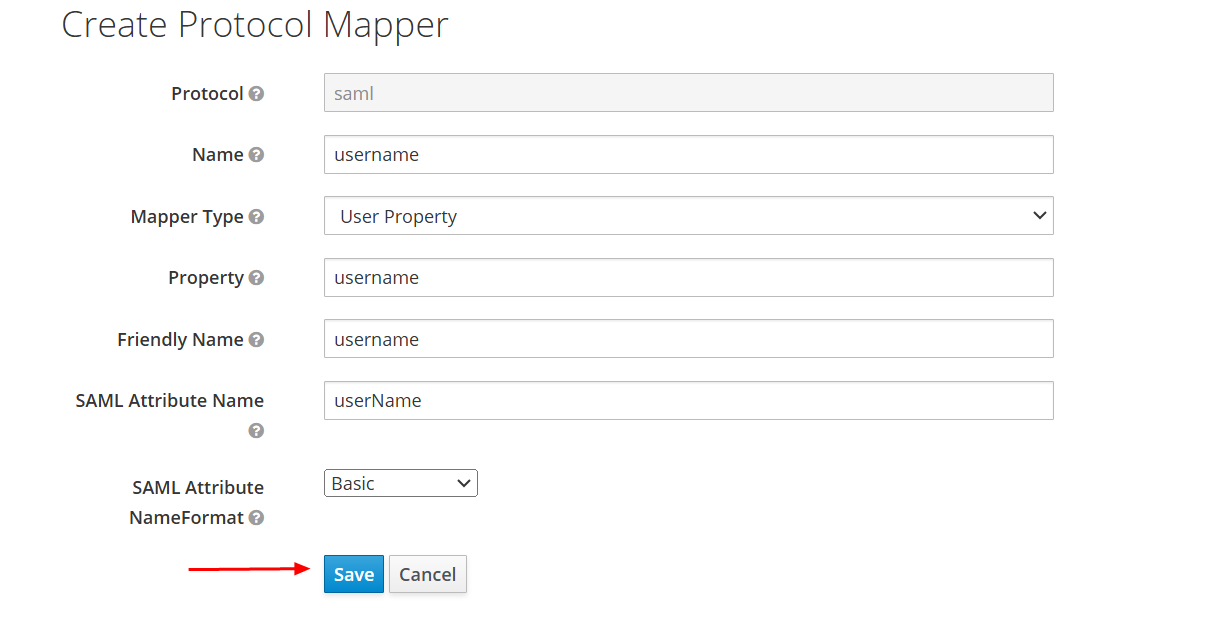
Select the “Mapper Type” as “User Property” and fill in the fields as shown in the image below.
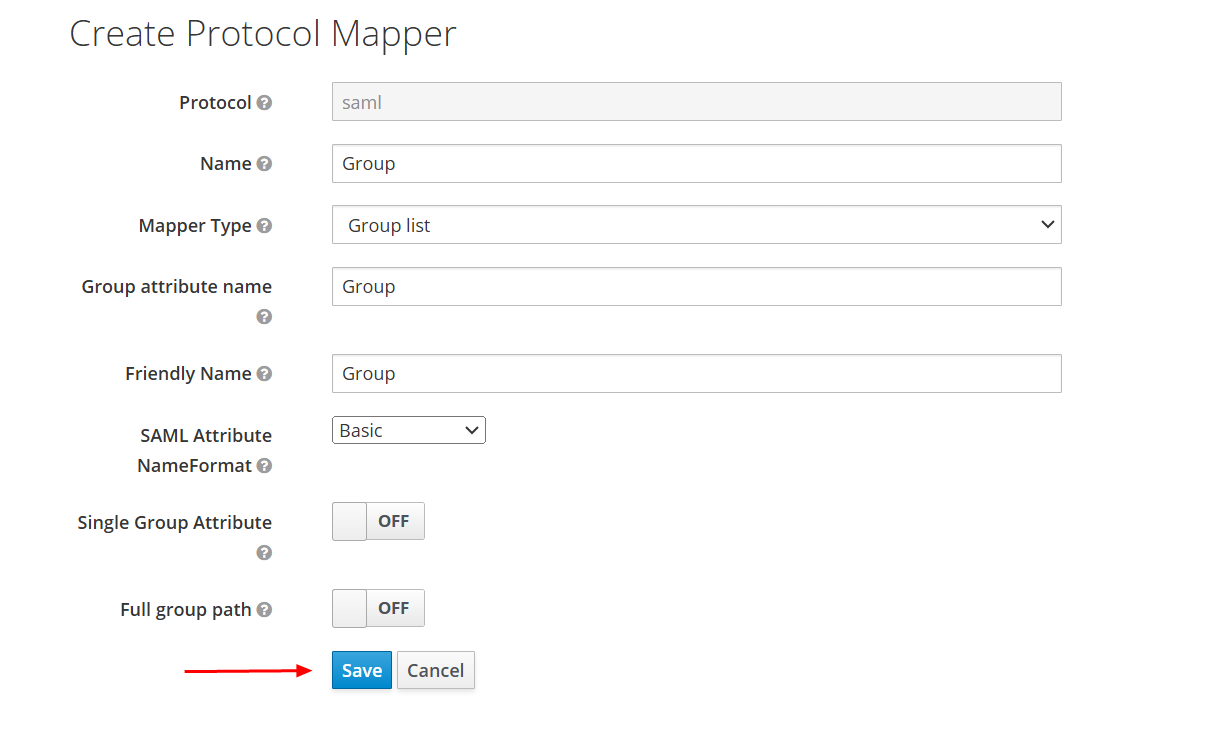
Navigate once again to the “Mappers” section, still in the Huawei Cloud client settings, and click “Create” to create a mapper for the group.
Select the “Mapper Type” as “Group list” and fill in the fields as shown in the image below.
Note: To perform Huawei Cloud user federation, users must first exist. If there is no user created in Keycloak, create a user.
Example
The following is an example of validating login to the Huawei Cloud console through identity federation.
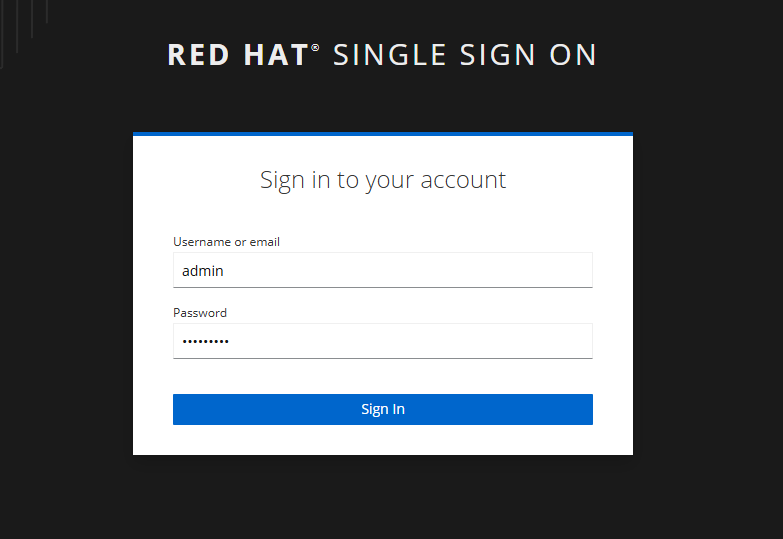
Accessing the IAM Identity Center portal hyperlink.

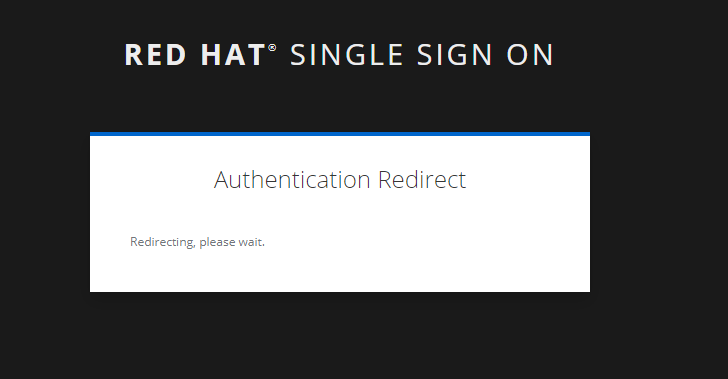
Redirection to the Identity Provider login page.
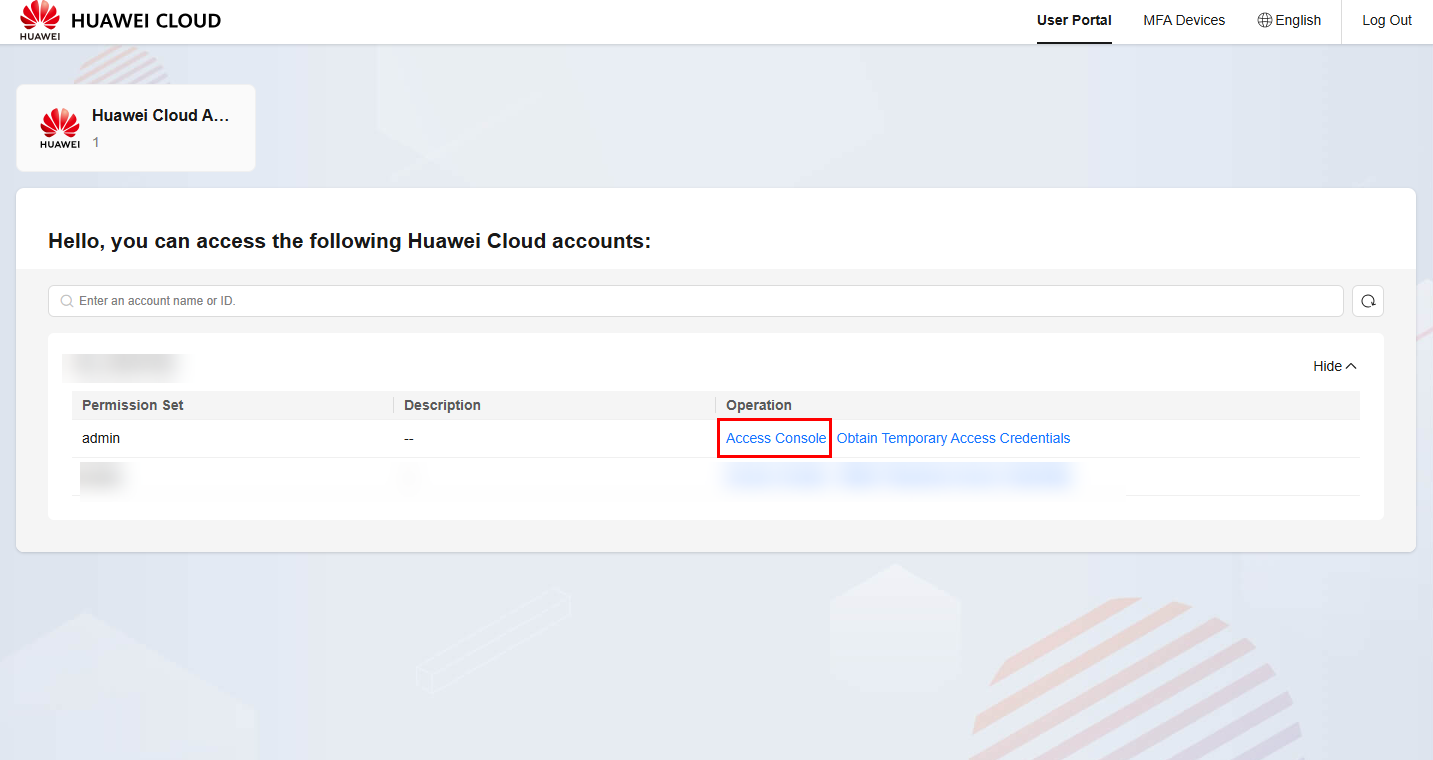
Redirection to the Huawei Cloud console after authentication is successful.
Click “Access Console” next to the desired permission set to log in to the desired account.
References
- IIC Documentation: https://support.huaweicloud.com/intl/en-us/productdesc-identitycenter/iic_01_0002.html
- Huawei Cloud Blog: https://bbs.huaweicloud.com/blogs/429838