![]()
Migrating Multiple Disks
V2.0 – May 2024
| Version | Author | Description |
|---|---|---|
| V1.0 – 2024-05-08 | Diogo Hatz 50037923 | Initial Version |
| V1.0 – 2024-05-08 | Wisley da Silva 00830850 | Document Review |
| V2.0 – 2024-05-16 | Diogo Hatz 50037923 | Document Update |
Introduction
IMS is an image management service available on Huawei Cloud. In addition to providing a range of public images for free use, IMS also allows you to create private images from a variety of formats or use images available on the marketplace.
This document aims to describe the methodology for creating private images from system disks and data disks.
qemu-img
To perform VM migration using IMS, you need to install the qemu-img tool to generate system and disk images. Install the tool using the following command: “yum install qemu-img -y”.

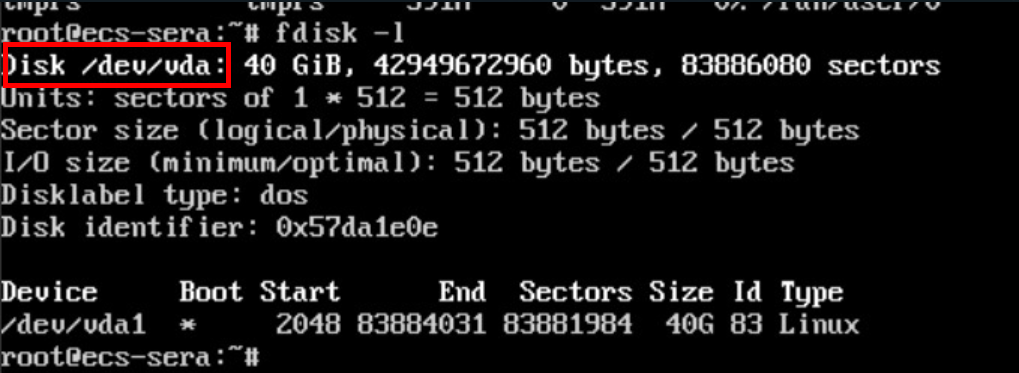
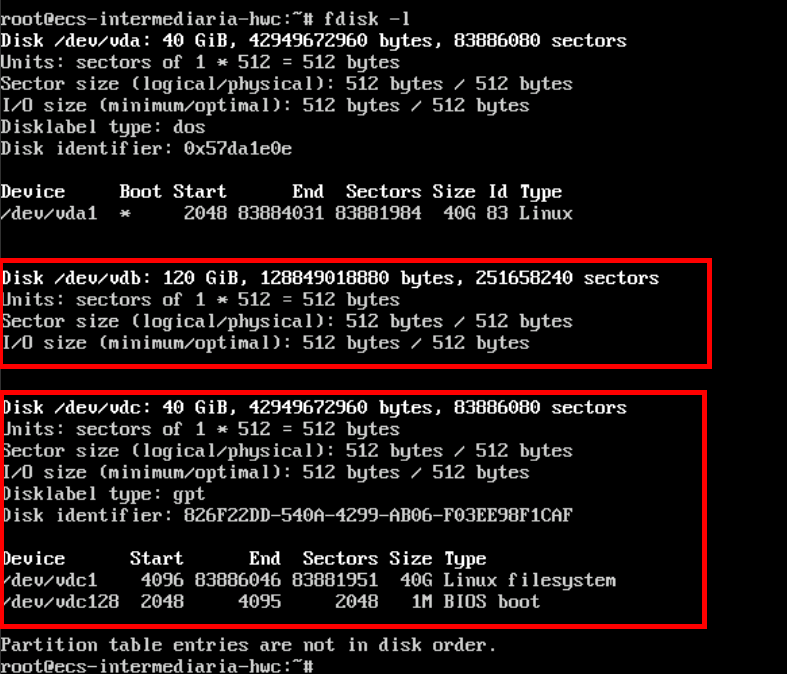
To check the paths of the disks to be migrated, type the command “fdisk -l” to list the disks present in the VM. Important: Take note of the path of the disk as a whole (vda), and not just a partition of the disk (vda1).
To export disks to images, type the following command “sudo qemu-img convert -f raw -O qcow2 /dev/vda /mnt/vdb/test.qcow2”, where the ”-O” parameter corresponds to the format in which the image will be exported (possible formats: qcow2, vhd, vmdk, raw, etc.), “/dev/vda” corresponds to the disk that will be exported and “/mnt/vdb/test.qcow2” corresponds to the image that will be generated by the tool.
Example:
sudo qemu-img convert -f raw -O qcow2 /dev/vda /mnt/vdb/test.qcow2
After generating the image, it will be necessary to export this image to a bucket in OBS, the HWC object storage service. To do this, one of the options is to use the obsutil tool, which allows you to upload files from a Linux machine directly to an OBS bucket via the CLI. Obsutil documentation: https://support.huaweicloud.com/intl/en-us/utiltg-obs/obs_11_0003.html.
IMS
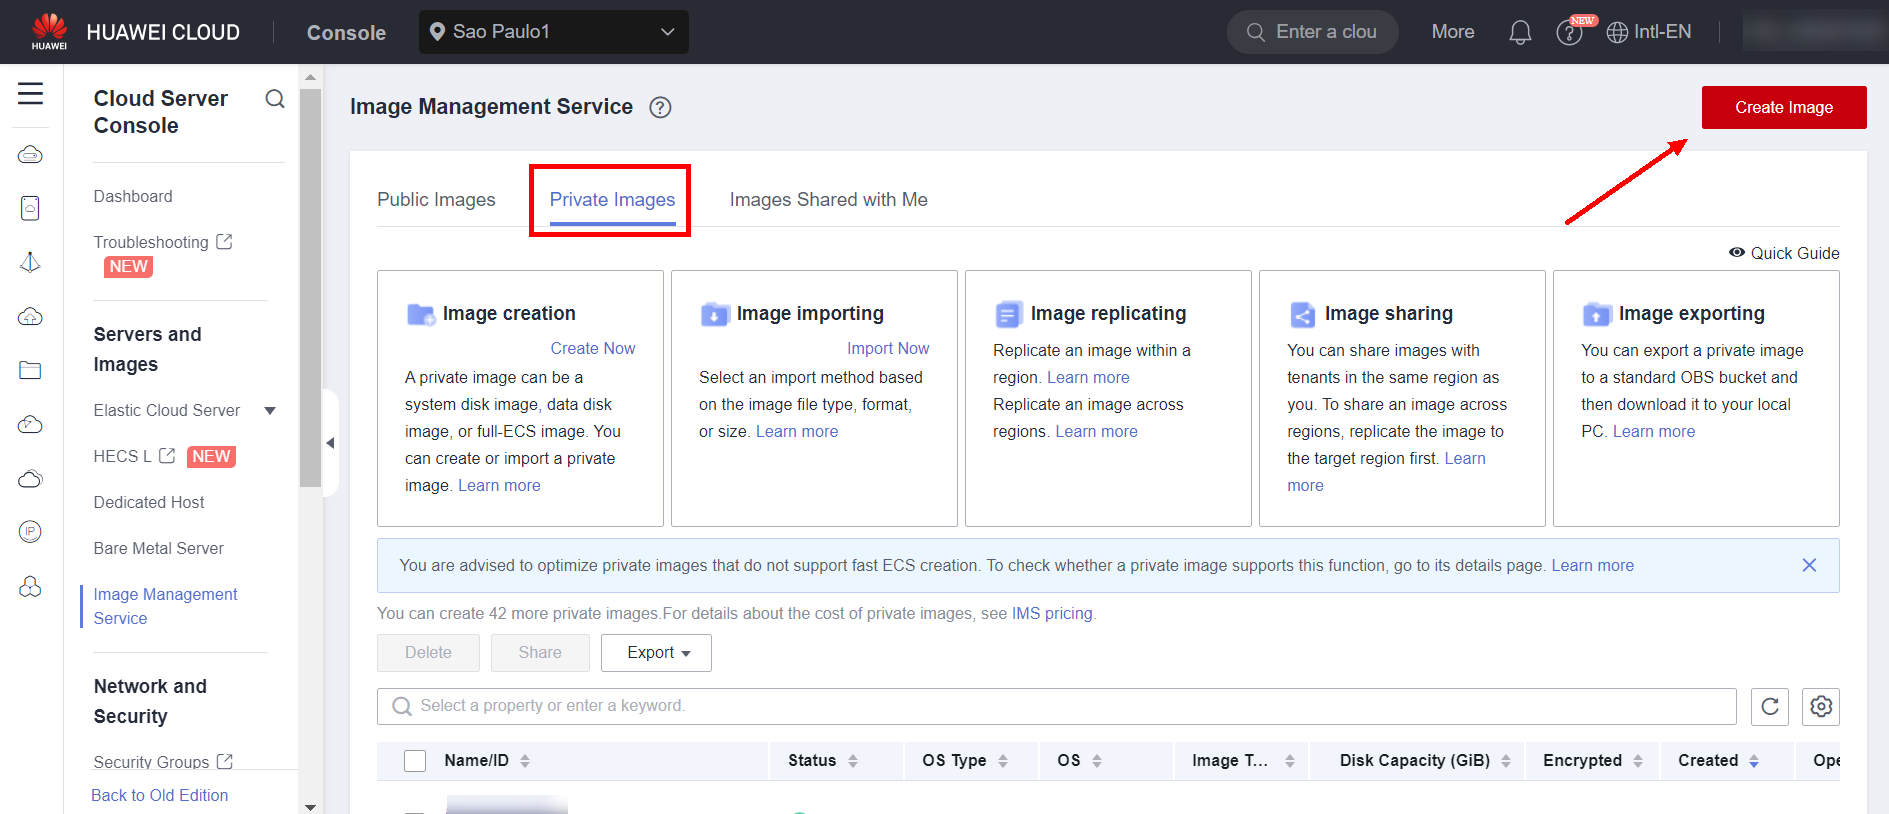
In order to import images to IMS, these images must be available in a bucket in the Huawei Cloud OBS Object Storage service. After uploading these images to the bucket, navigate to the IMS service section in the Huawei Cloud console and select “Create Image” in the “Private Images” section. 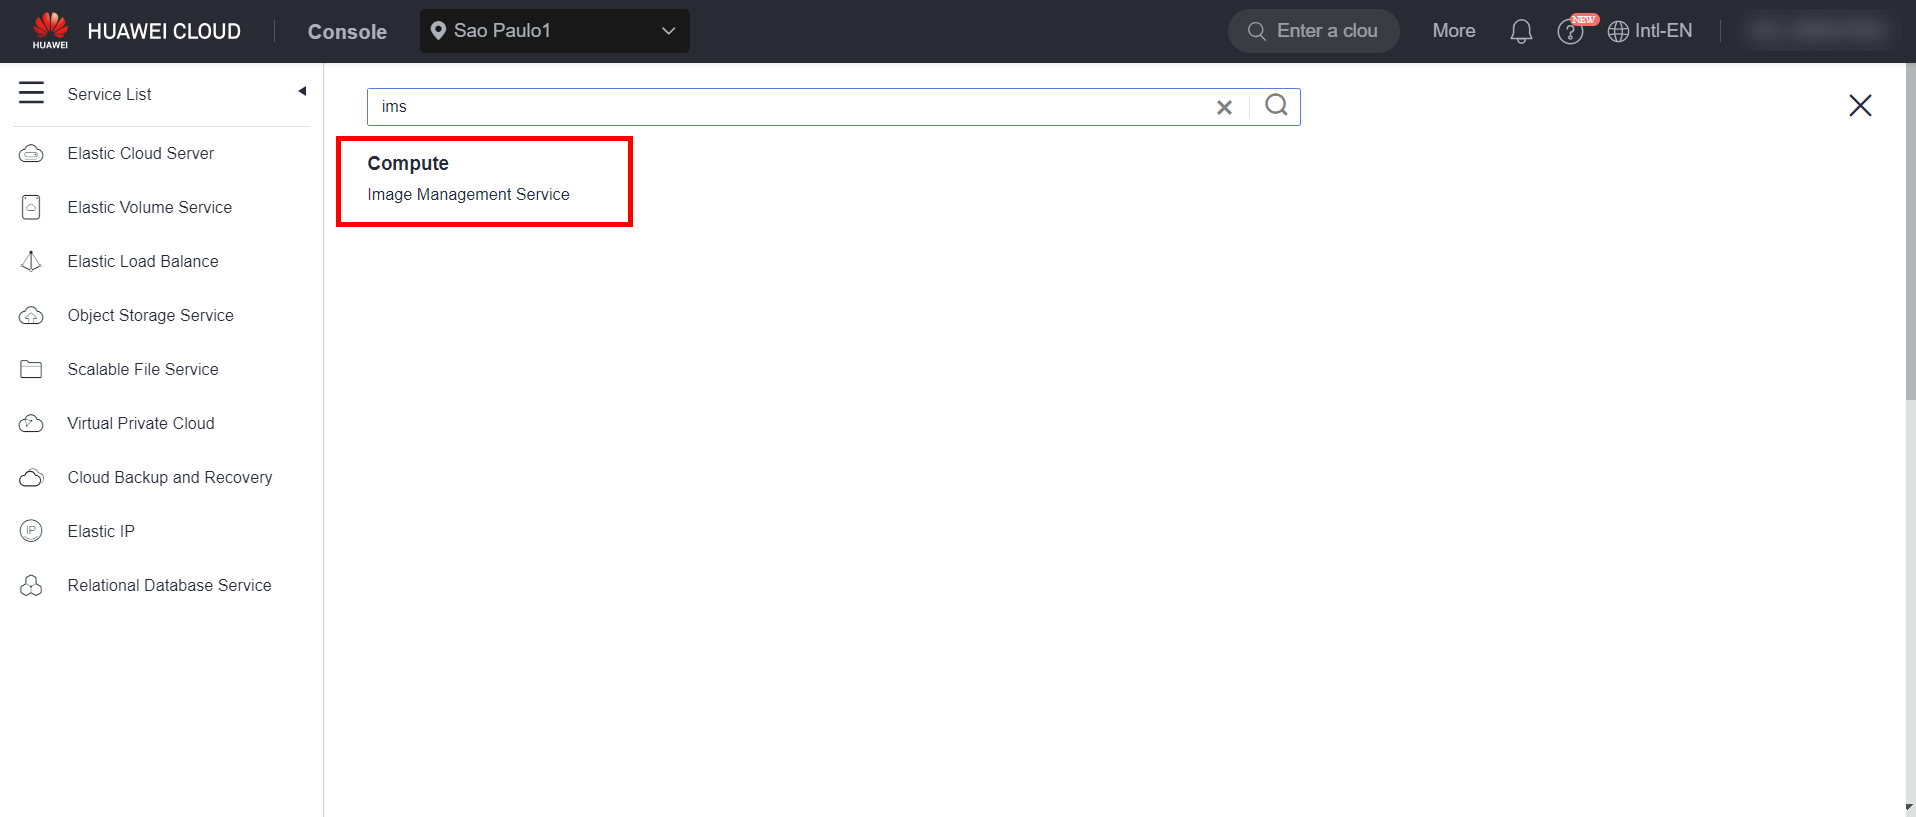
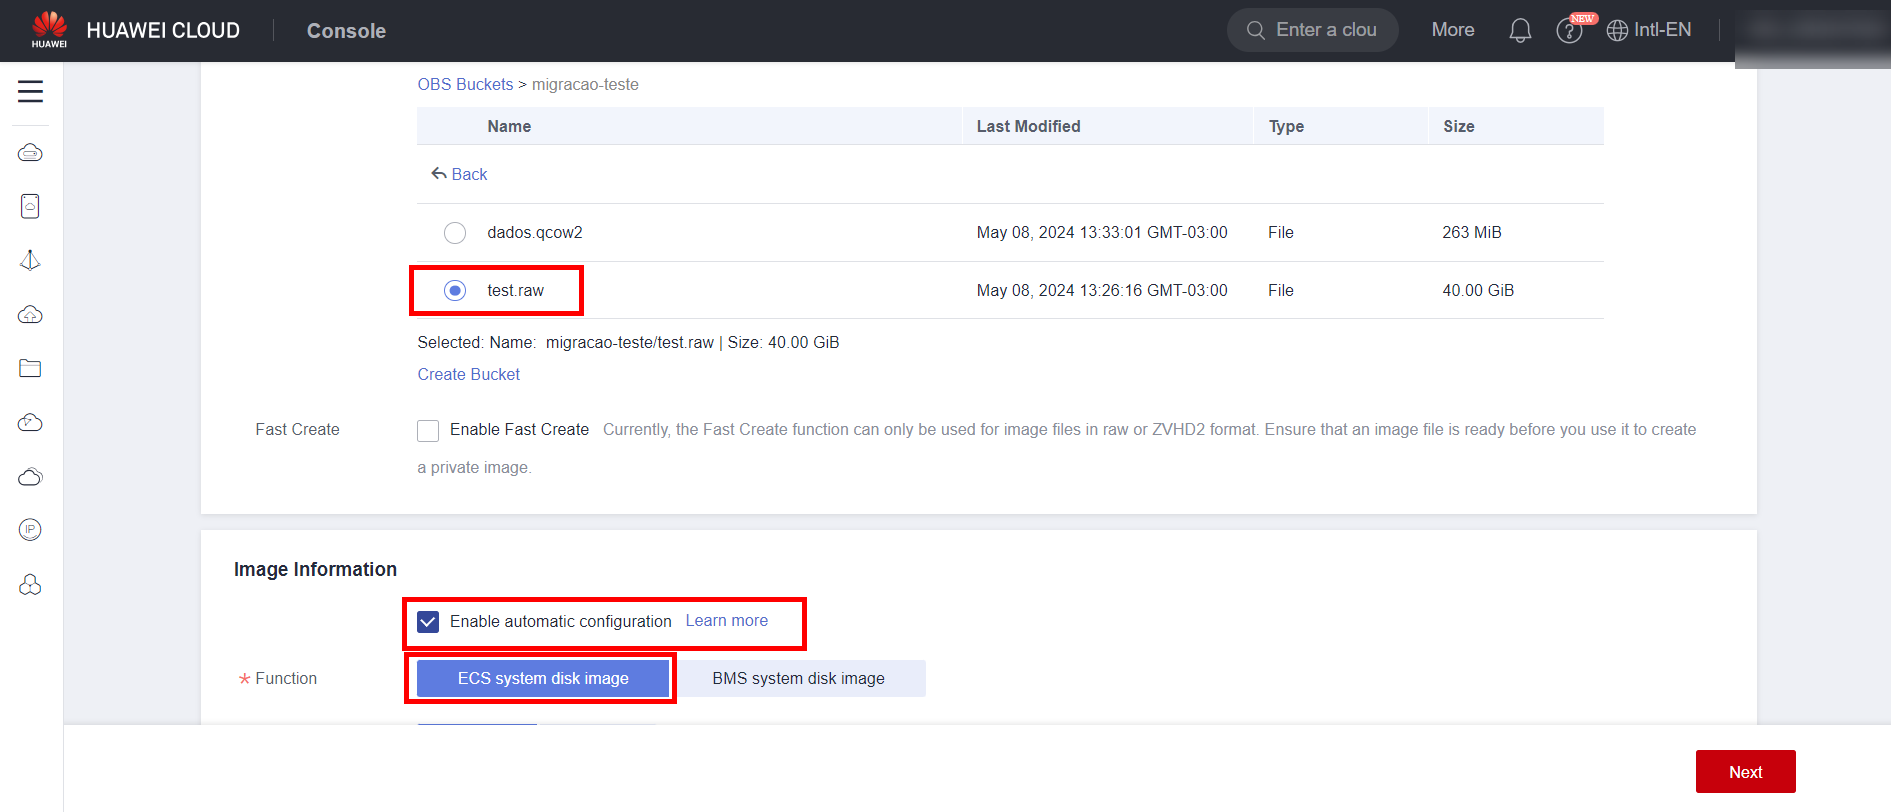
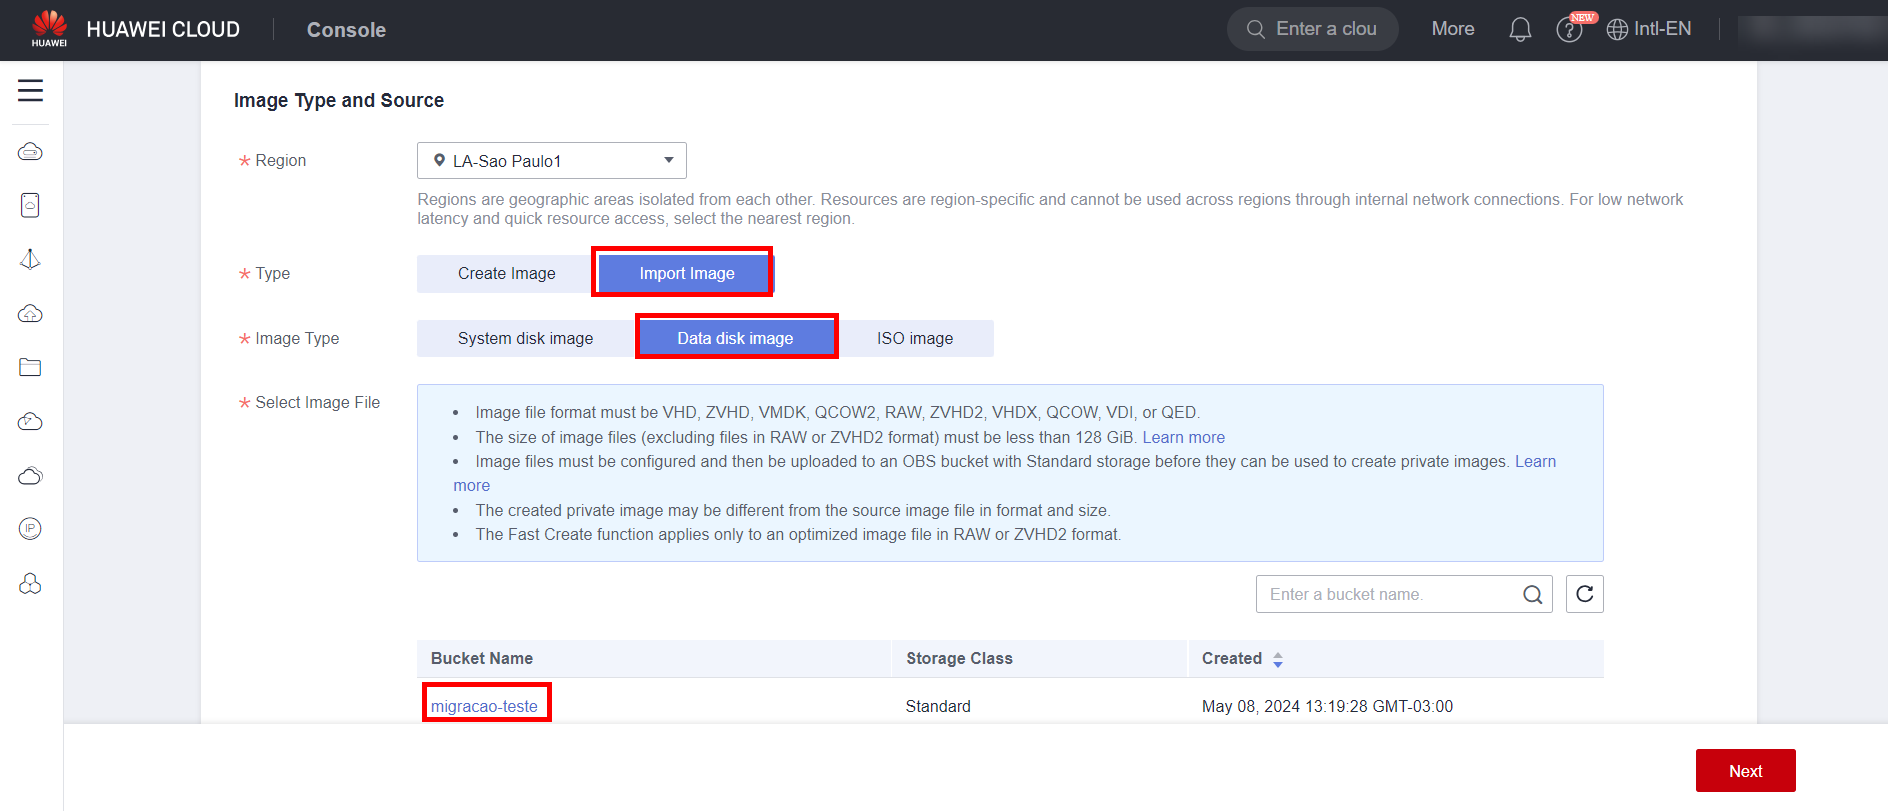
 Select the “Import Image” option. For system disks, select the “System disk image” option and click the bucket where the image is located.
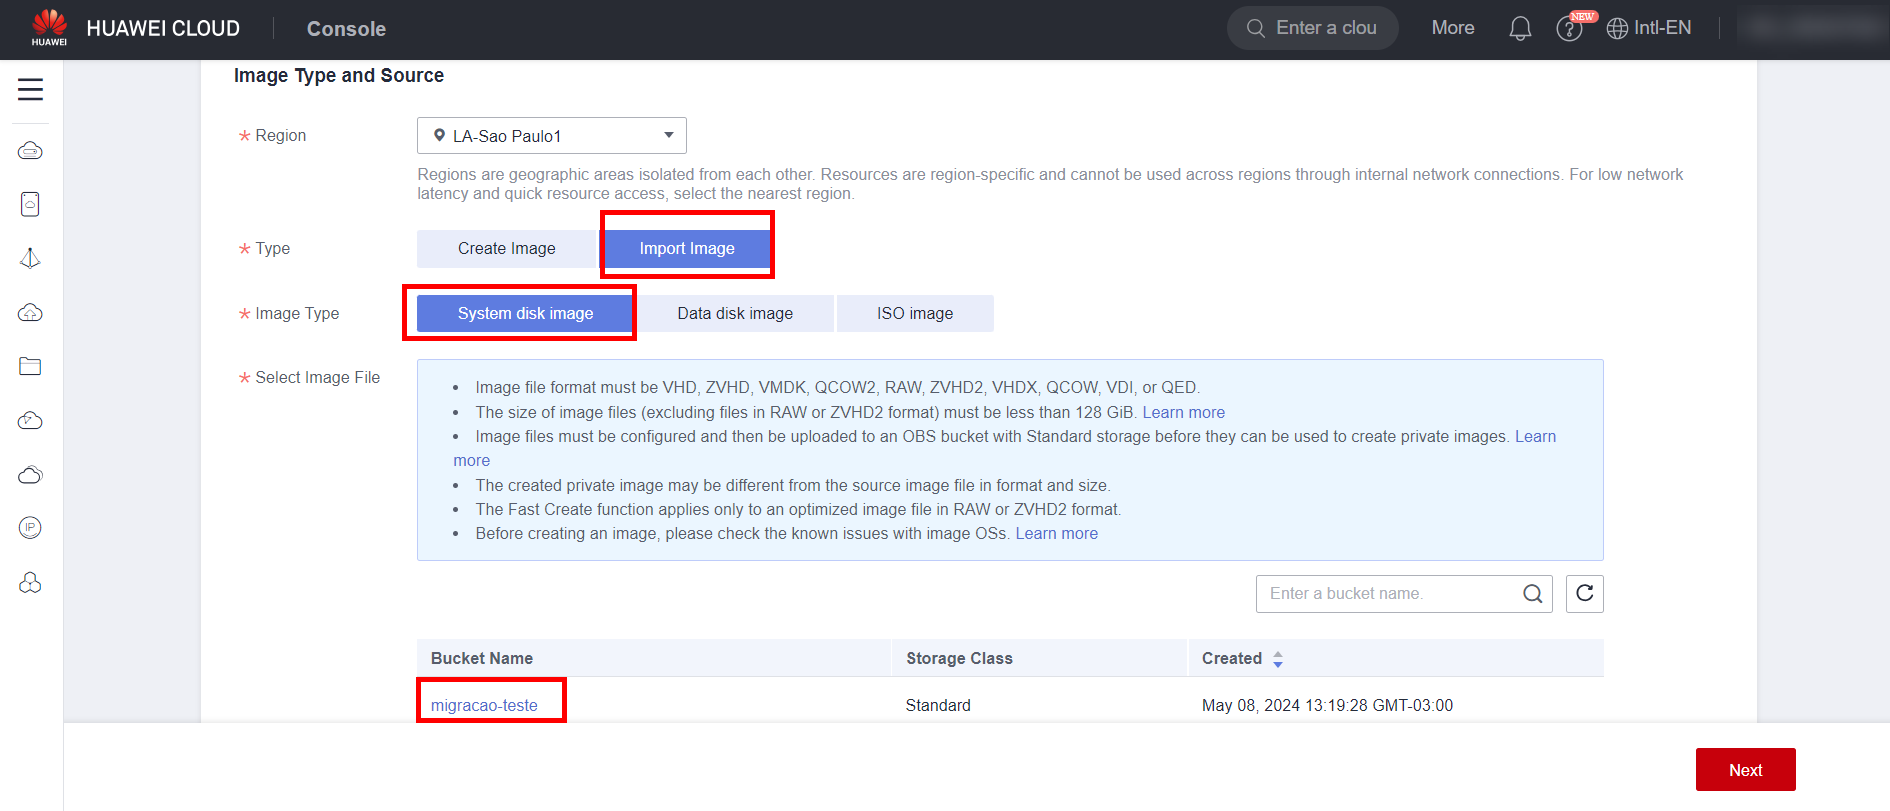
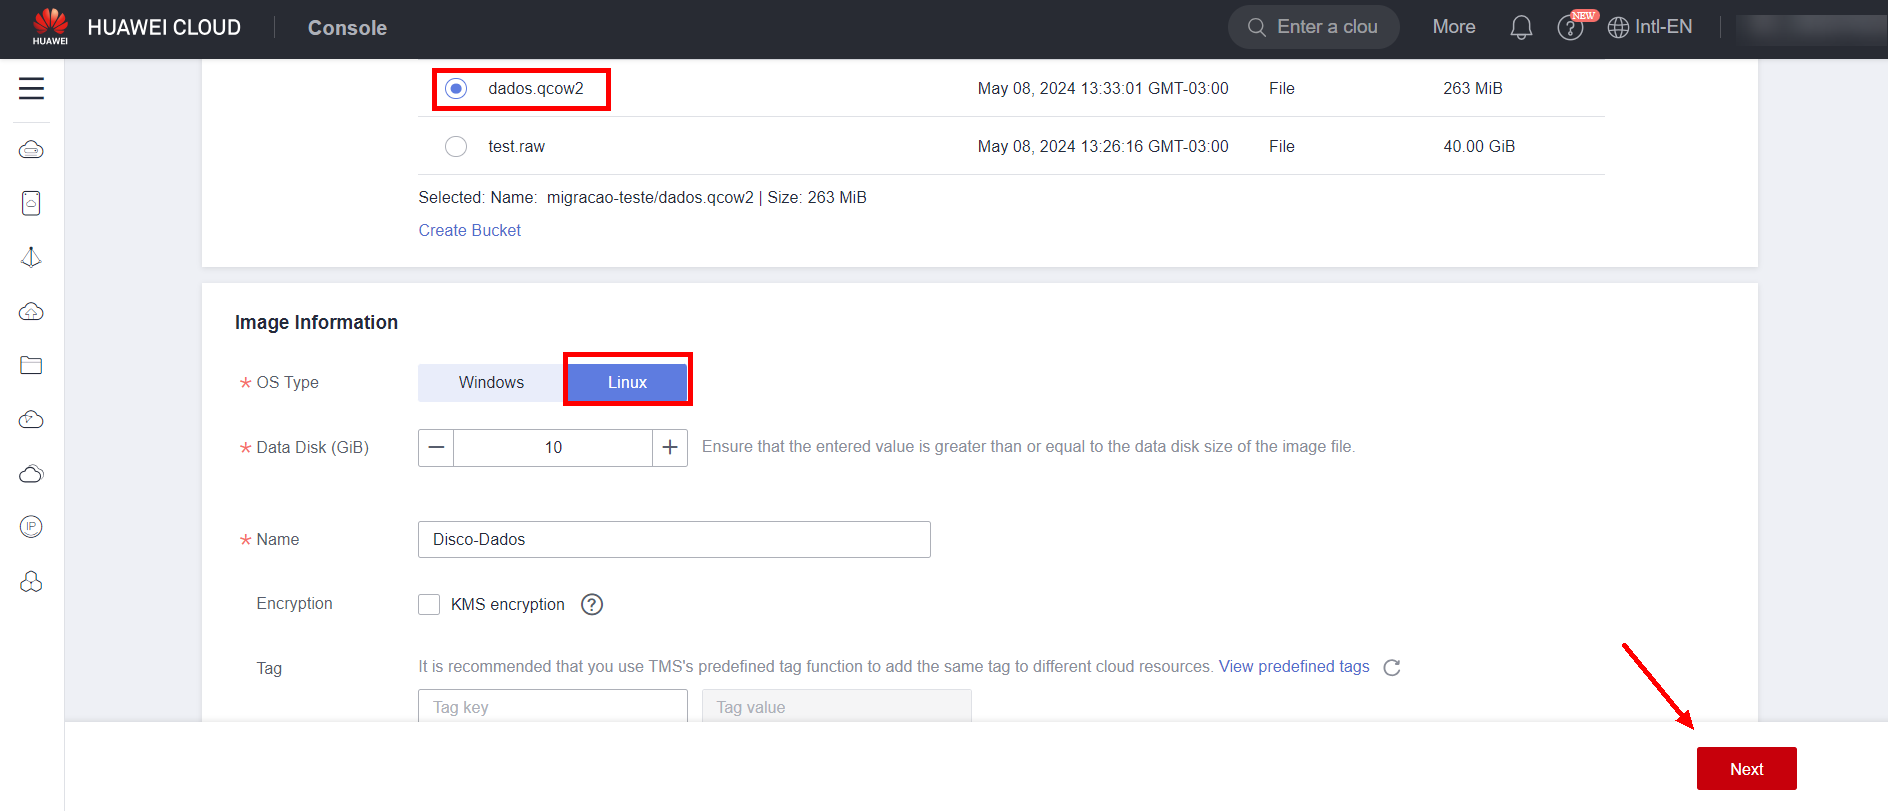
Select the system disk image from the objects contained in the bucket and select the “Enable automatic configuration” option.
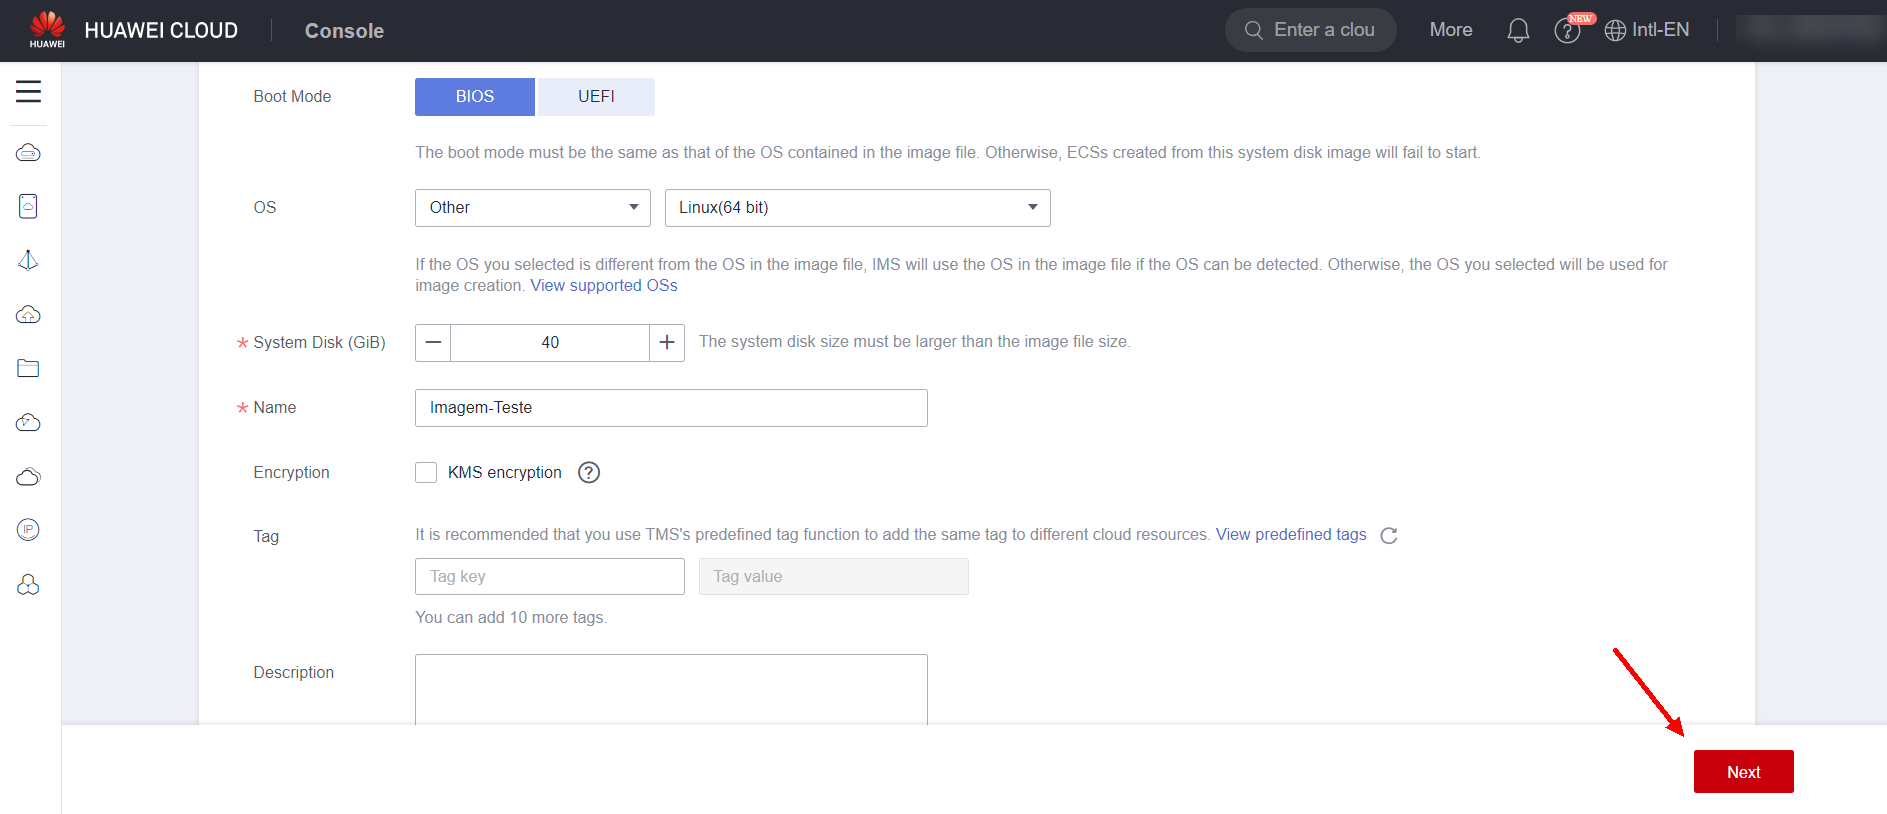
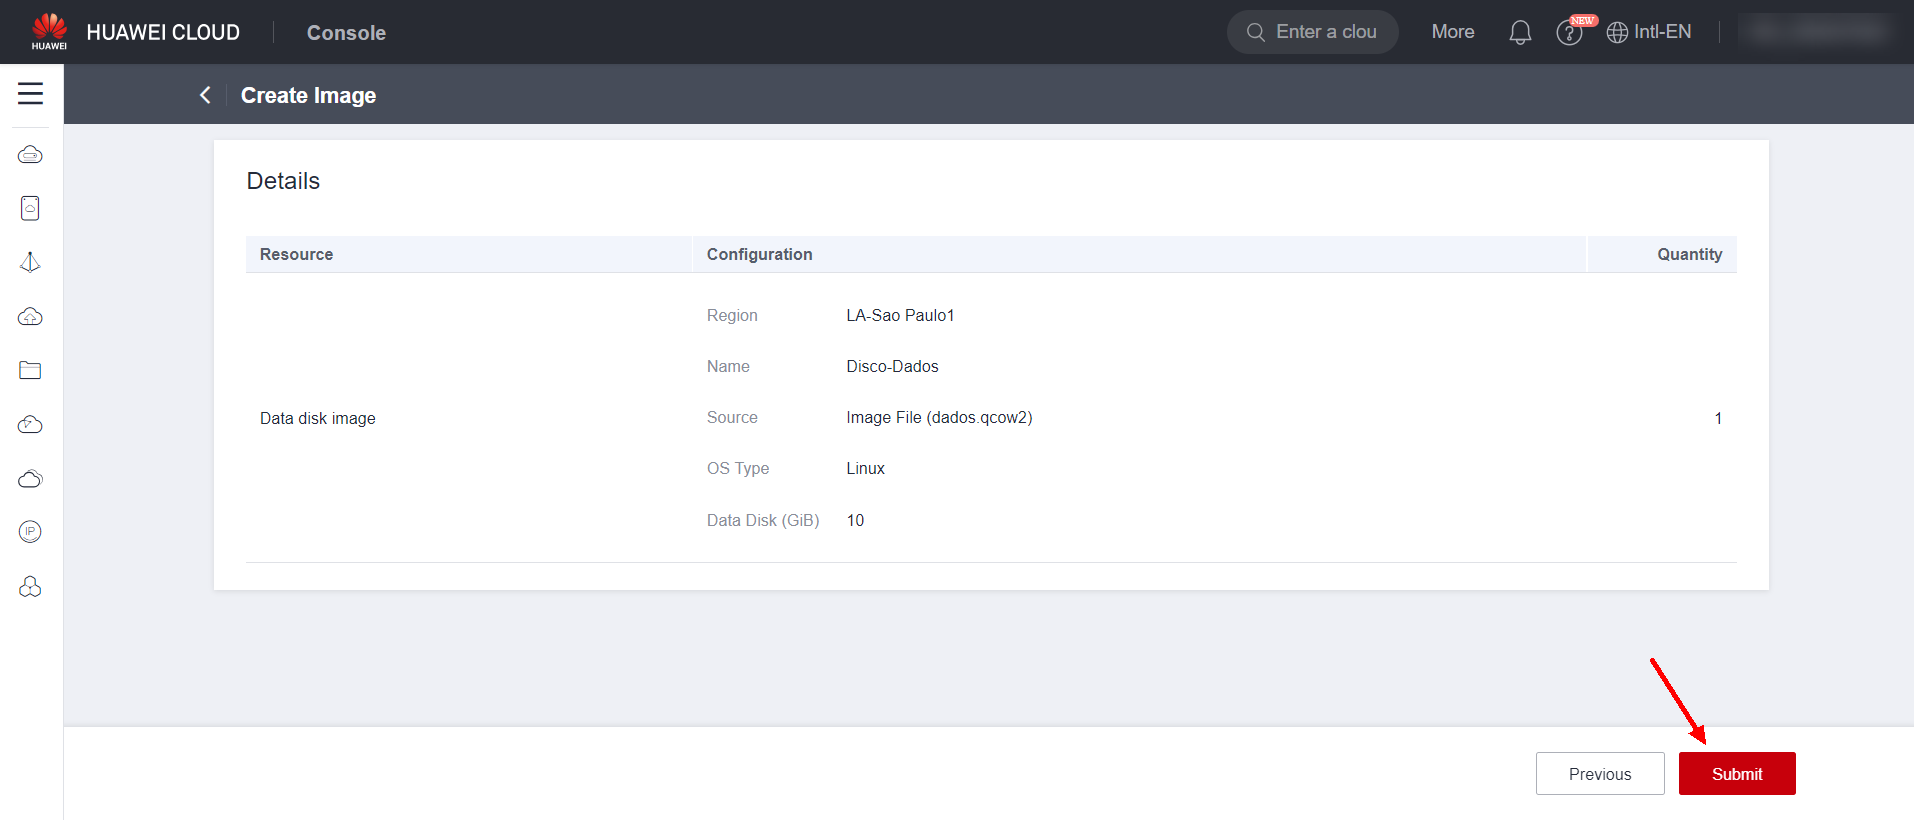
Also fill in the fields related to the source machine’s Boot mode, BIOS or UEFI, the machine’s operating system, the system disk size and the name of the image to be created. Click “Next” to proceed and confirm the image creation.
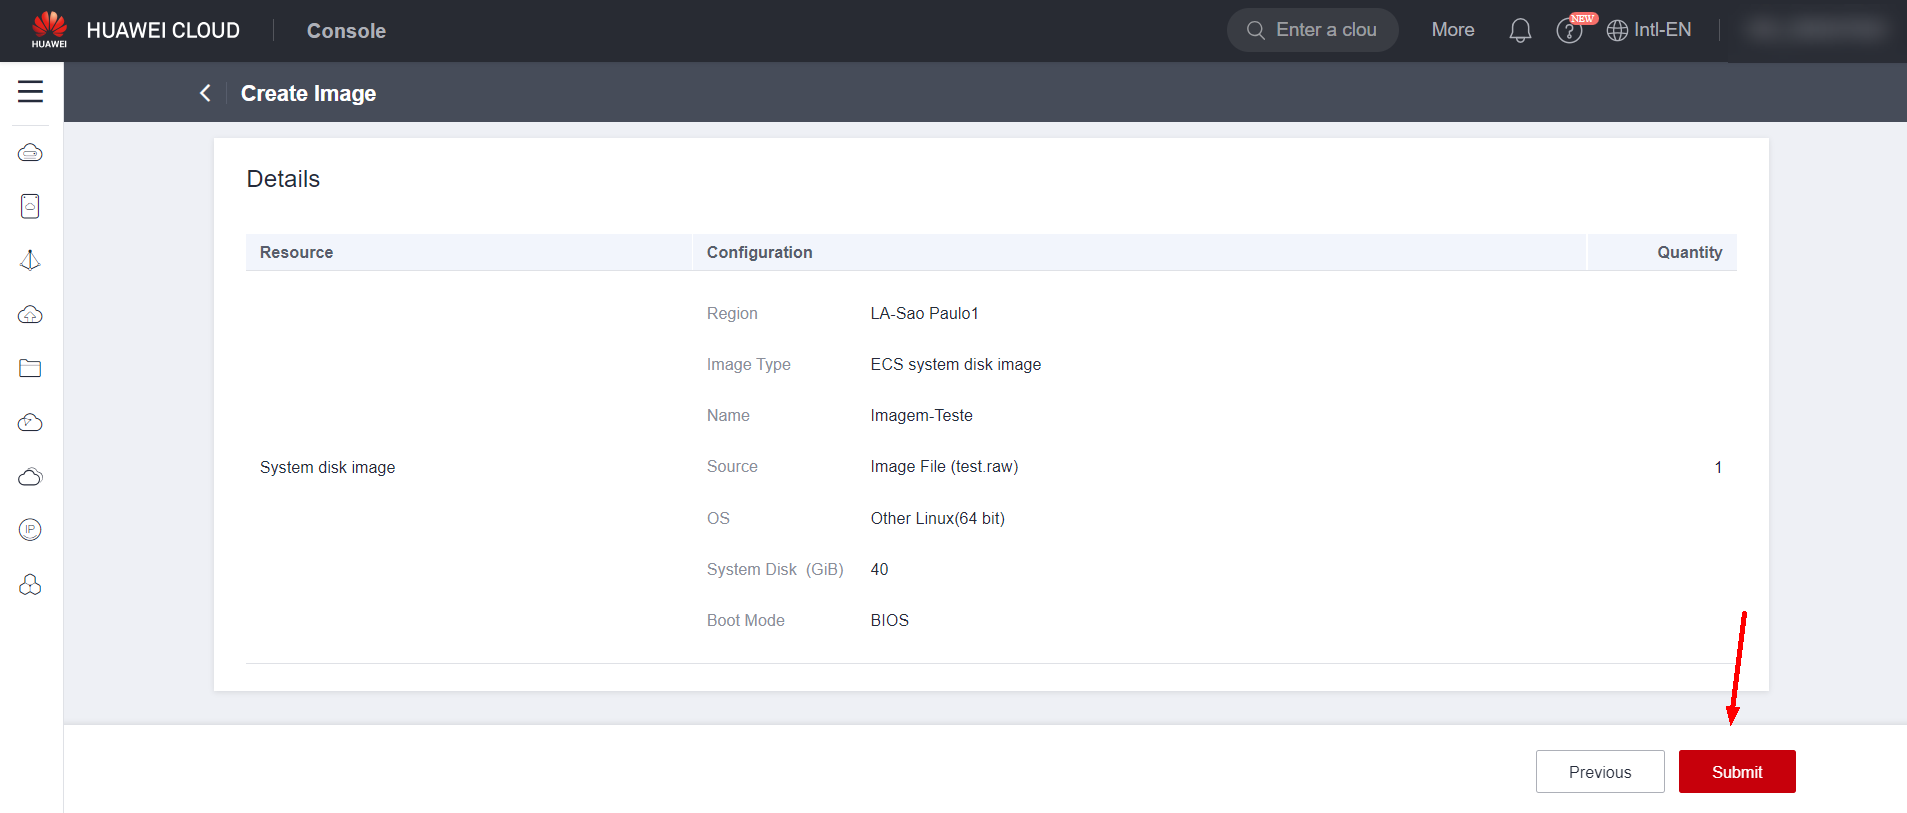
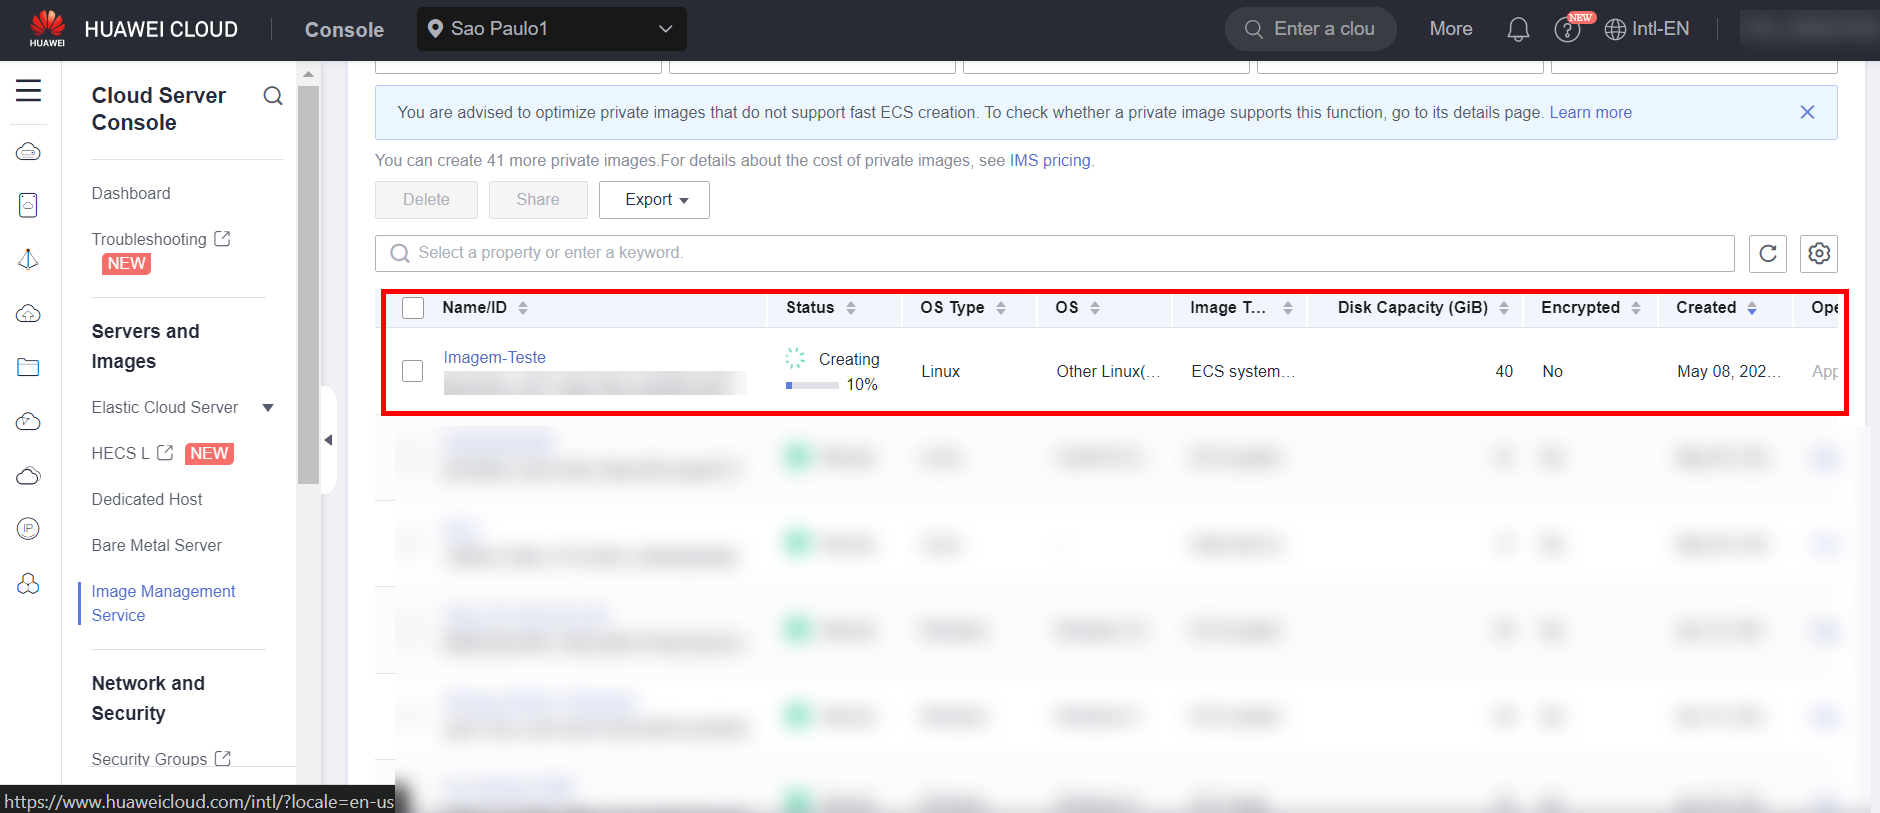
Wait until the image is finished being created.
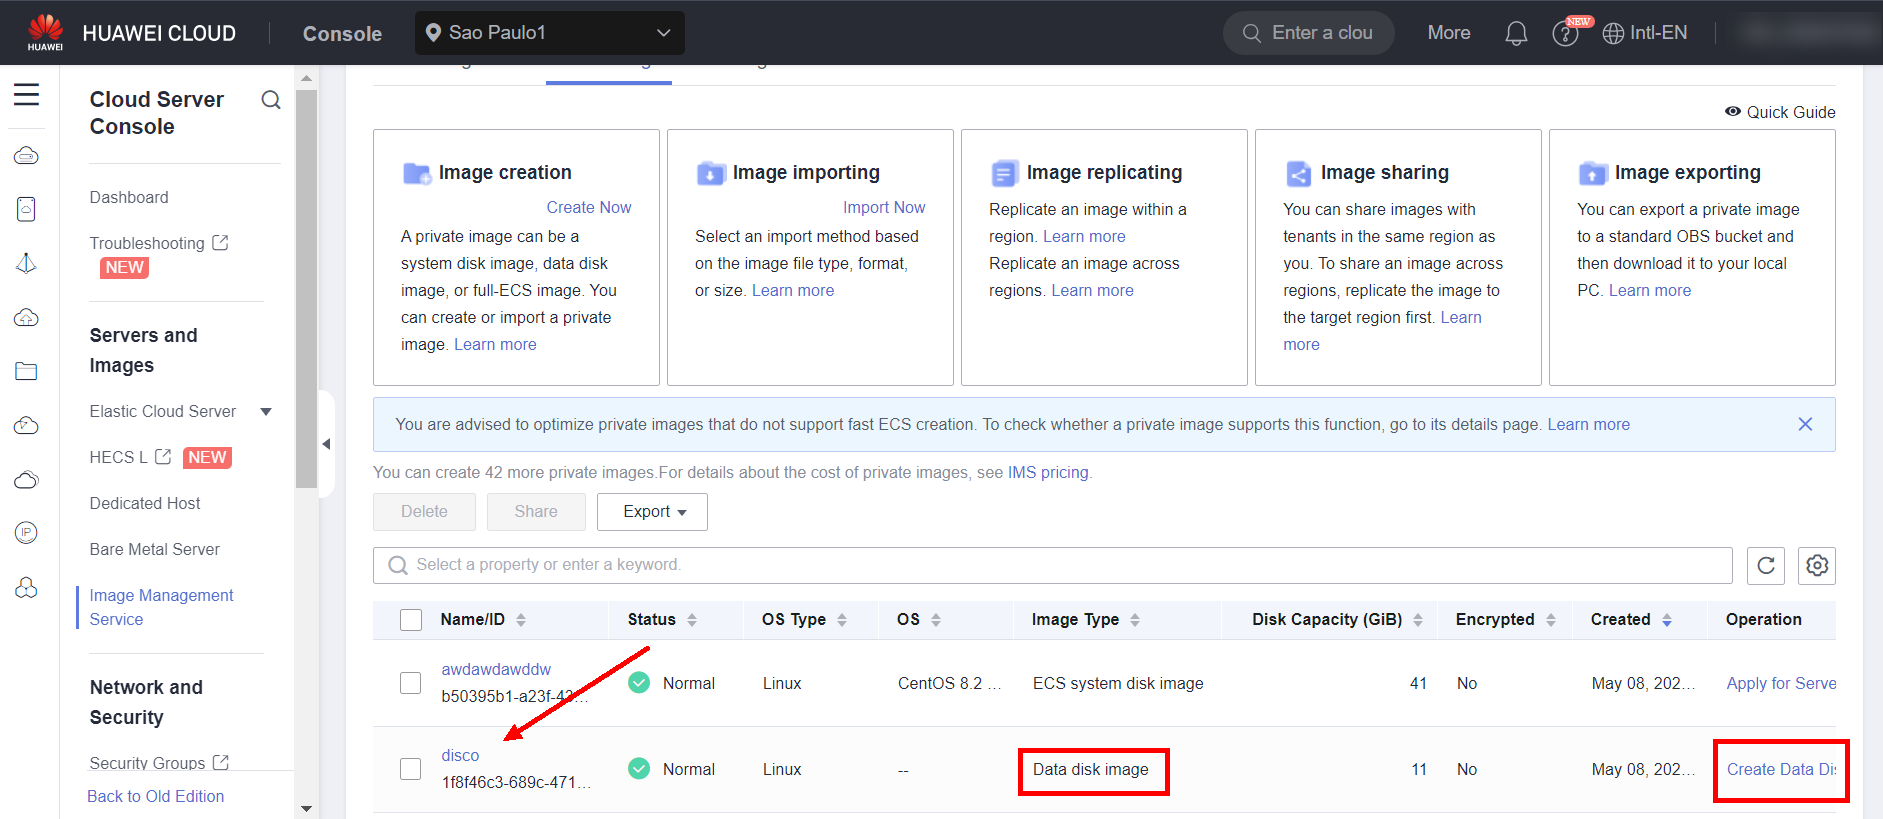
To create data disks, repeat the same process above, selecting the “Data disk image” option in “Image Type” instead of “System disk image”.
ECS Creation
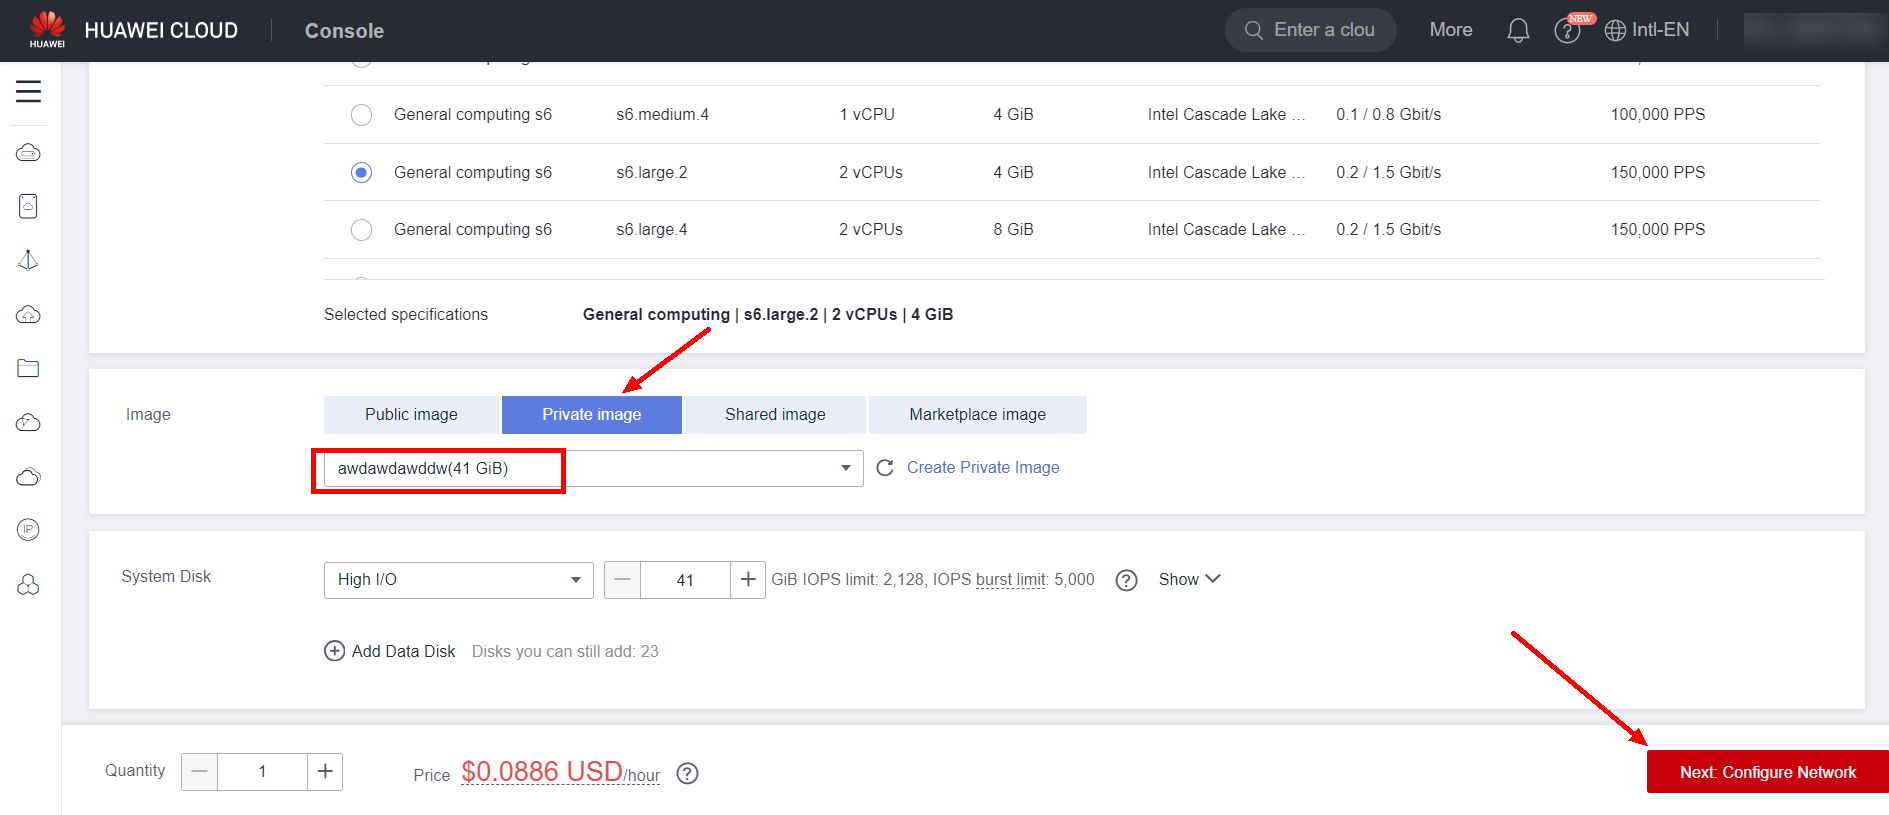
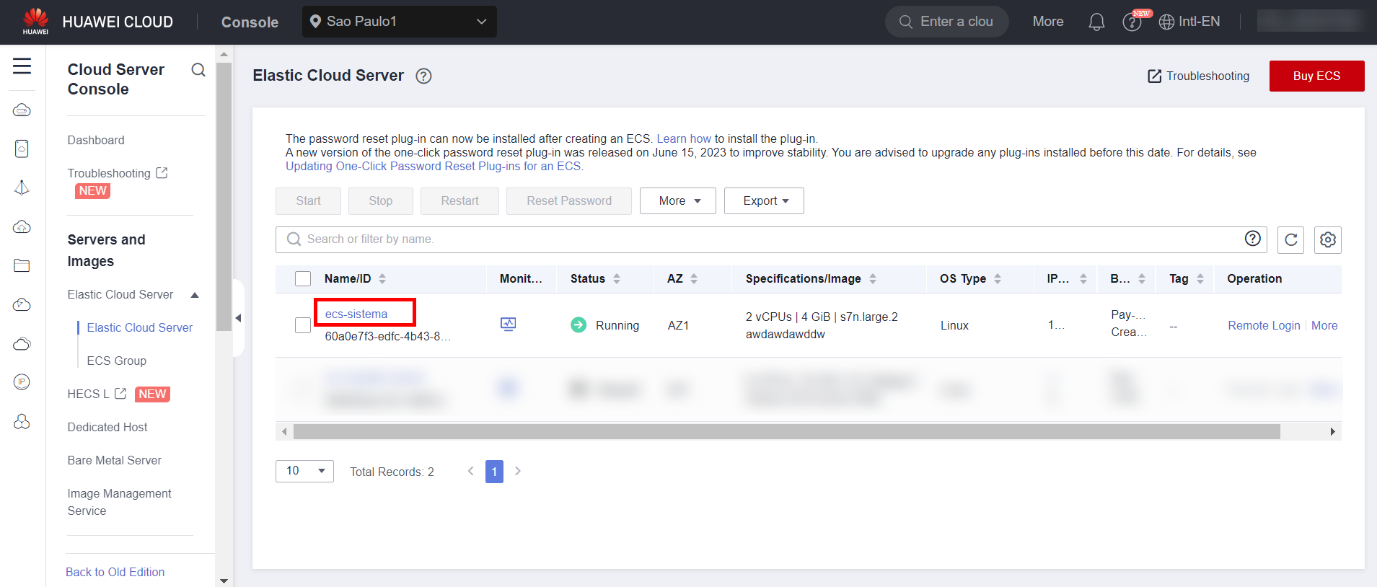
After the image creation is complete, navigate to the created system disk image and select “Apply for Server” to create a server from the generated image.

Select the created system disk image and complete the remaining ECS creation settings.

EVS Creation
After creating the server from its system disk, navigate to the created data disk image and select “Create Data Disk” to create a data disk from the generated image.
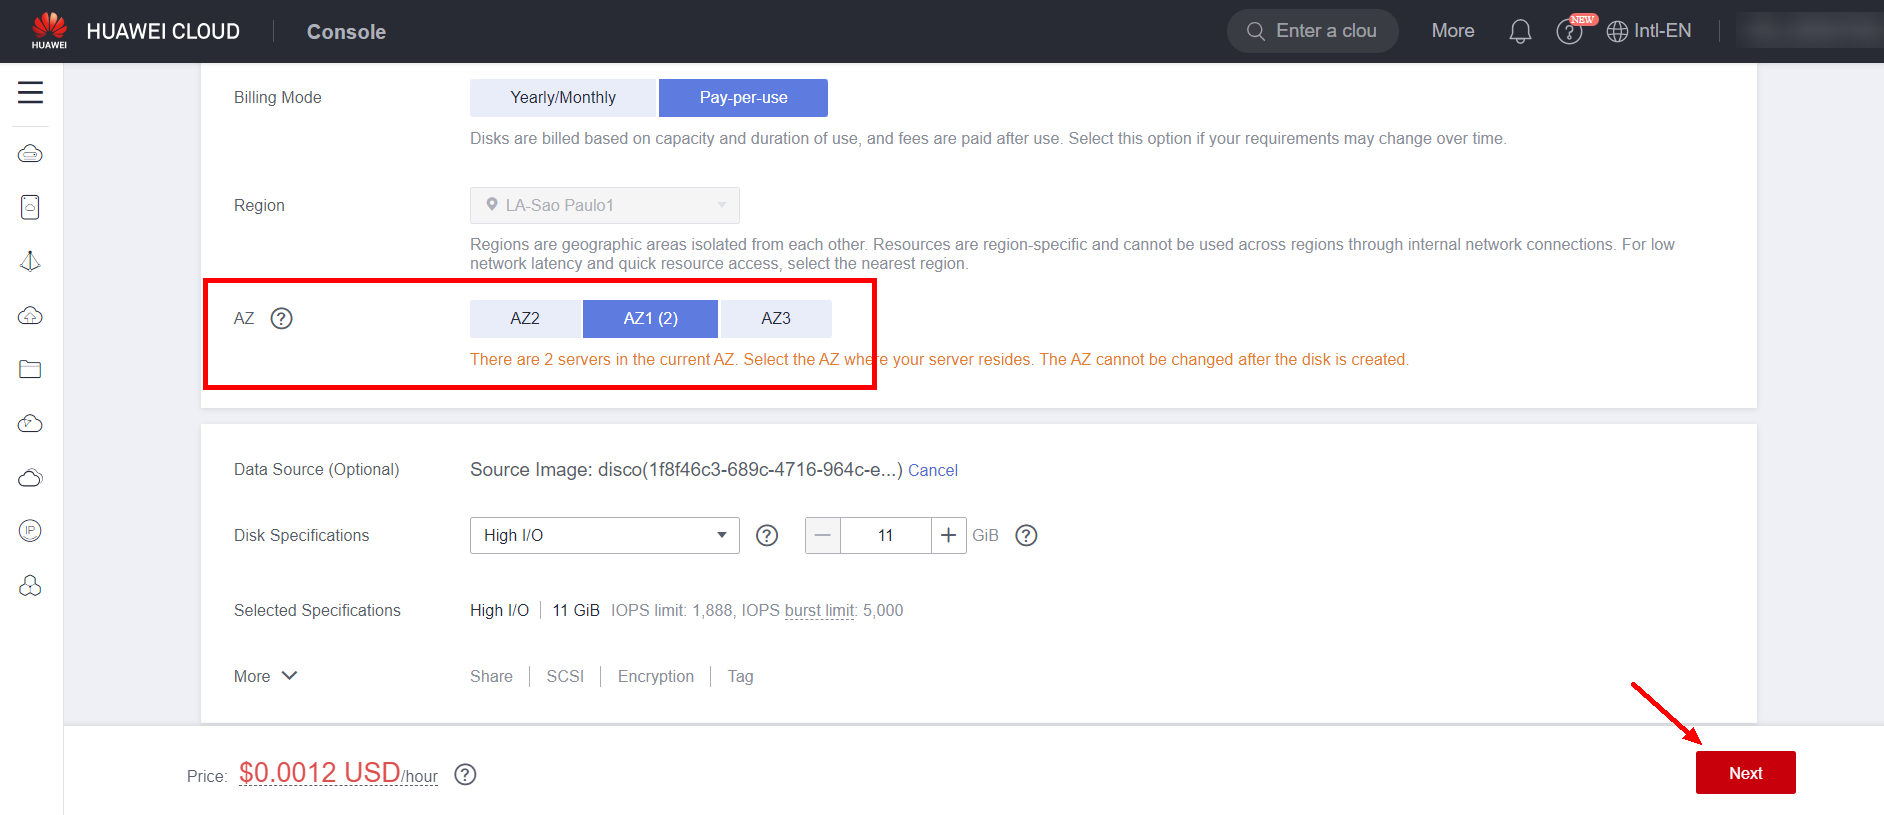
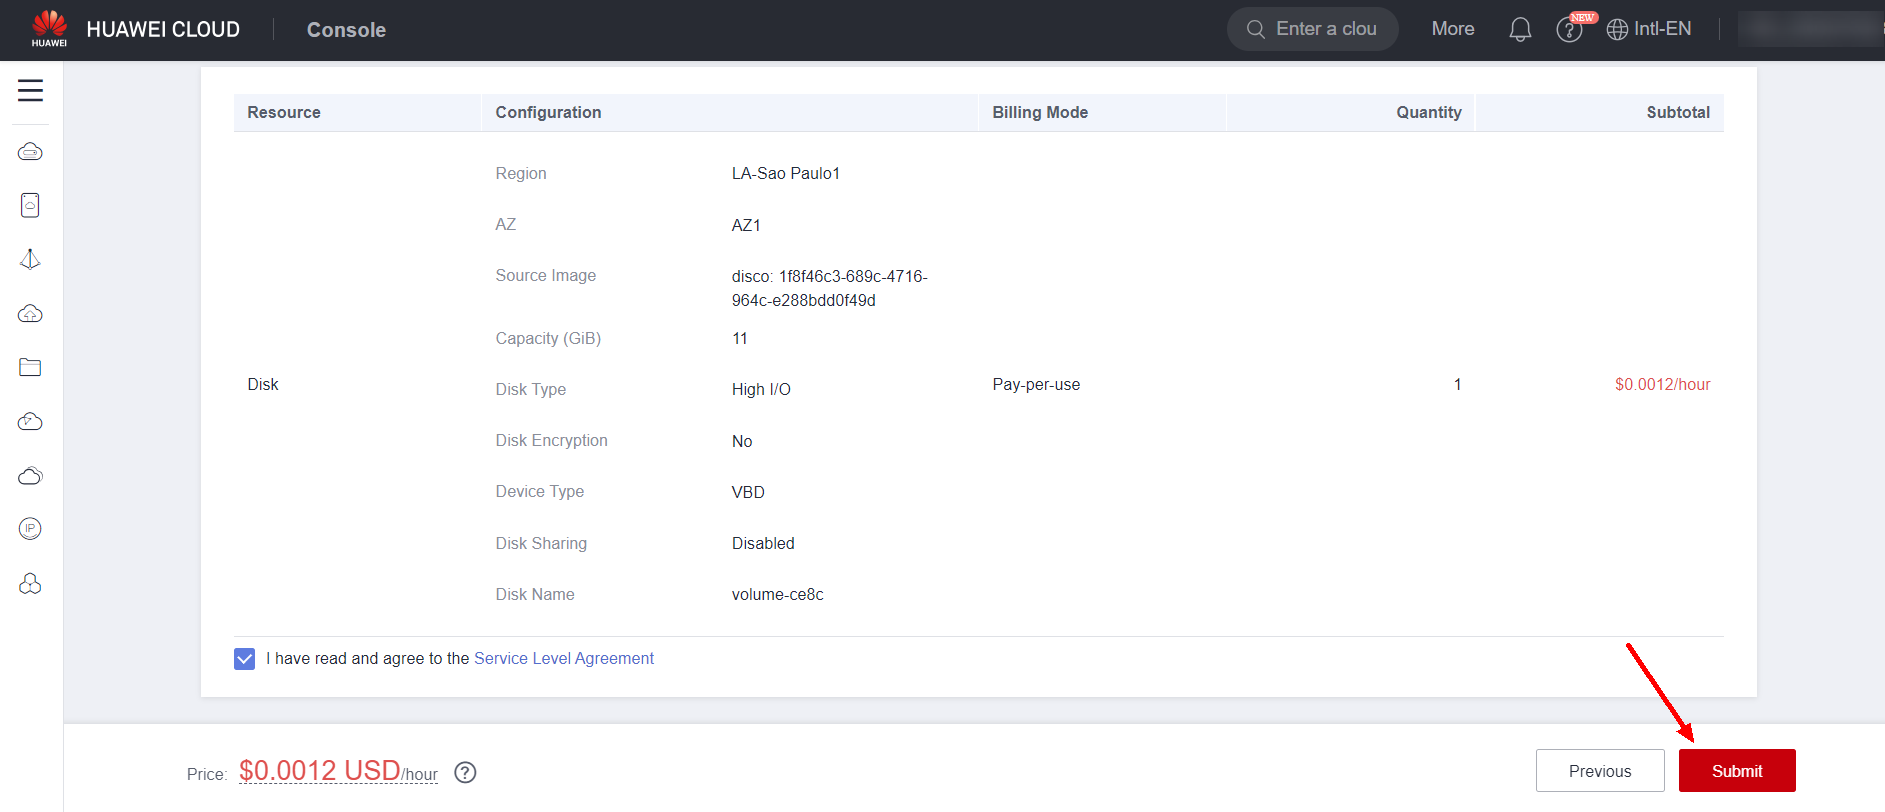
Configure the parameters of the disk to be created, as the disk name and size, and mark the same AZ as the previously created server. Otherwise, it will not be possible to mount the disk on the ECS.
Mount the EVS on the ECS
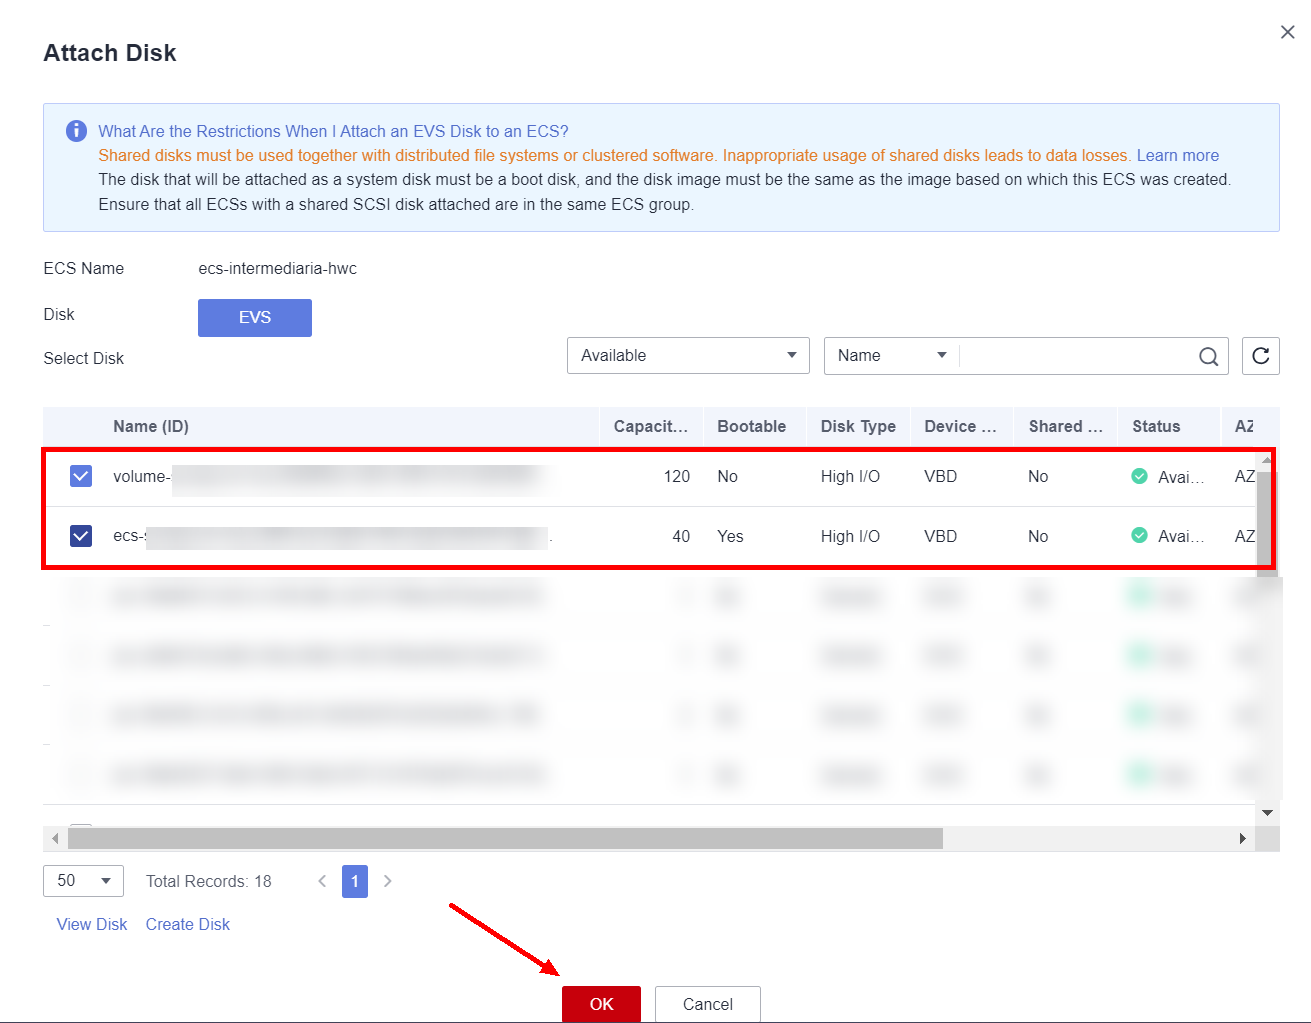
Finally, to mount the data disk on the server, navigate to the ECS section in the console and click on the created ECS. After that, click on the “Disks” section and select “Attach Disk”

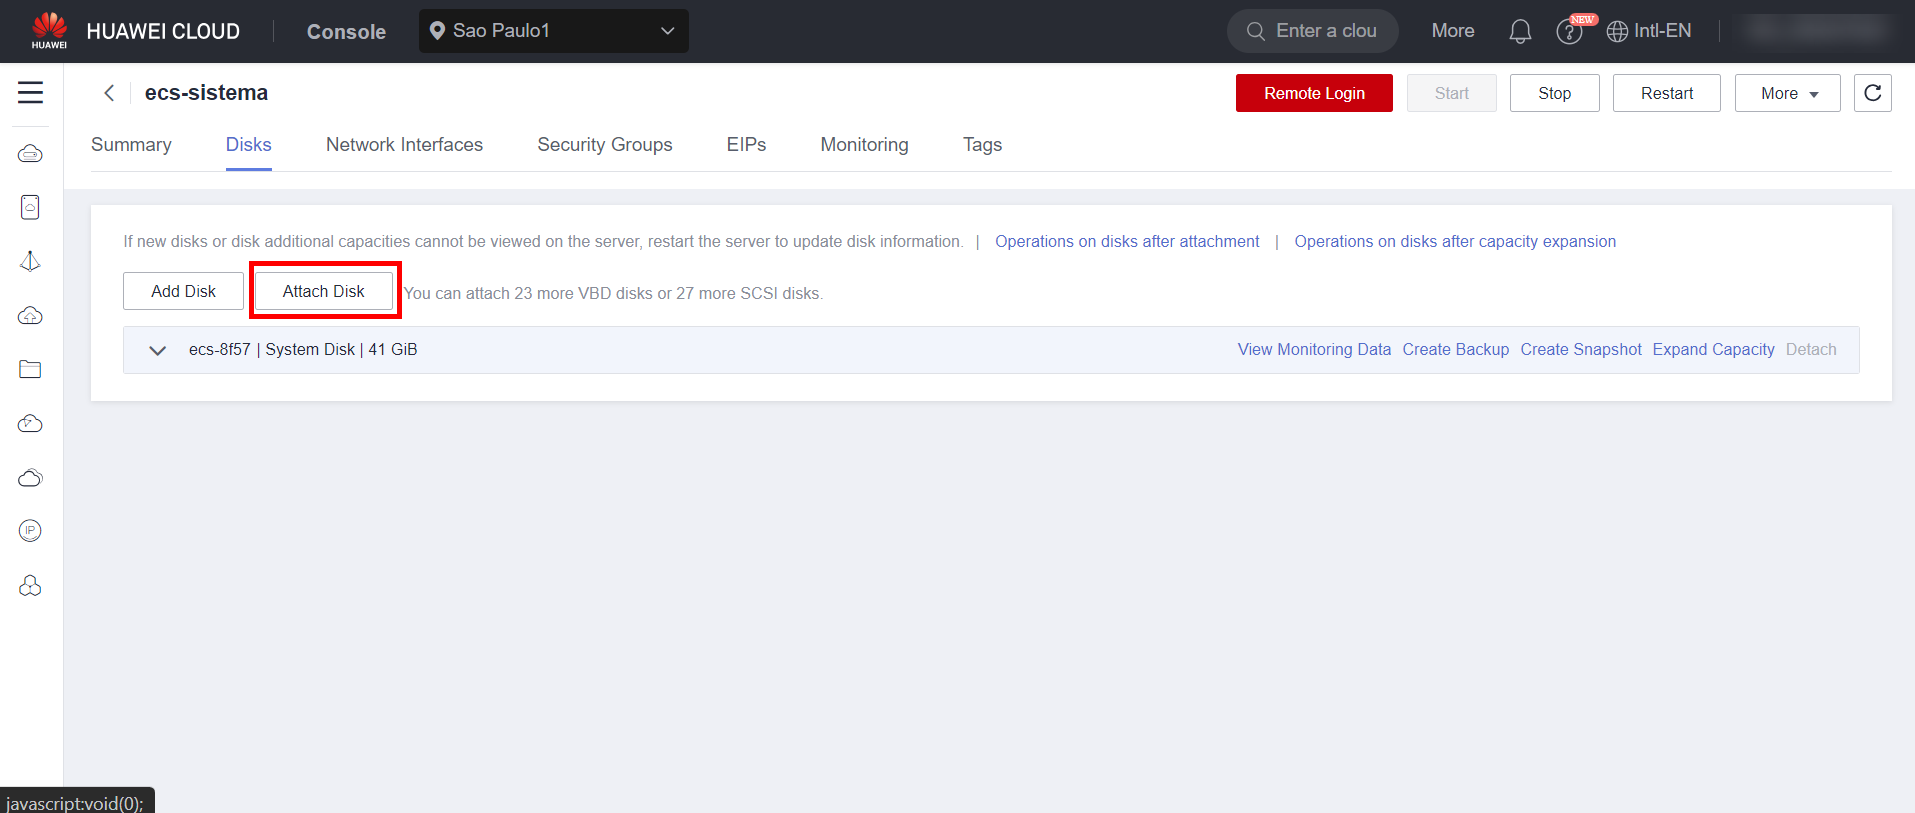
Select the created disk and click “OK” to associate the disk with the instance. With the disk associated with the instance, simply configure the disk’s mount through the instance’s terminal.
Recover File System
If the file system of the migrated machines is corrupted after migration, it will be necessary to restore it through an intermediate VM. To confirm that the filesystem of the system disk is damaged, first wait until the following message appears during boot. Waiting for the following error to appear before proceeding to the next steps is important for the process. 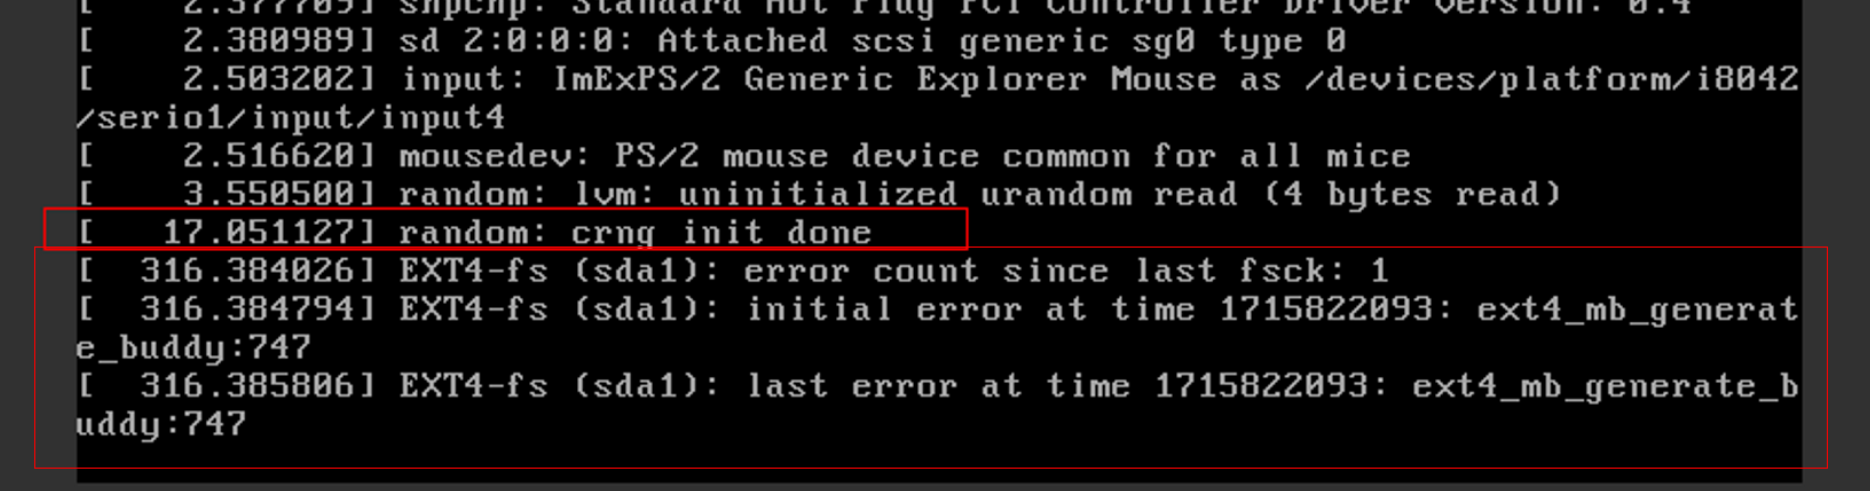 After creating a new ECS in the HWC console, mount the disks whose filesystem needs to be restored to the intermediate ECS. First, remove the damaged disks from the original ECS and then place them in the intermediate ECS.
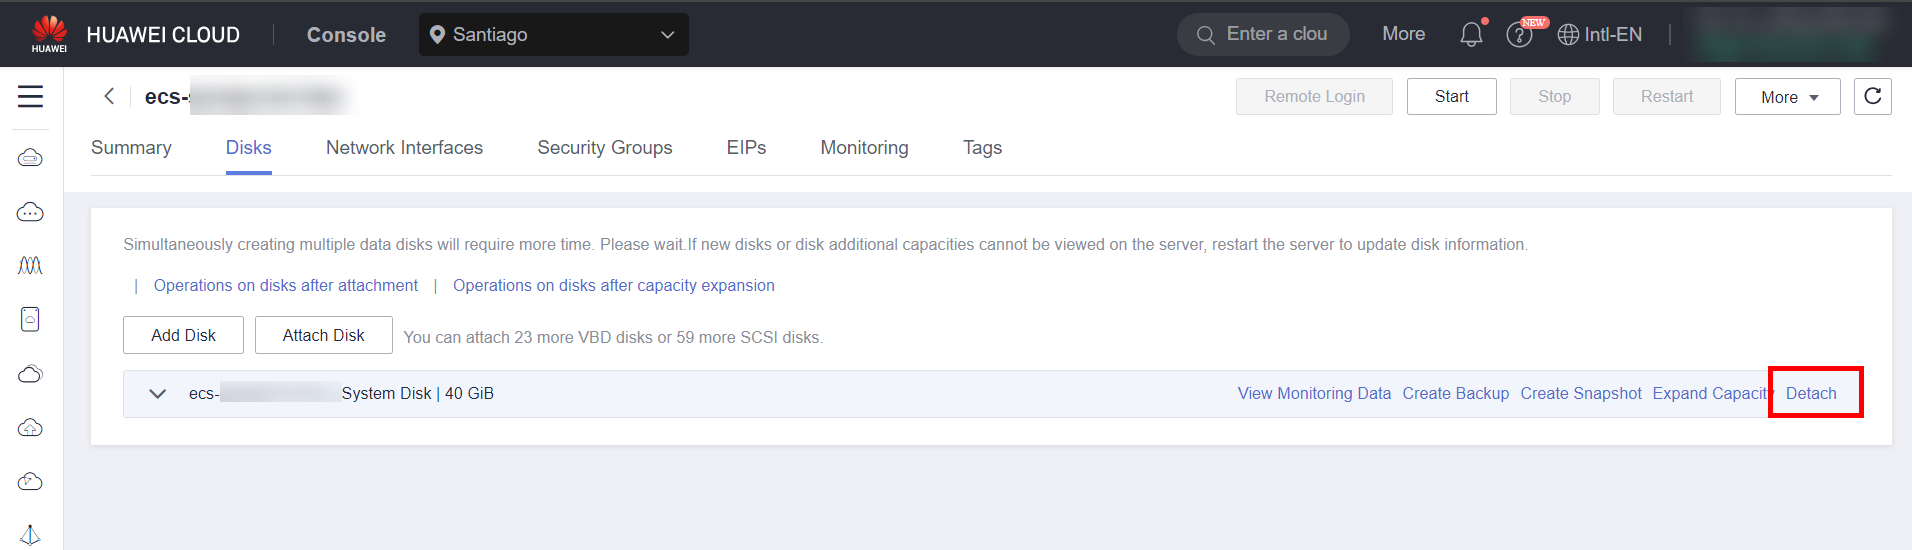
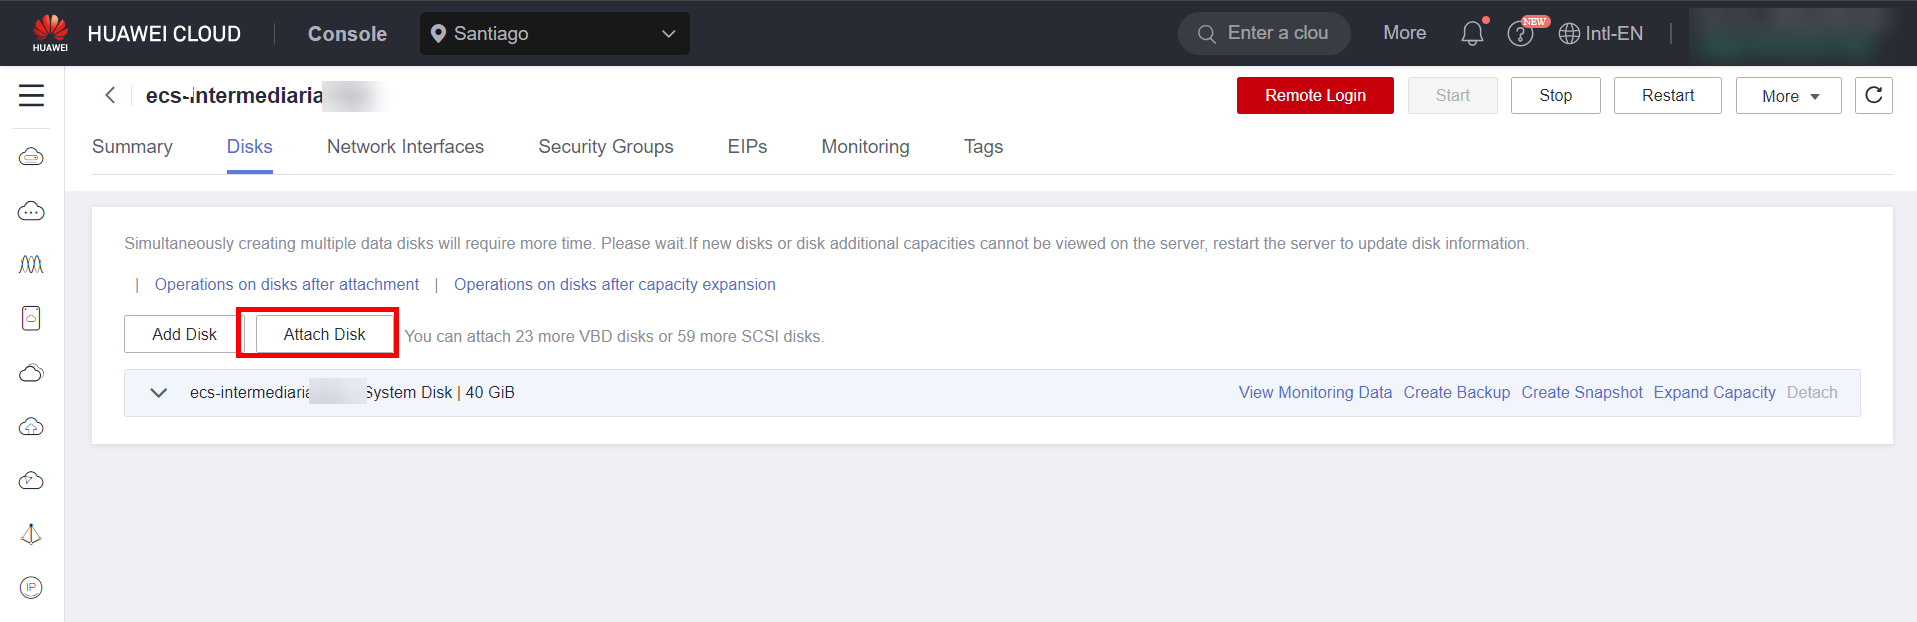
After removing the disks from the original ECS, mount them on the intermediate ECS

Log in to the intermediate ECS and enter the command “fdisk -l” to list the disks mounted on the ECS. Copy the path of the device whose filesystem is corrupted, such as “/dev/vdc” or “/dev/vdb1”.
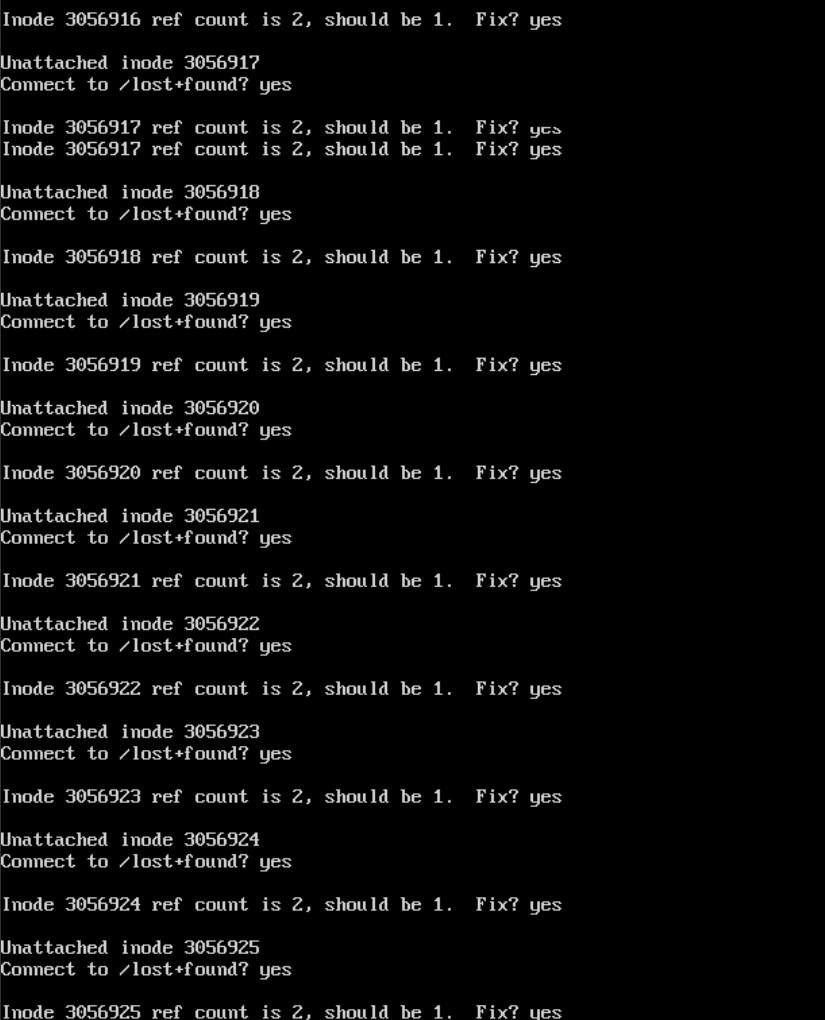
To recover the corrupted filesystem, enter the command “fsck /dev/vdb”, where /dev/vdb will be replaced by the disk or partition that needs to be recovered. Press “a” to recover all corrupted inodes. It is worth noting that the disk does not need to be mounted in a directory for this process.
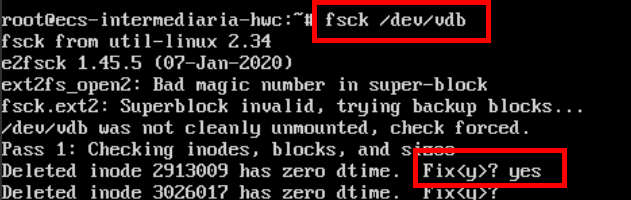
Wait until the recovery of all inodes is complete.
Modifying fstab
If the ECS has problems during initialization, follow the following steps to edit the fstab disk table of the system. It is worth noting that for this step it will also be necessary to use an intermediate ECS if the filesystem of the original ECS is set to read-only due to a bad initialization. First, mount the system disk in a directory.

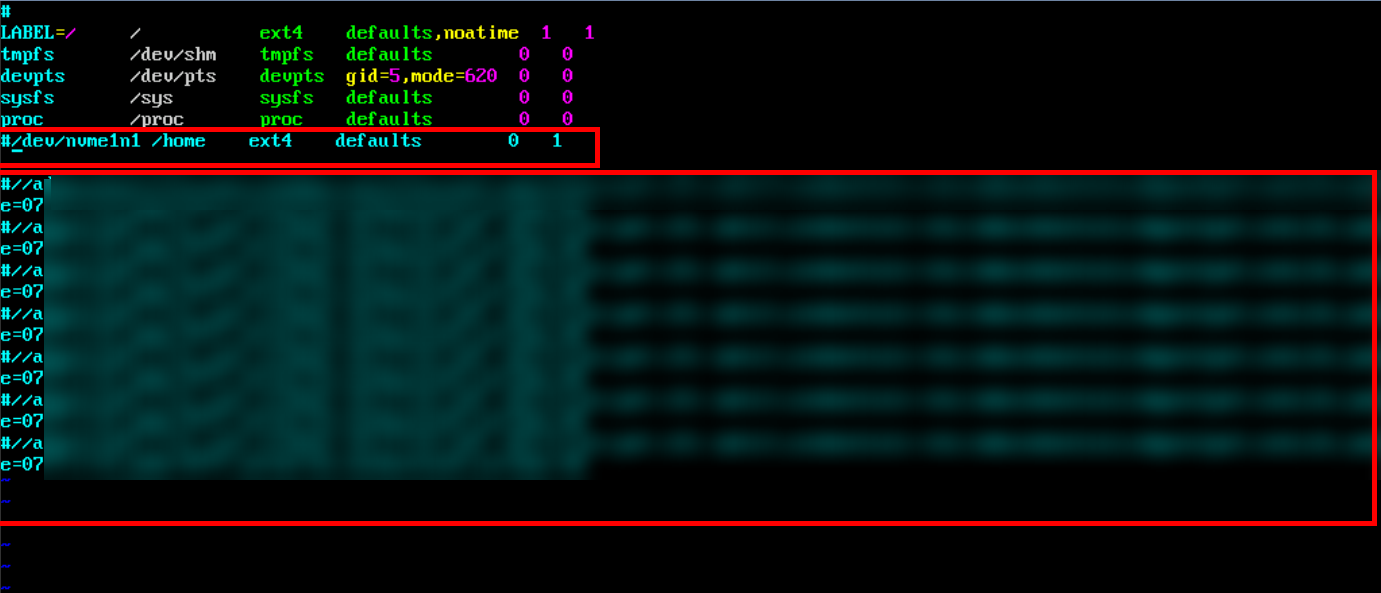
Edit the “/etc/fstab” file of the original ECS system disk.

Comment out all the old mounted disks in fstab.
After that, unmount the disk from the directory where it was mounted and remove the disks from the ECS to insert them into the original ECS again.

References
- SMS Documentation: https://support.huaweicloud.com/intl/en-us/bestpractice-sms/sms_05_0071.html.
- IMS documentation: https://support.huaweicloud.com/intl/en-us/usermanual-ims/ims_01_0215.html.
- obsutil documentation: https://support.huaweicloud.com/intl/en-us/utiltg-obs/obs_11_0003.html.