![]()
Creating a Private Windows Image
V1.0 – January 2024
| Version | Author | Description |
|---|---|---|
| V1.0 – 2024-01-02 | Diogo Hatz 50037923 | Initial Version |
| V1.0 – 2024-01-02 | Wisley Paulo 00830850 | Document Review |
Introduction
Image Management Service (IMS) is a service provided on Huawei Cloud that allows image management. Images are nothing more than cloud servers or disk templates that contain an operating system (OS), service data, or software.
This document aims to provide a step-by-step guide on how to create customized images on IMS on Huawei Cloud from ISO files external to Huawei Cloud.
ISO preparation
In order to provide the instances generated from the ISO file with access to the Internet and other VM functionalities, it is necessary to install VMTools drivers on these instances. To do this, the VMTools driver will be integrated into the desired ISO file using the AnyBurn software, which can be downloaded via the following hyperlink: http://www.anyburn.com/index.htm.
In addition, the VMTools driver package can be downloaded from the following link: https://ecs-instance-driver.obs.cn-north-1.myhuaweicloud.com/vmtools-windows.zip. After installing AnyBurn and extracting the VMTools driver package files from the “vmtools-windows.zip” file, open the installed AnyBurn software and click “Browse/Extract image file”. 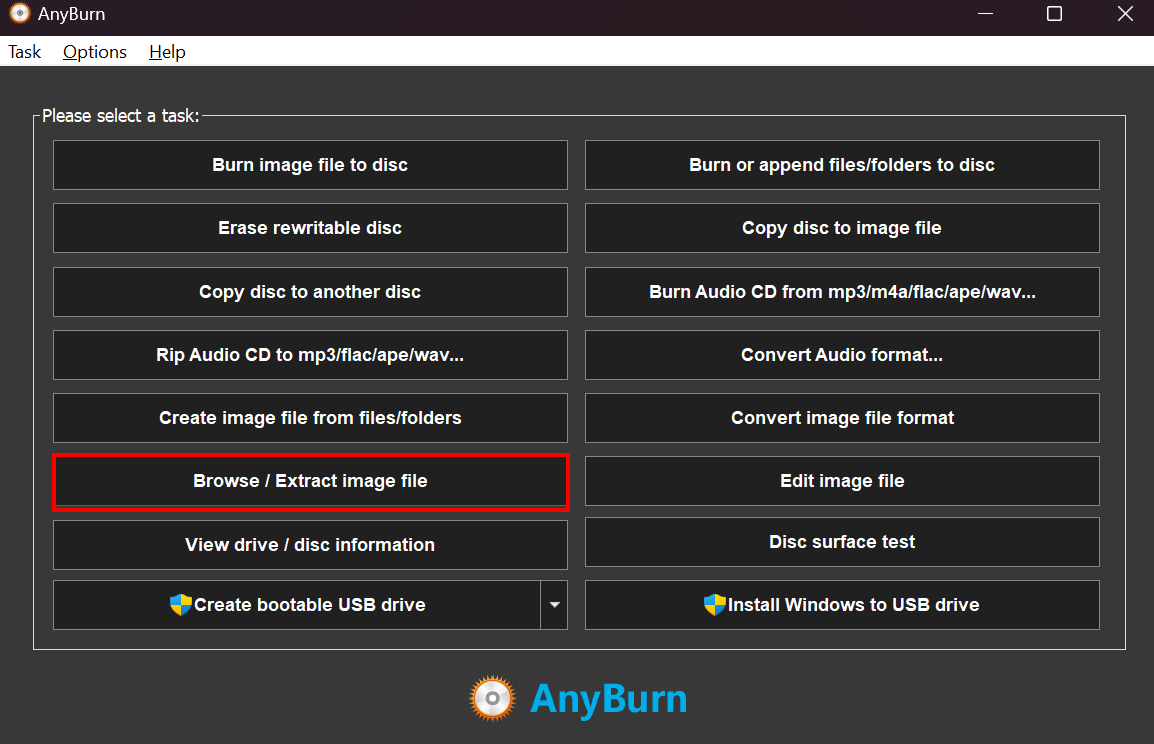 Select the “vmtools-windows” folder directory and select the “vmtools-windows.iso” file. Click “Next” twice.
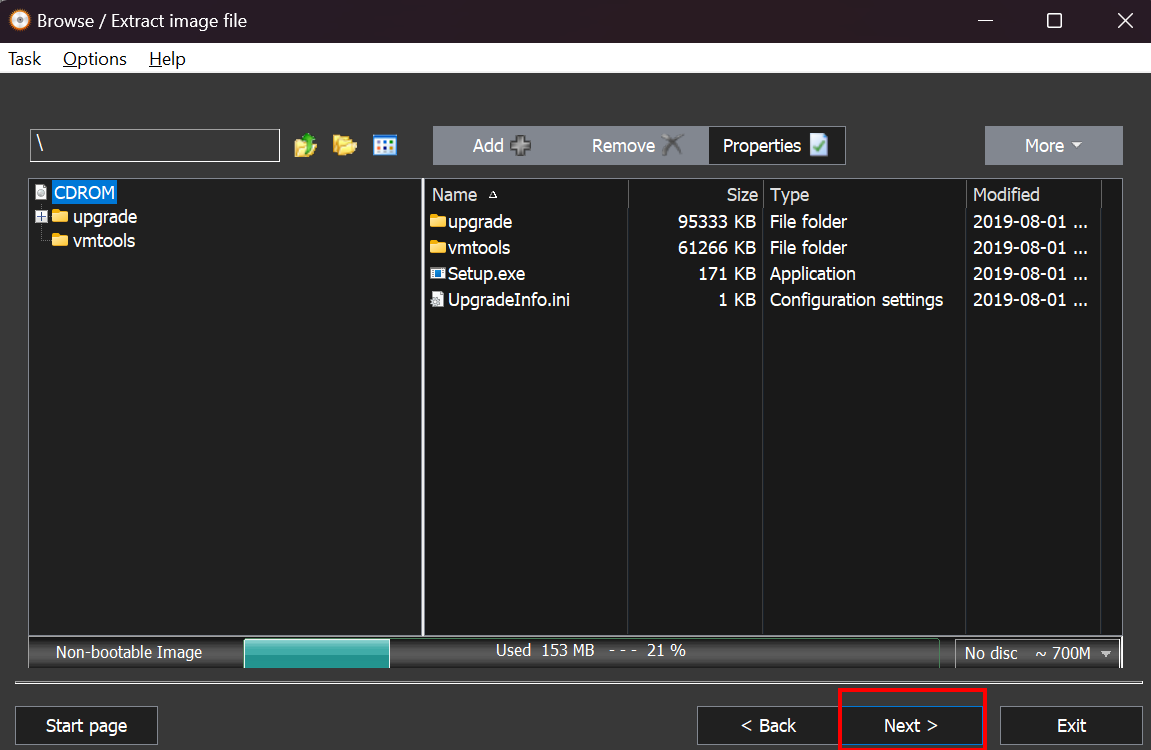
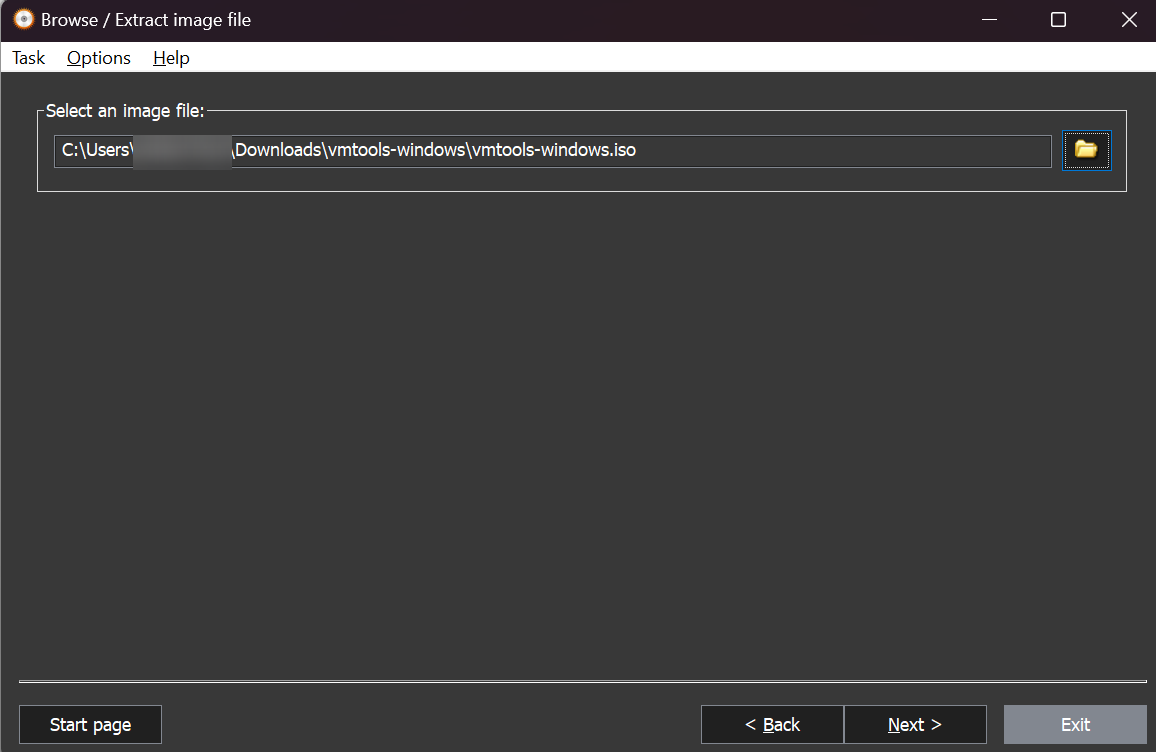
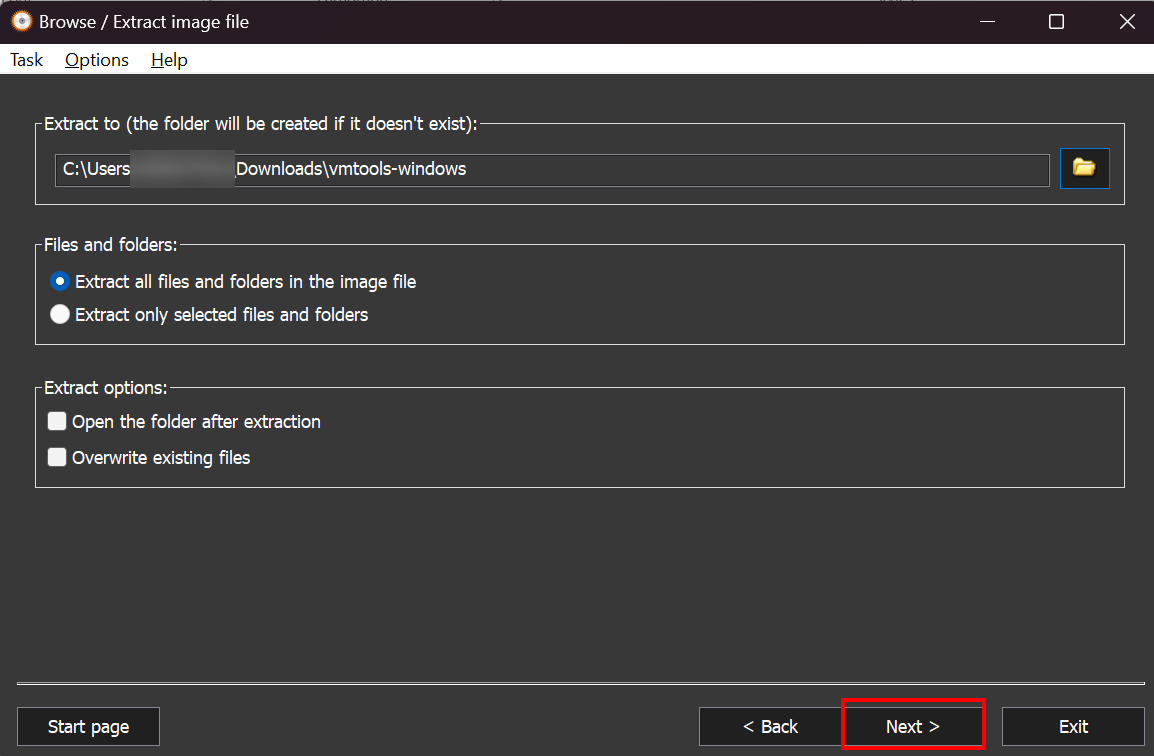
Select the directory where the ISO files will be extracted. As a suggestion, select the previously extracted “vmtools-windows” folder and click “Next”.
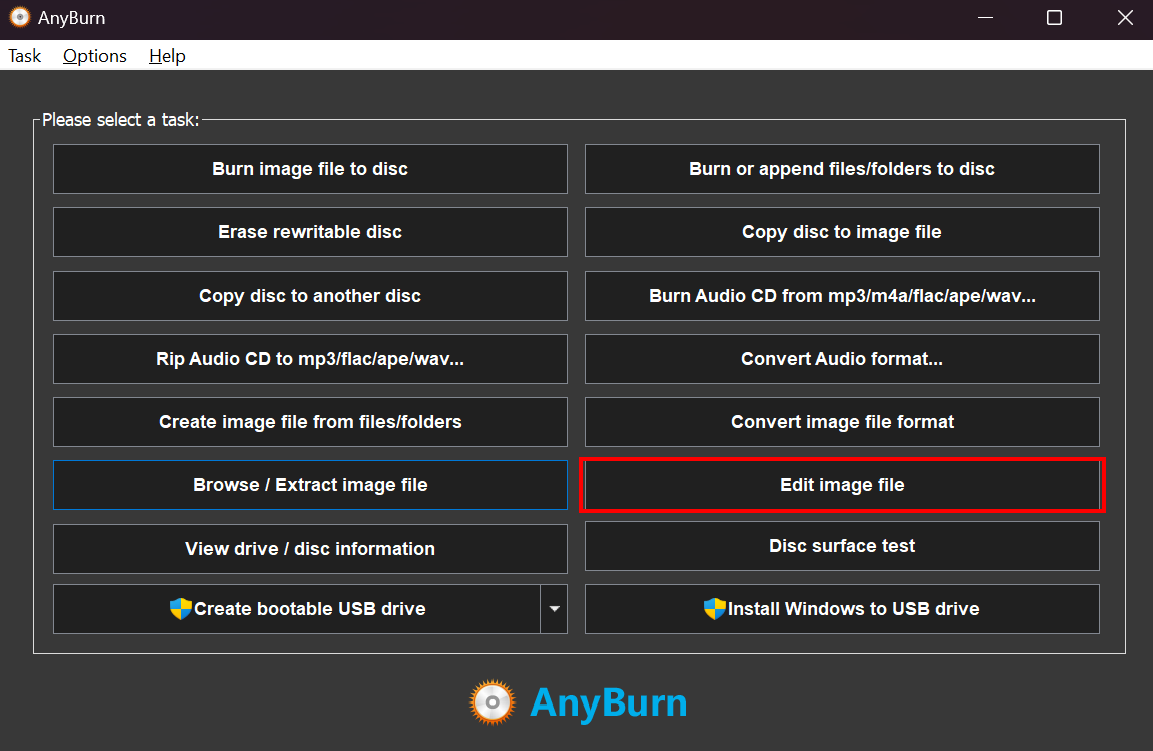
Return to the AnyBurn software home menu and select the “Edit image file” option.
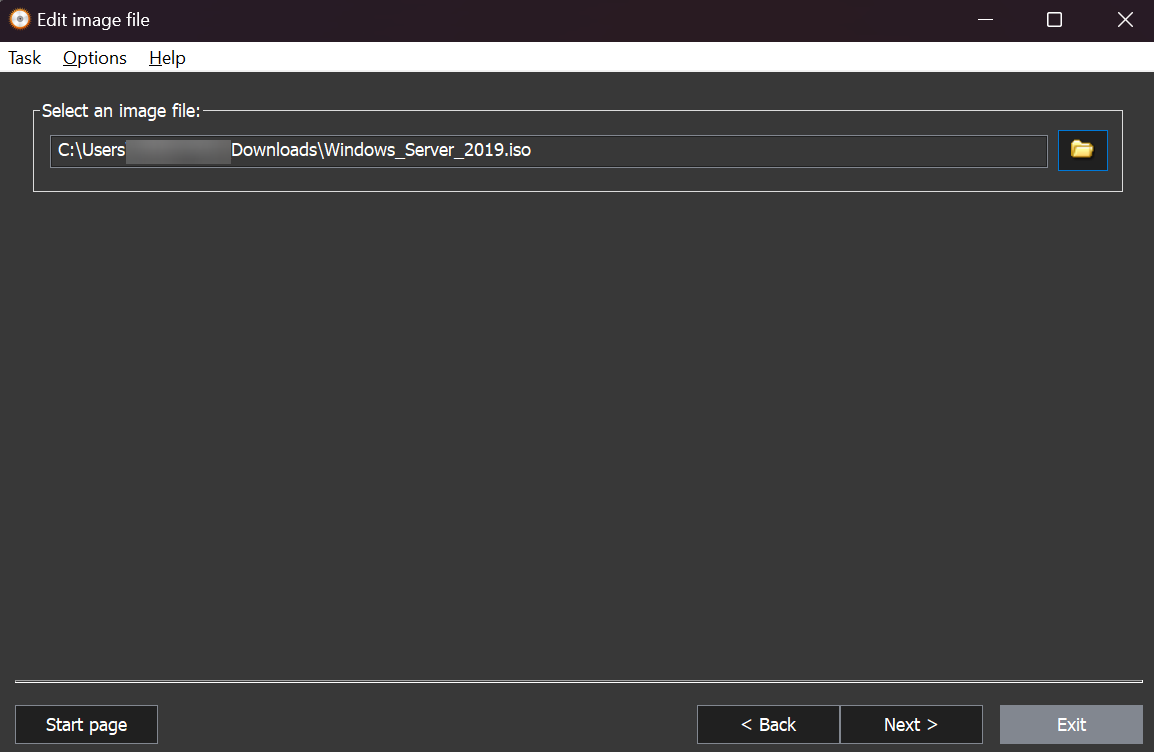
Select the directory of the ISO image to be created and click “Next”.
In this case, the selected file will be the Windows Server 2019 ISO.
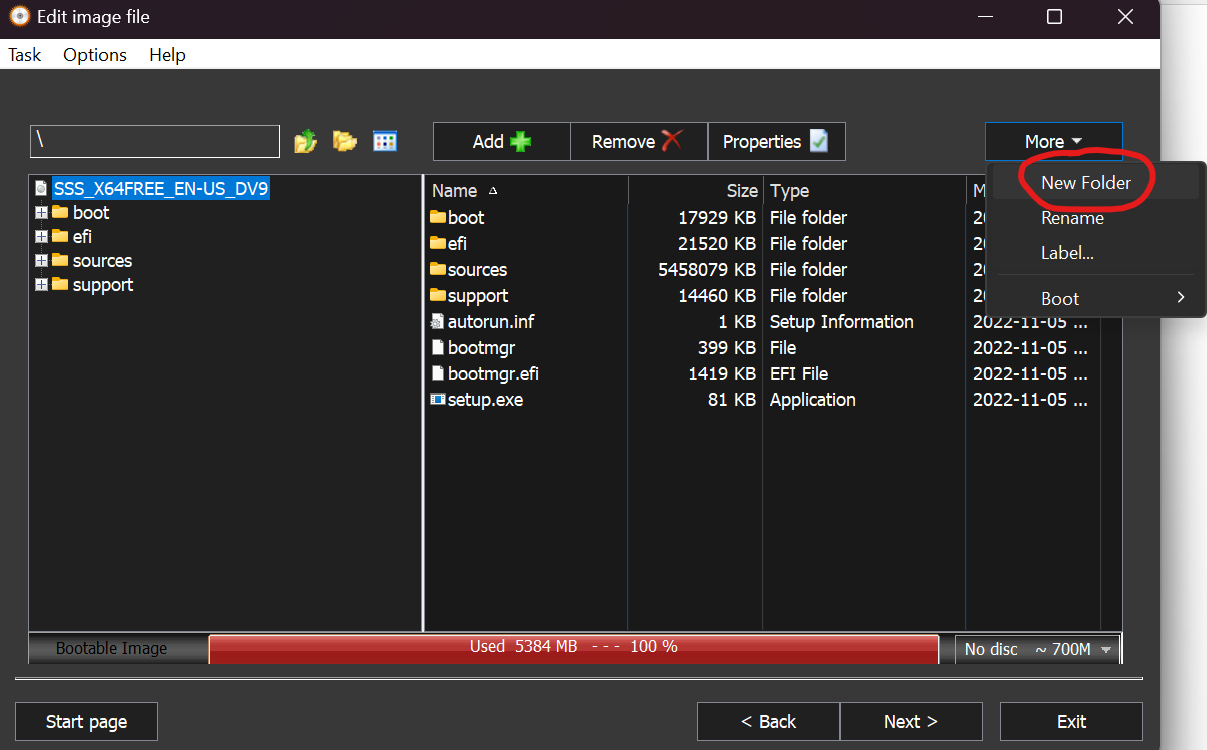
Select the “More” option and click “New Folder”. Name the folder as “vmtools-windows”.
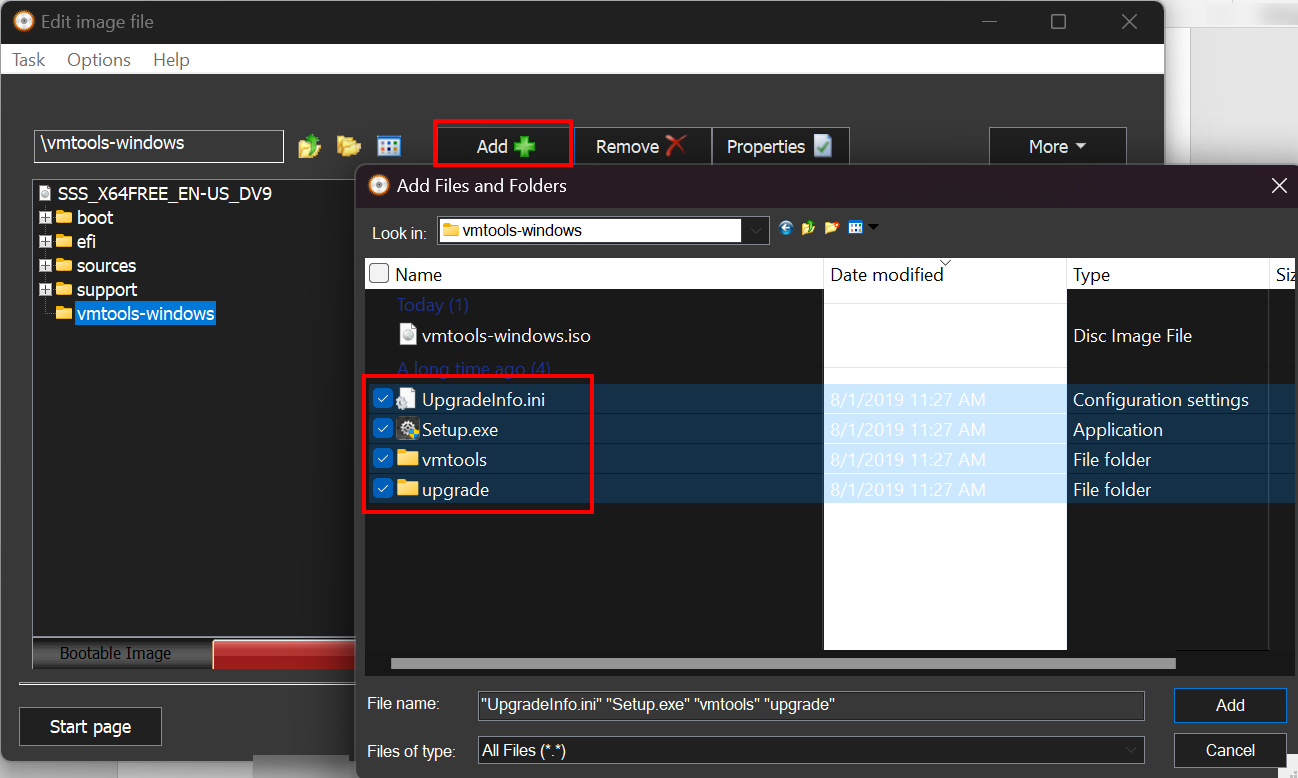
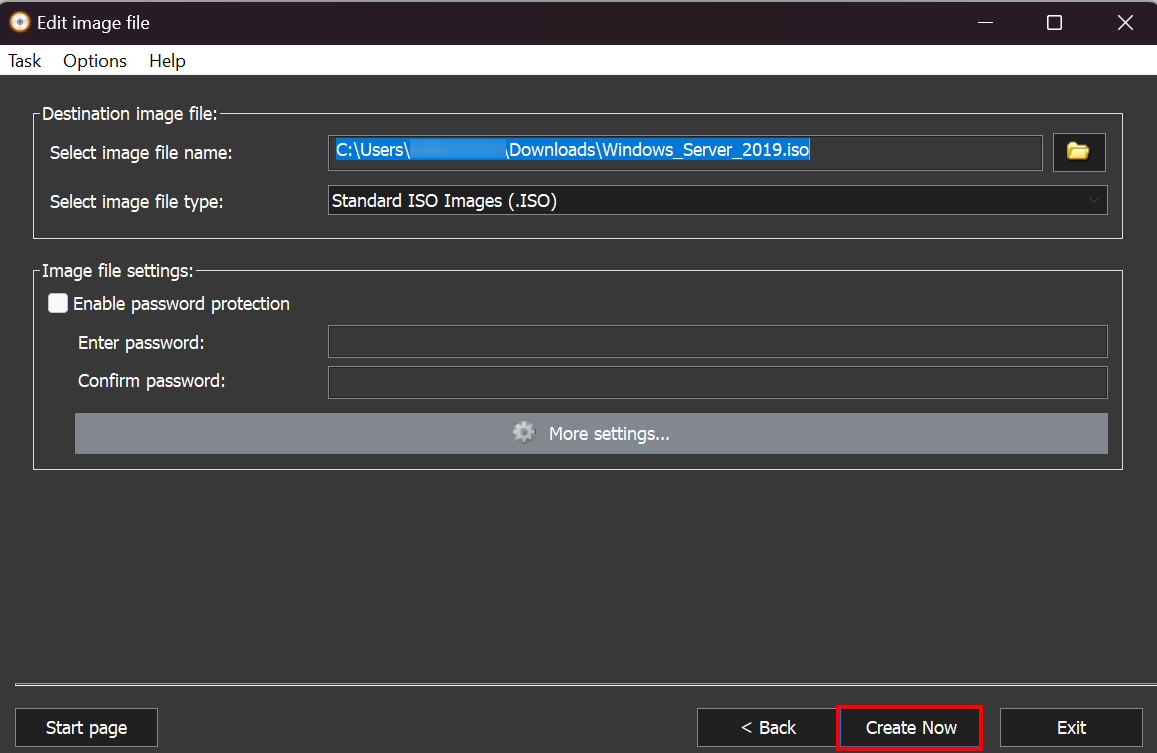
Click on the created folder and click “Add+”. Select the four files extracted from the “vmtools-windows.iso” ISO and click “Next” and then “Create now”.
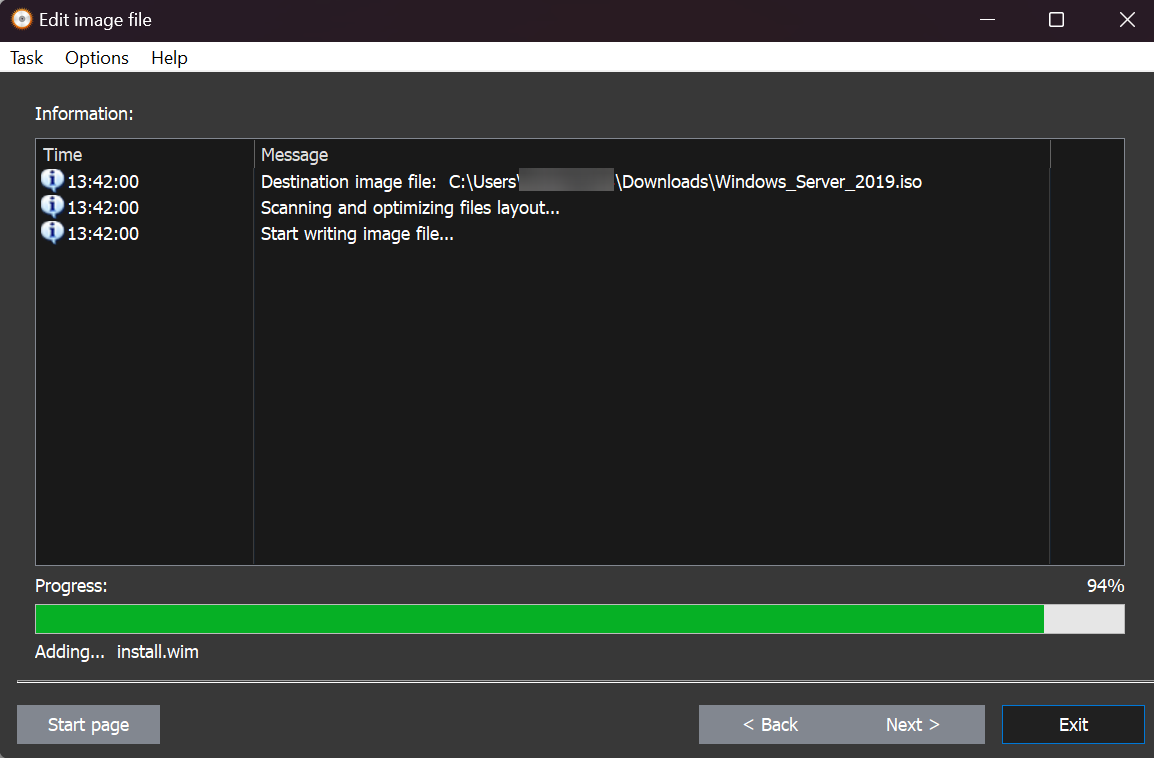
Wait until the progress bar reaches the end.
Upload the ISO
To upload the ISO of the instance to be created, the OBS storage service will be used. Access the Huawei Cloud console and go to the OBS section. 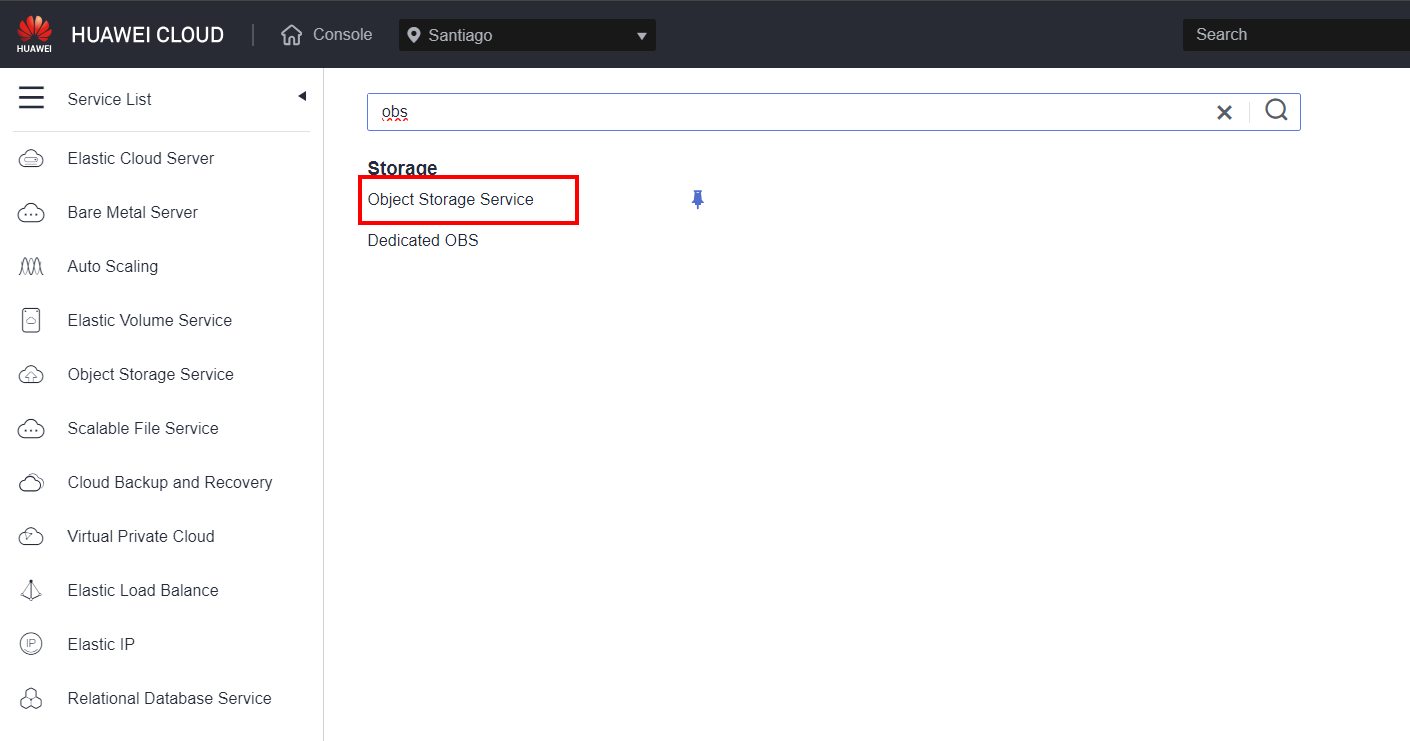 If the OBS Browser + application is not installed on your computer, please read section 3.1. Otherwise, skip to section 3.2.
OBS Browser +
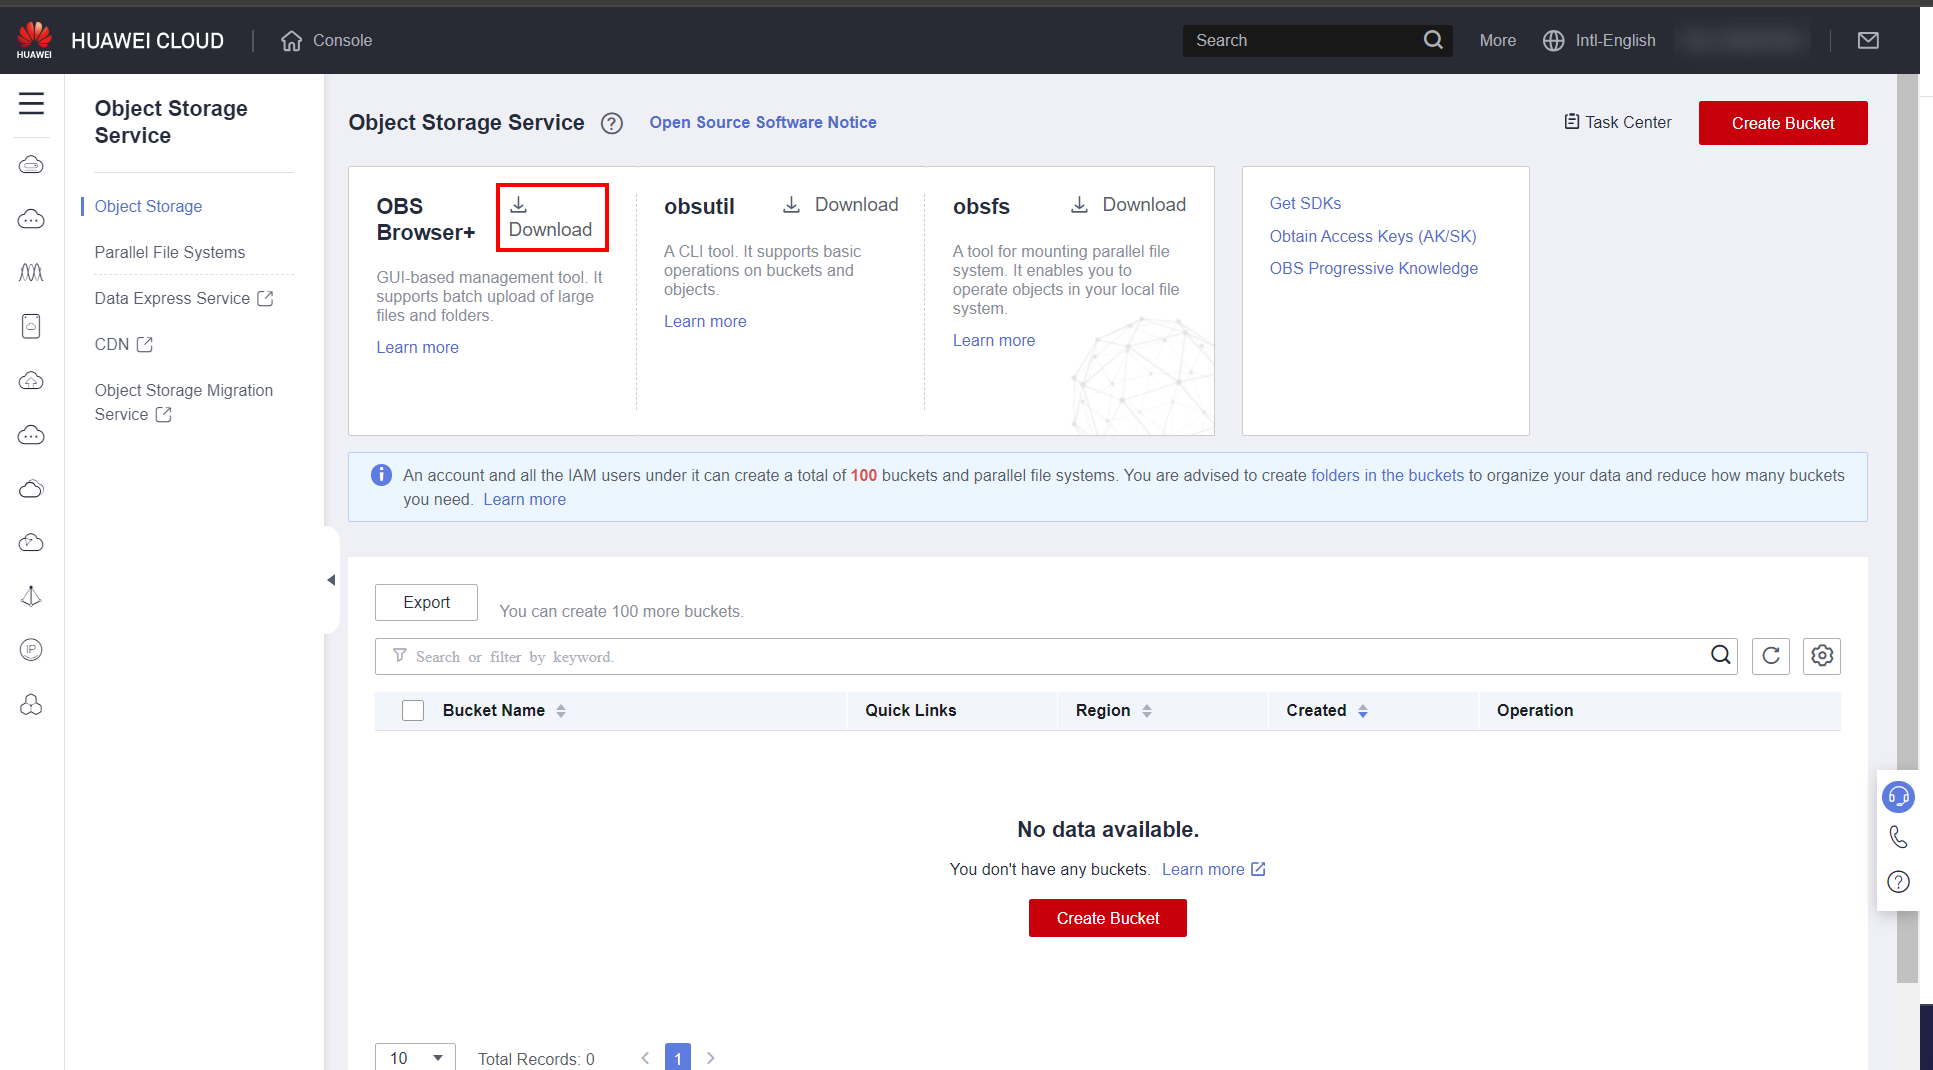
Within OBS, click “Download” on the icon representing OBS Browser +. Download and install the OBS Browser + software.
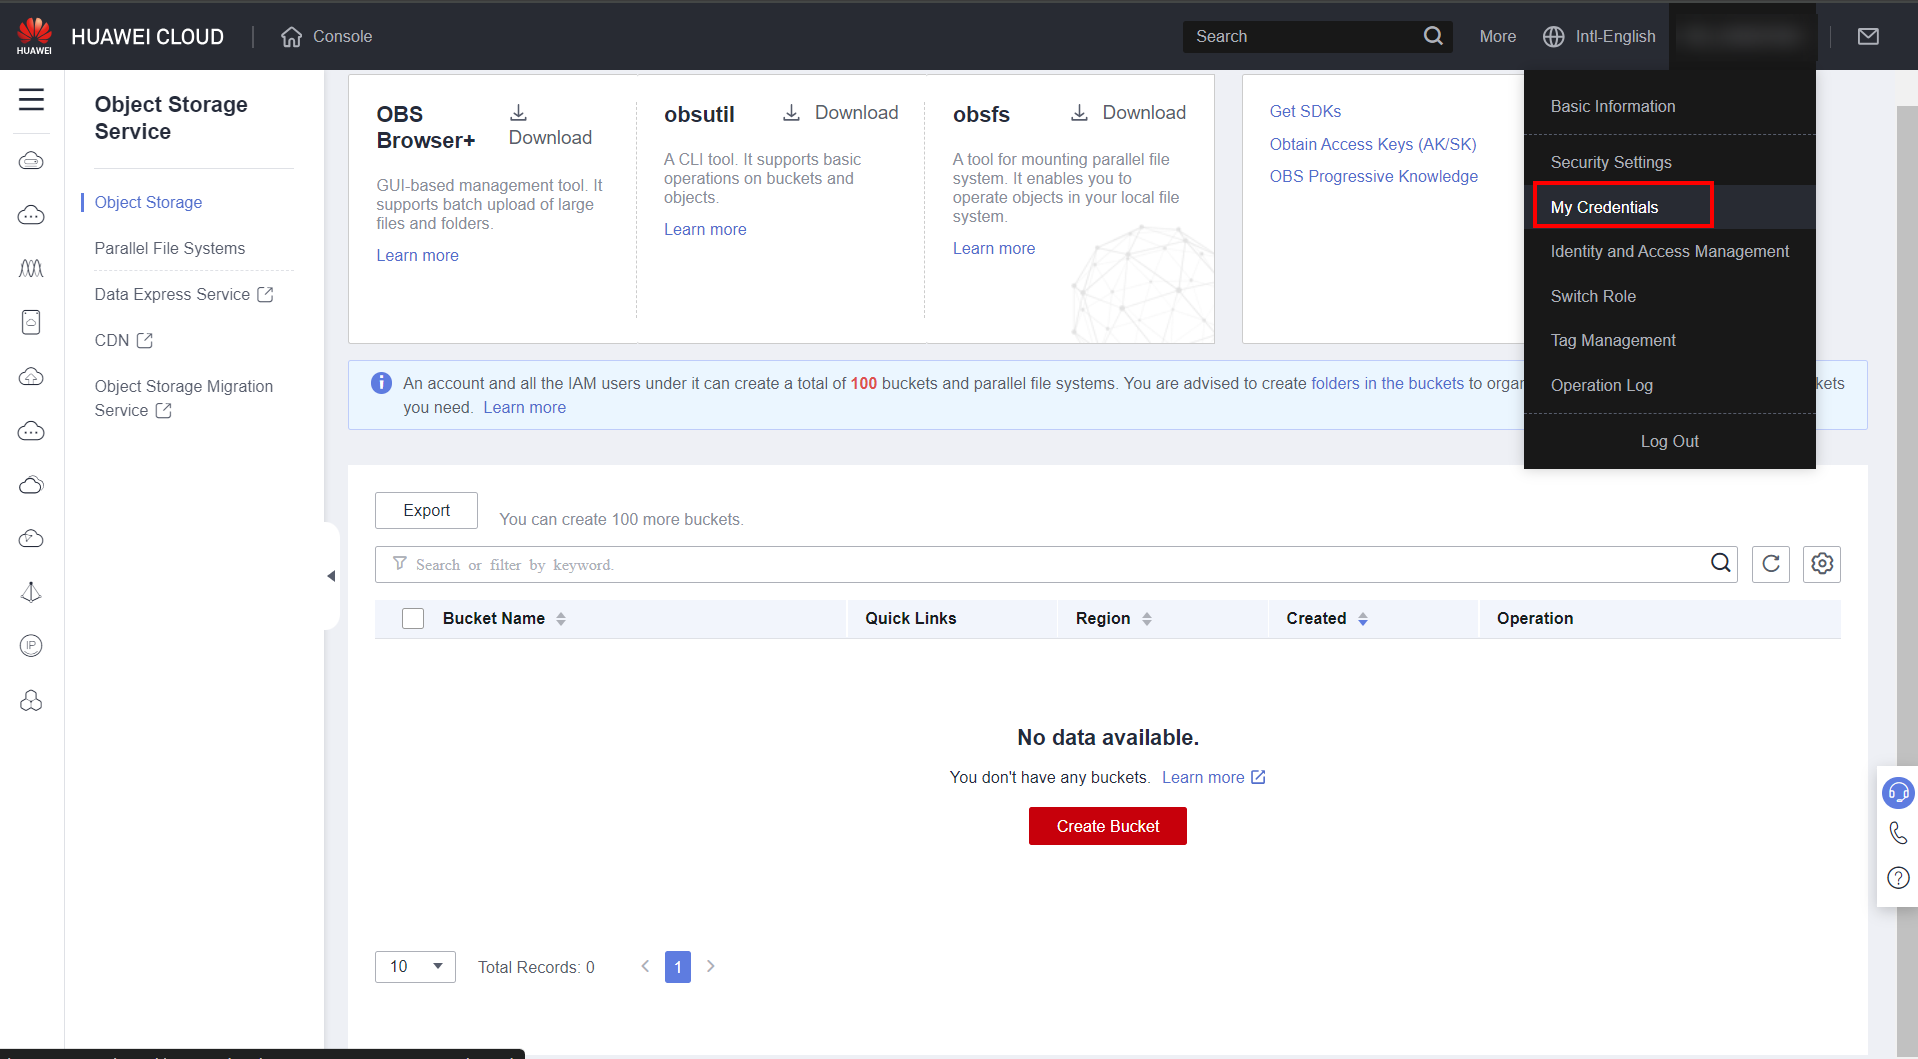
Return to the Huawei Cloud console, hover over your Huawei Cloud ID, and click “My Credentials”.
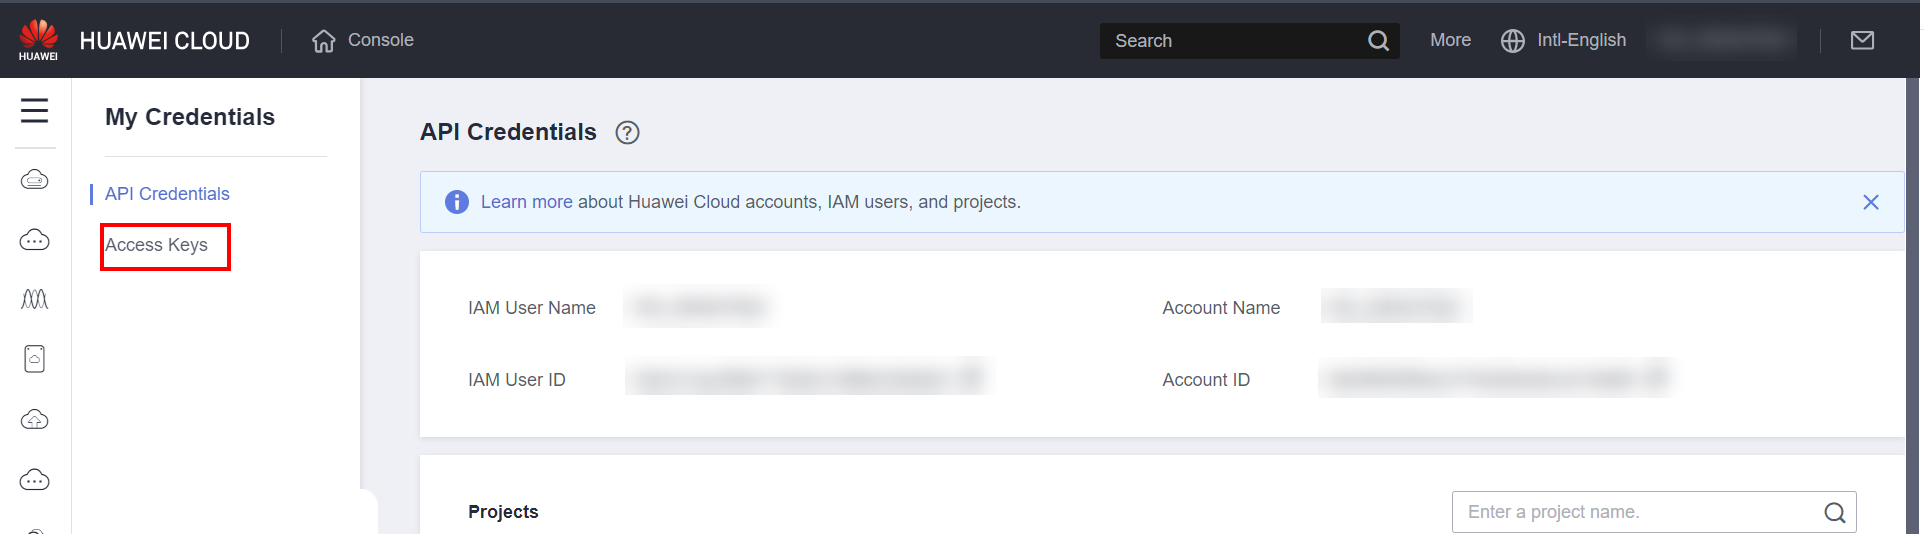
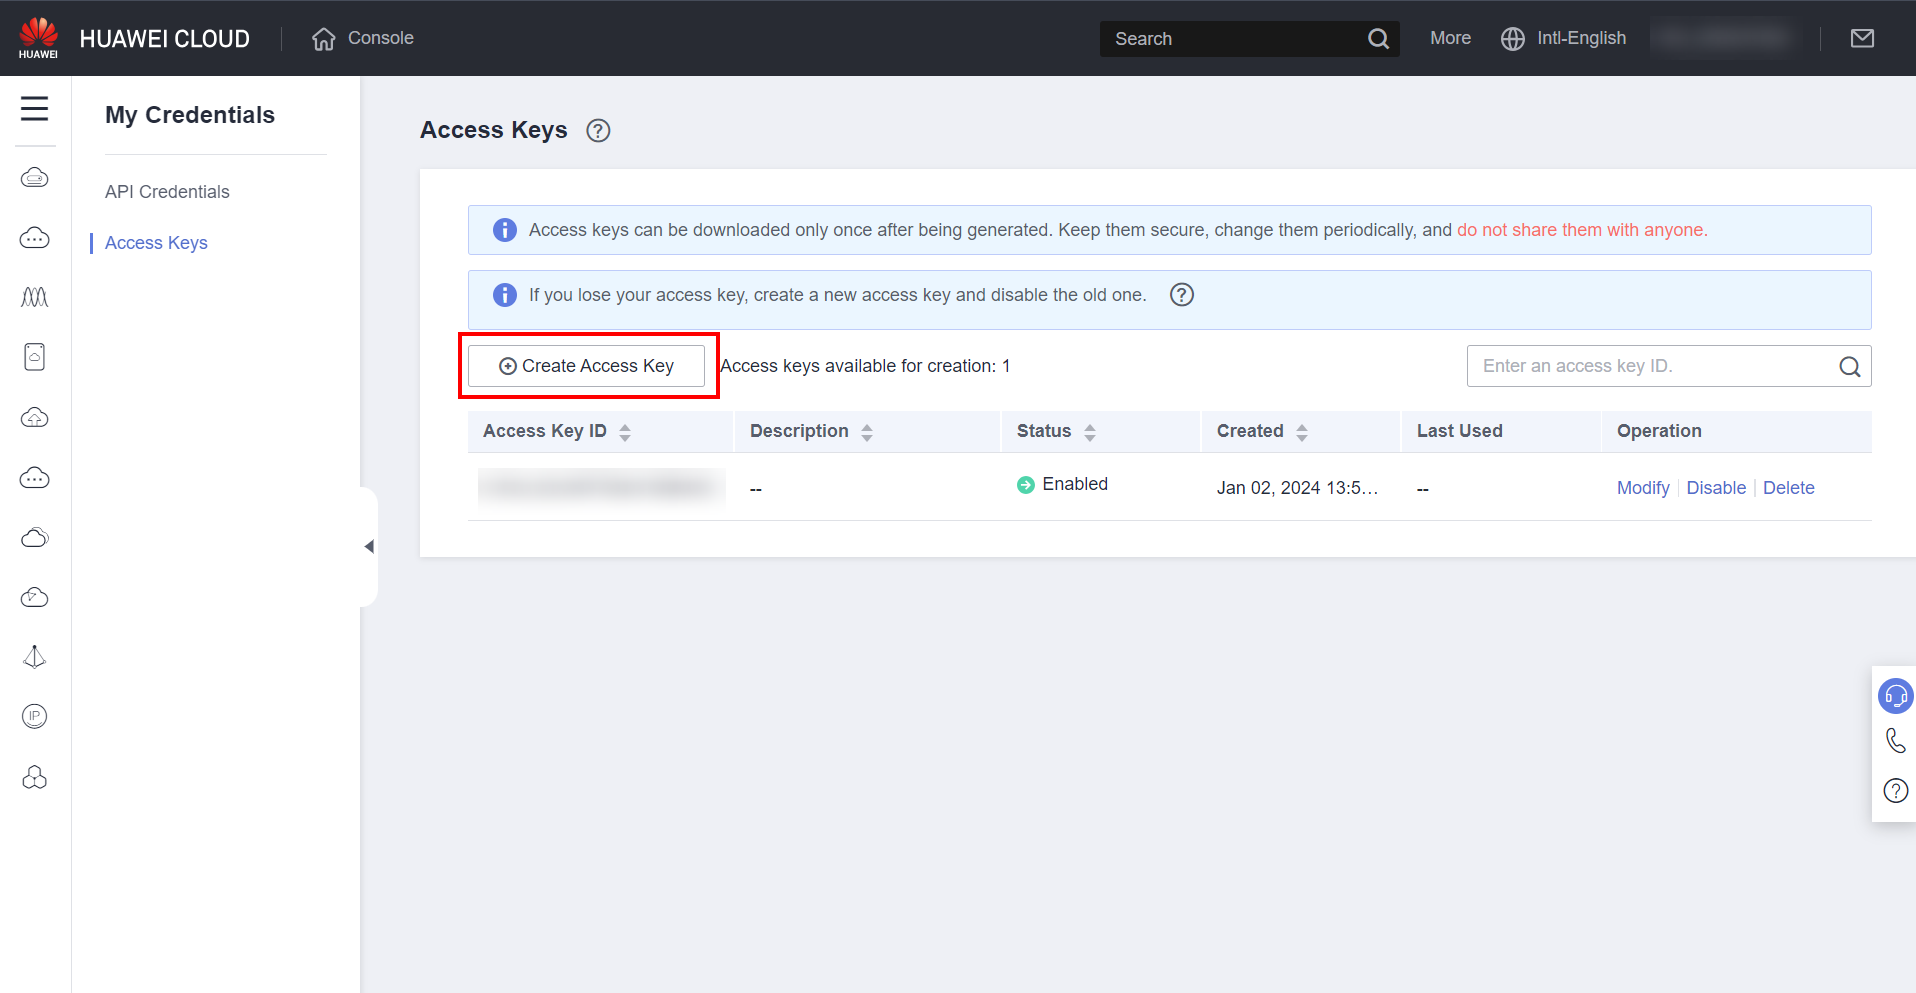
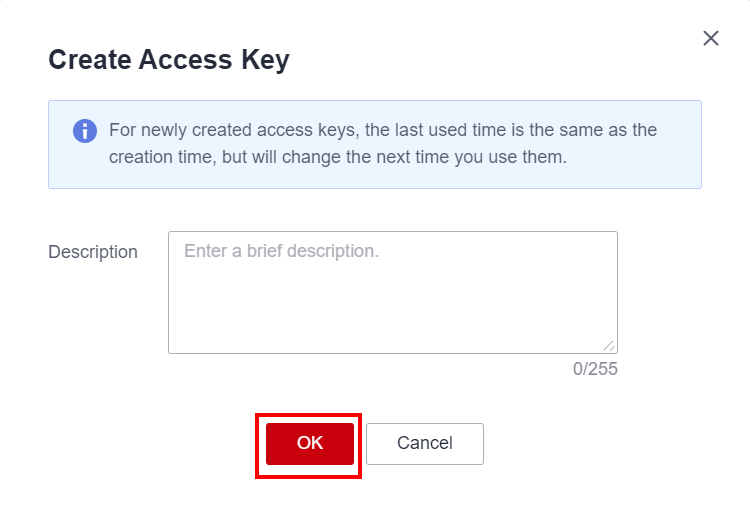
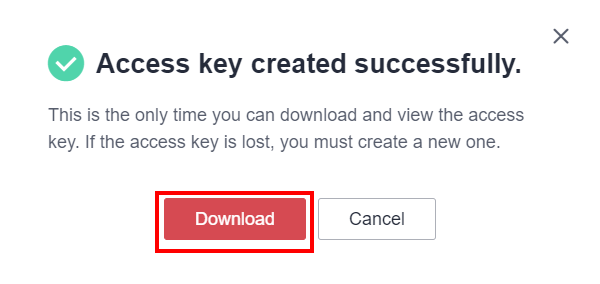
Click on “Access Keys”, “Create Access Keys”, “Ok” and “Download”.
Upload ISO to bucket
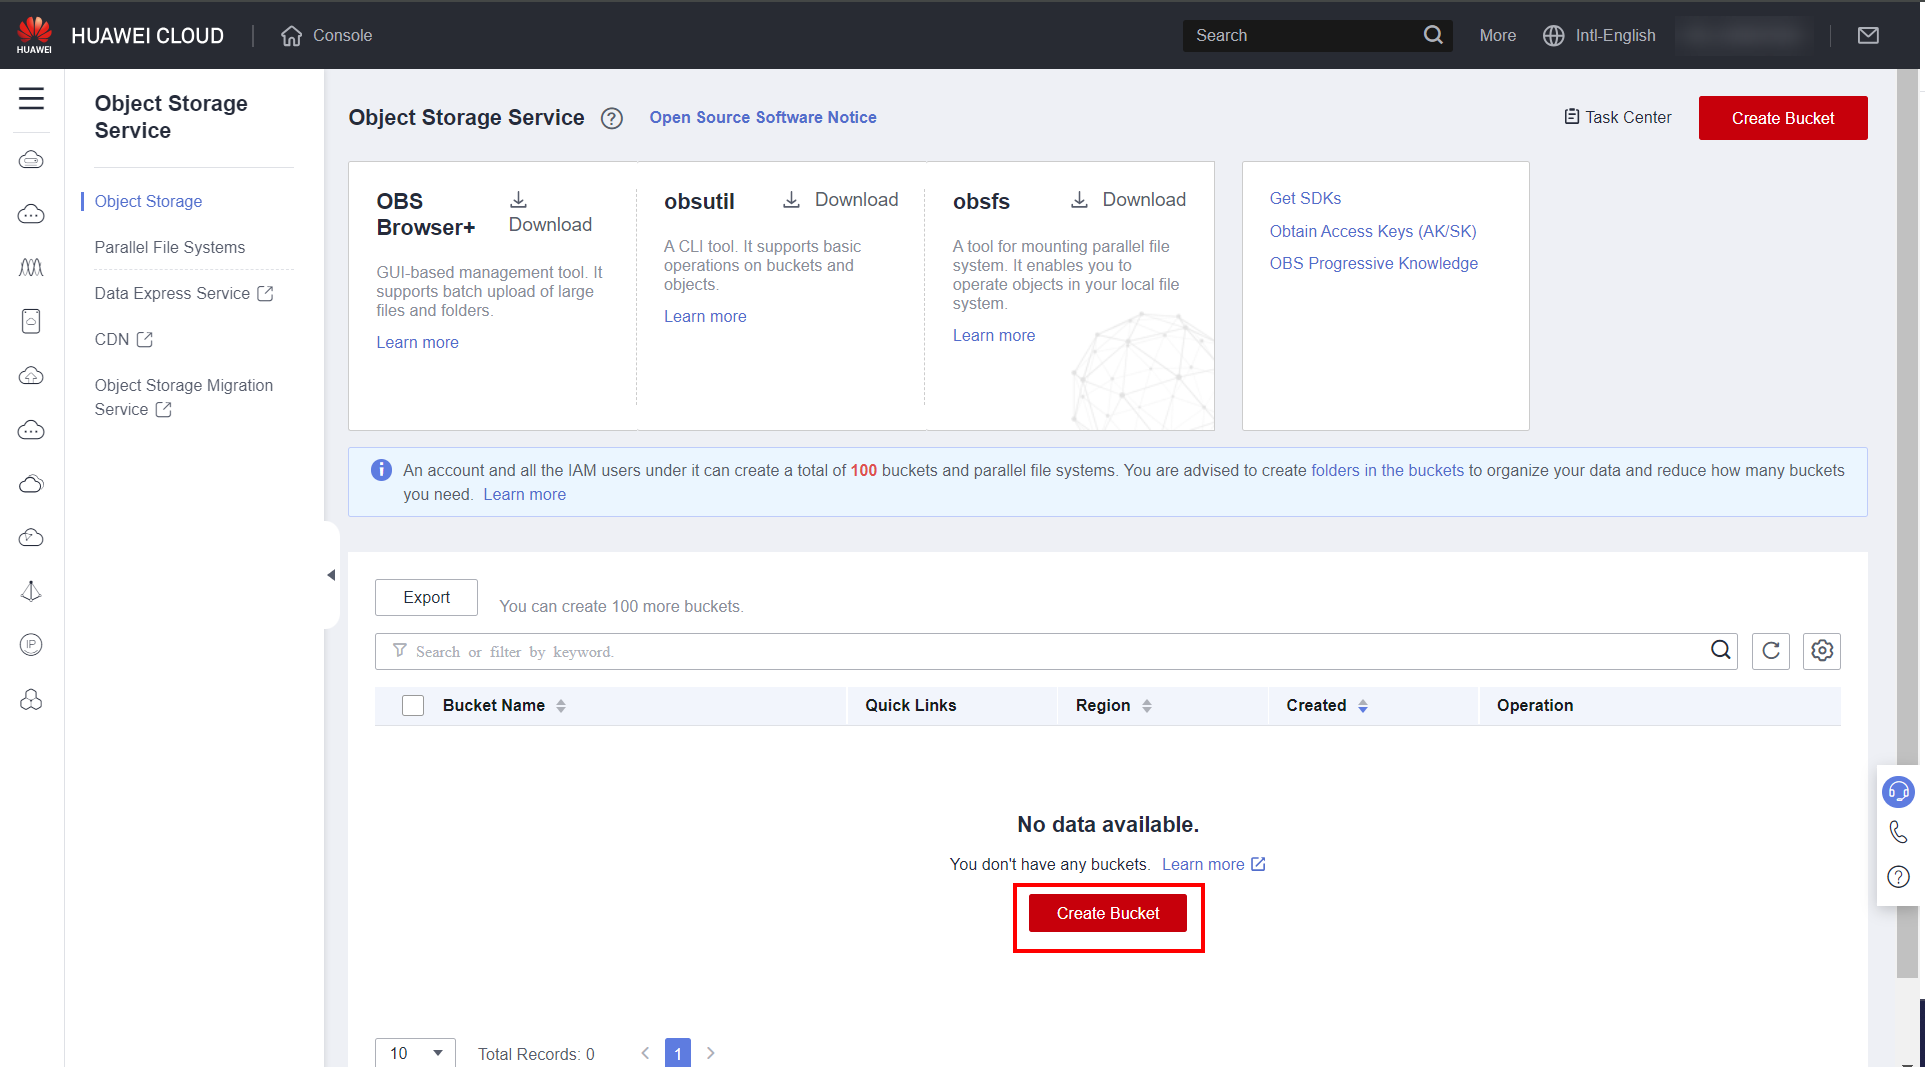
In the OBS section within the Huawei Cloud console, click “Create Bucket”.
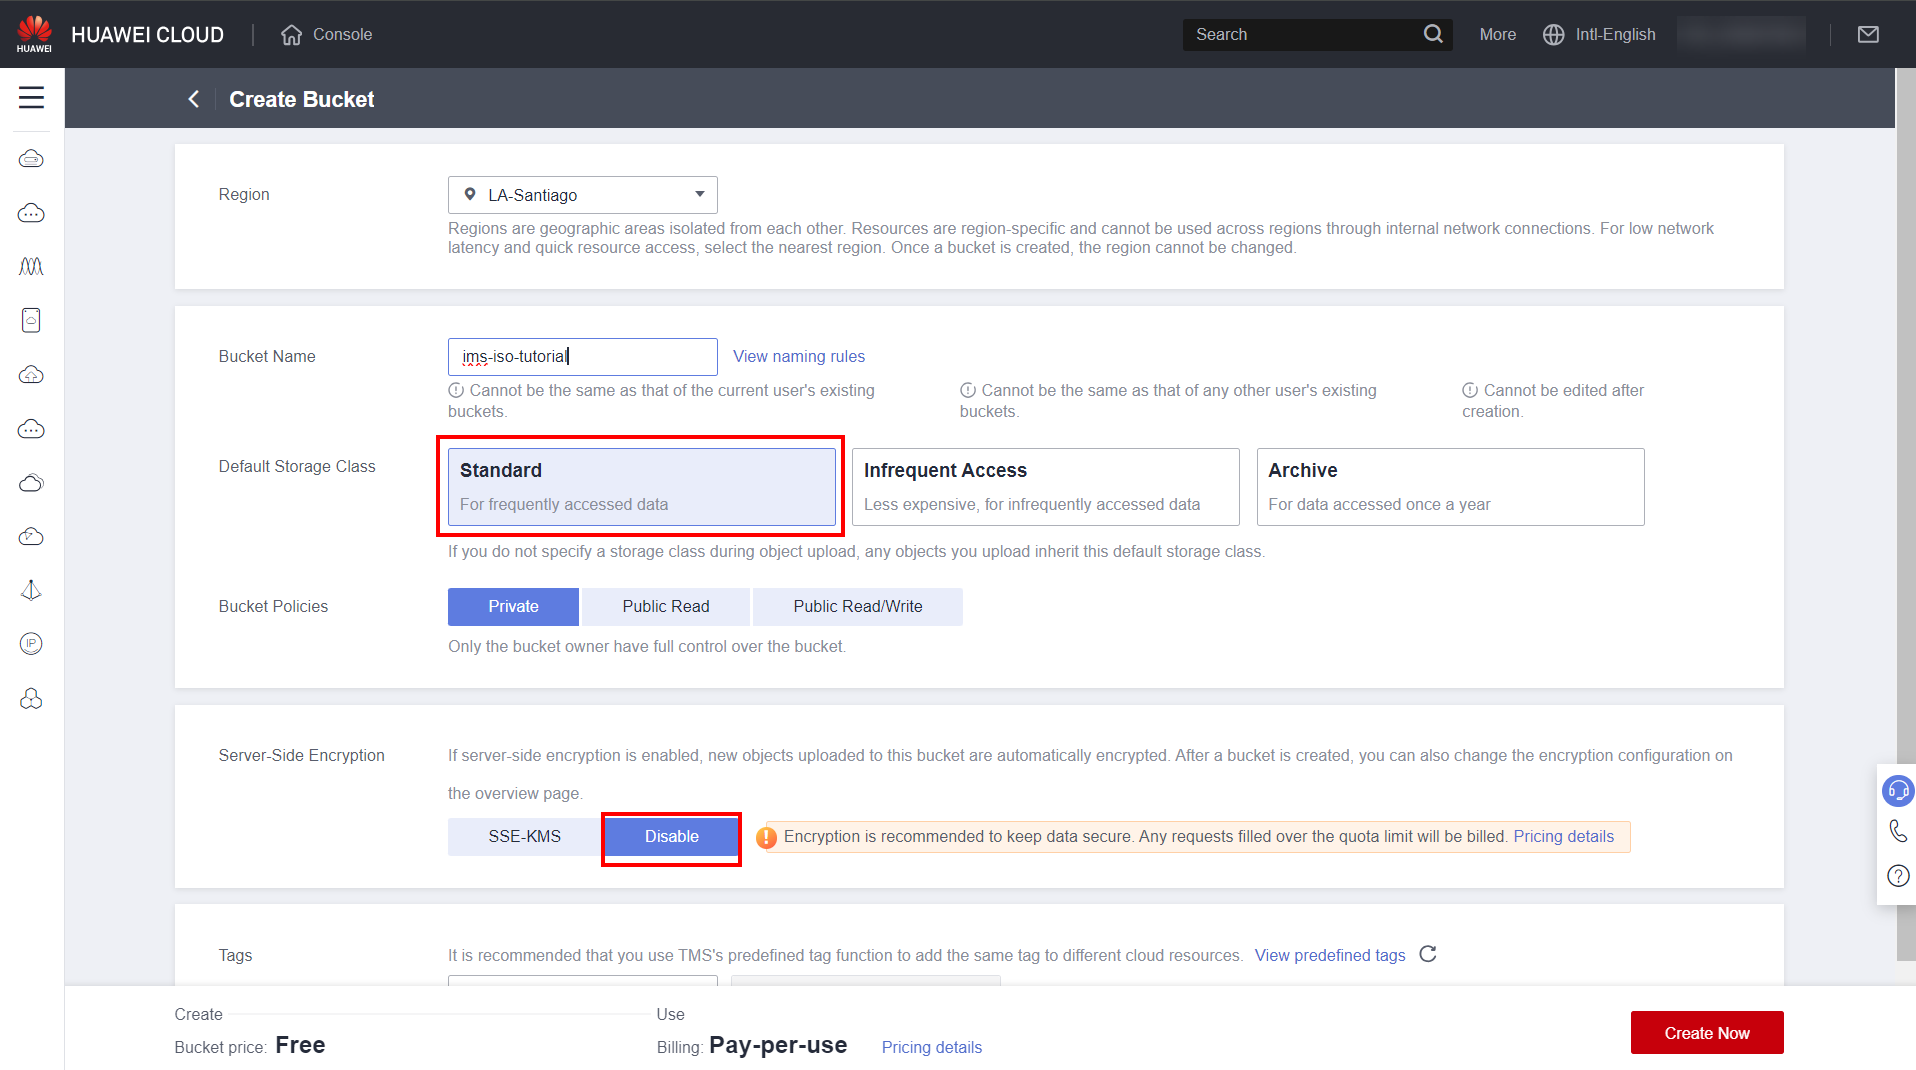
Give the bucket a name and select “Standard” in “Default Storage Class”. This setting is important, since if another class option is selected, an error will occur when creating the image from the ISO later.
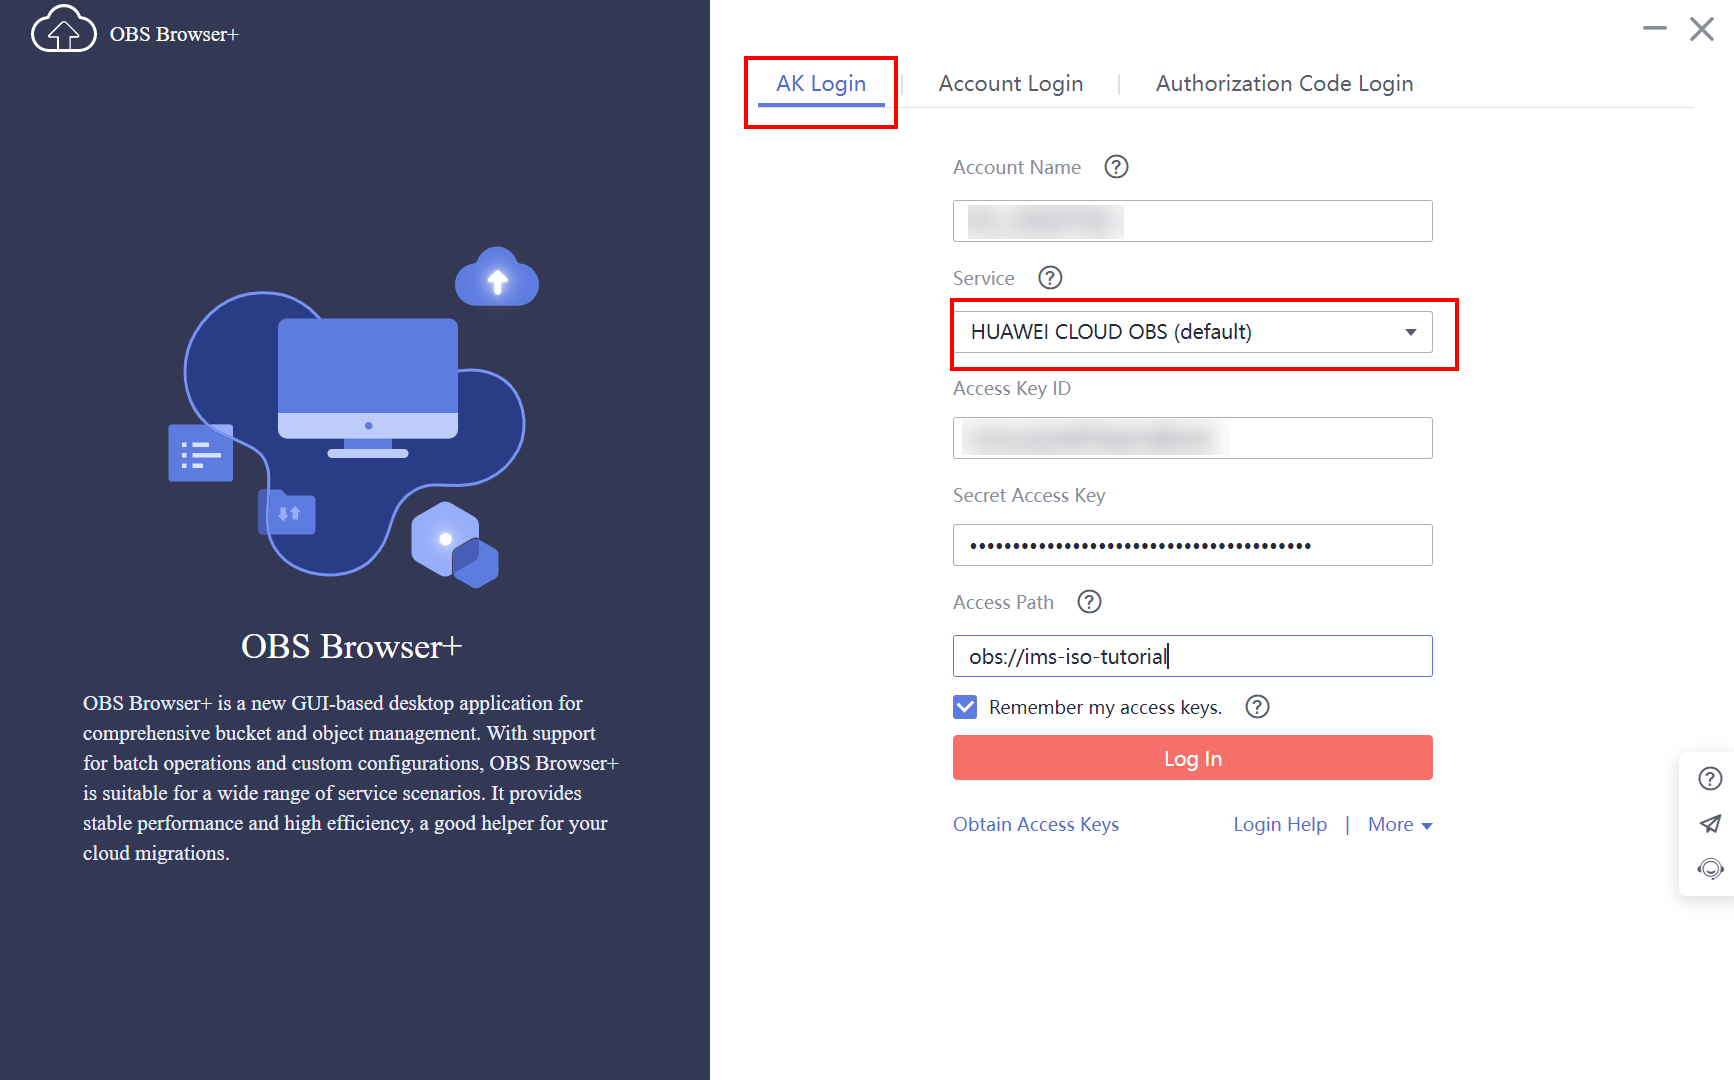
Click “Create Now” to create the bucket. Open the OBS Browser + application and enter the access information as requested in the “AK Login” section. In the “Access Key ID” and “Secret Access Key” fields, enter the generated data in section 3.1. In “Service”, select “HUAWEI CLOUD OBS (default)”. In “Access Path” enter “obs://” followed by the name of the bucket created. In this example, the path will be “obs://ims-iso-tutorial”. Click on “Log In”.
Click Upload
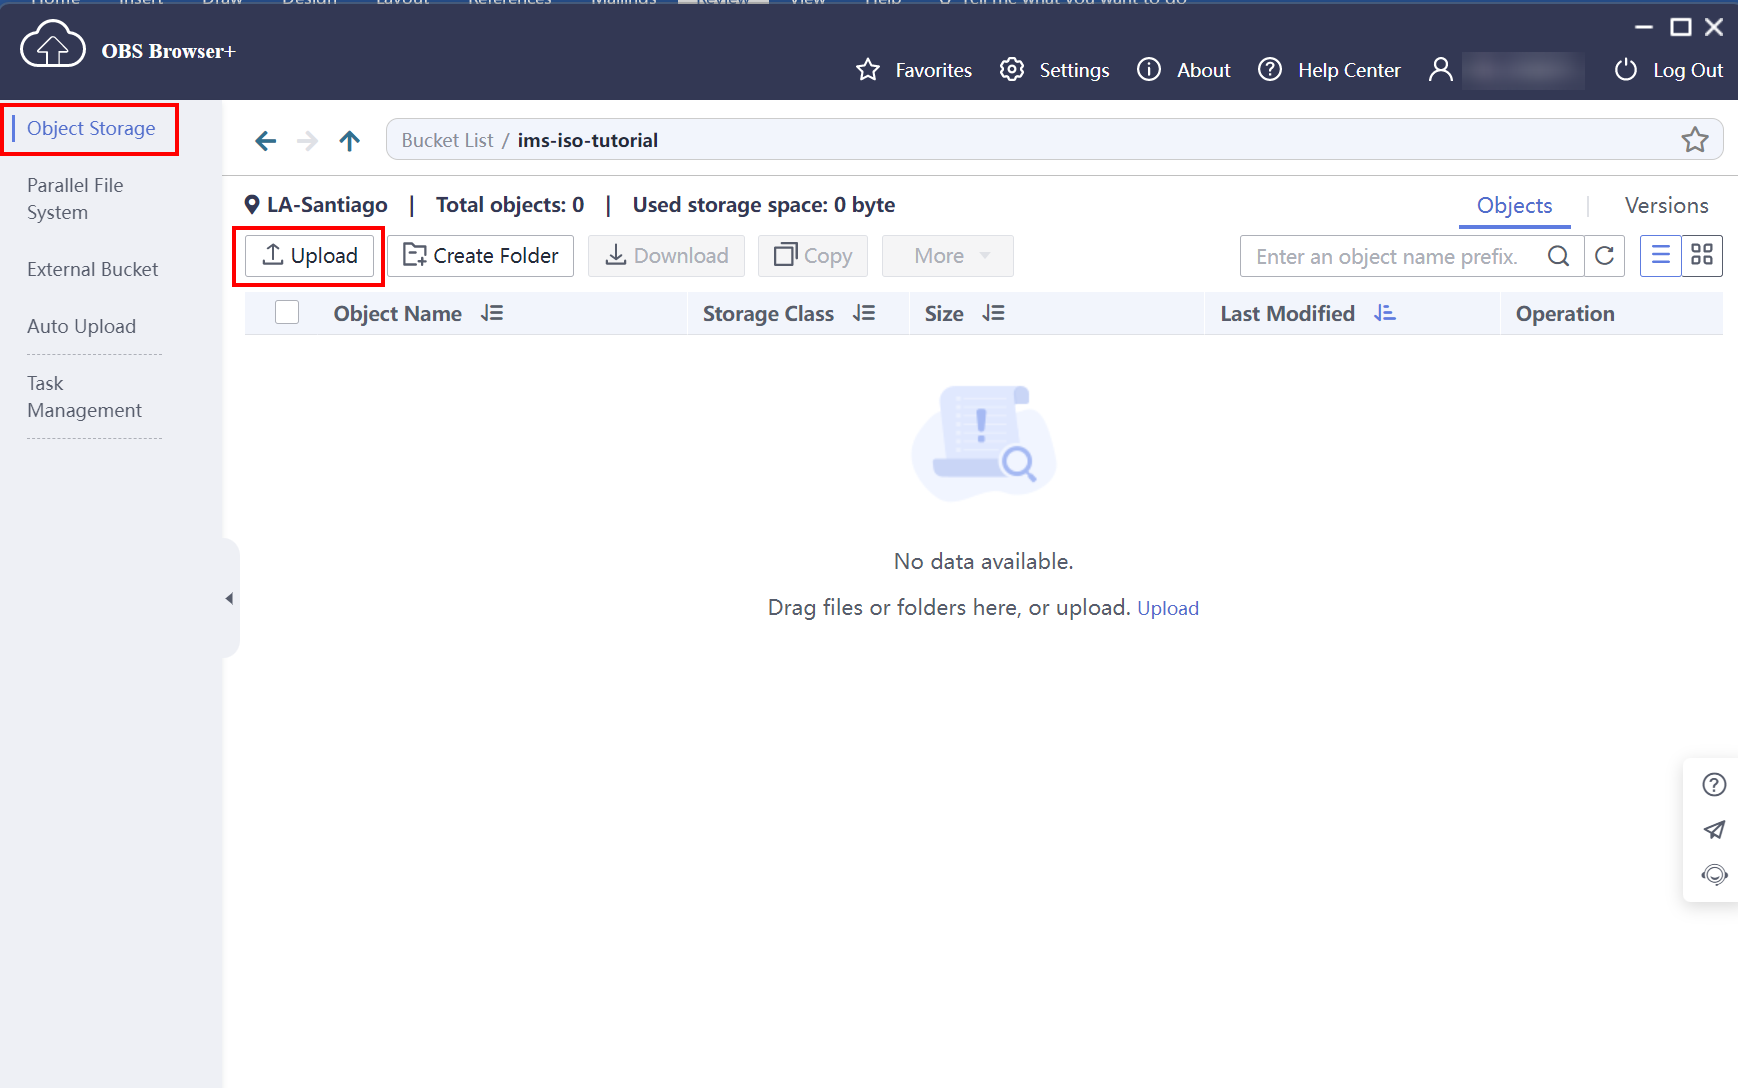
Select the “Standard” option in “Storage Class” and in “Add File” to add the iso of the instance to be created. In this case, the Windows Server 2019 ISO. Wait until the upload is complete before proceeding to the next steps. 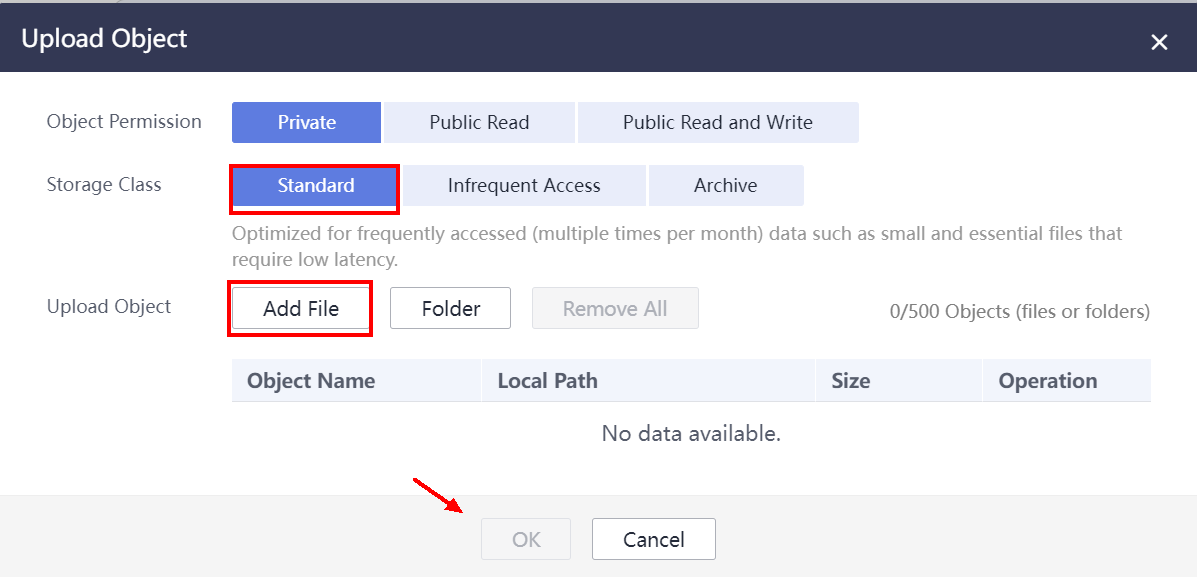
Creating the image in IMS
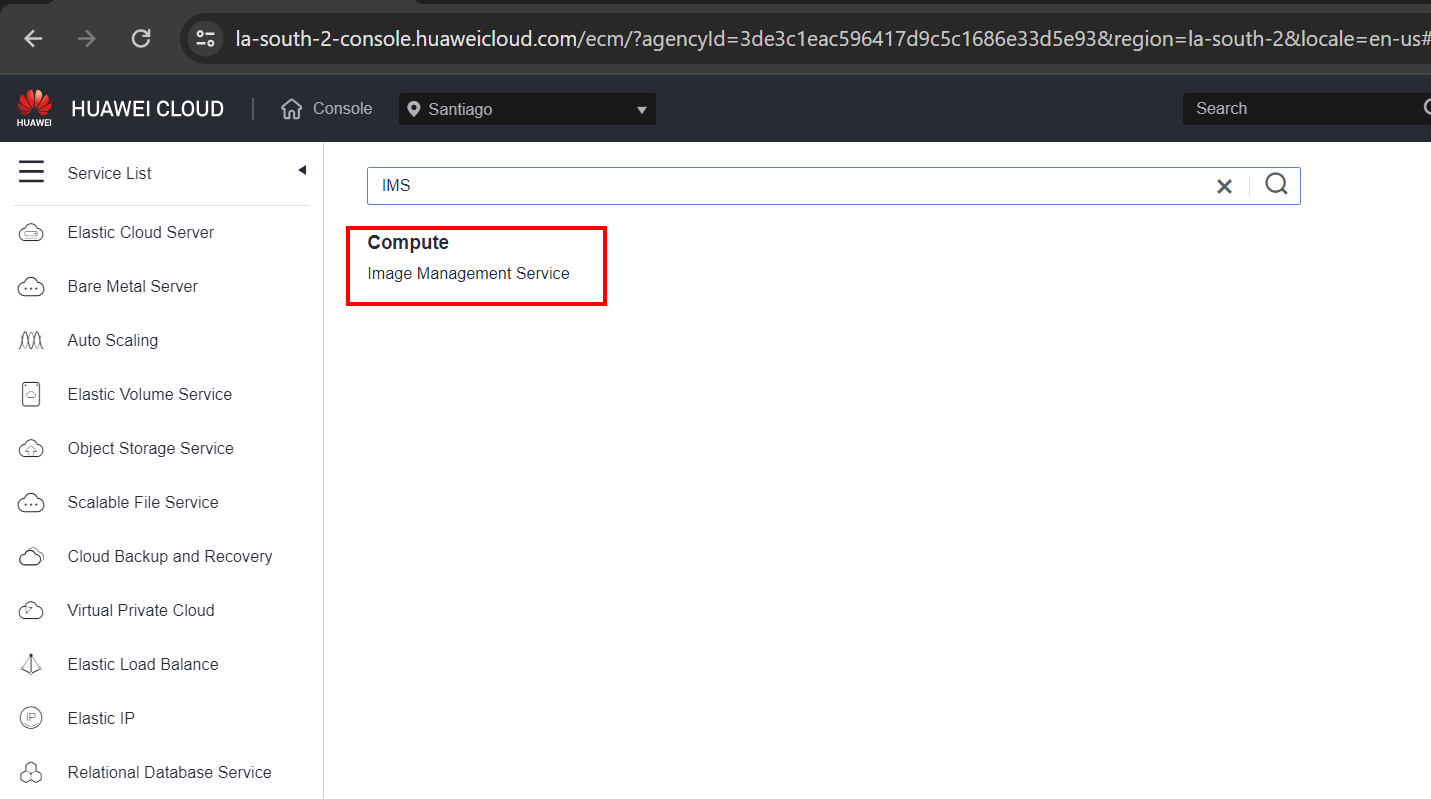
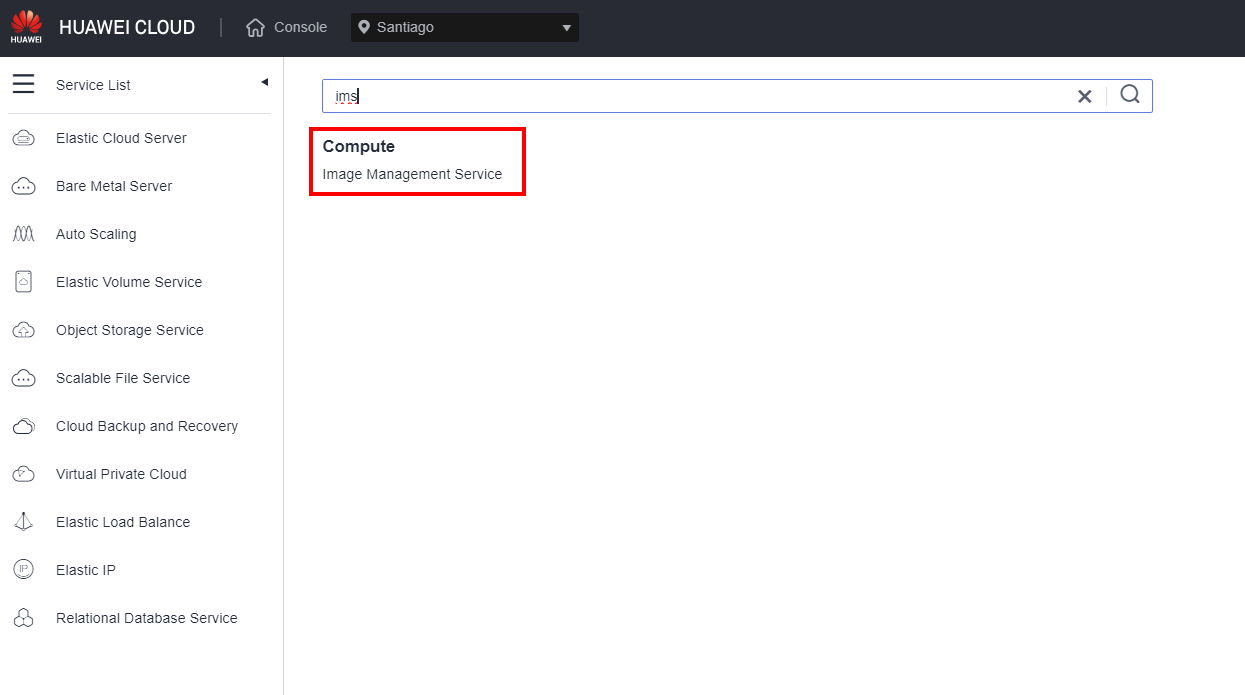
Access the Huawei Cloud console and go to the IMS section.
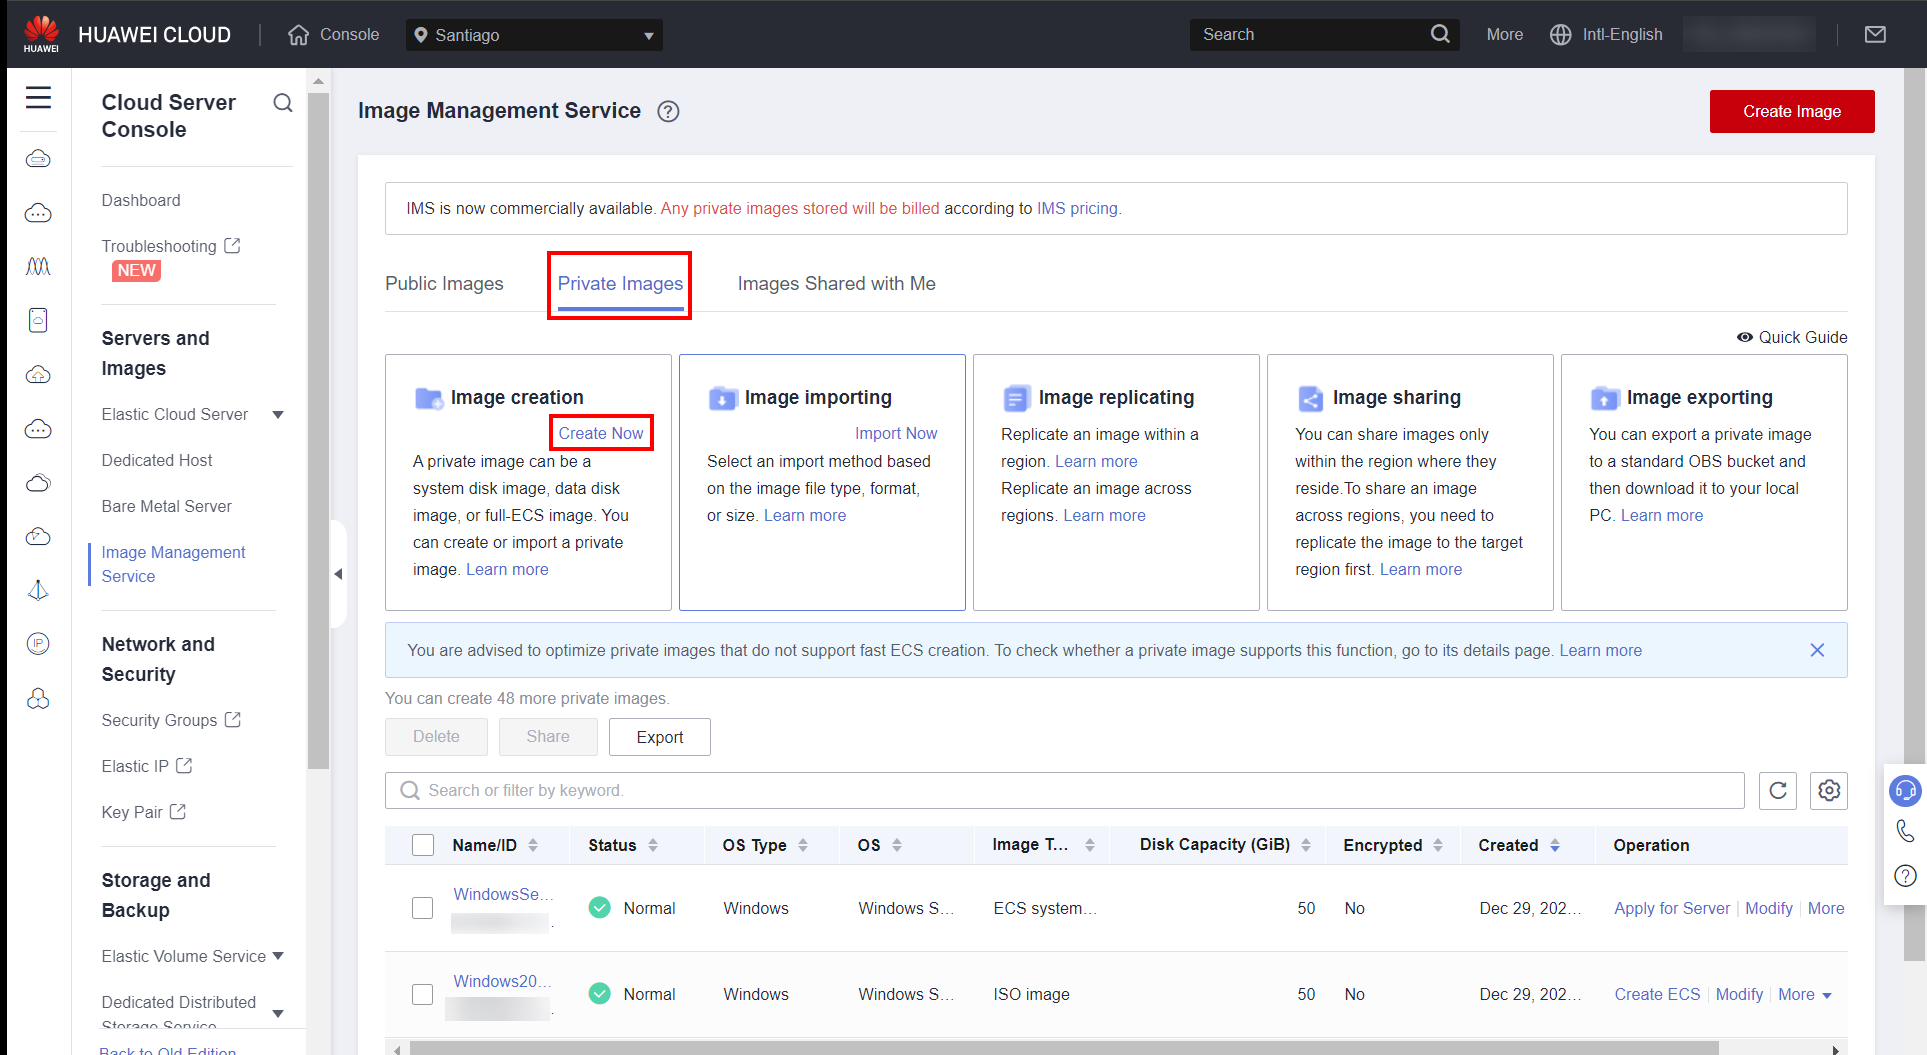
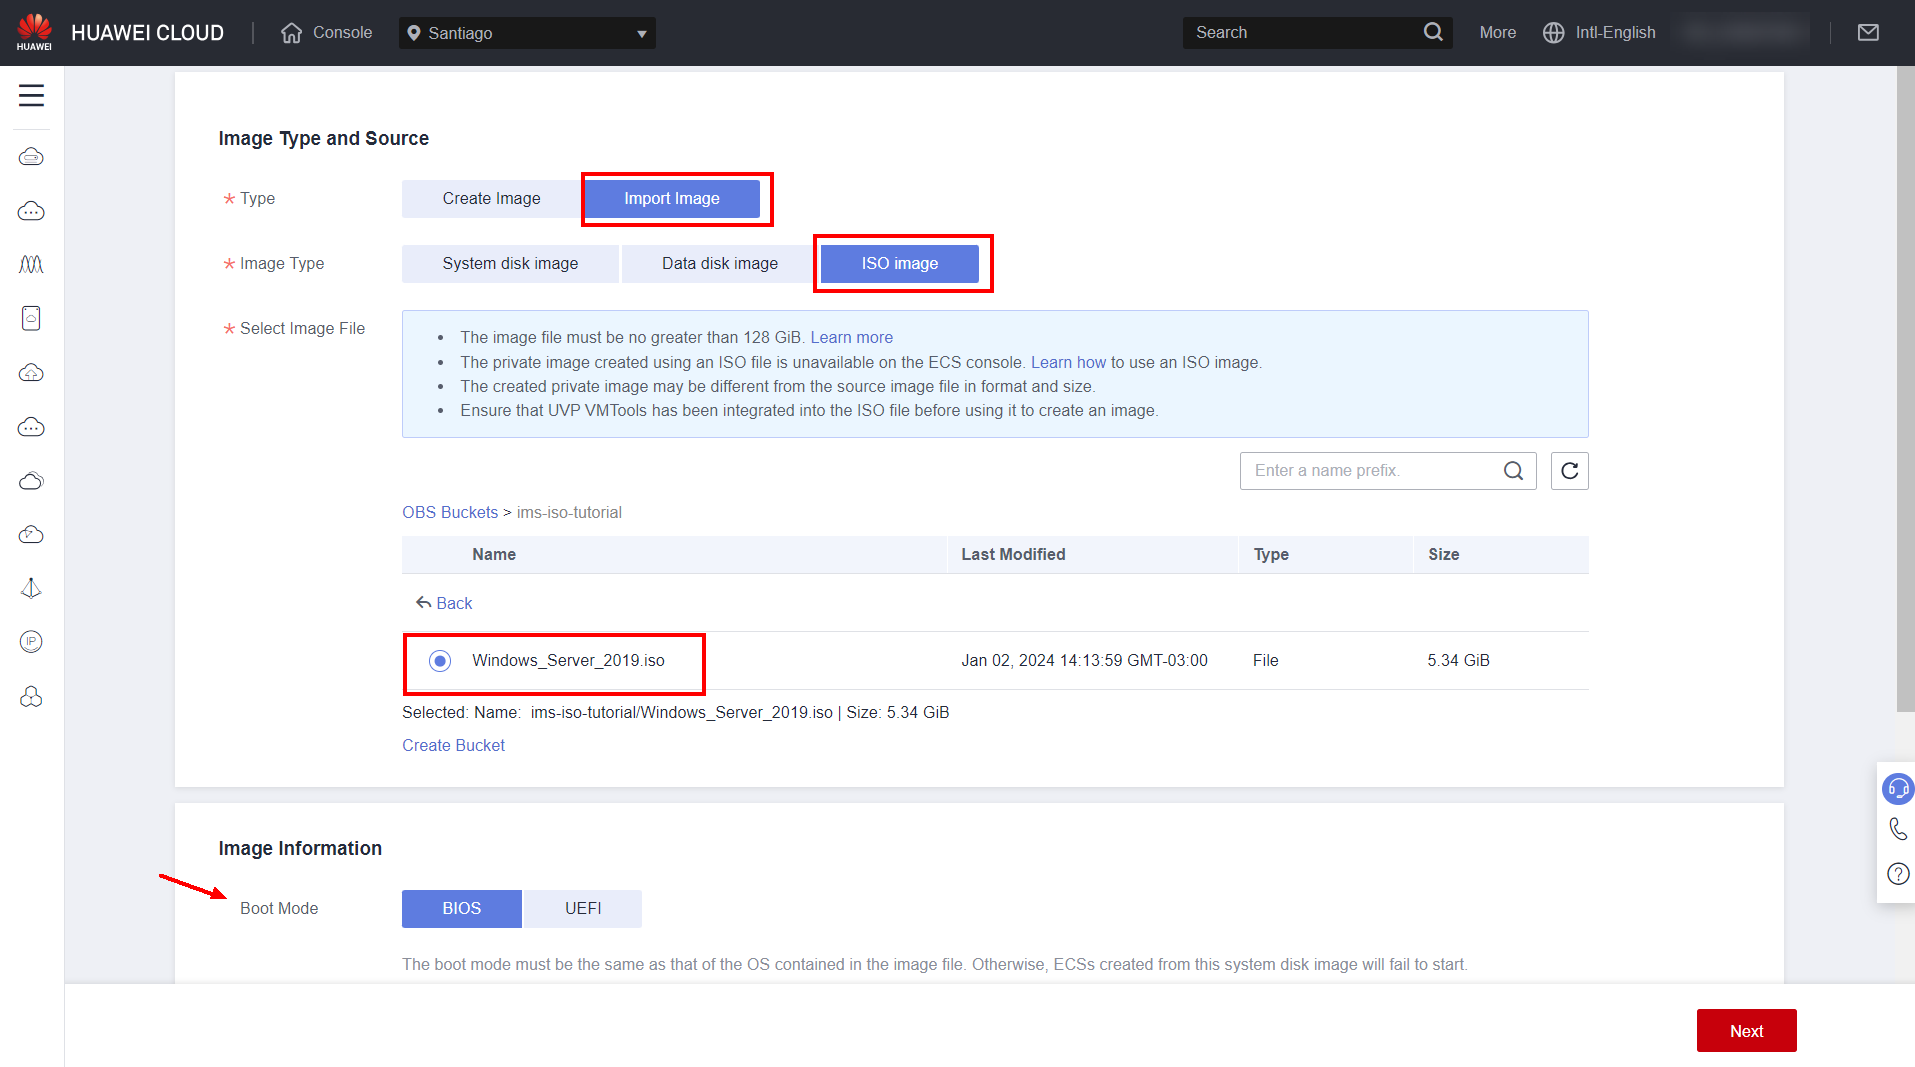
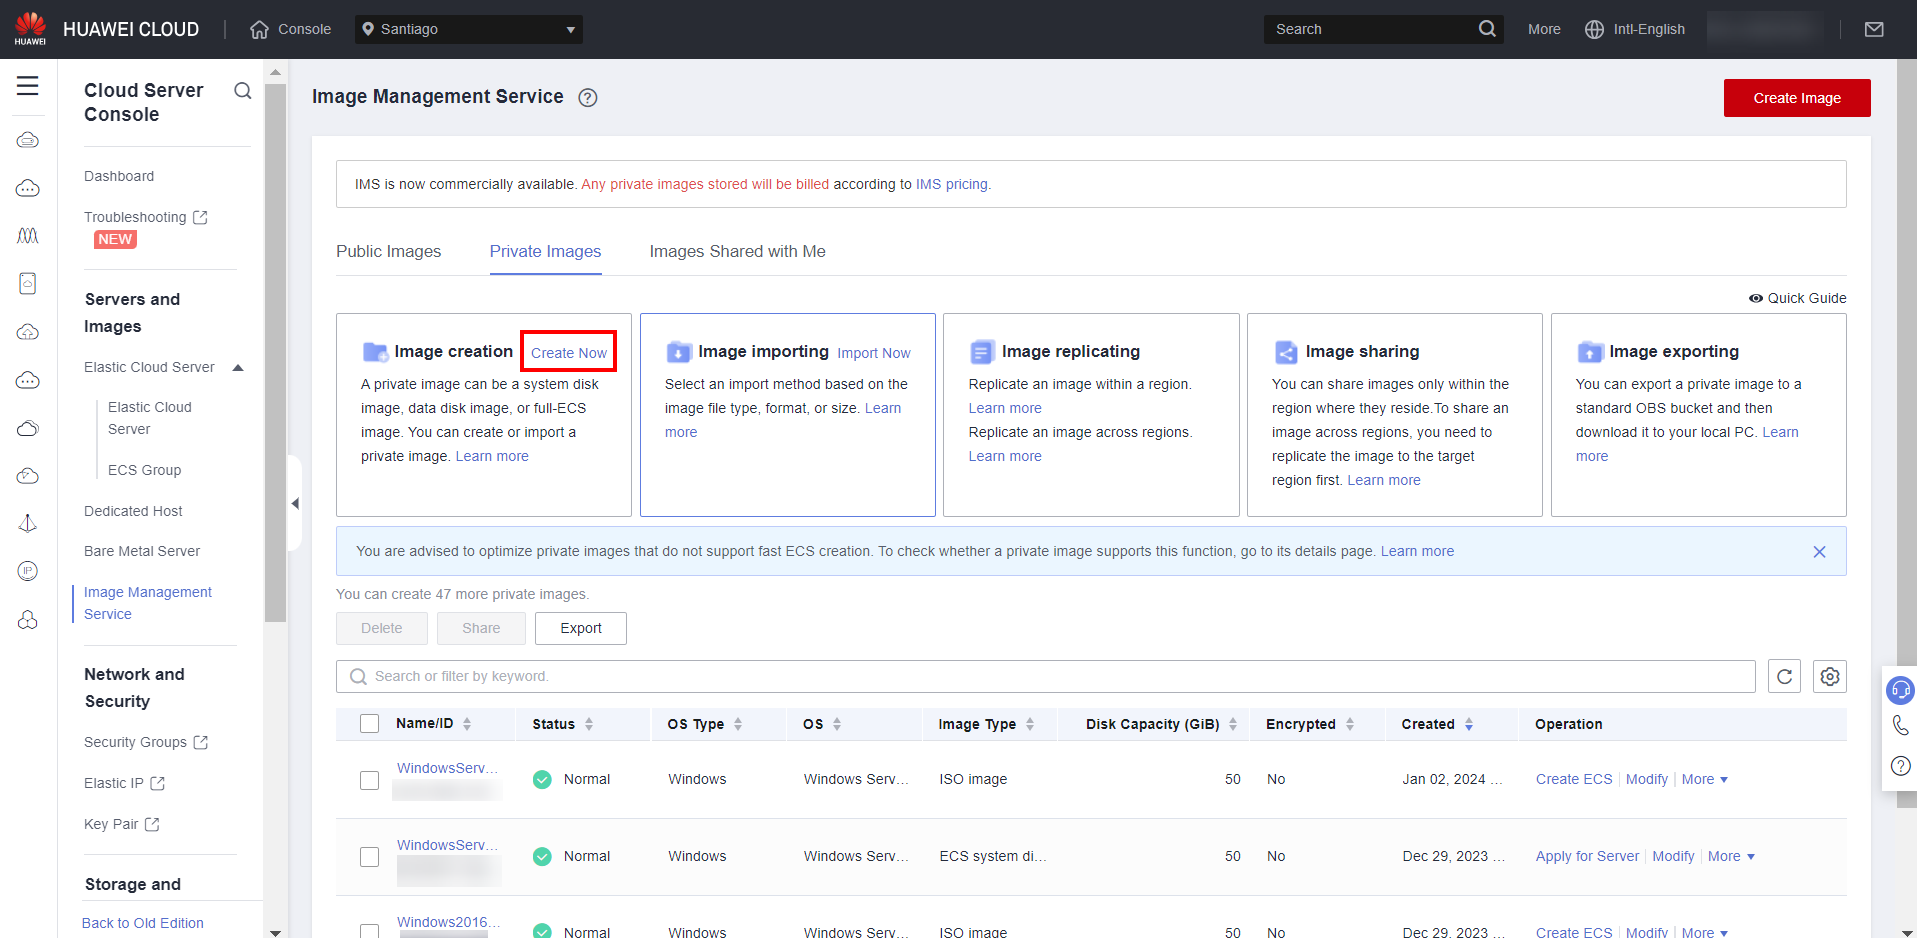
Go to the “Private Images” section and click “Create Now”.
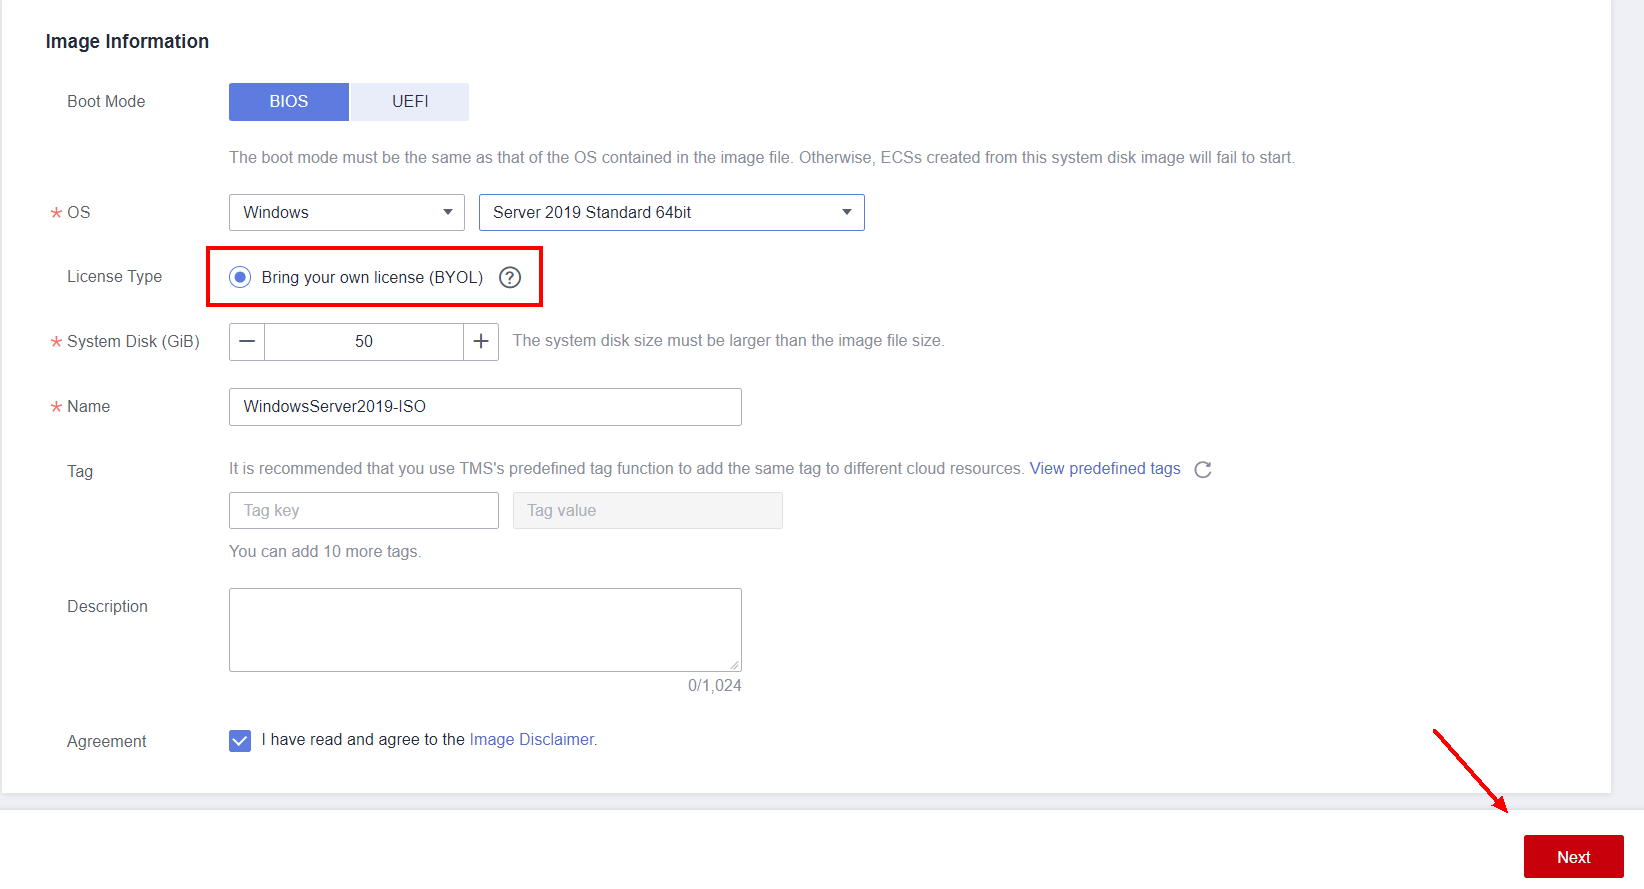
Configure the parameters according to the instance image that will be created. In this case, the Windows Server 2019 Standard OS.
For Windows images, select the “Bring your own license (BYOL)” option.
Click “Next” after configuring all fields.
Check if the information is correct and click “Submit”.
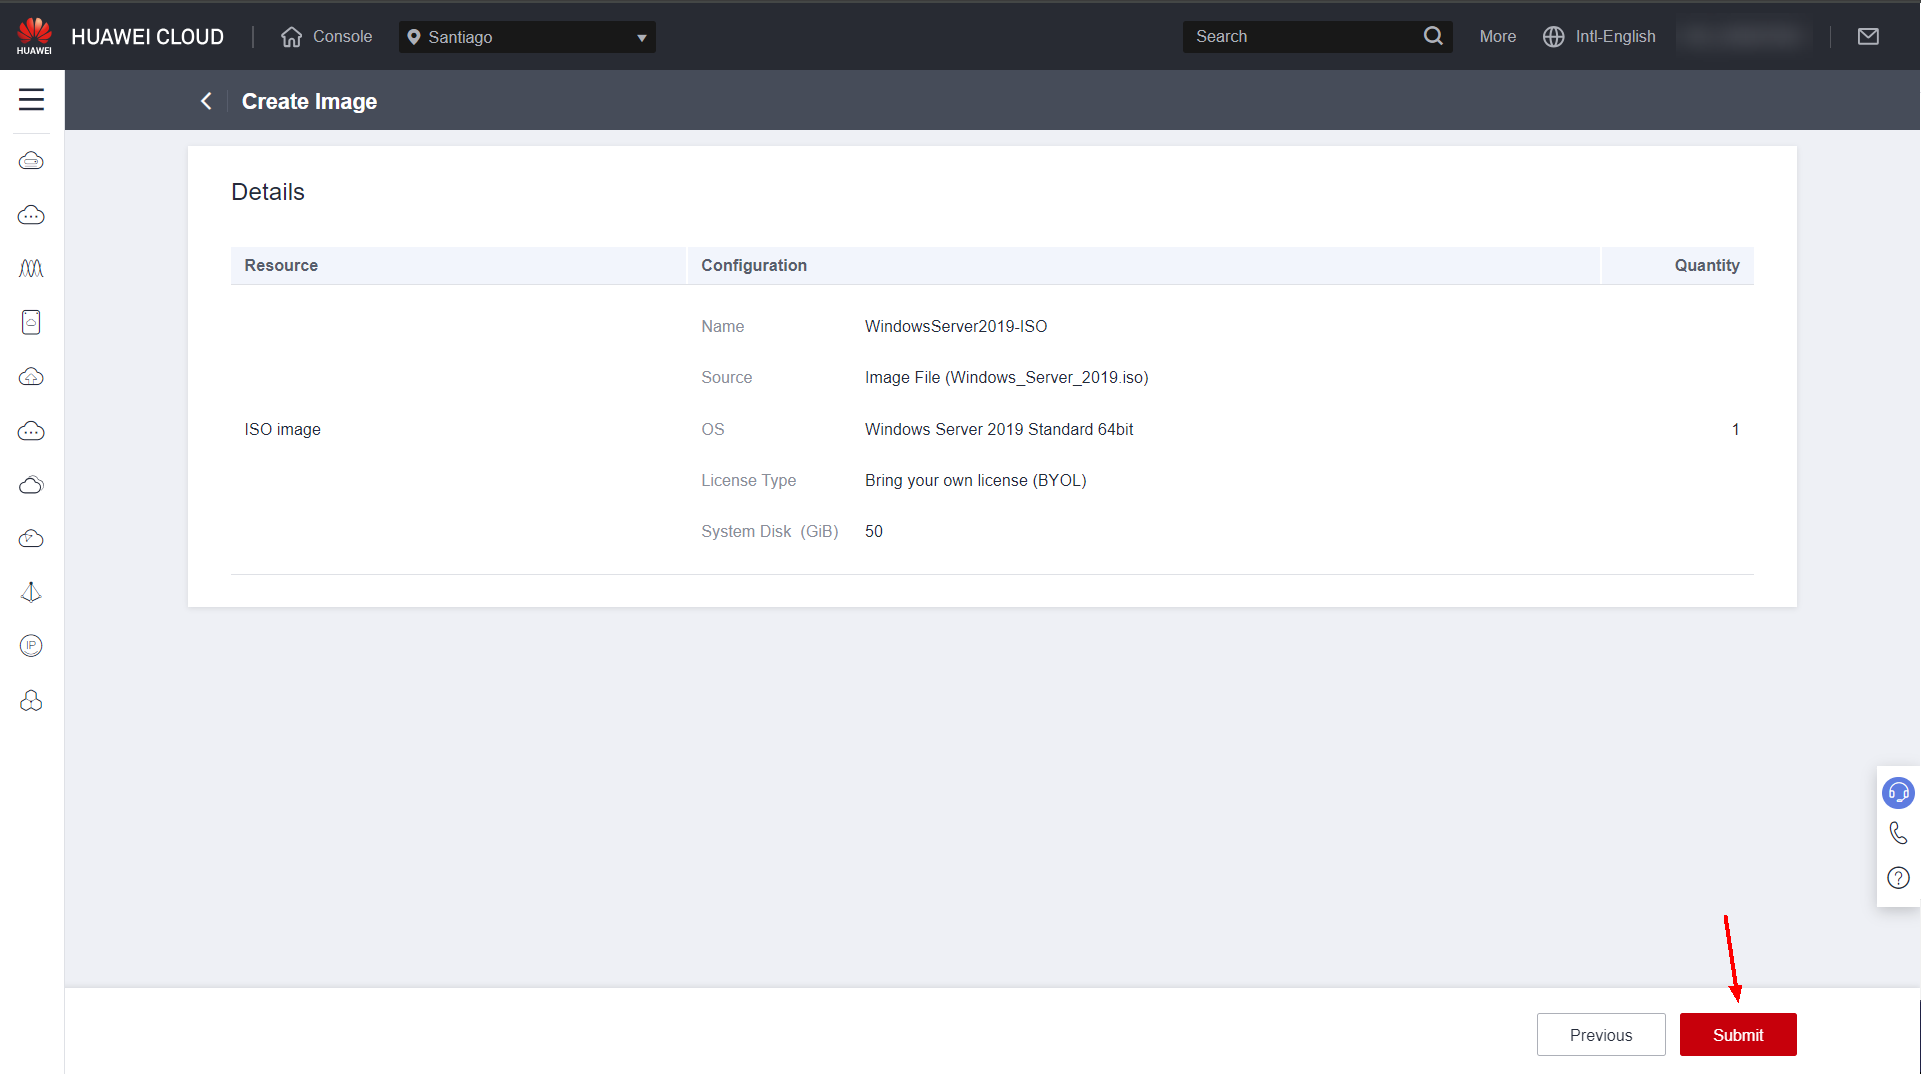
Wait until the ISO image is created and click “Create ECS” to create an instance of the generated image.

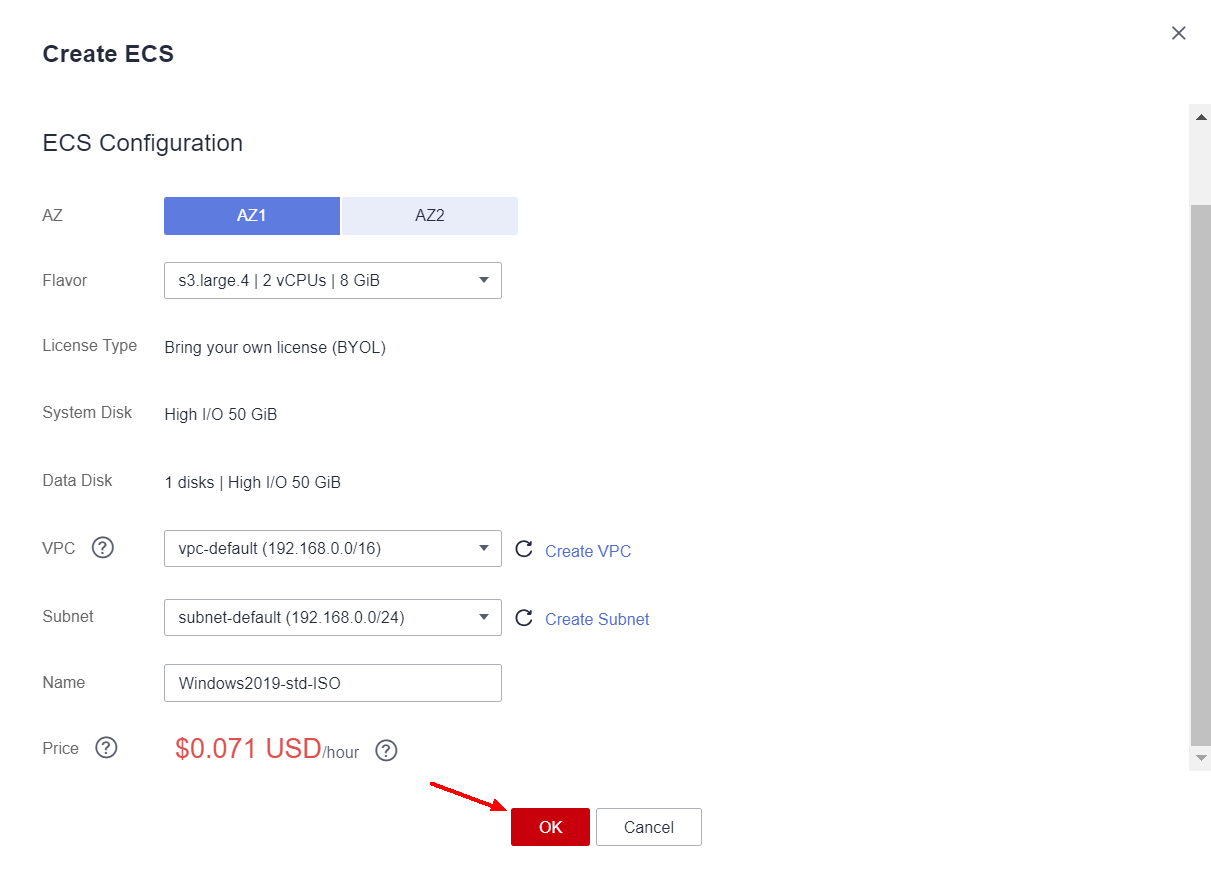
Configure the information required to create the ECS and click “OK” to create the ECS.
The next steps will be important to configure the image with the software and settings required for the proper functioning of the instances created from this image.
OS Installation
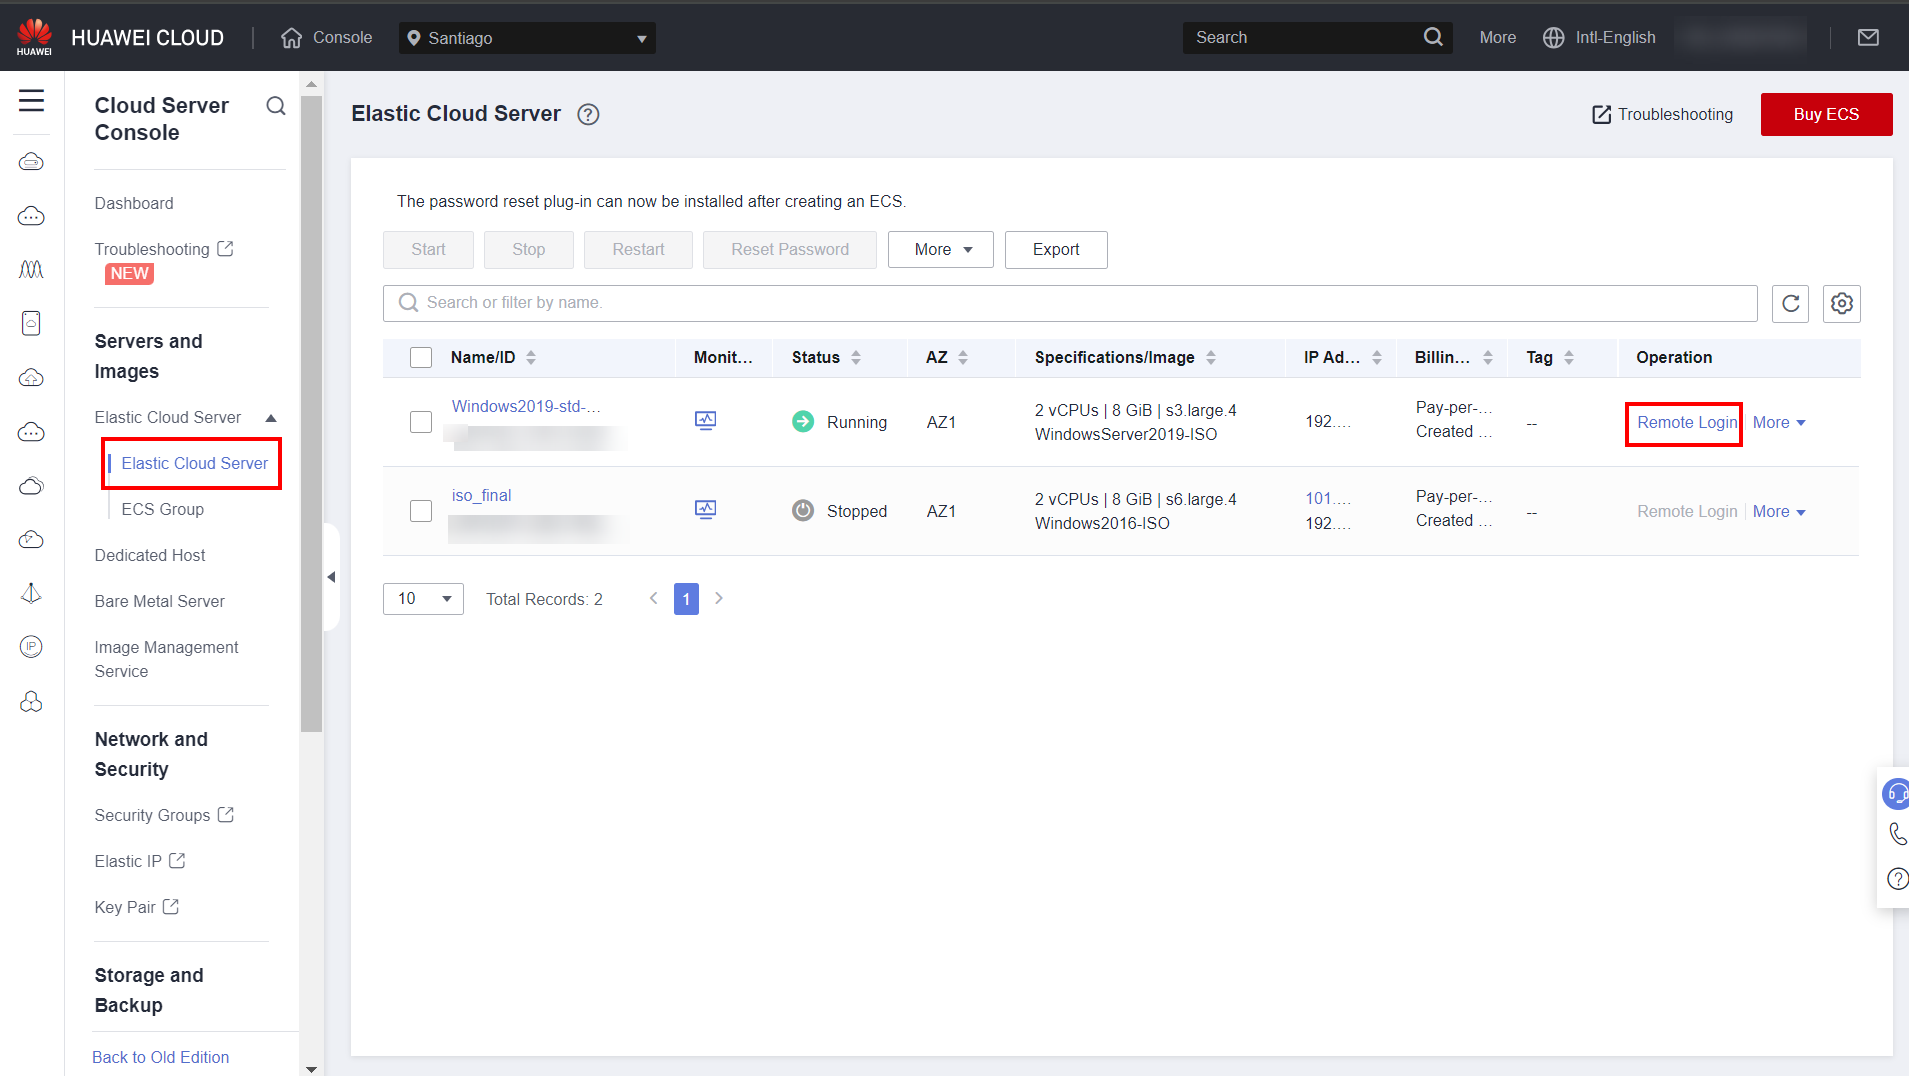
Access the Huawei Cloud console and go to the ECS service section. Click “Remote Login” to remotely access the instance created in step 4 of this document.
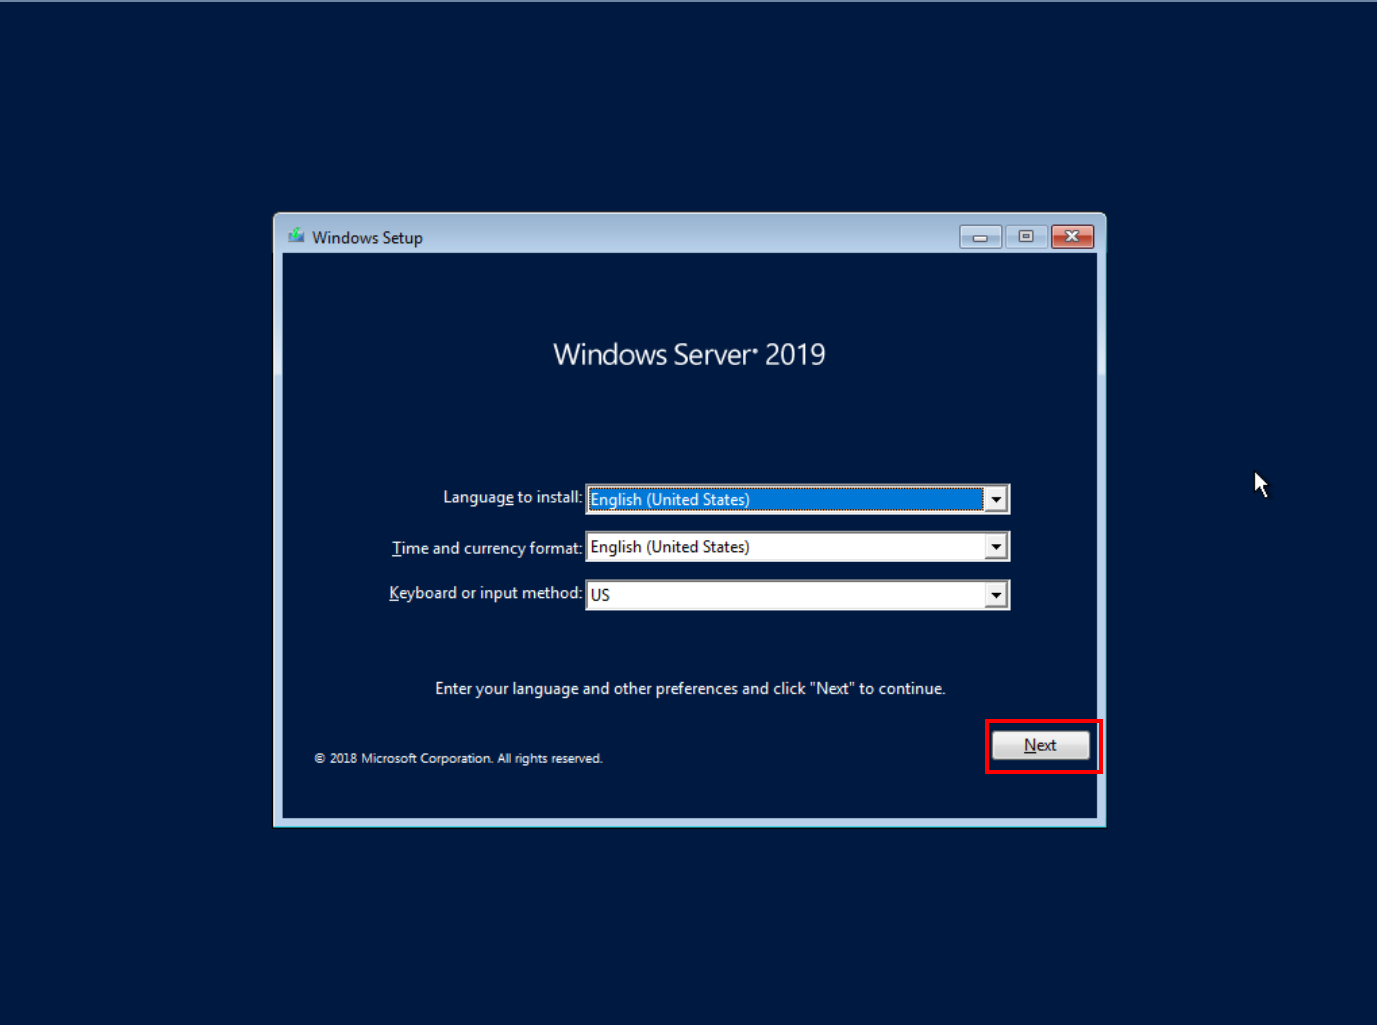
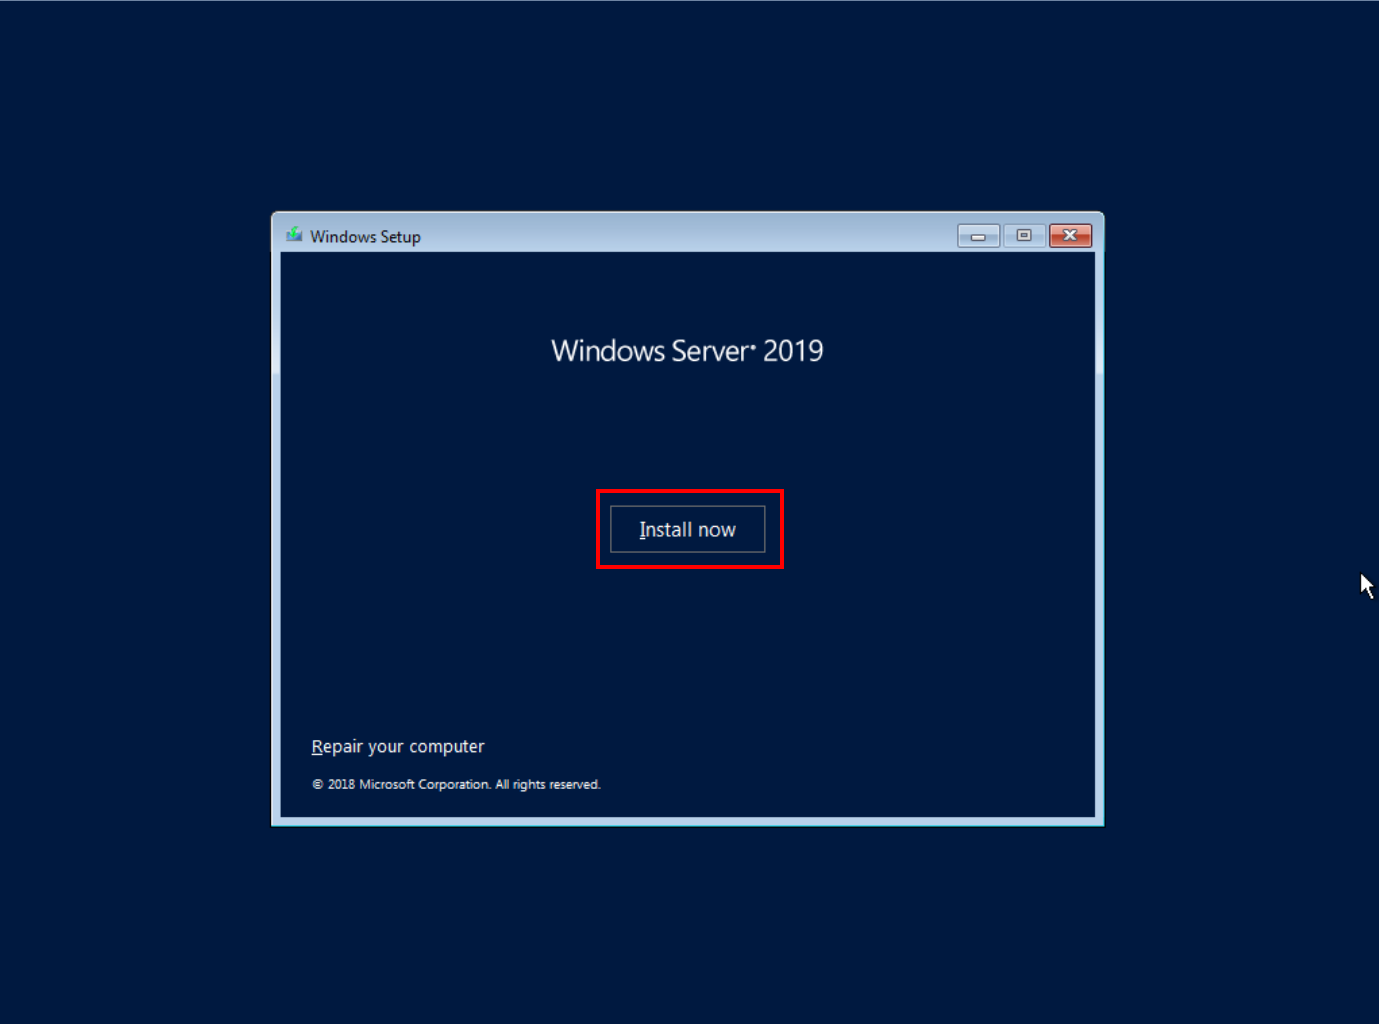
Set the system language and click “Next” and “Install now”.
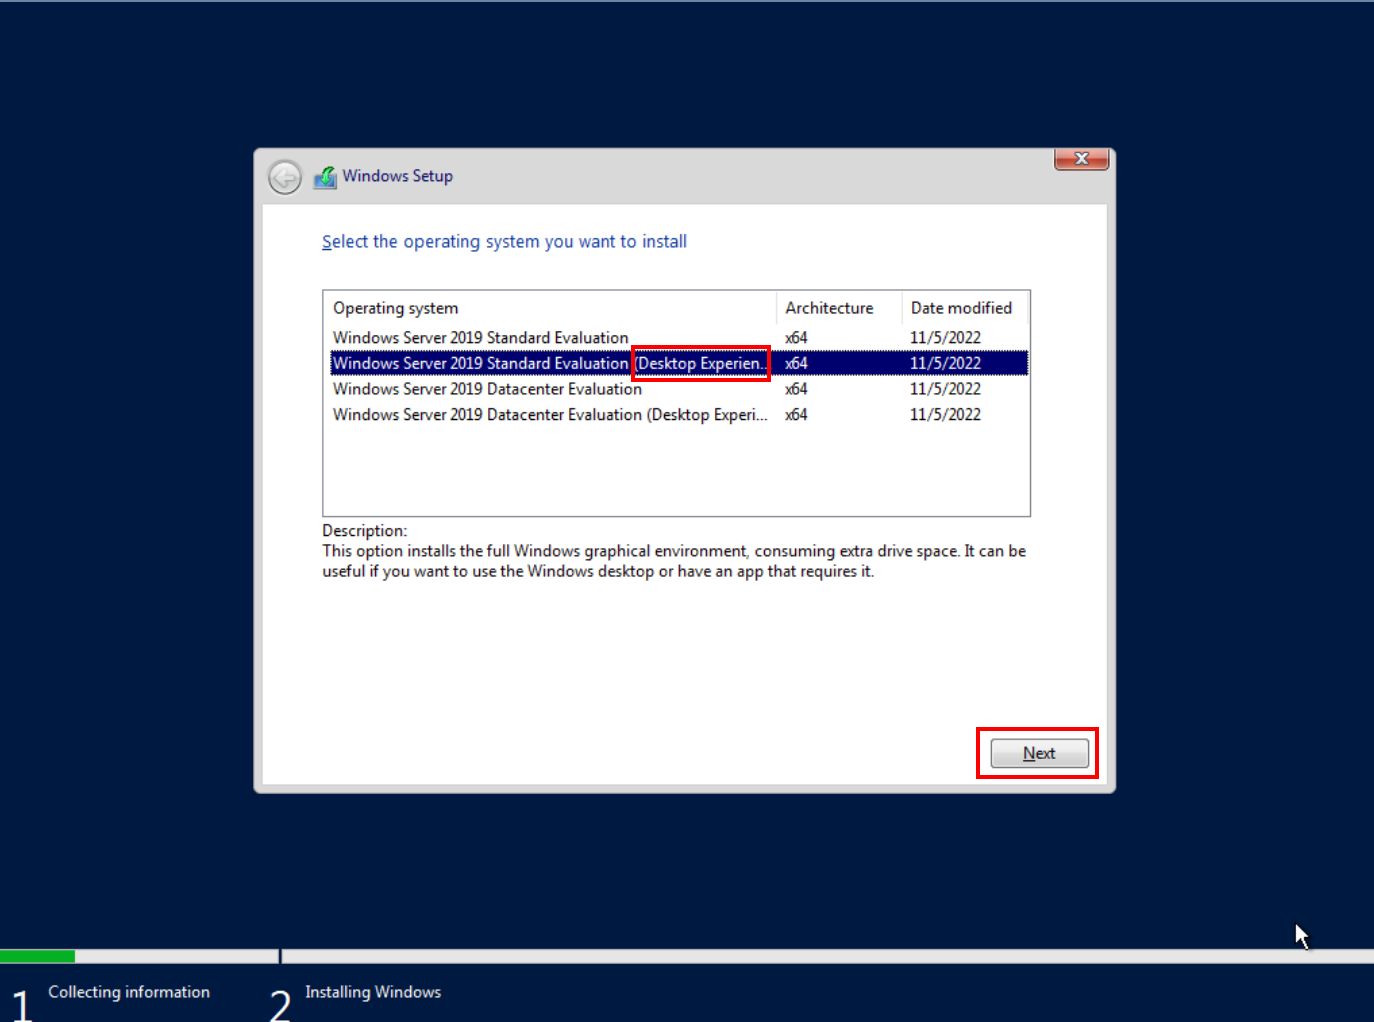
Select the OS version to be installed, check that the option contains “Desktop Experience” so that a graphical interface is installed with the system, if desired, and click “Next”.
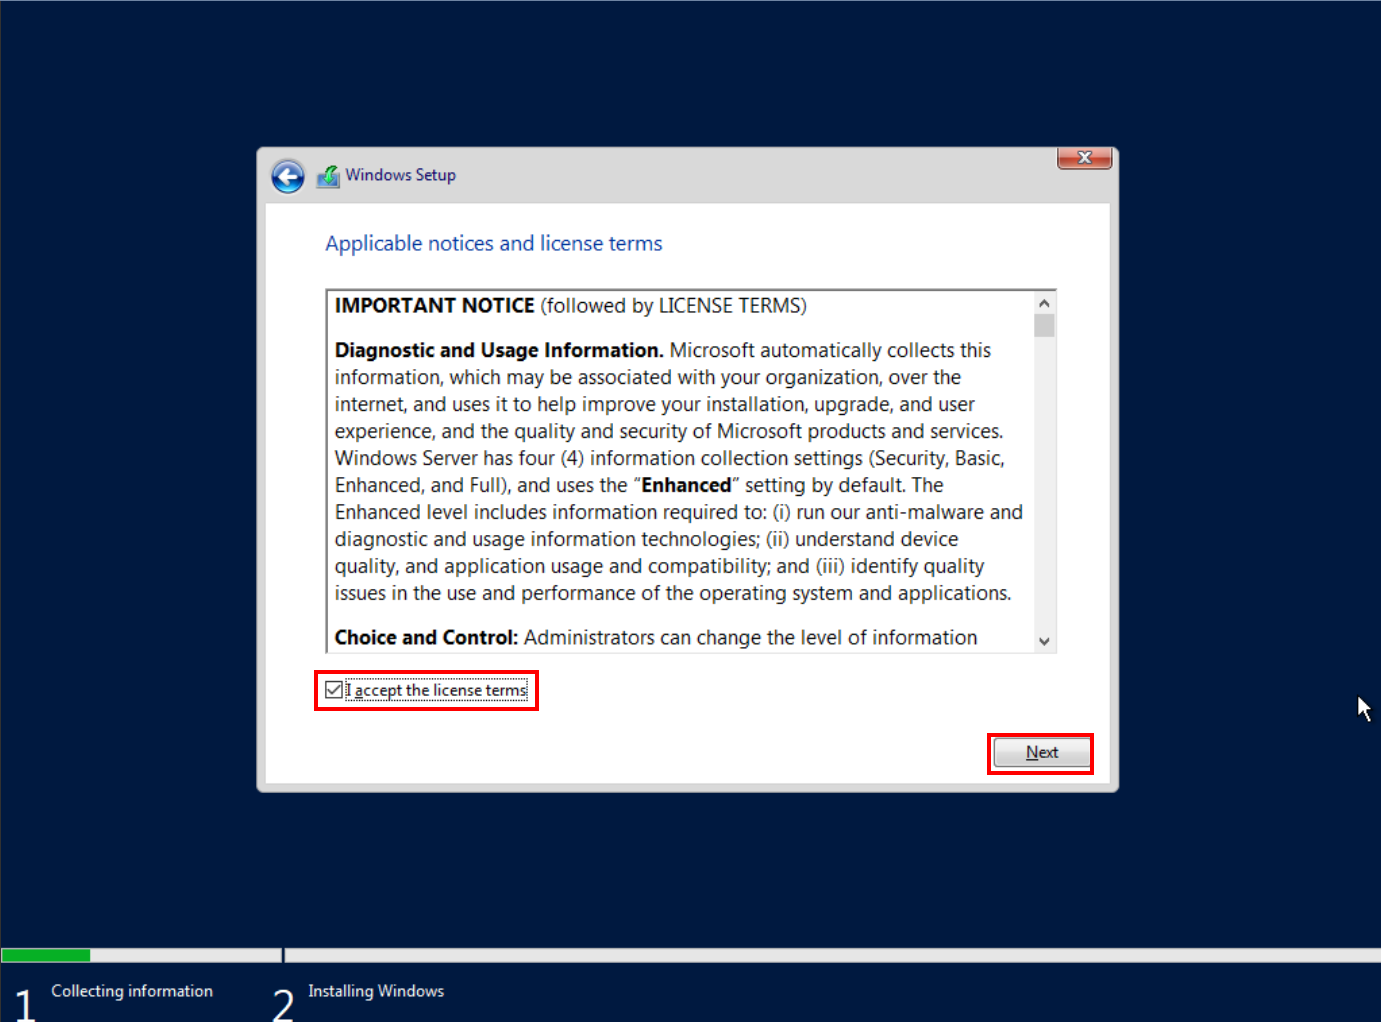
Accept the terms and click “Next”.
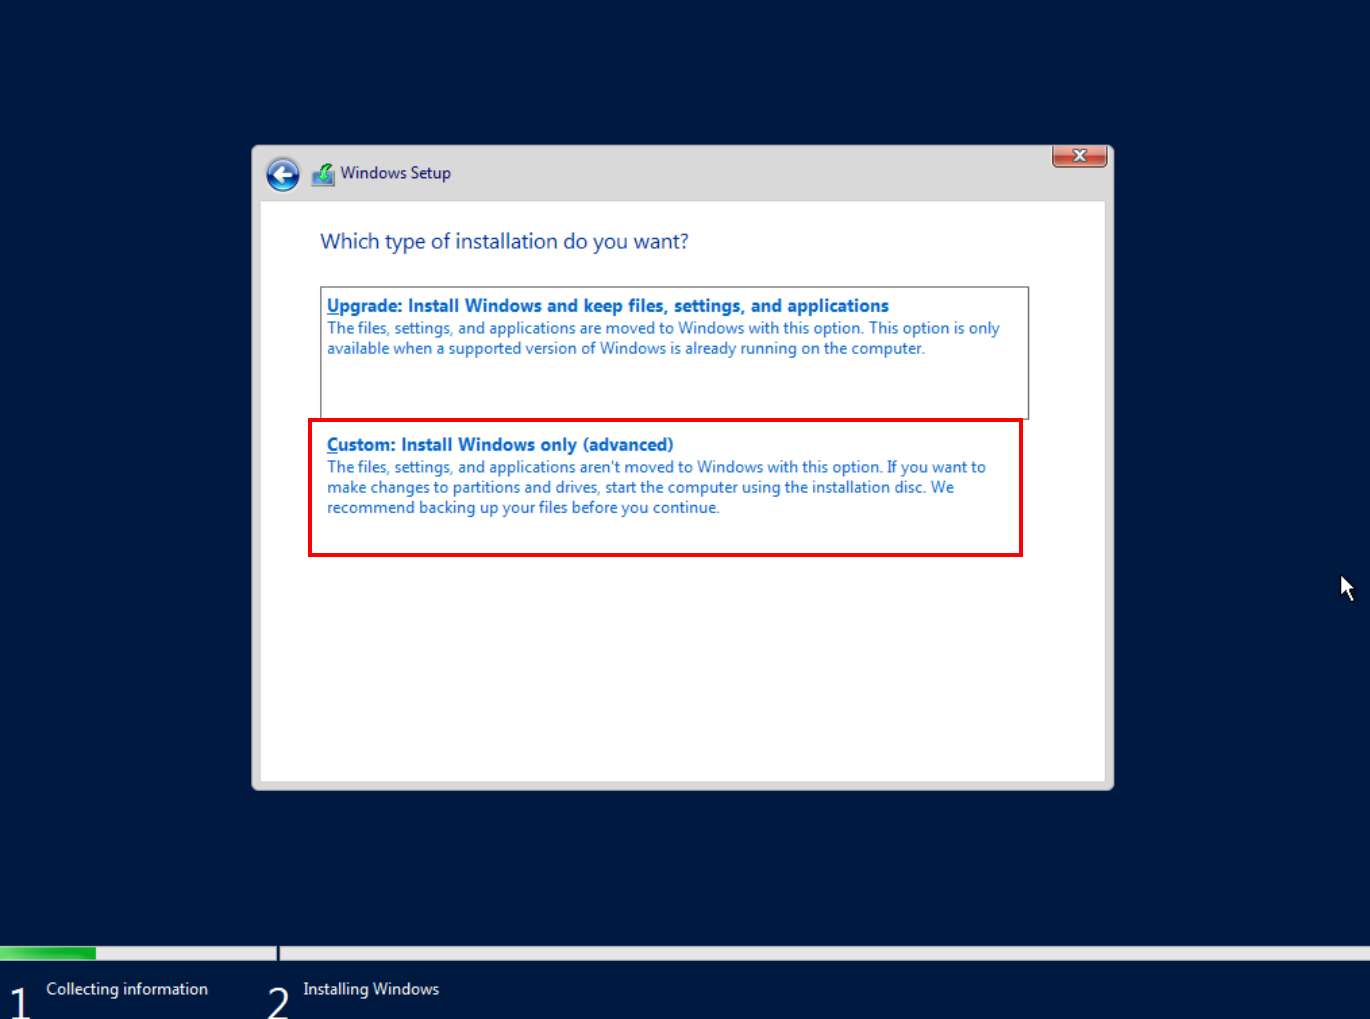
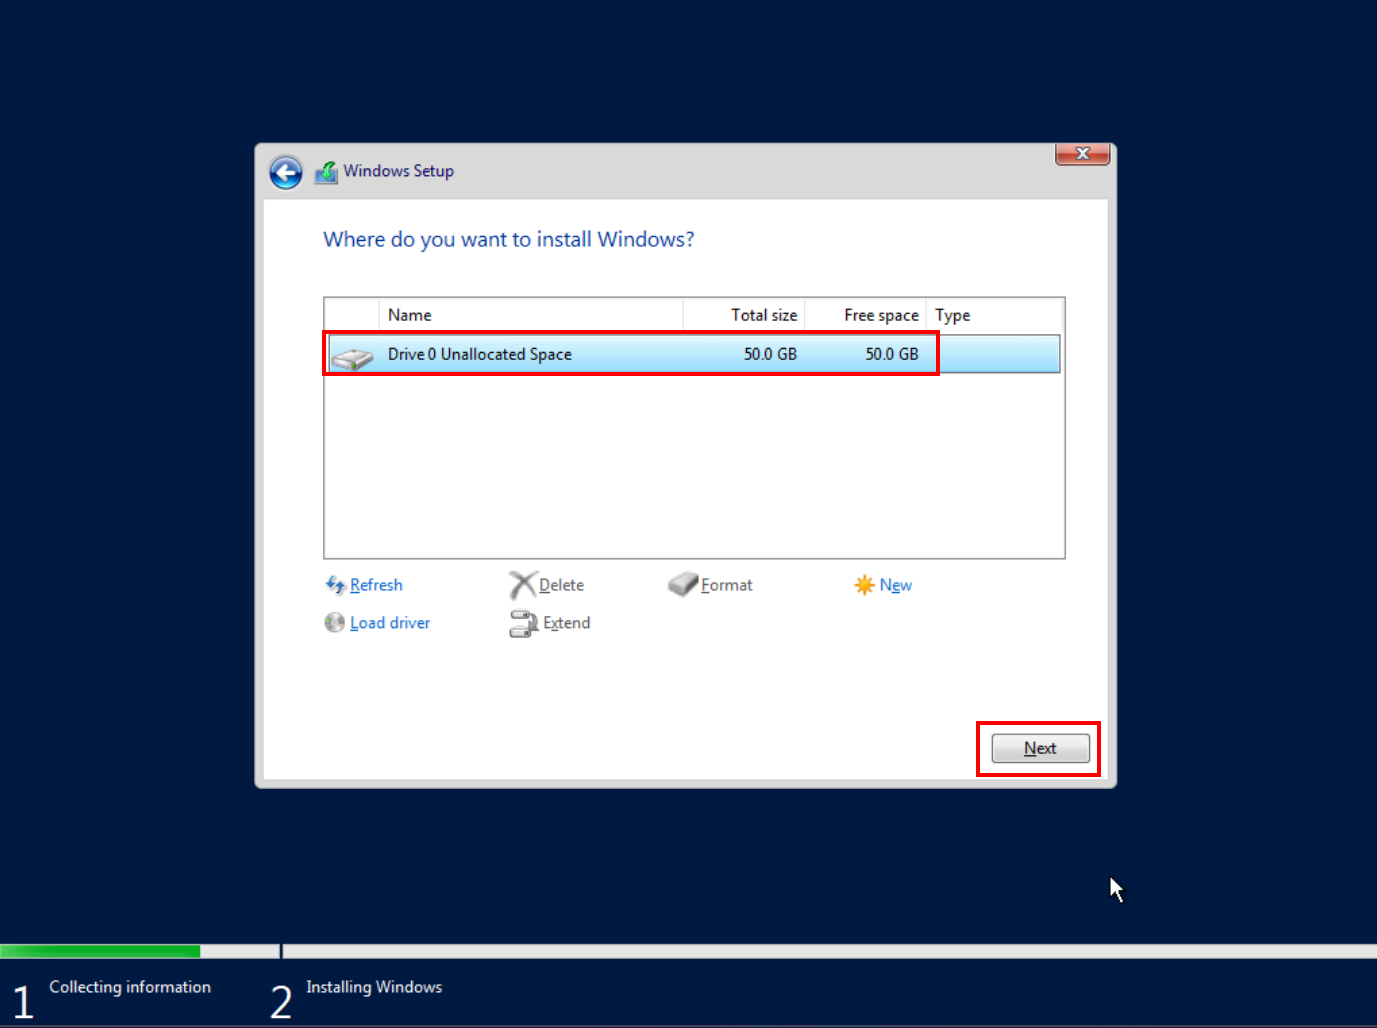
Select the “Custom: Install Windows only (advanced)” option.
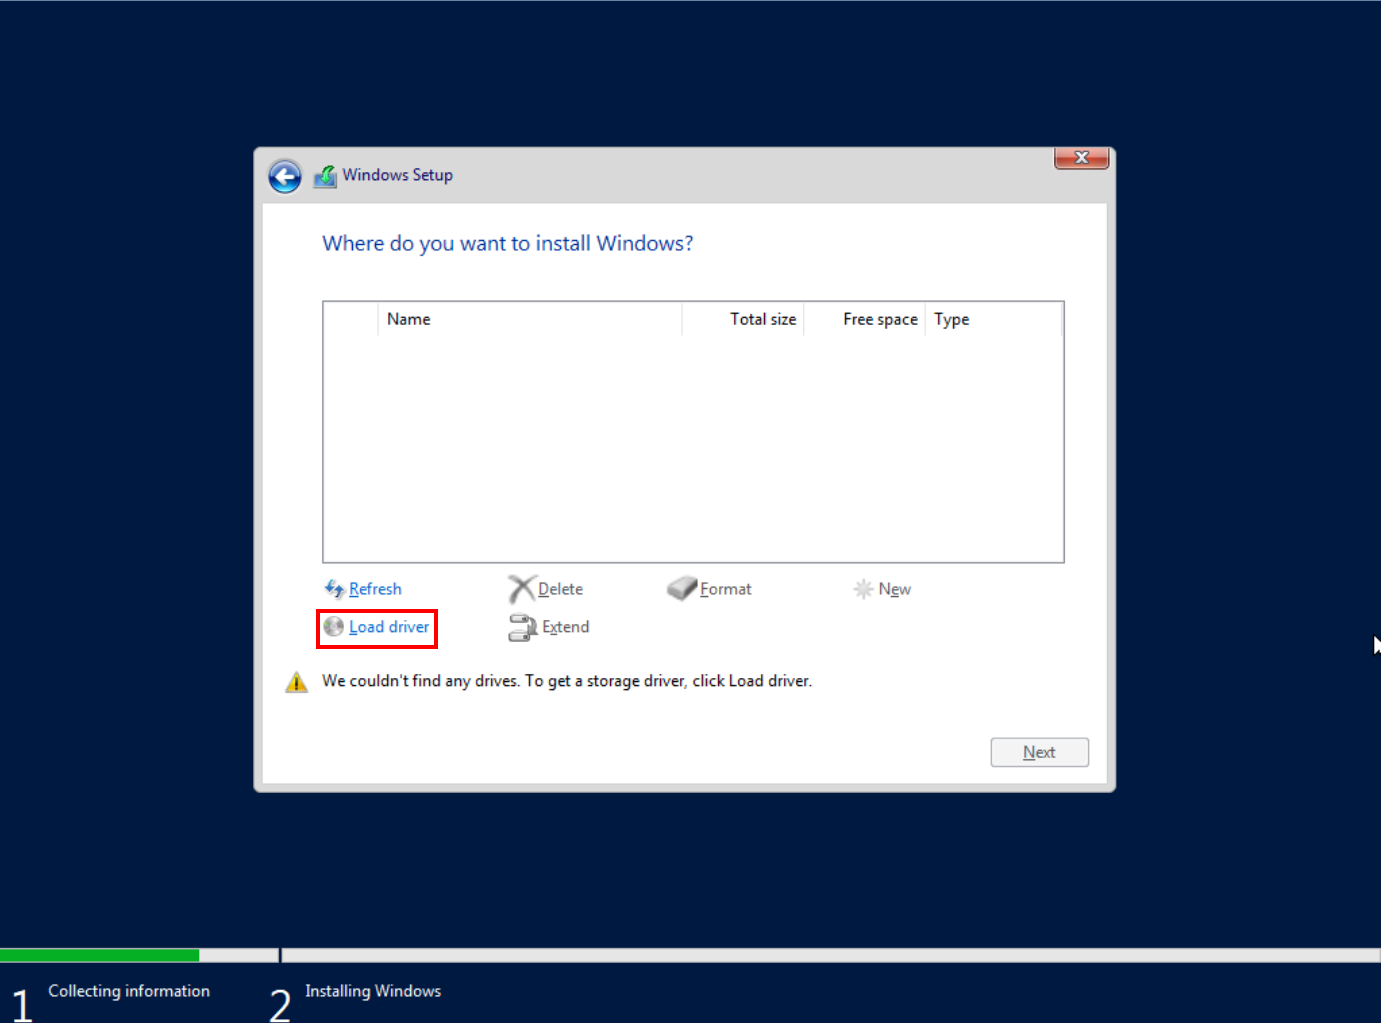
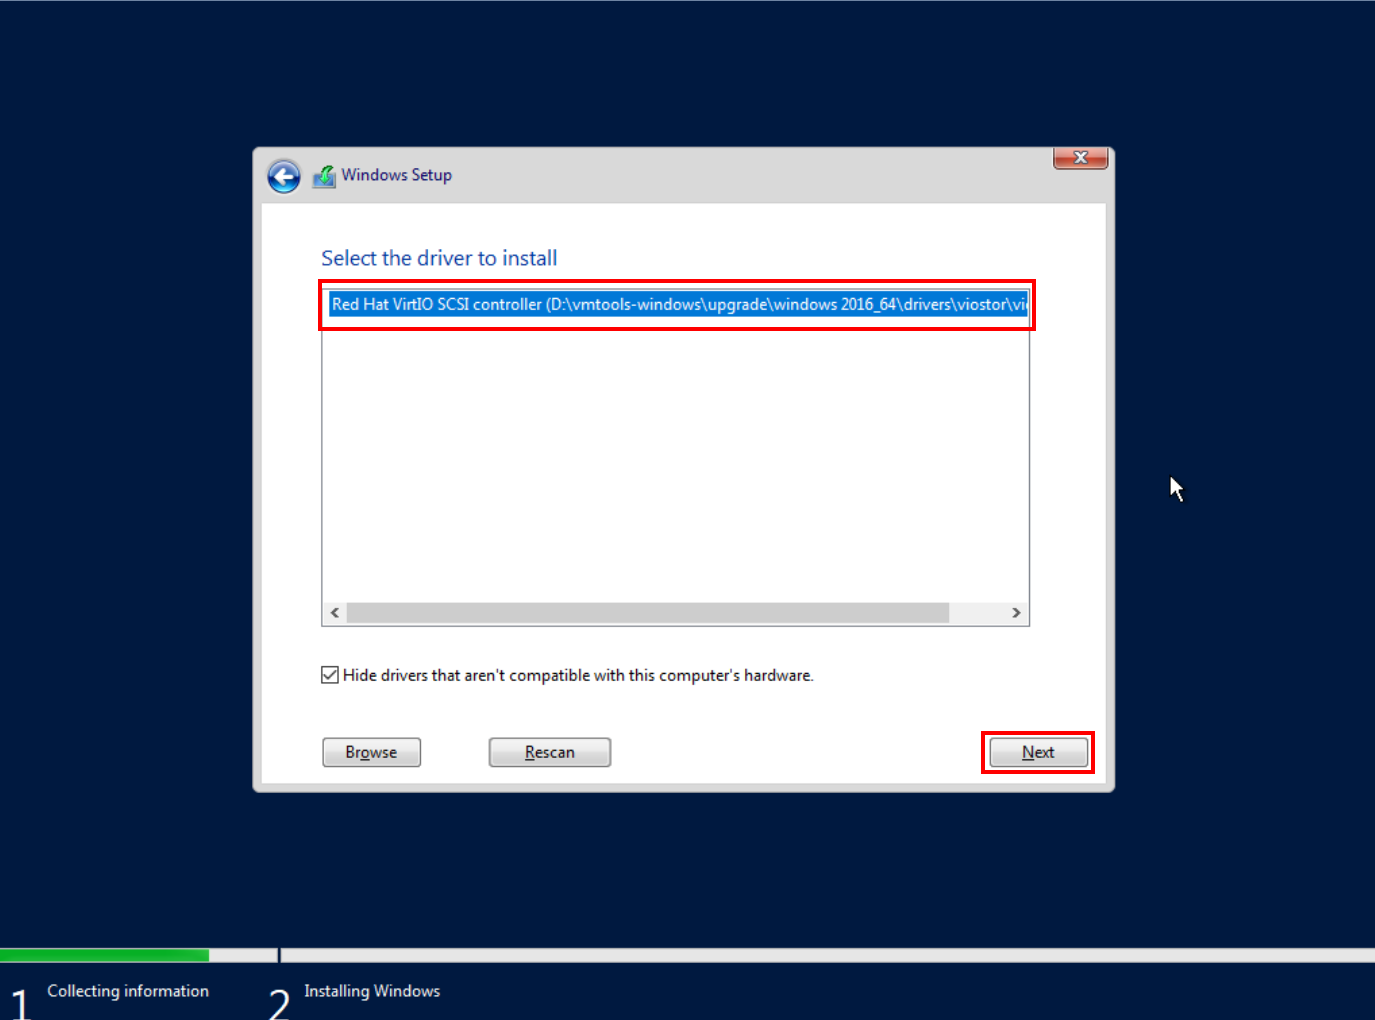
Click “Load driver” and then “Browse”. Select the following path: “C:\vmtools-windows/upgrade/your-OS-version/drivers/viostor”.
Note: For Windows Server versions later than 2016 (2019, 2022 and 2025), select the driver for Windows Server 2016.

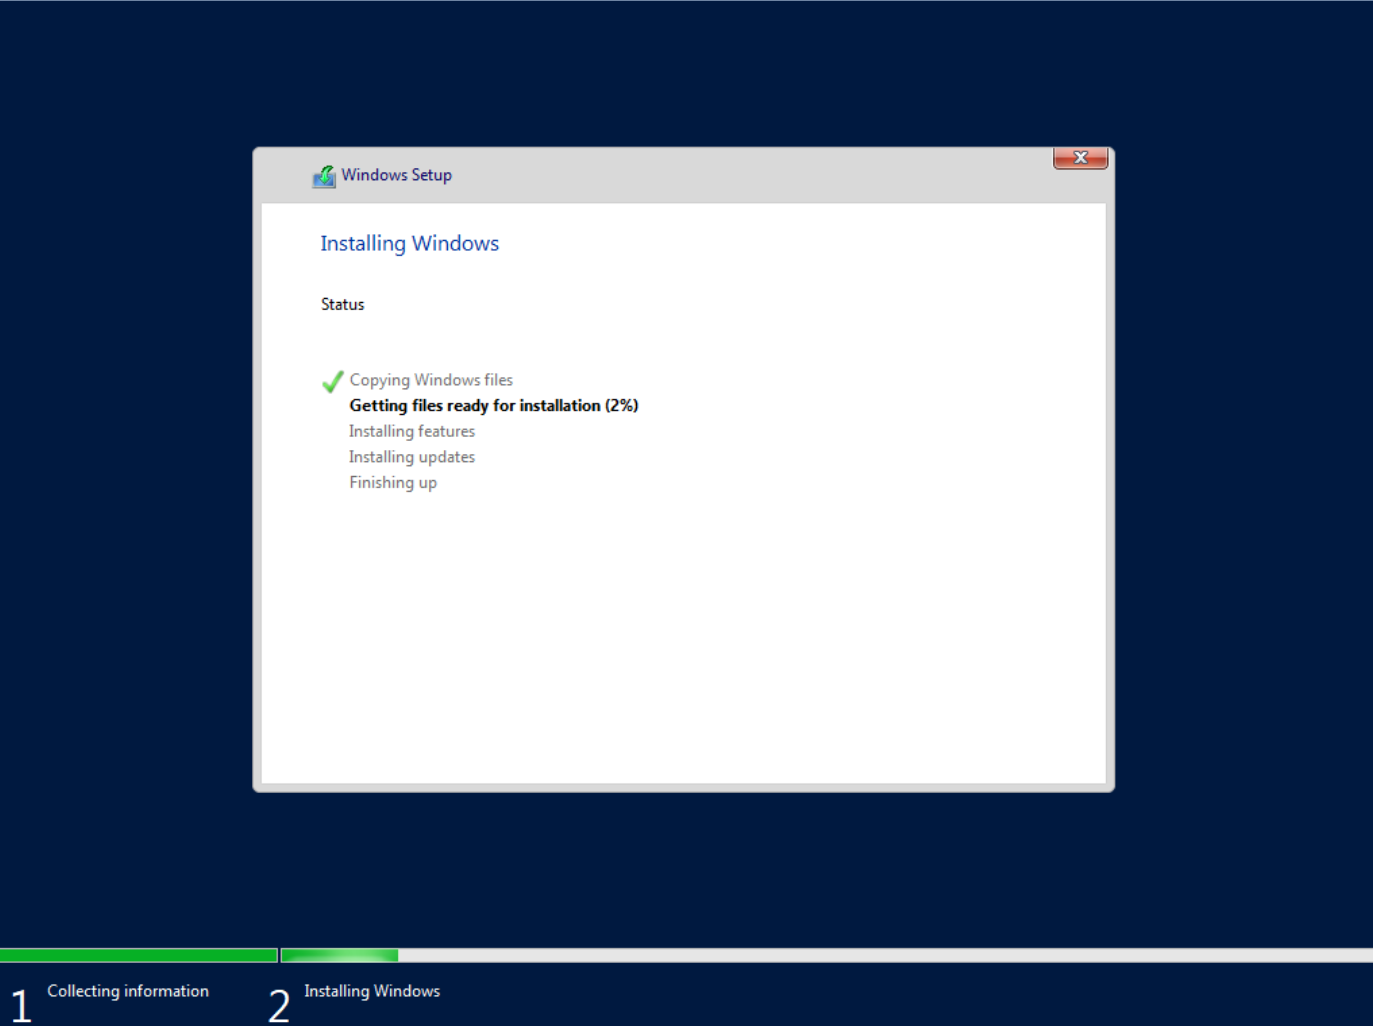
Click “Next” twice in a row and wait for Windows to install.
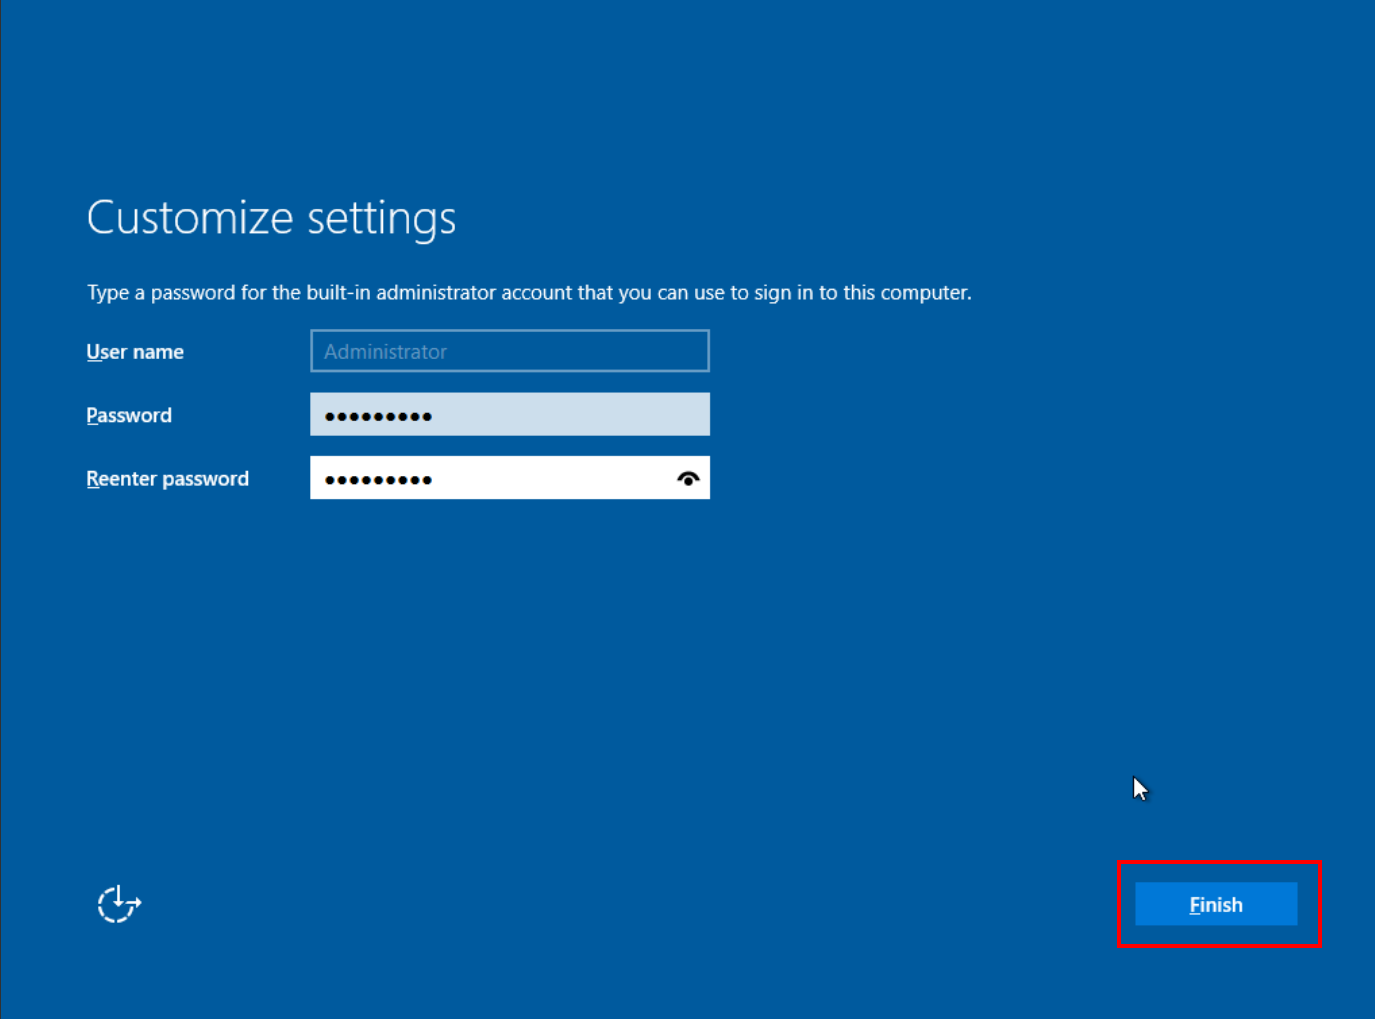
Set a password for the Windows Administrator profile and click “Finish” to complete the Windows installation.
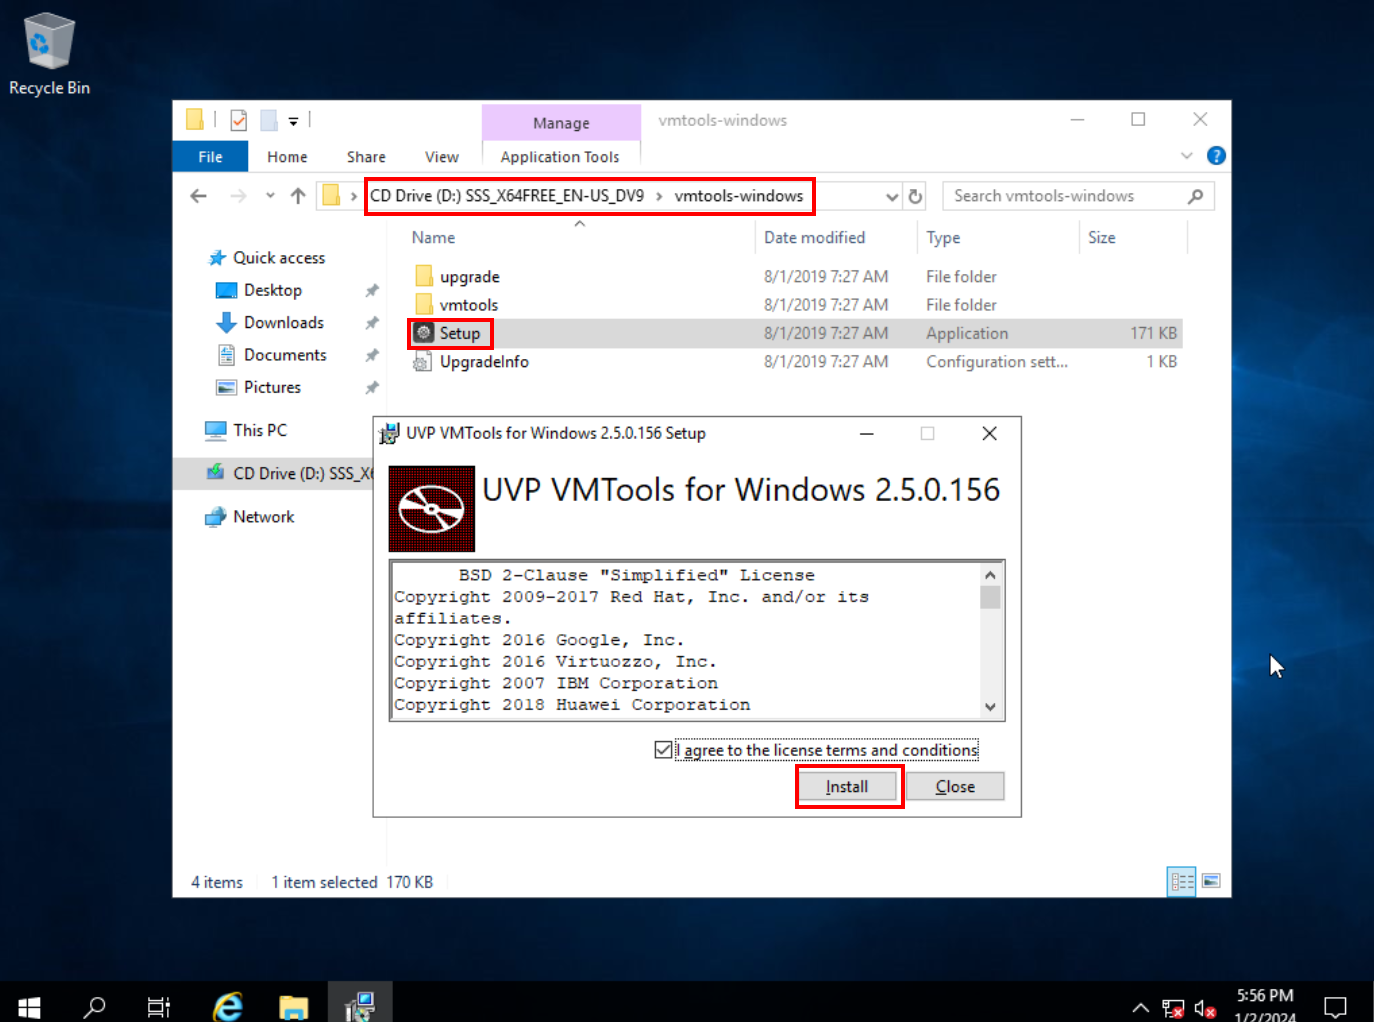
Go to the Windows desktop, open File Explorer, and navigate to the ejectable drive. Open the “vmtools-windows” folder and install the “setup” software, which corresponds to the VMTools drivers.
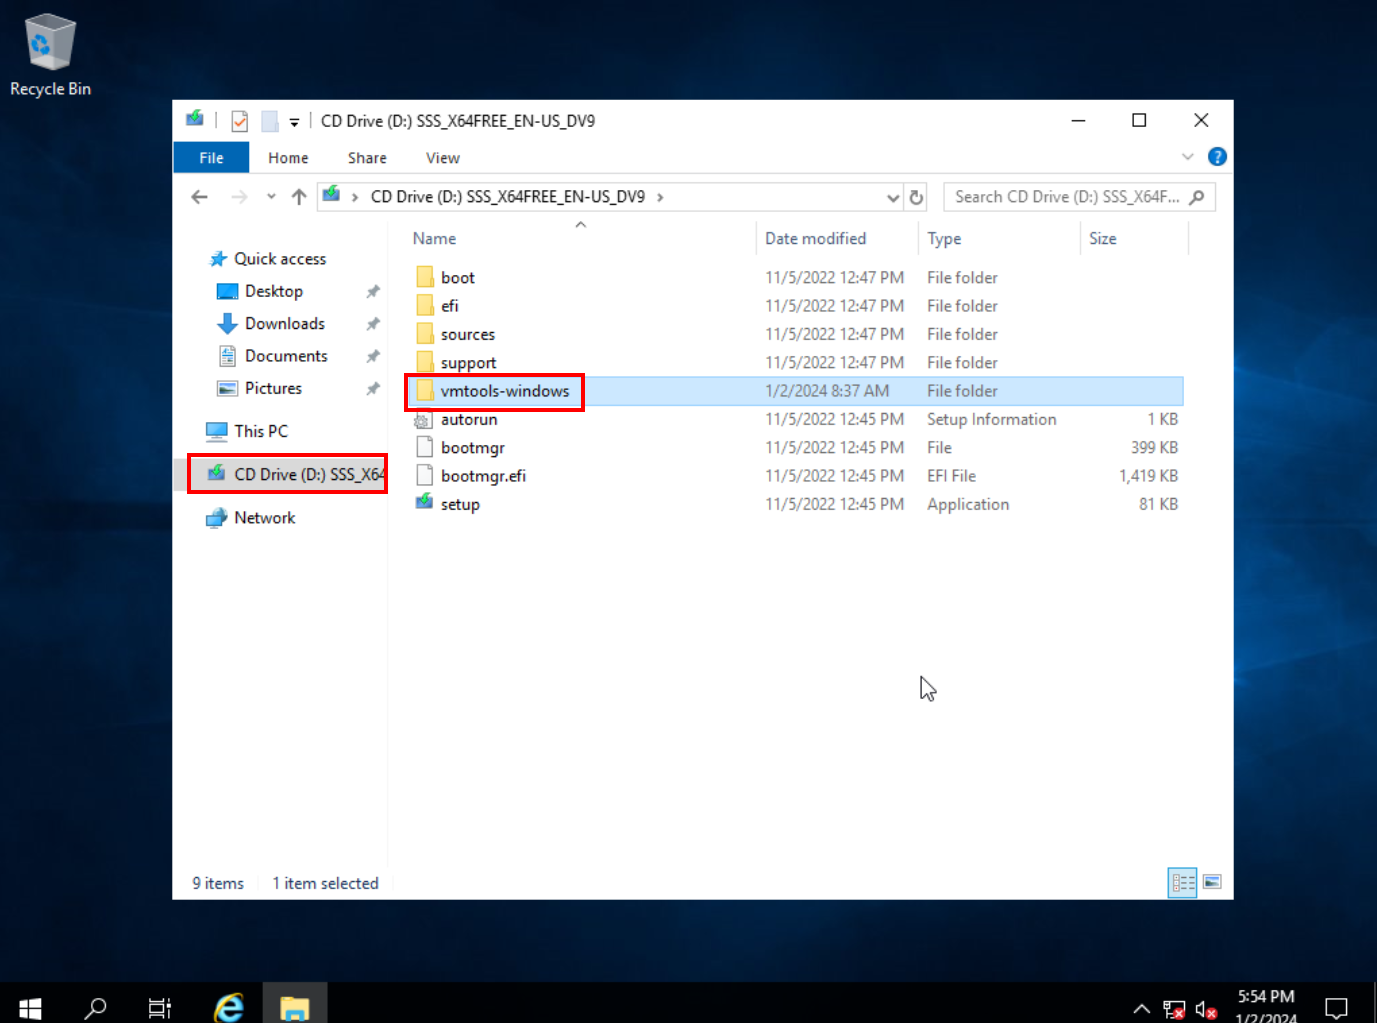
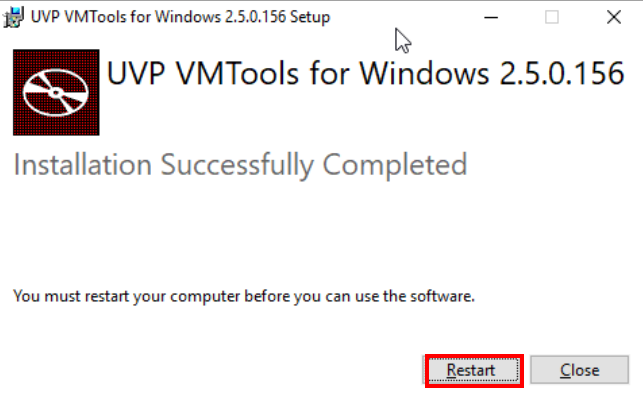
Restart the computer when prompted.
ECS Configuration
EIP
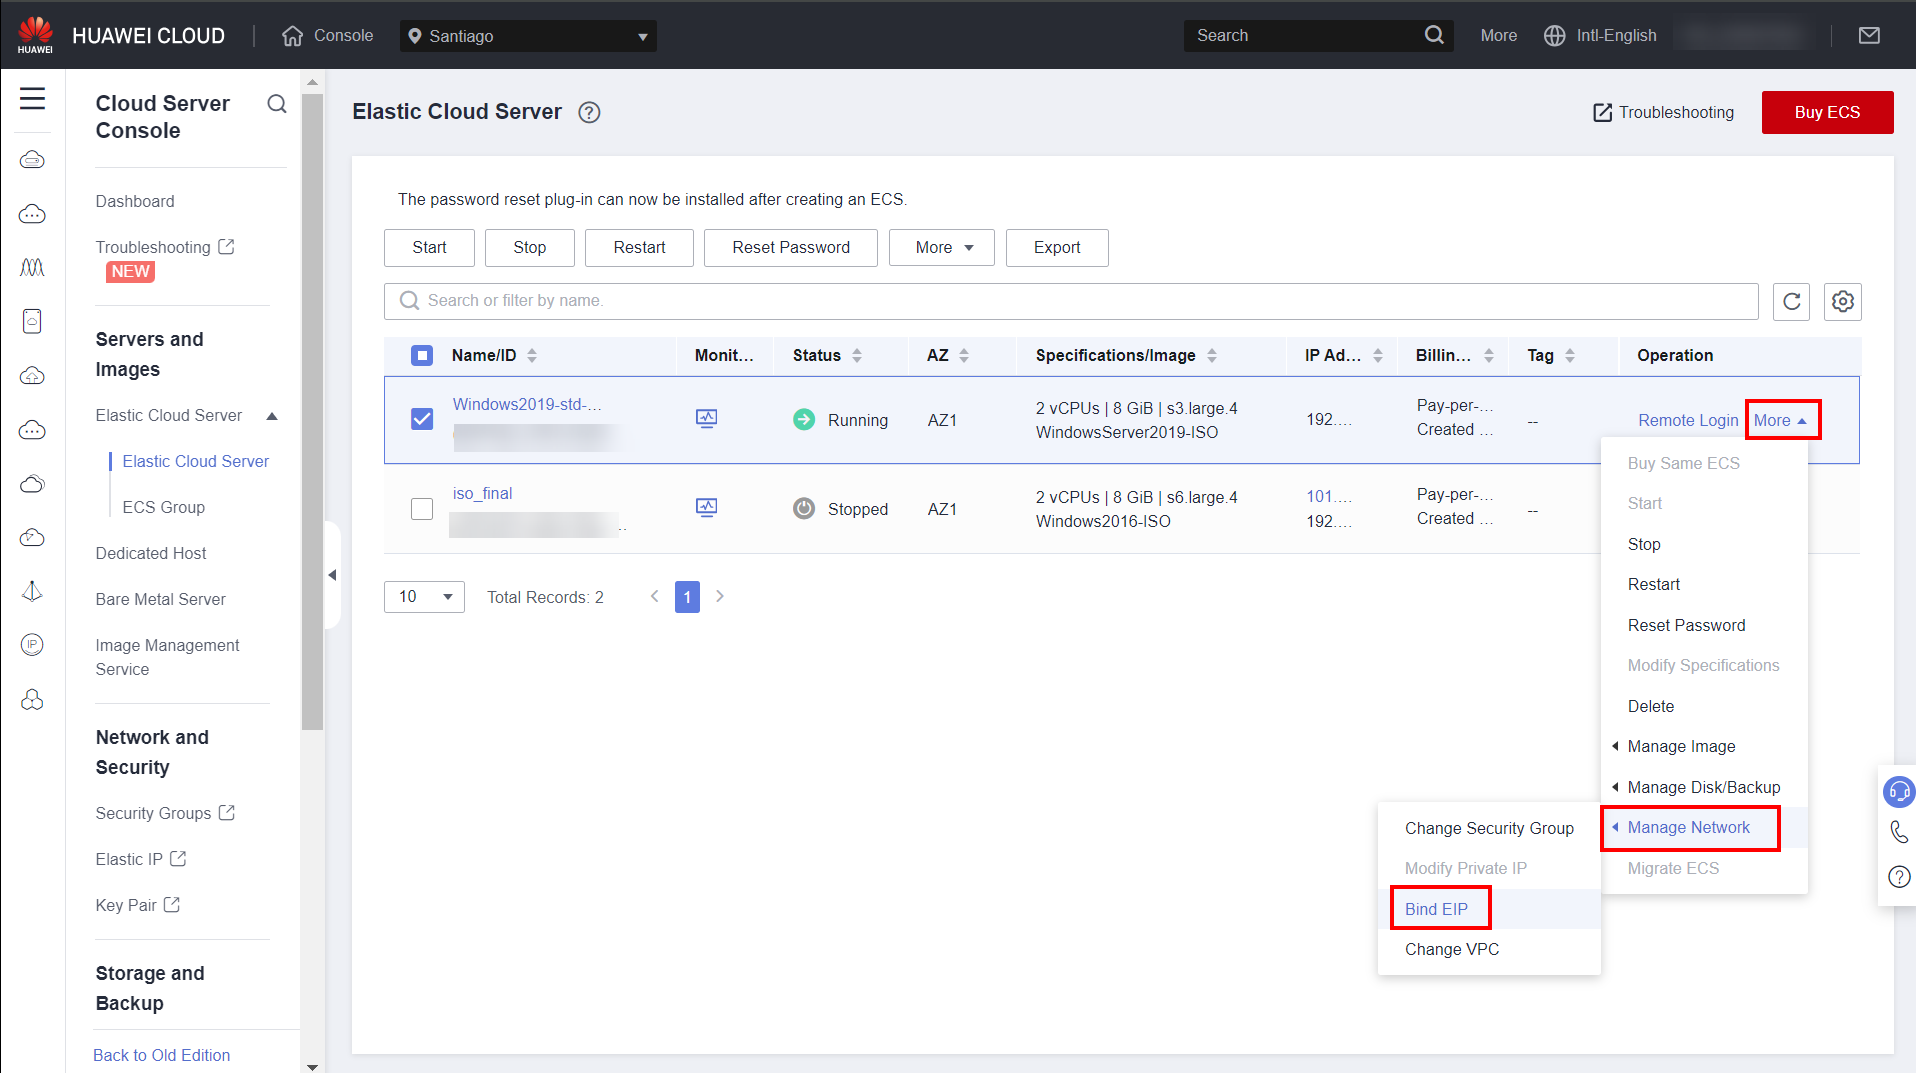
To provide Internet access to the ECS, it is necessary to attach an EIP to the ECS. To do this, click “More” next to the desired ECS in the ECS section of the Huawei Cloud Console, “Manage Network” and “Bind EIP”.
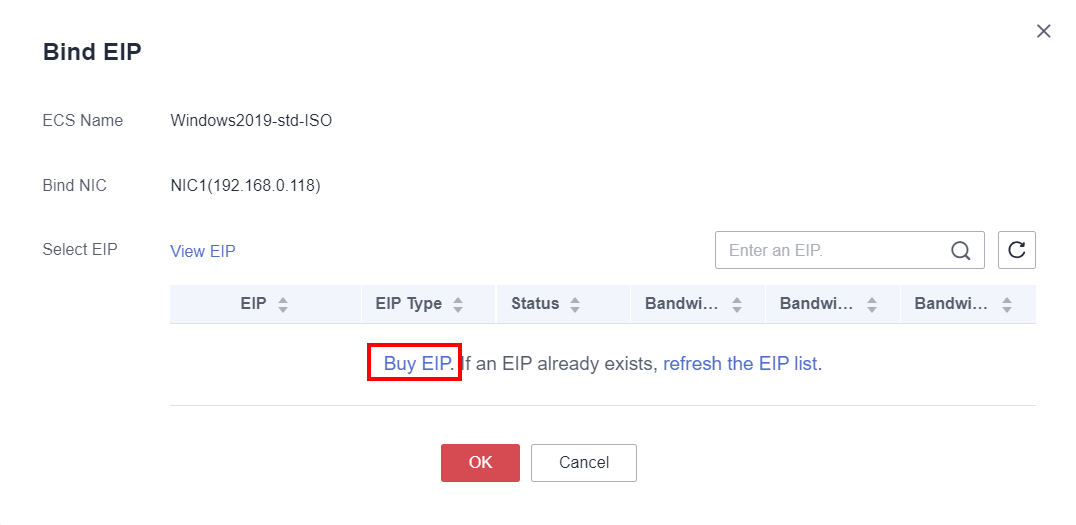
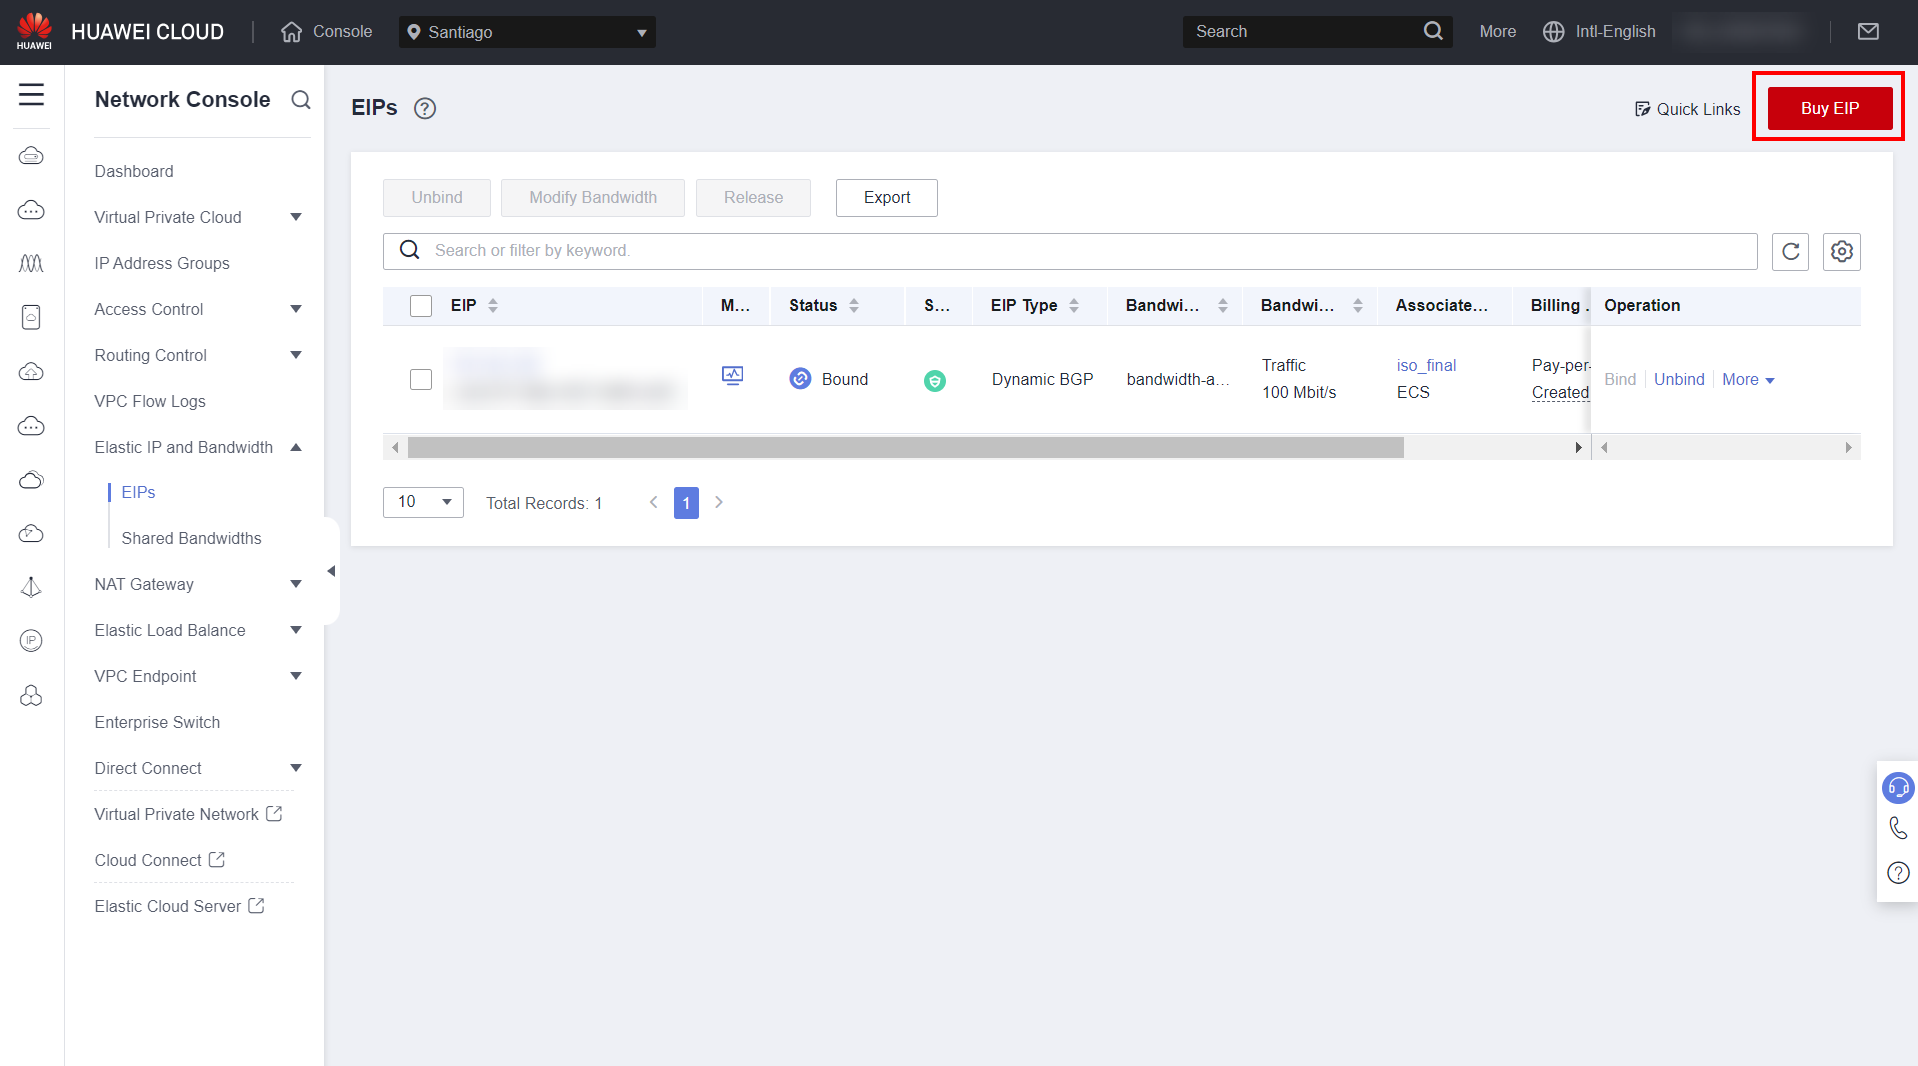
If no EIP is available, purchase an EIP by clicking “Buy EIP”.
Click “Buy EIP again”.
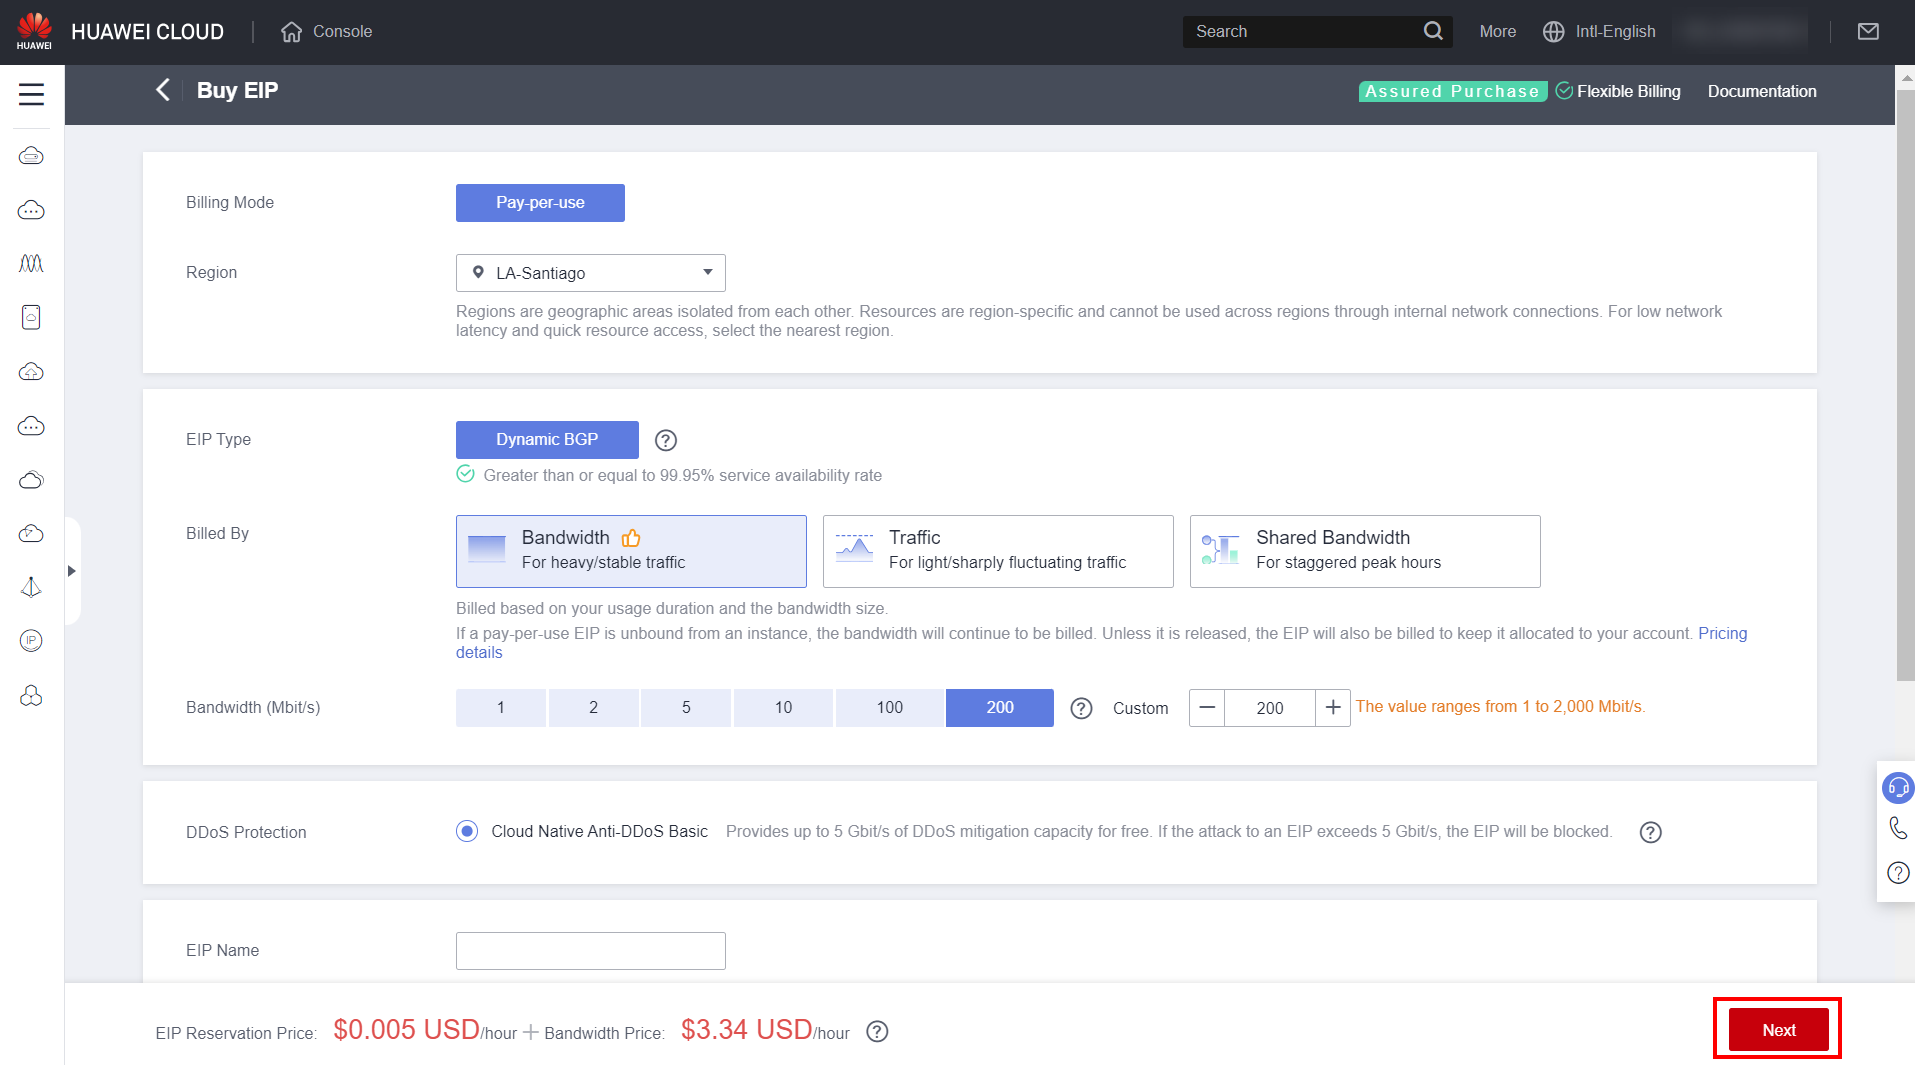
Select the parameters of the EIP that will be attached to the ECS, such as its bandwidth, and click “Next” and “Submit”.
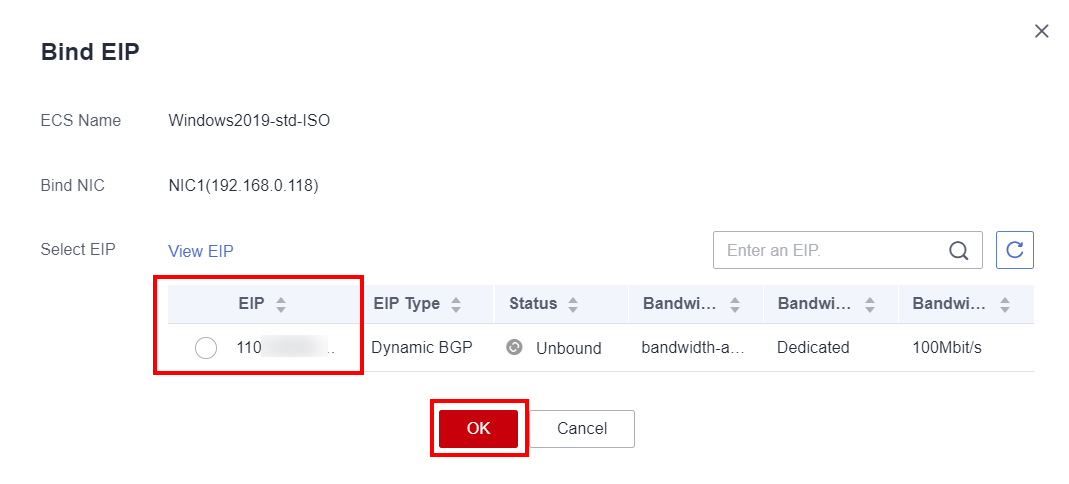
Select the purchased EIP to be attached to the ECS.
If you want to install system updates, proceed to section 6.2. Otherwise, skip to section 6.3. Warning: It is important that system updates are performed before any other system configuration if chosen.
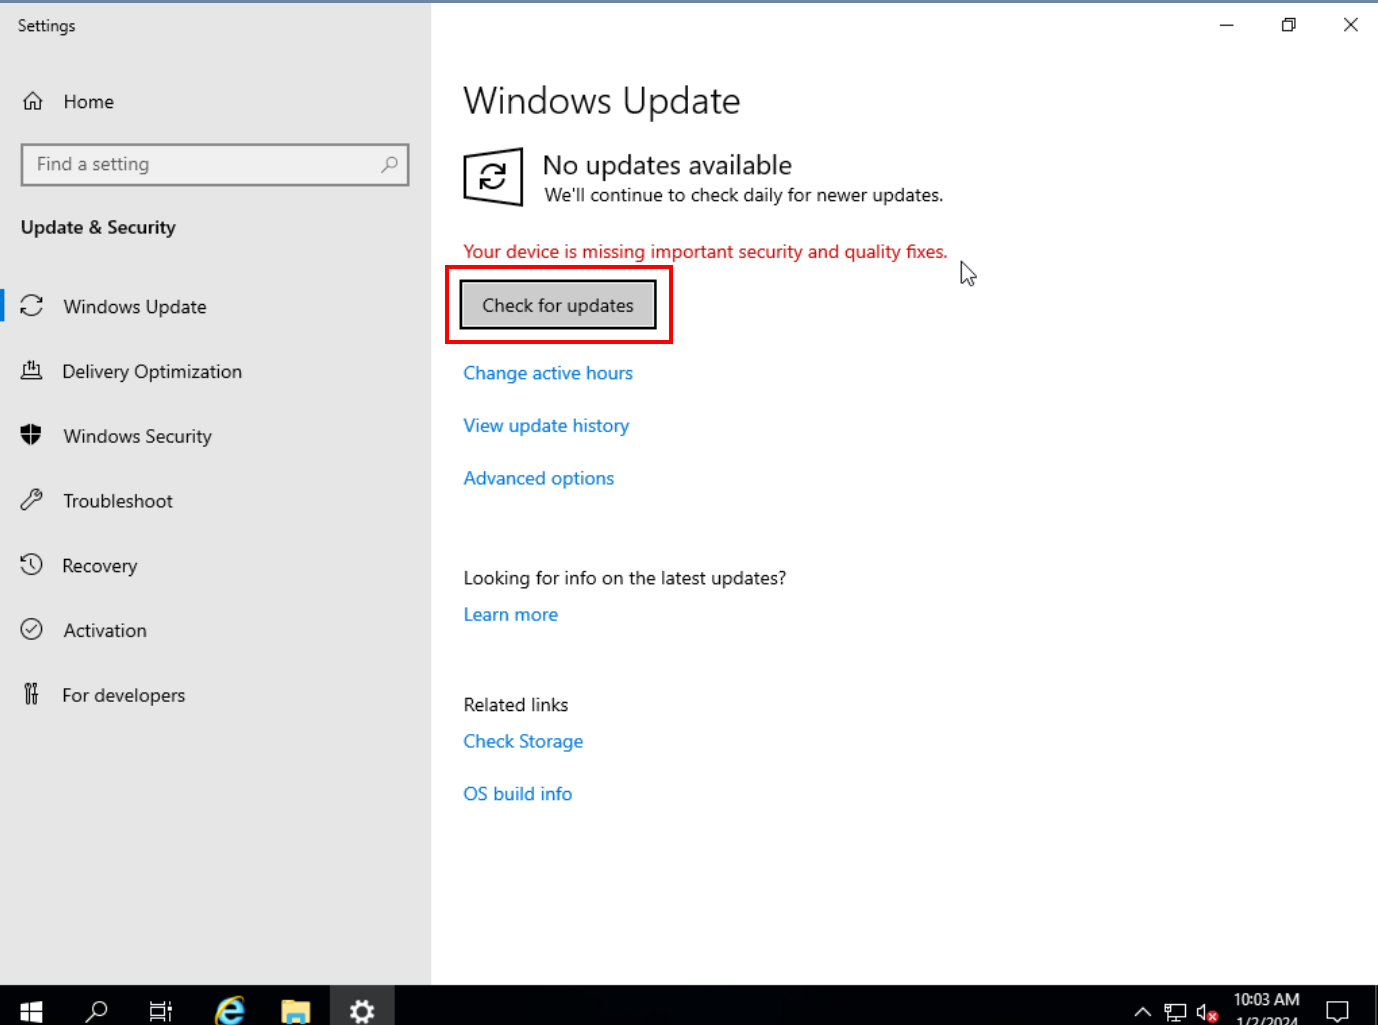
System update
To update the system, click on Windows Search, type “update” and click on “Check for updates”.
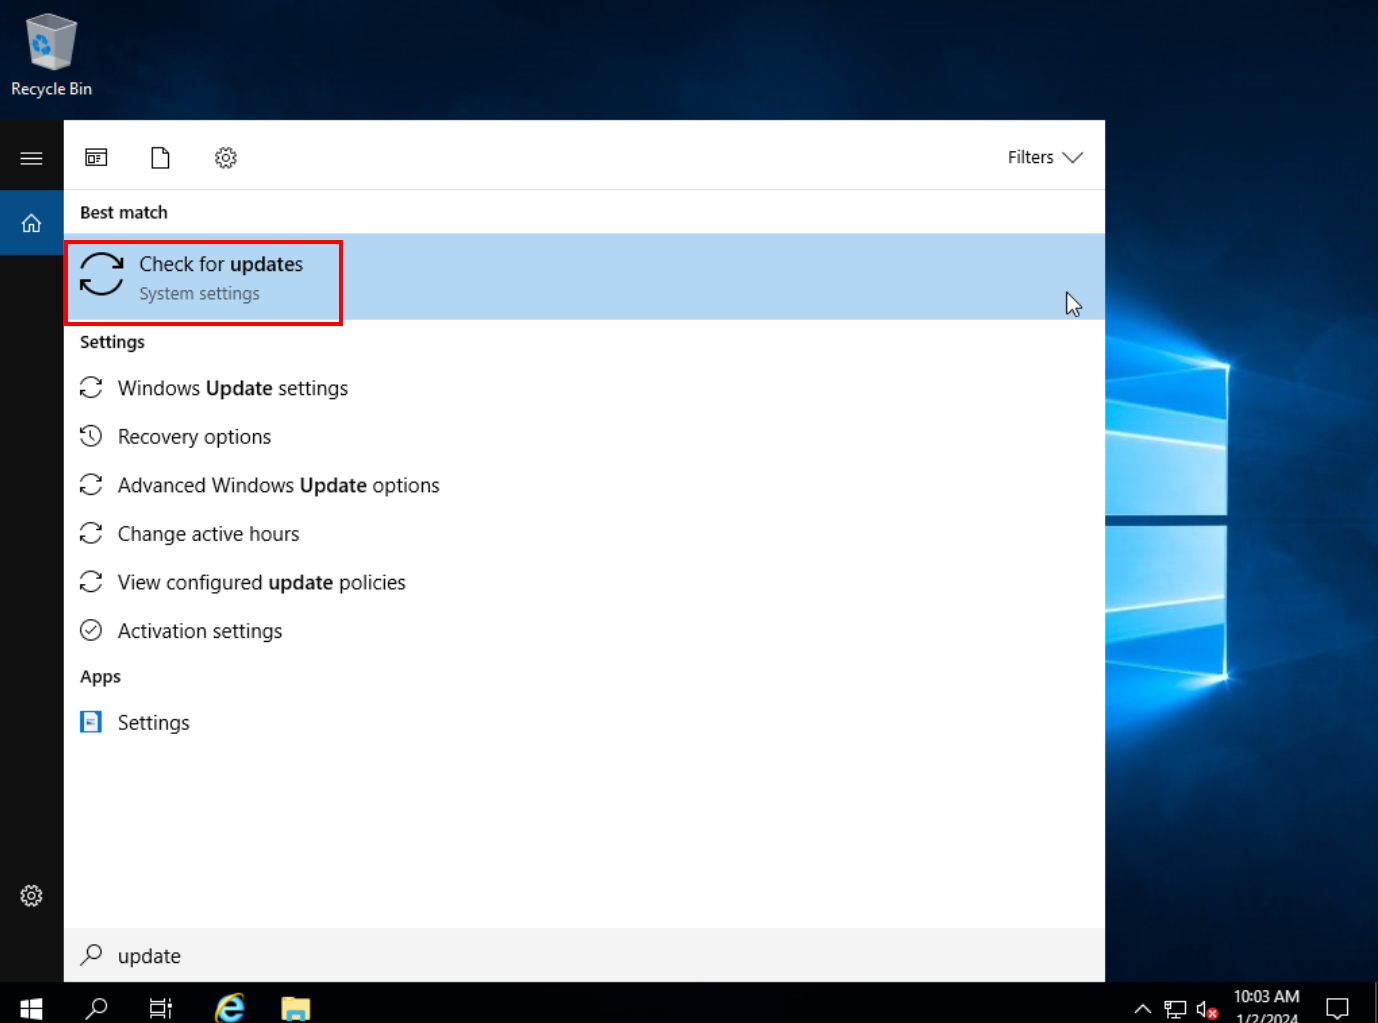
Click on “Check for updates” again and wait until all updates are performed. ECS may be restarted a few times in this process.
Gpedit.msc
Click on Windows Search and type “gpedit.msc” to open the local group policy editor.
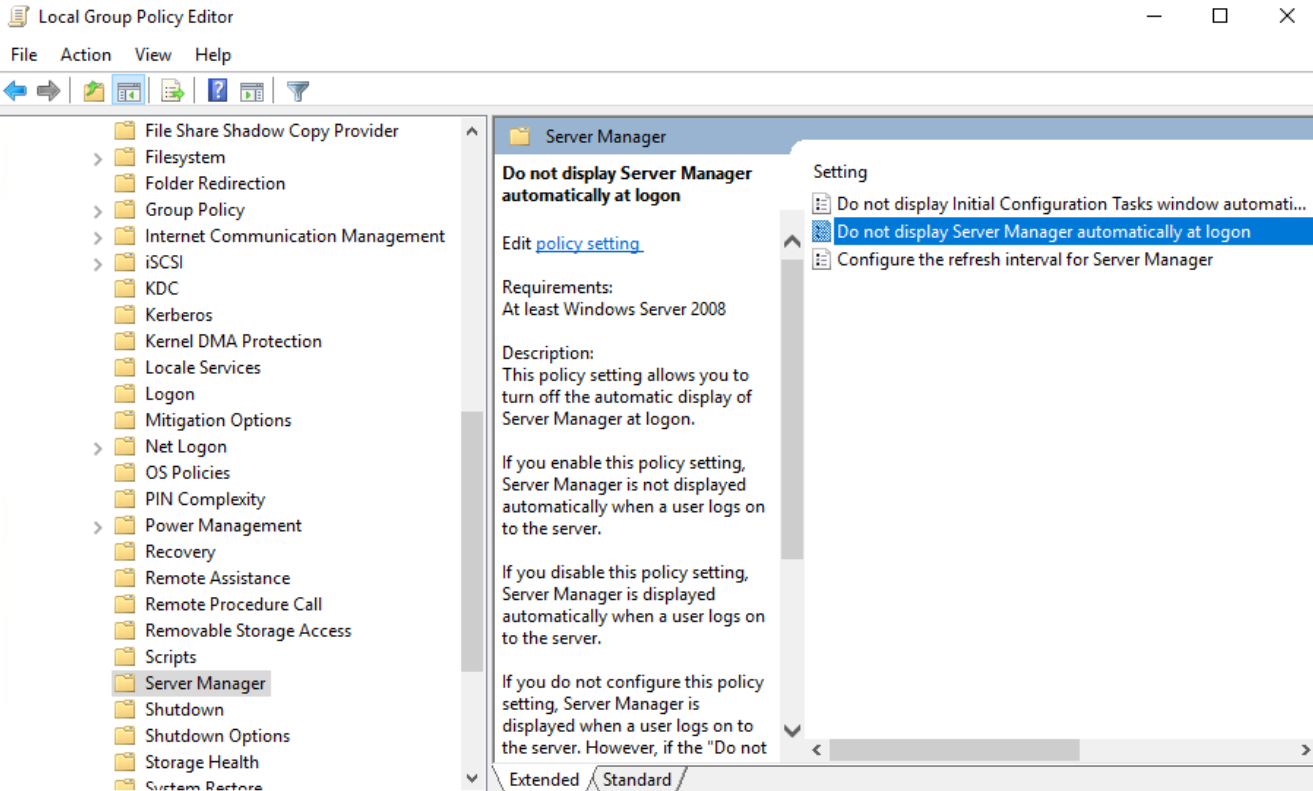
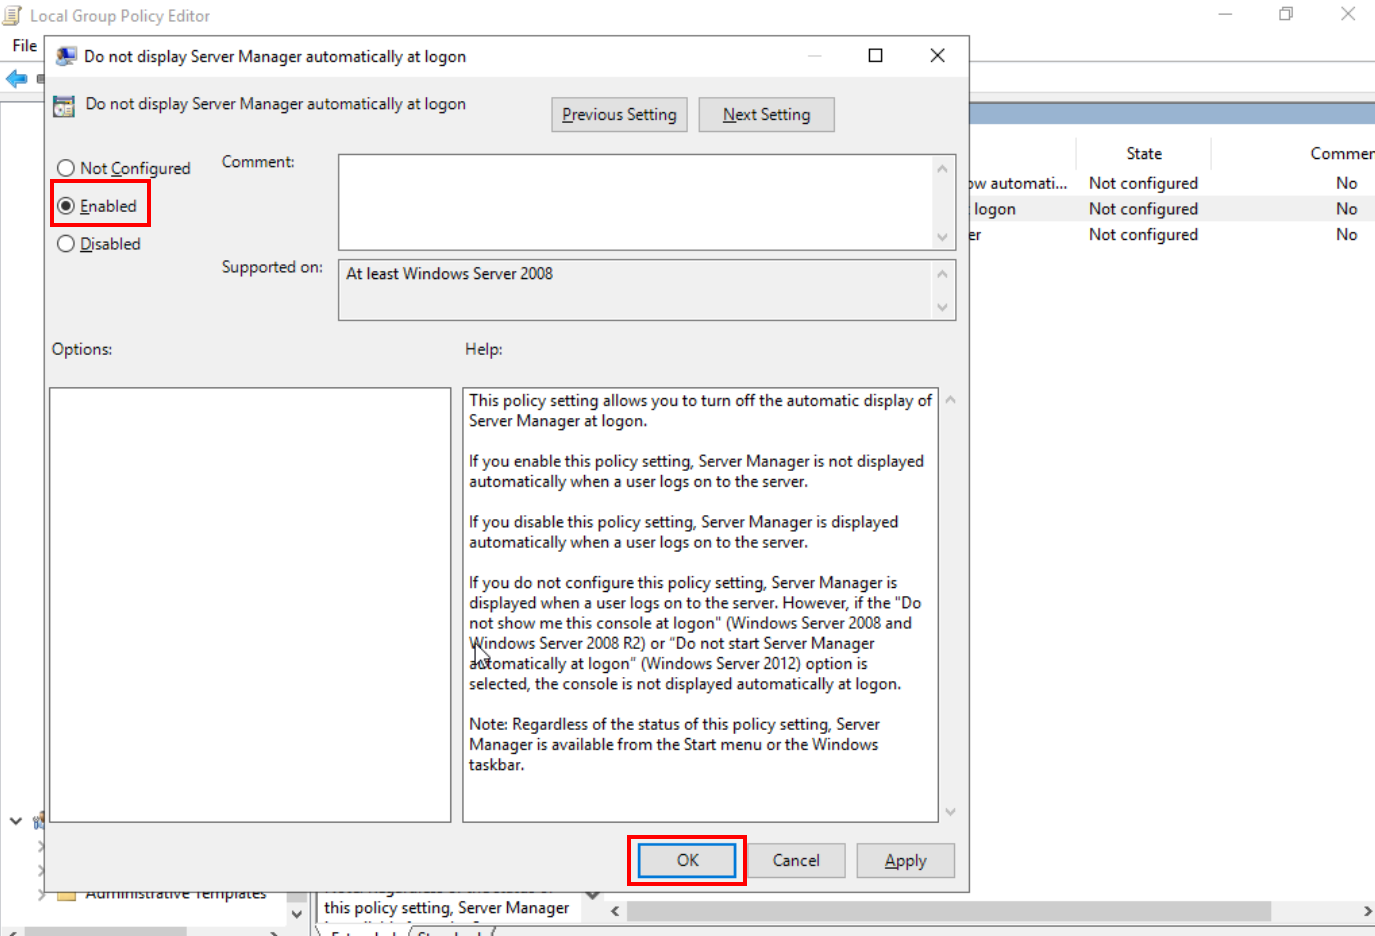
Server Manager
Navigate to “Computer Configuration > Administrative Templates > System > Server Manager”. Double-click on “Do not display Server Manager automatically at logon” and select “Enabled” to prevent Server Manager from opening automatically when starting the instance.
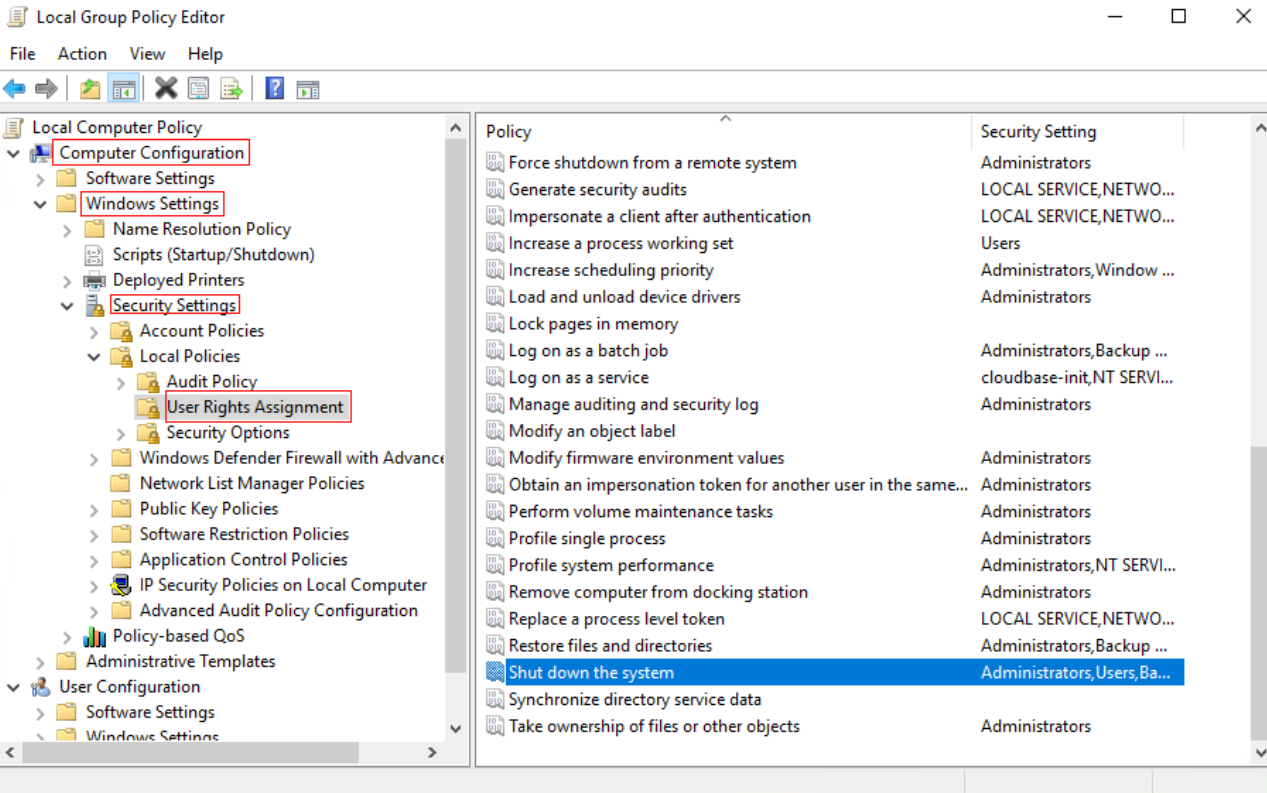
Shut down
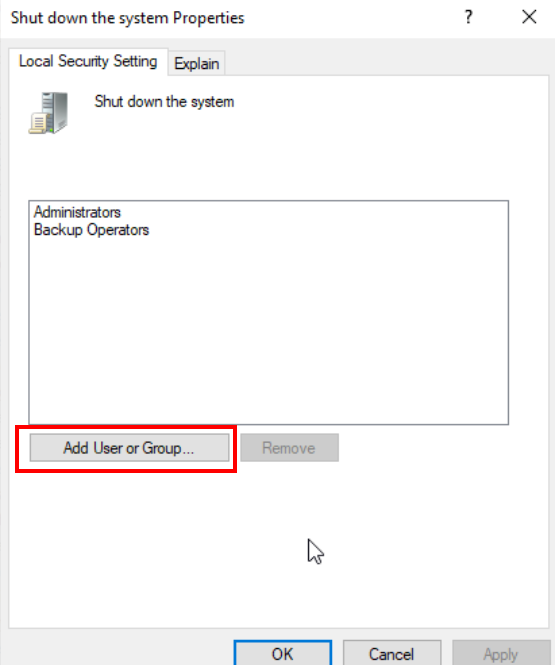
Navigate to “Computer Configuration > Windows Settings > Security Settings > User Rights Assignment“ and double-click on the “Shut down the system” option.
Click “Add User or Group”.
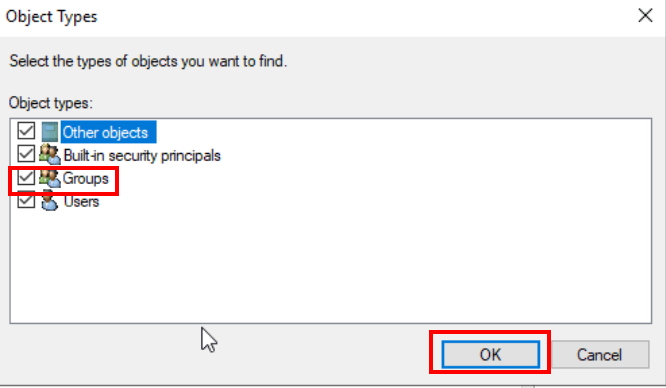
Click “Object Types”.

Enable the “Groups” option and click “OK”.
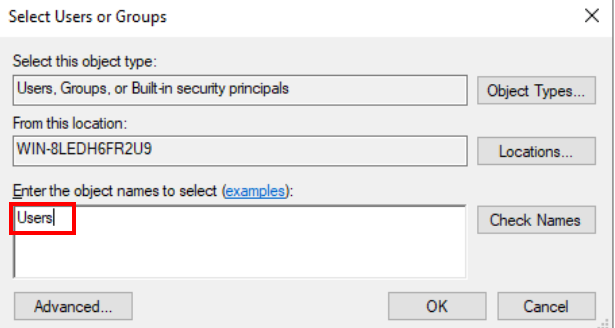
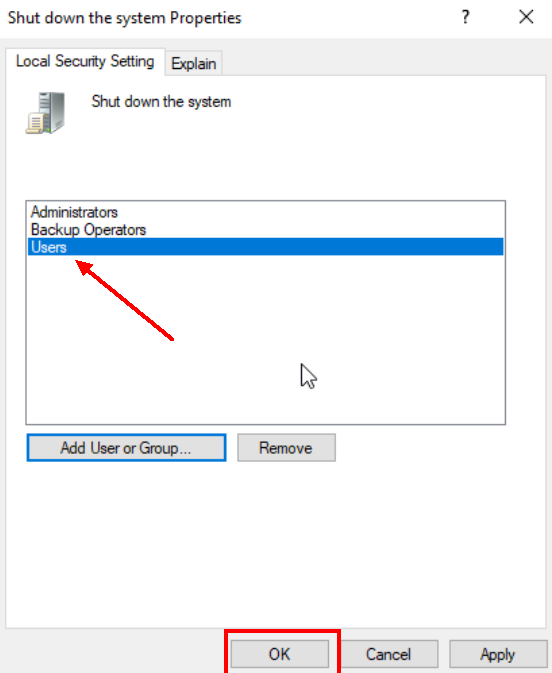
In “Enter the object names to select”, type “Users” and press the Enter key. Click “OK”.
Firewall
Navigate to “Computer Configuration > Network > Network Connections > Domain Profile”, double-click “Windows Firewall: Protect all network connections” and select the “Disabled” option.
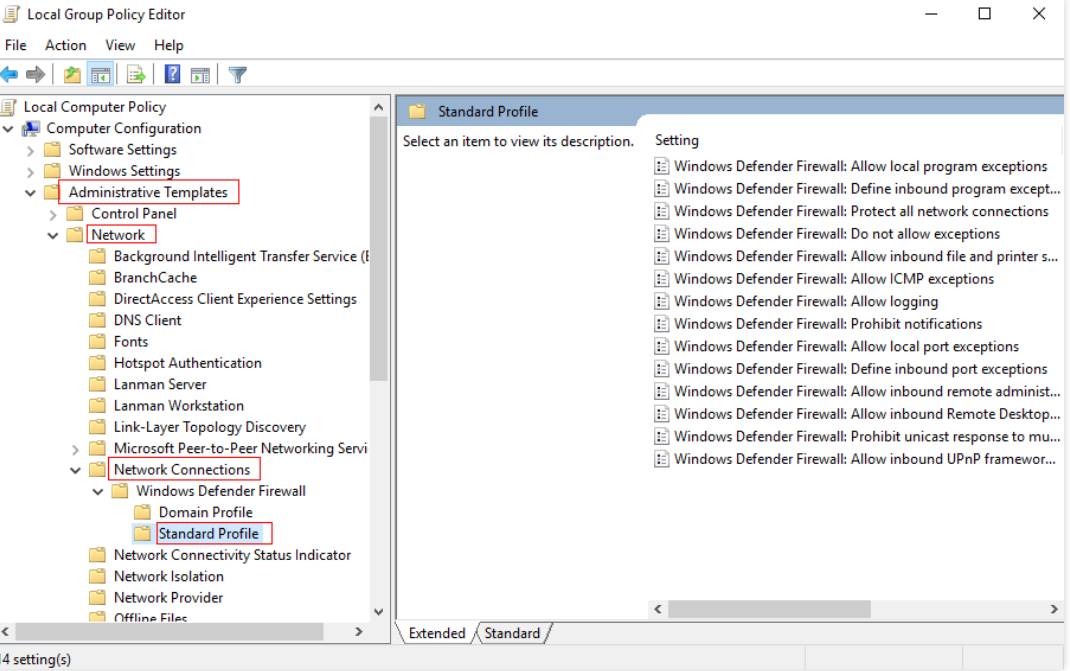
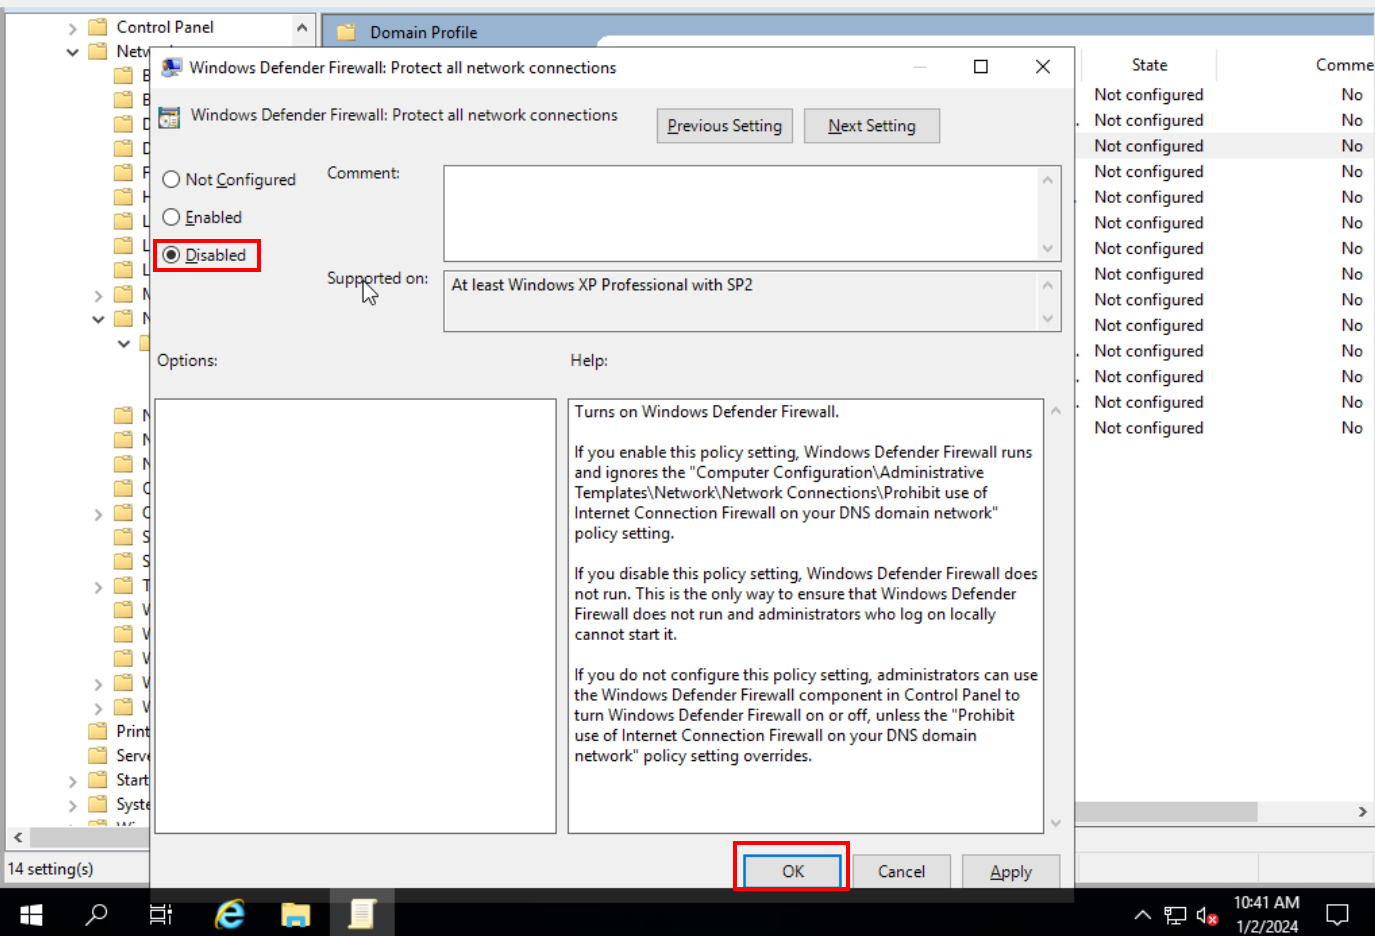
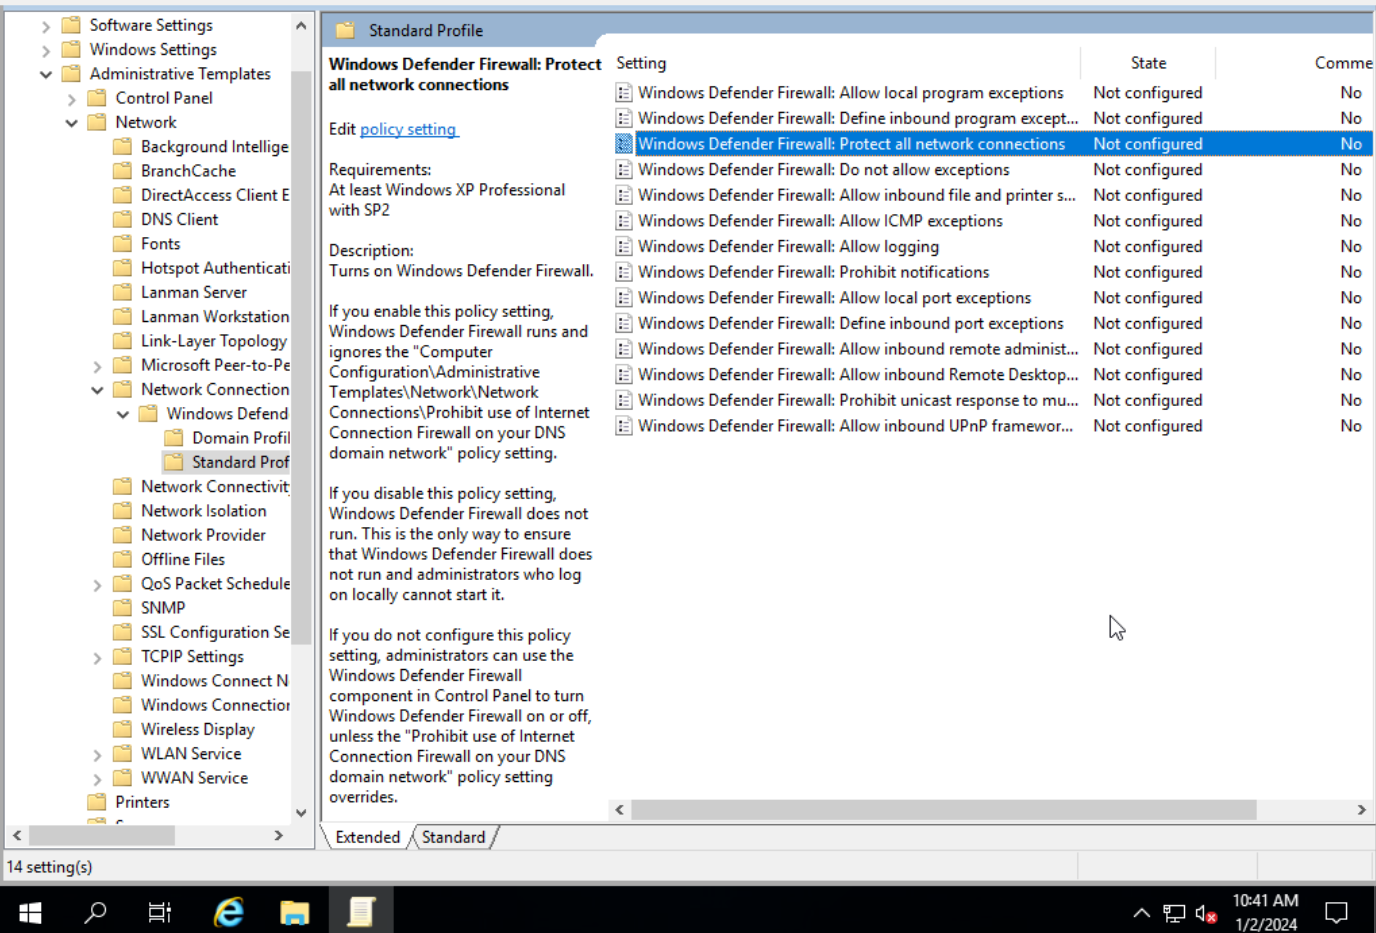
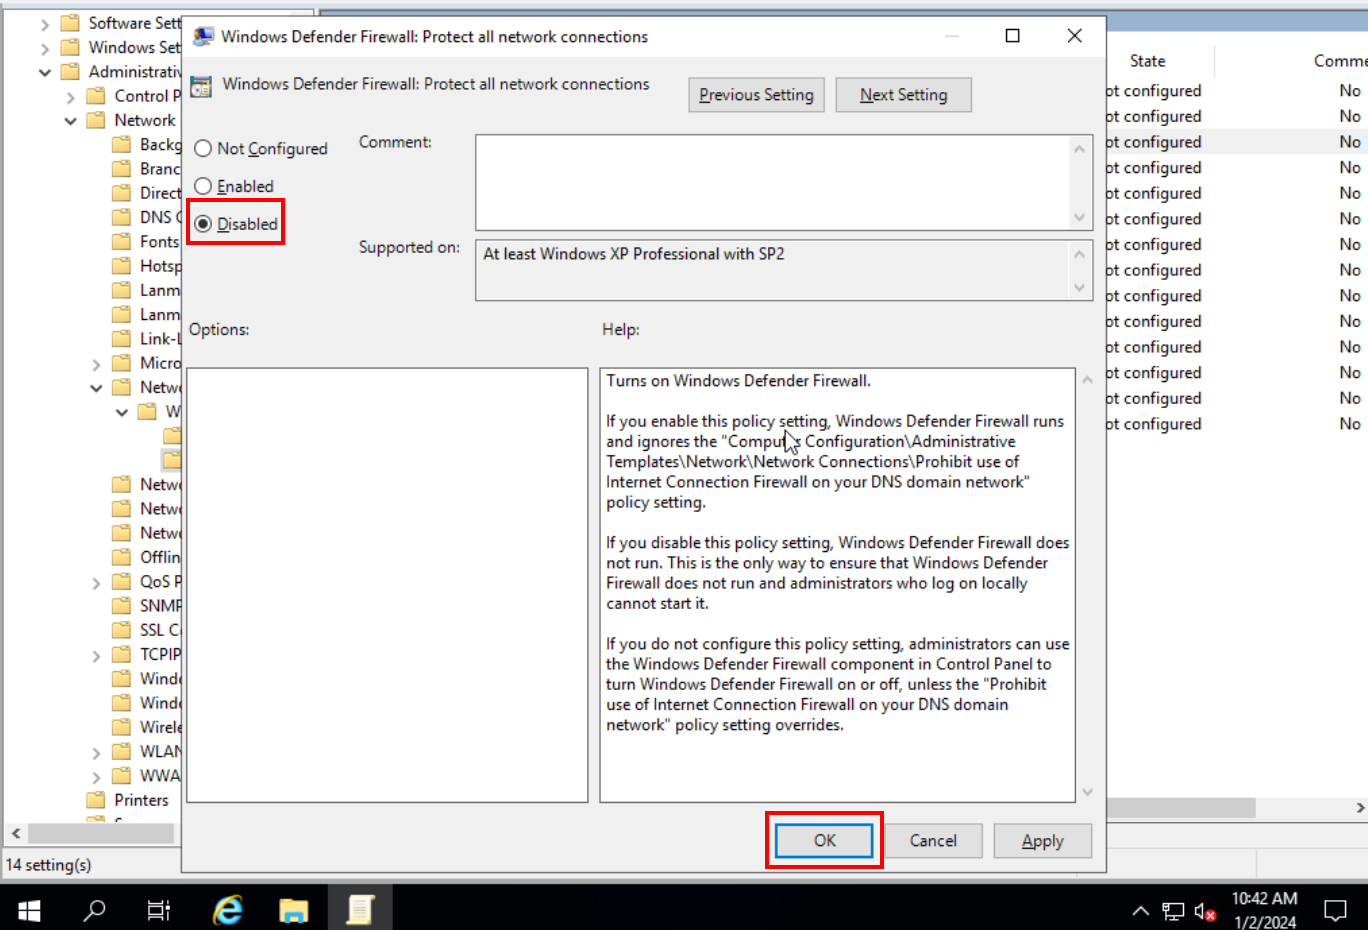
Navigate to “Computer Configuration > Network > Network Connections > Standard Profile”, double-click “Windows Firewall: Protect all network connections” and select the “Disabled” option.
Services
Note: For Windows Server 2019, skip section 6.4.
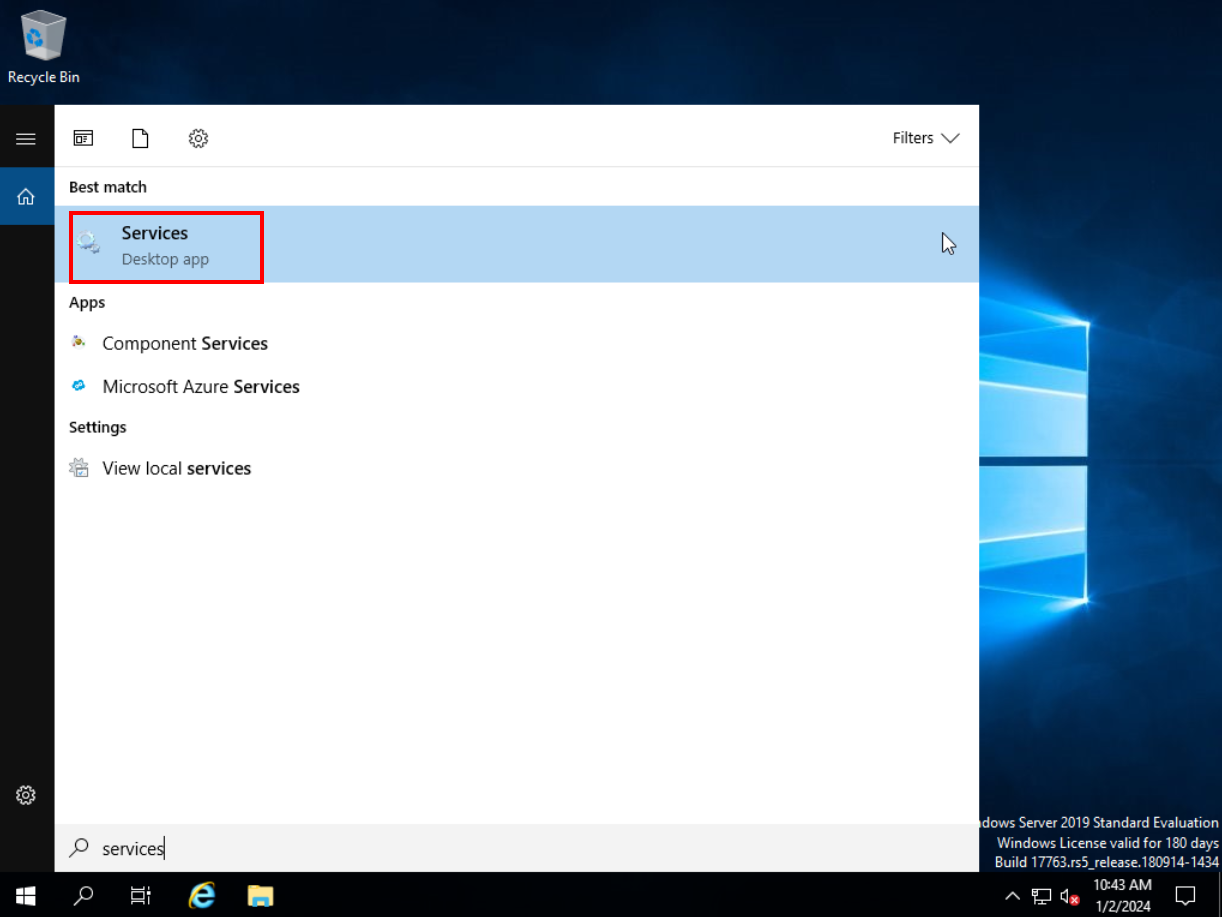
Click on Windows Search and type “services” to open the Windows services management window.
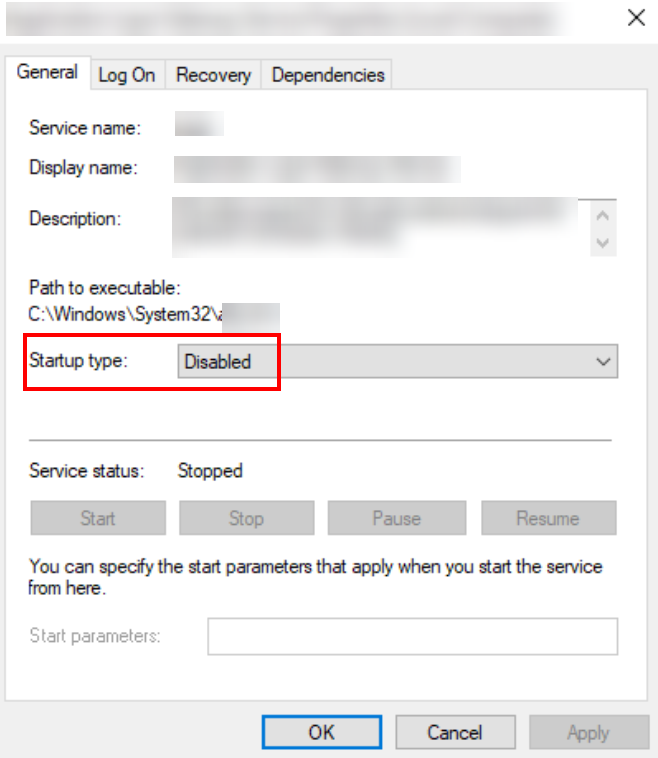
Navigate to “Windows Firewall” and double-click it. In “Startup type” select “Disabled”.
DHCP
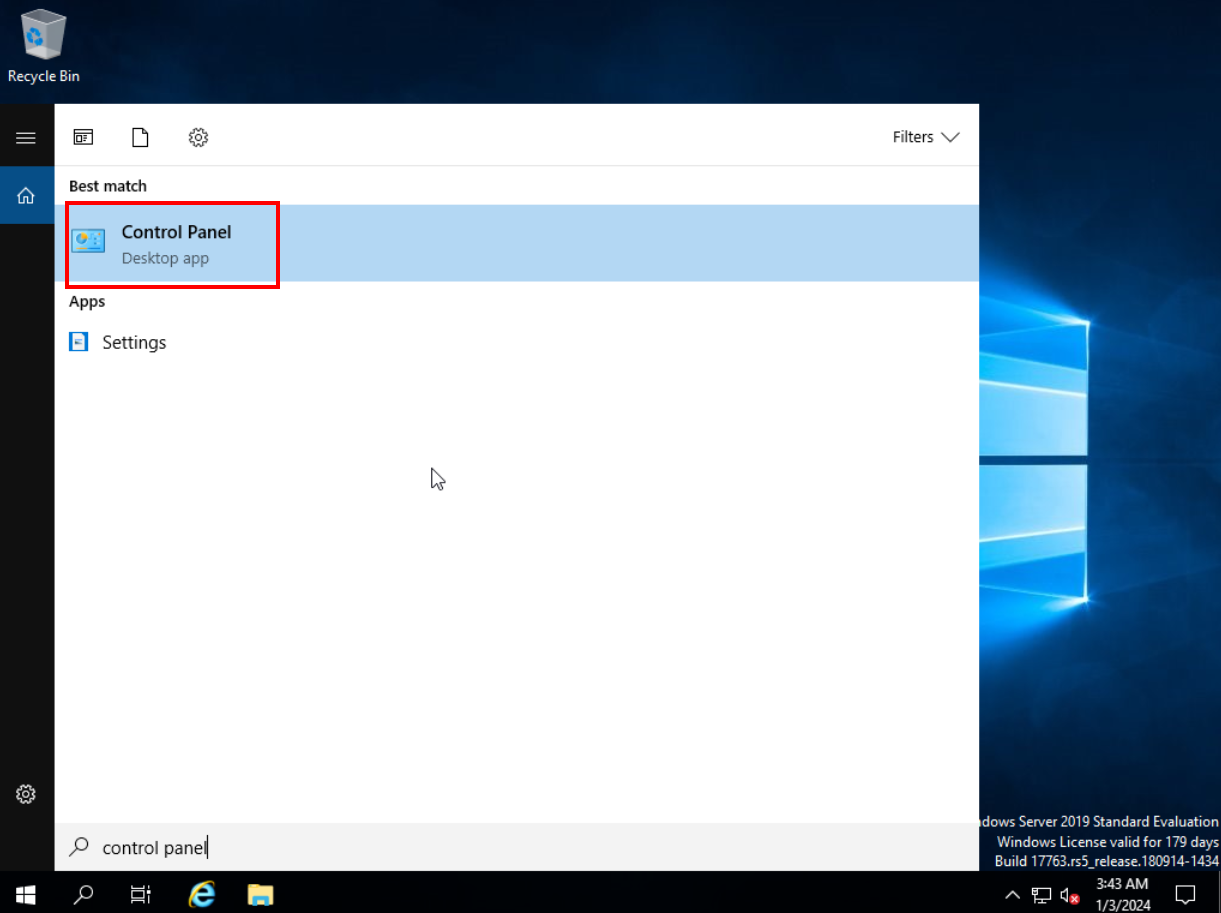
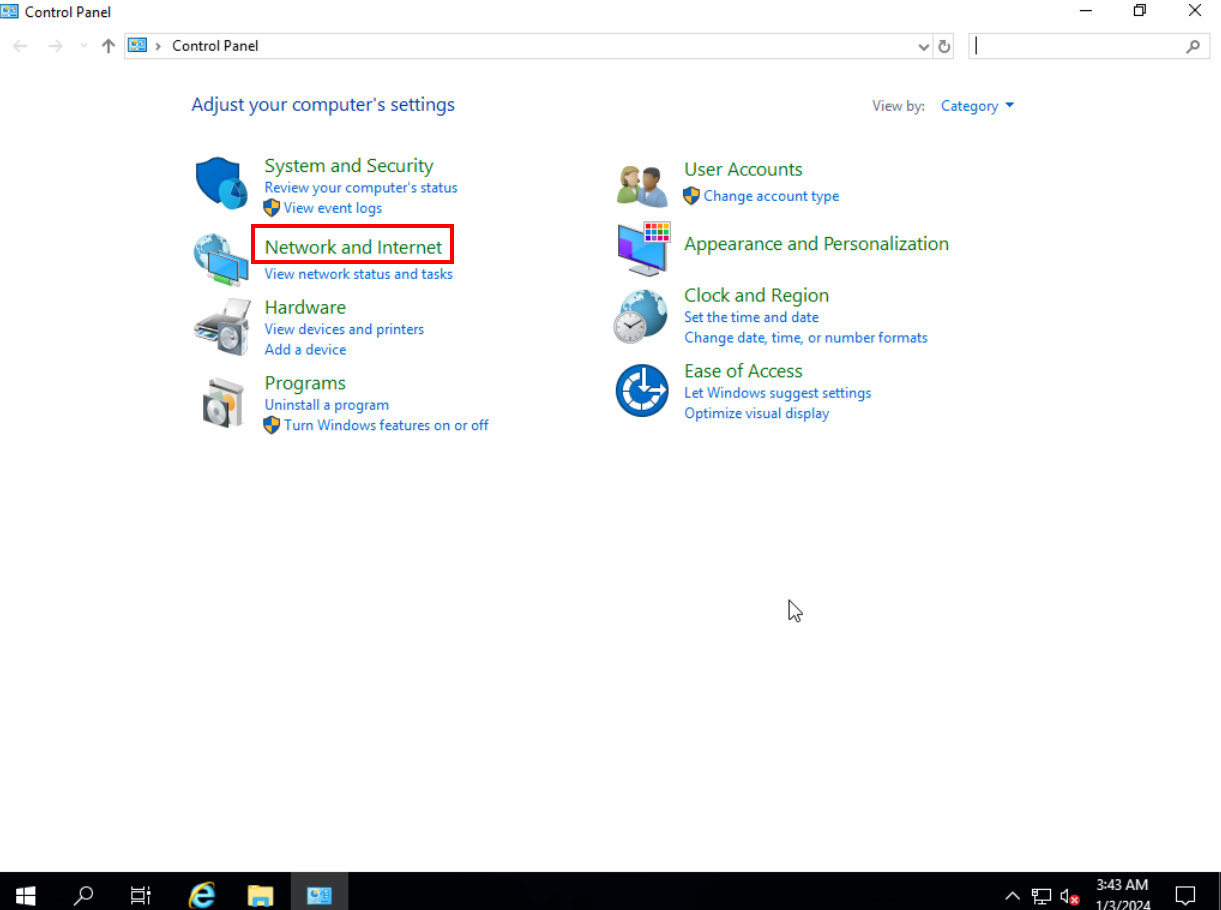
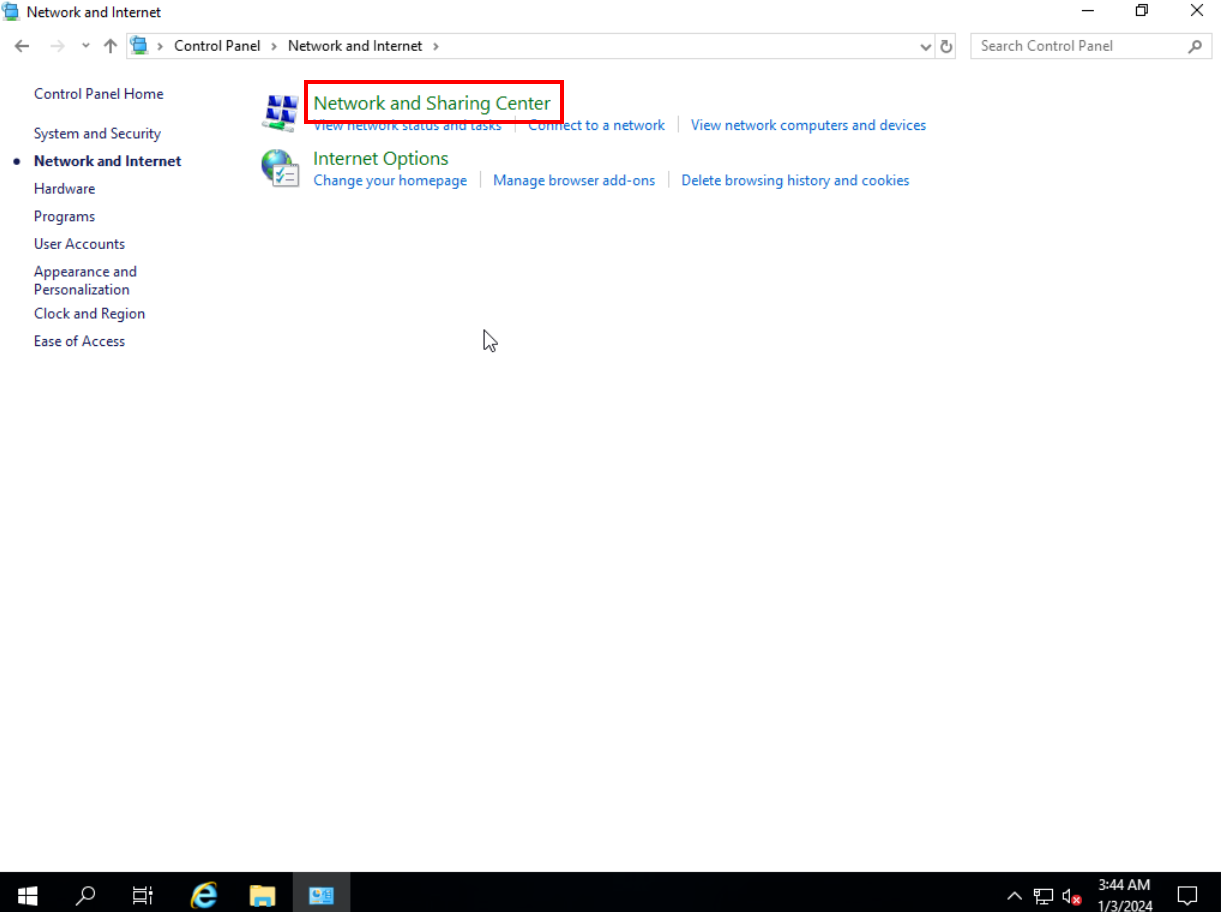
Check if the instance’s NICs are configured as DHCP. To do this, navigate to the “Control Panel” through Windows Search, go to “Network and Internet Connections”, click on ”Network and Sharing Center”.
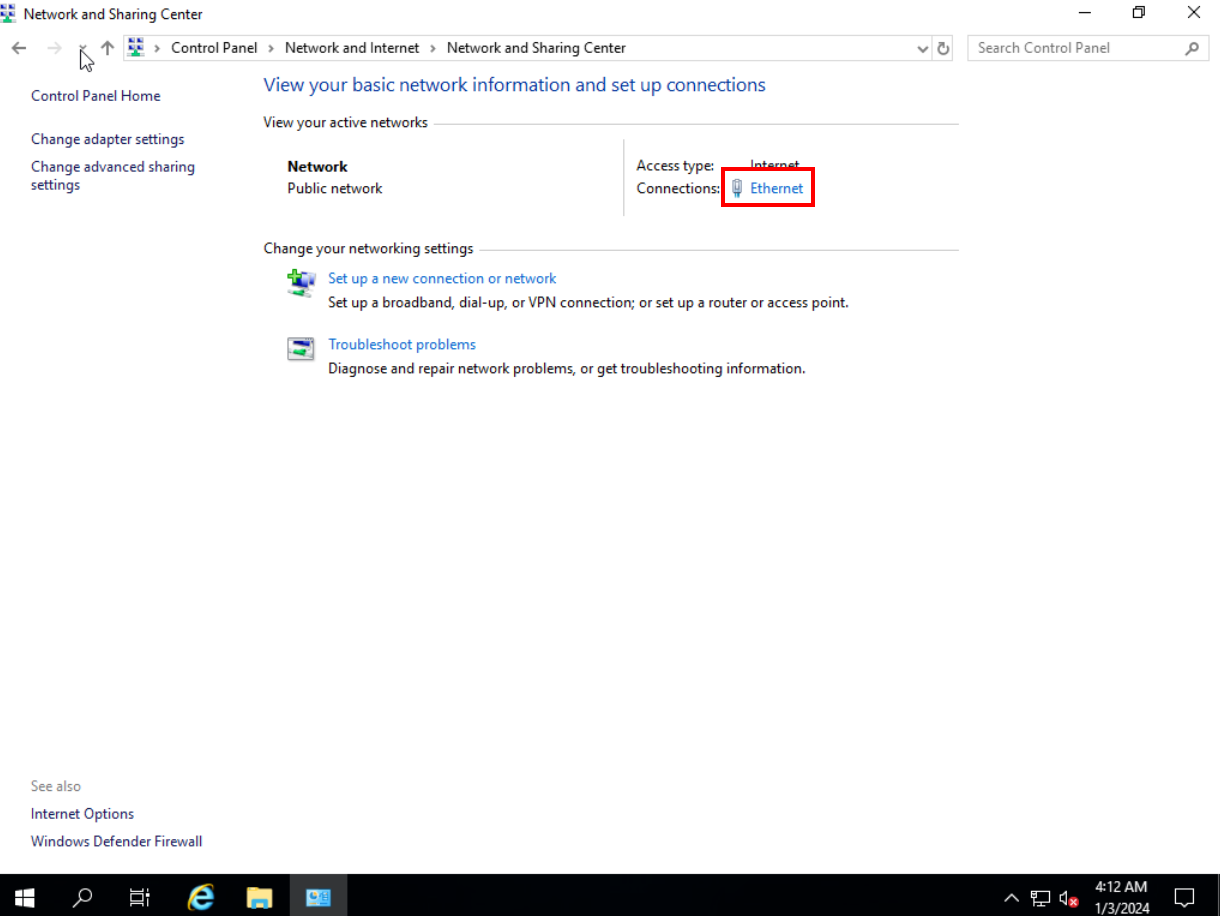
Click on the network adapter available in your instance and click on “Properties”.
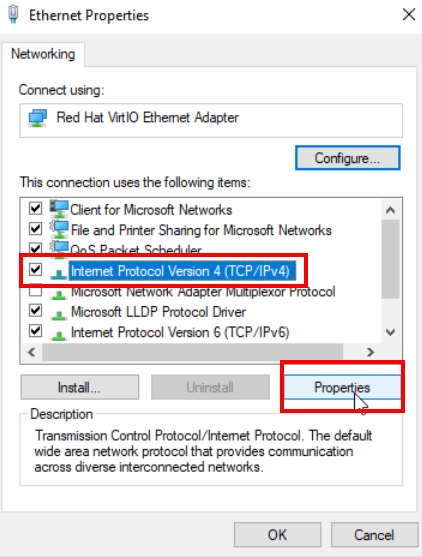
Select the network protocol used by the instance, in this case IPv4, and click “Properties”.
Check whether the enabled option for both options is related to obtain the IP address and DNS automatically. Click “Ok” to save.

Remote Desktop
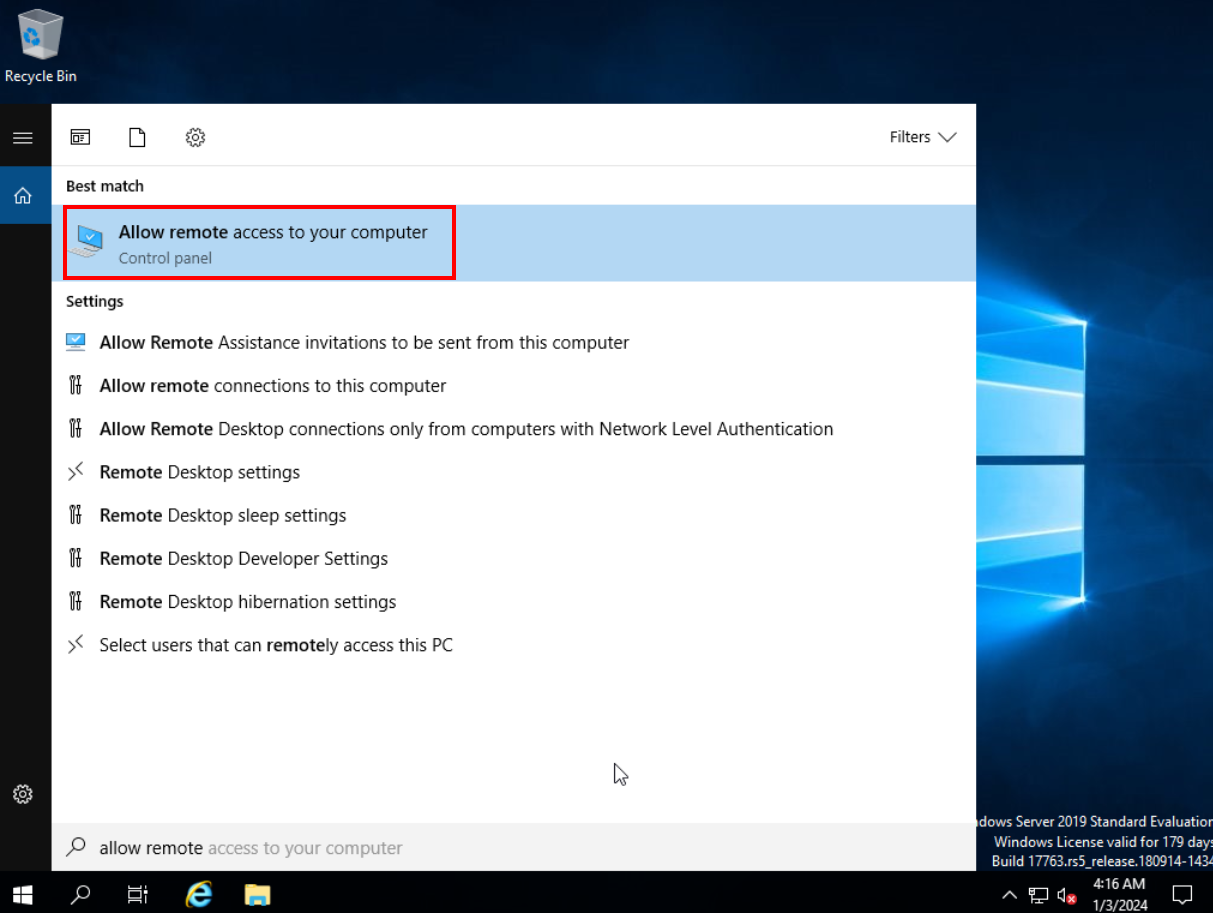
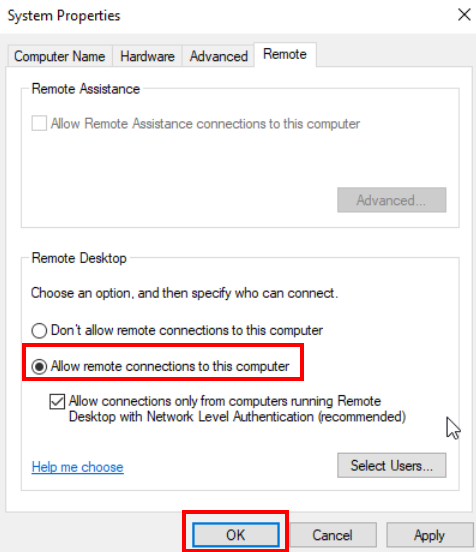
To enable remote access to the instance, open Windows Search and type “Allow remote access to your computer”.
Enable the “Allow remote connections to this computer” option and click “OK” to confirm the change.
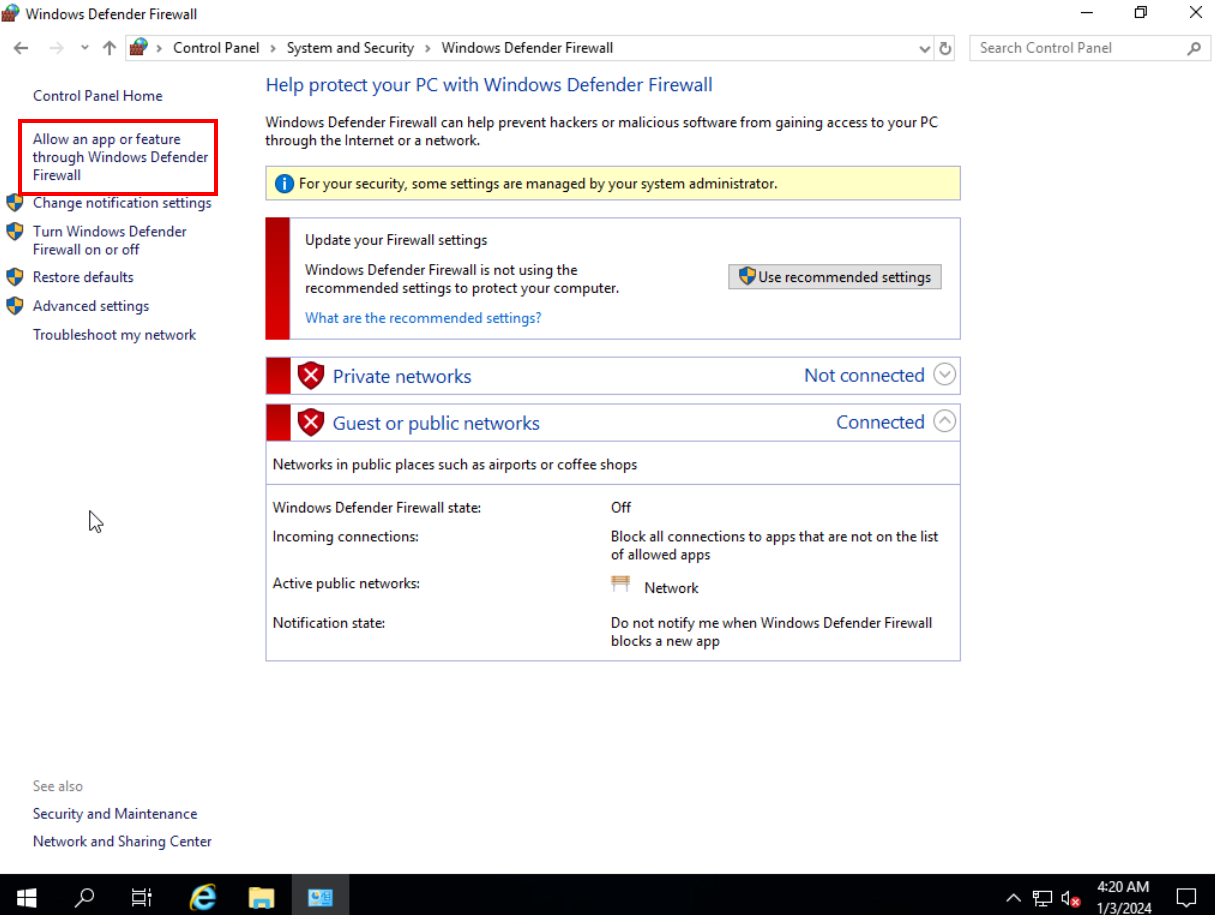
Check if the Windows firewall allows incoming and outgoing traffic for the remote access service by navigating to Windows Firewall

Click “Allow an app or feature through Windows Defender Firewall”.
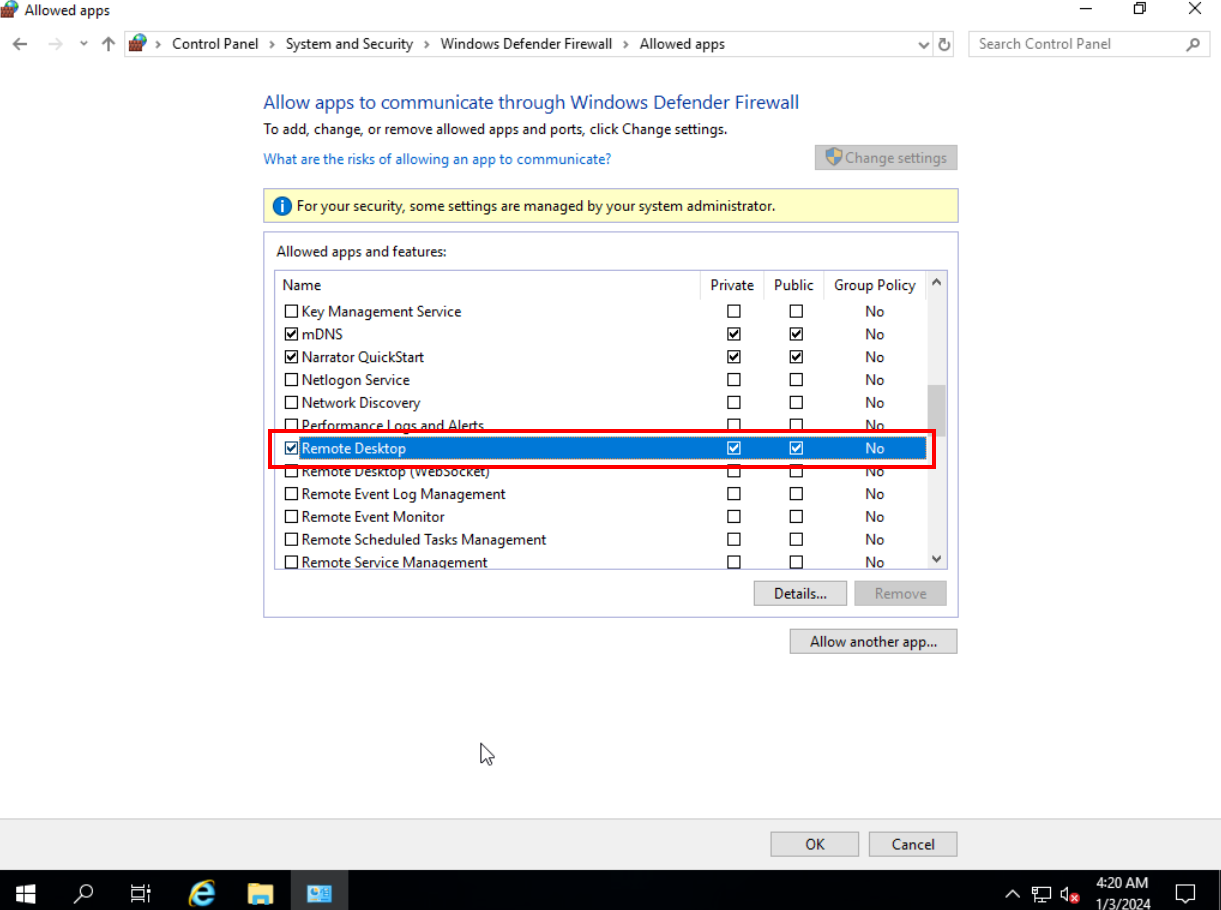
Enable remote access through the firewall by enabling the “Remote Desktop” service options.
PV Driver
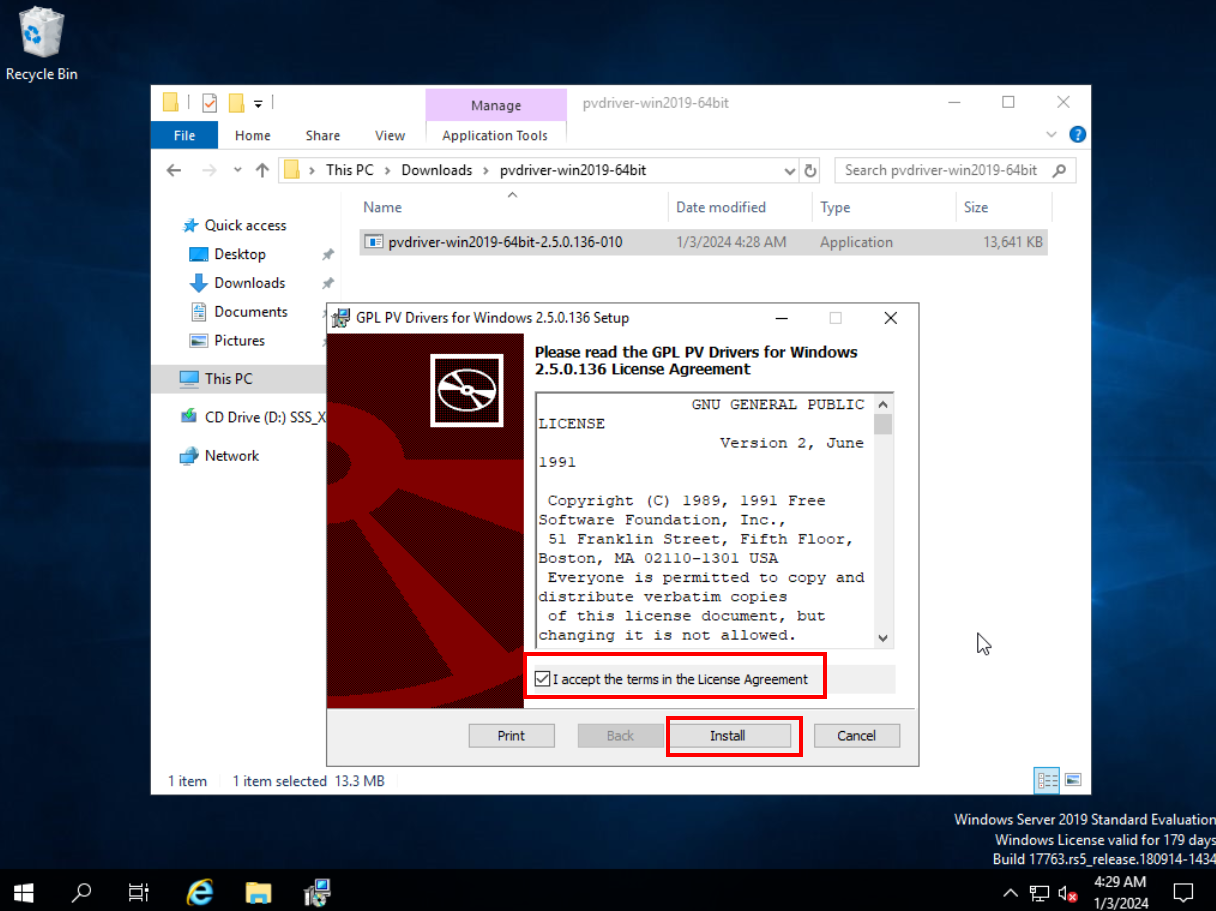
The PV Driver is responsible for managing instances with Xen virtualization. Although this type of virtualization technology has been discontinued in Huawei Cloud, it is still important that the drivers are installed. Download them through the following link in the instance: https://support.huaweicloud.com/intl/en-us/usermanual-ims/ims_01_0317.html. Extract the downloaded file and launch the “pvdriver-win” installer. Accept the terms of service and click “Install”.
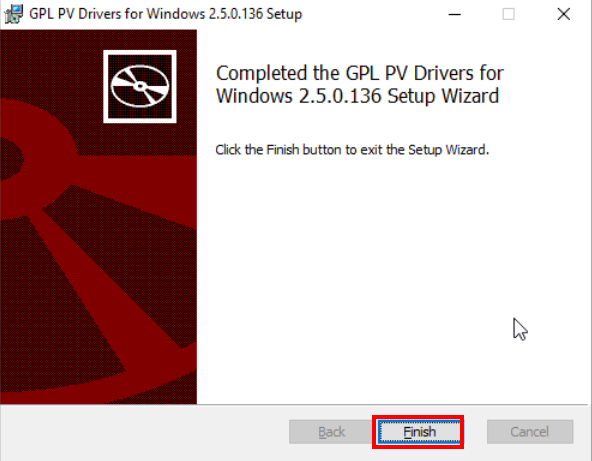
Click “Finish” after the installation is complete.
One-click reset password plugin
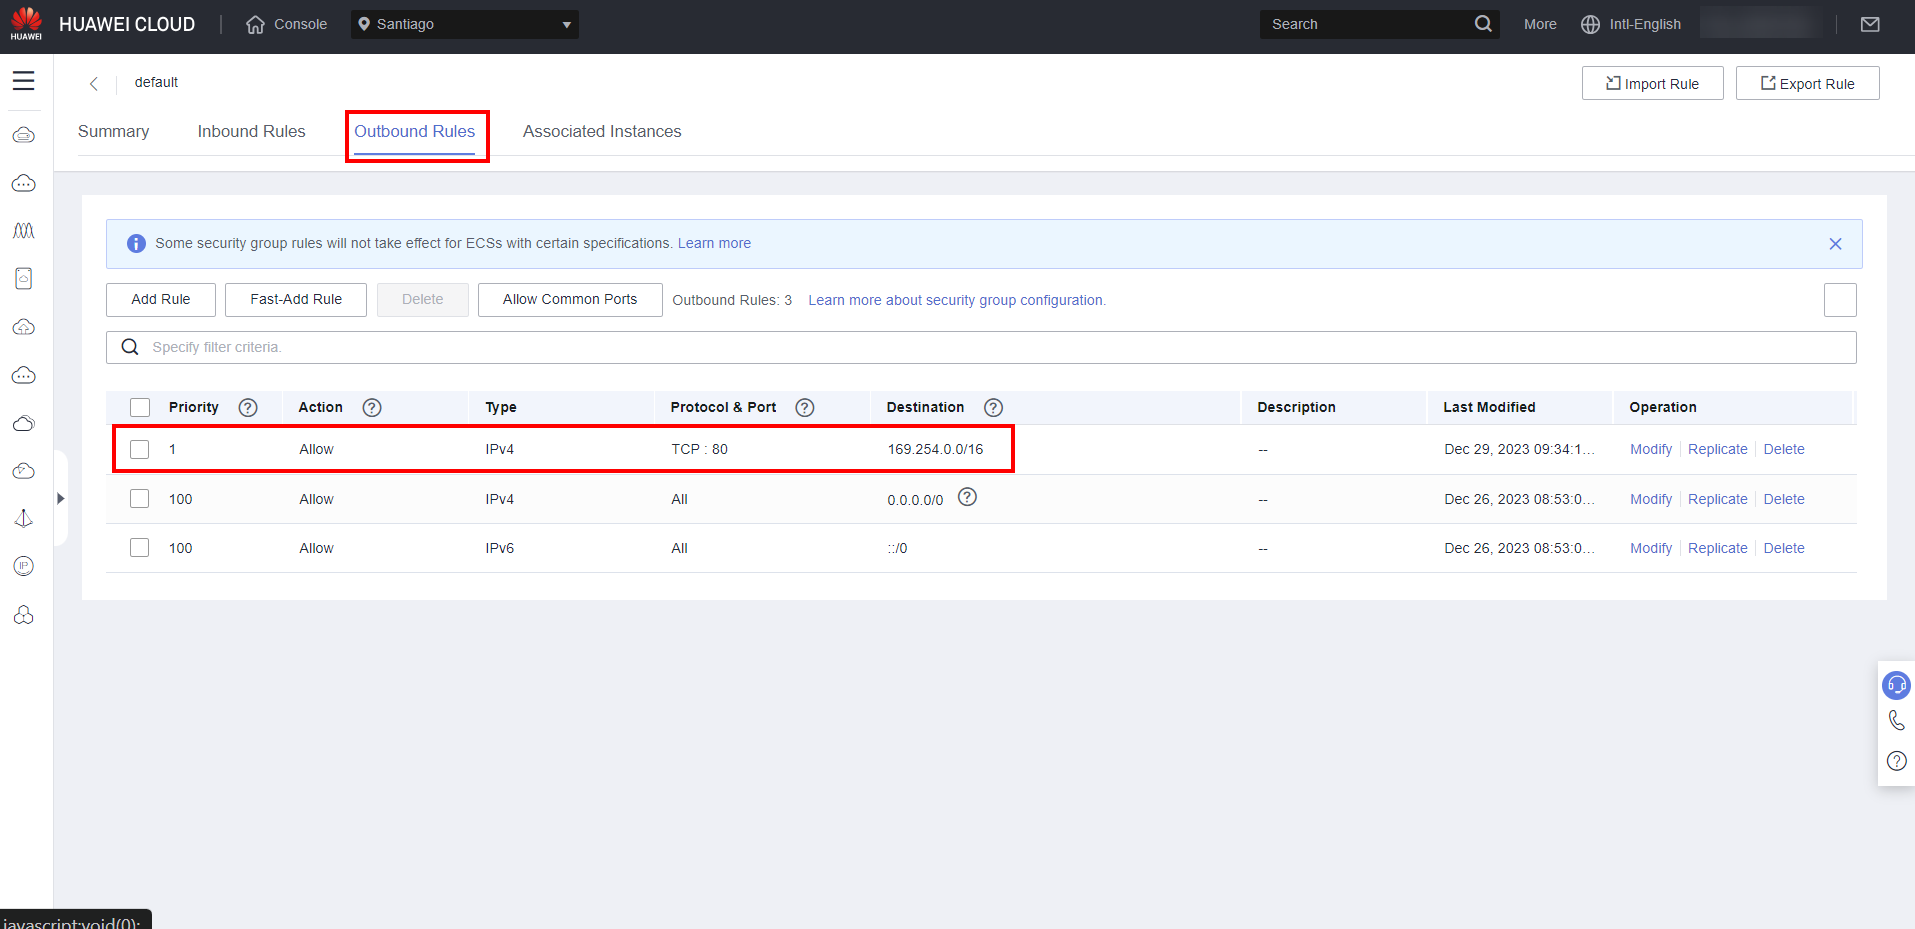
This plugin allows the instance password to be reset via the Huawei Cloud console. To install it, download it from the following link on the instance: https://cn-north-1-cloud-reset-pwd.obs.cn-north-1.myhuaweicloud.com/windows/reset_pwd_agent/CloudResetPwdAgent.zip. Extract the downloaded “CloudResetPwdAgent.zip” file. Before installing it, however, port 80 needs to be enabled in the ECS security group for the installation to be successful. Navigate to the Huawei Cloud console and go to the ECS section. 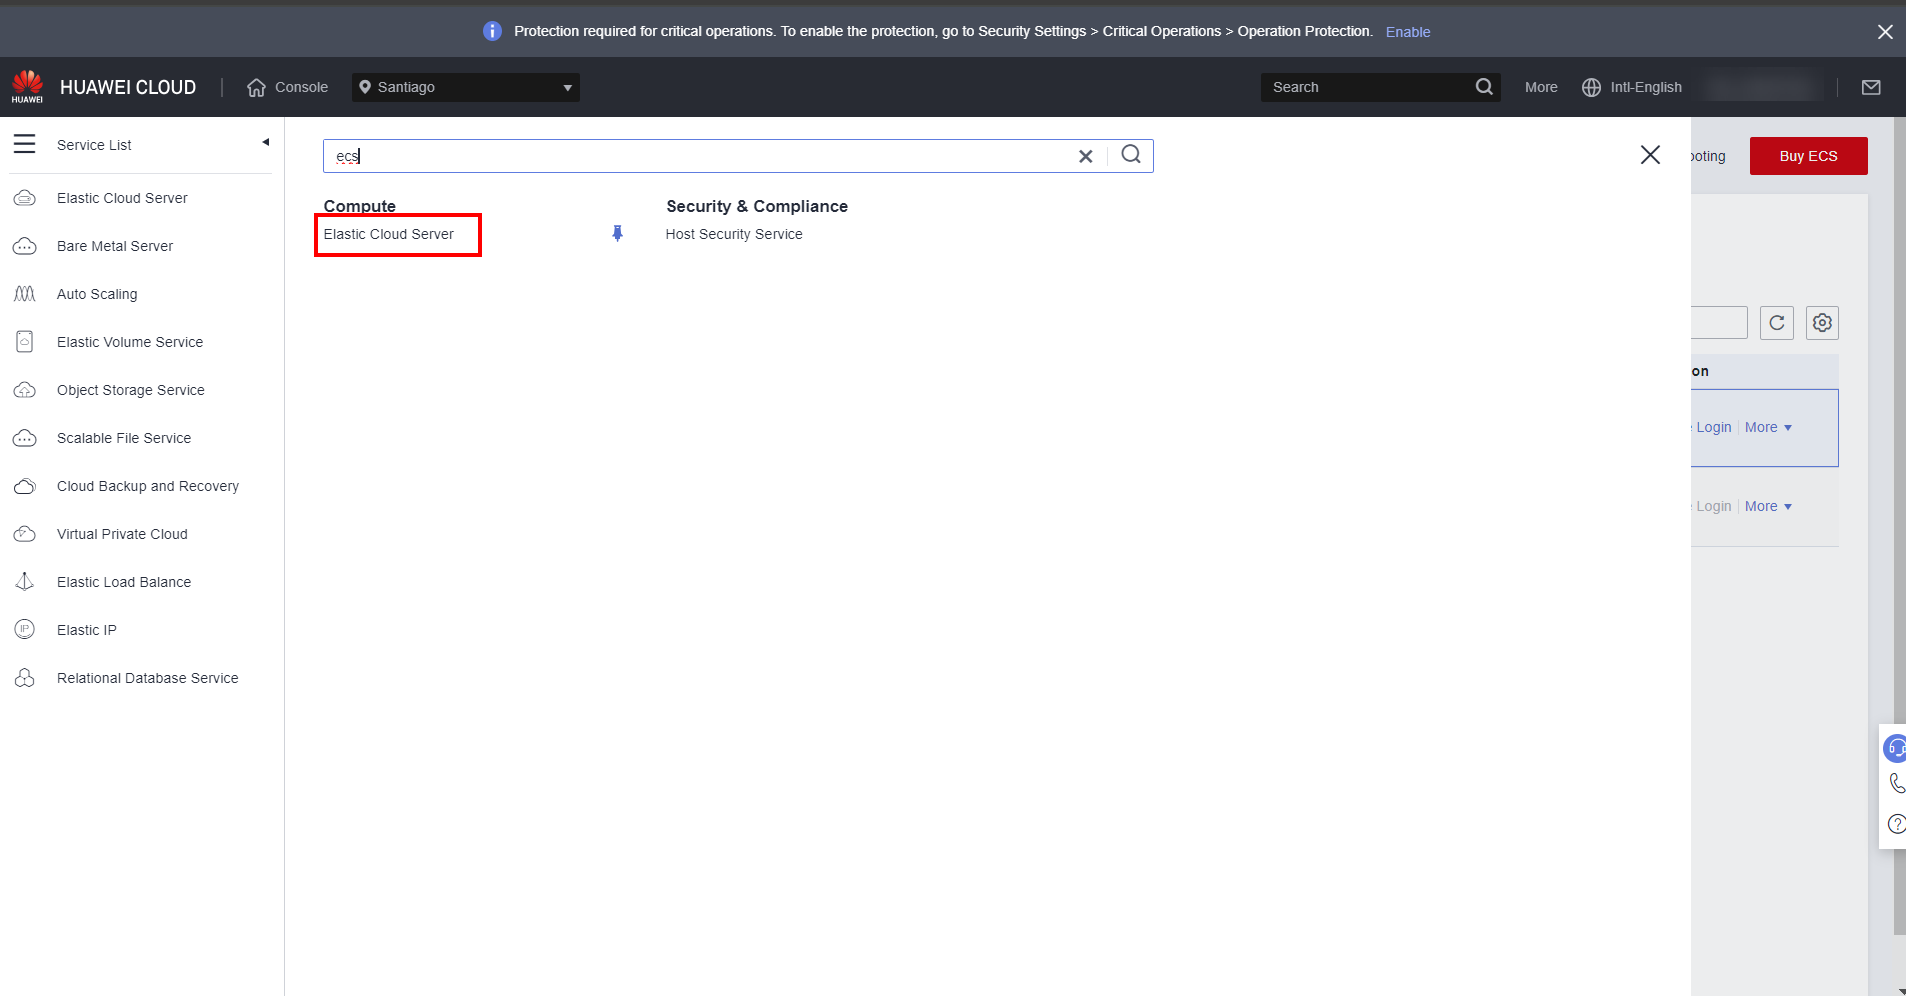 Under “Network and Security”, click “Security Groups”.
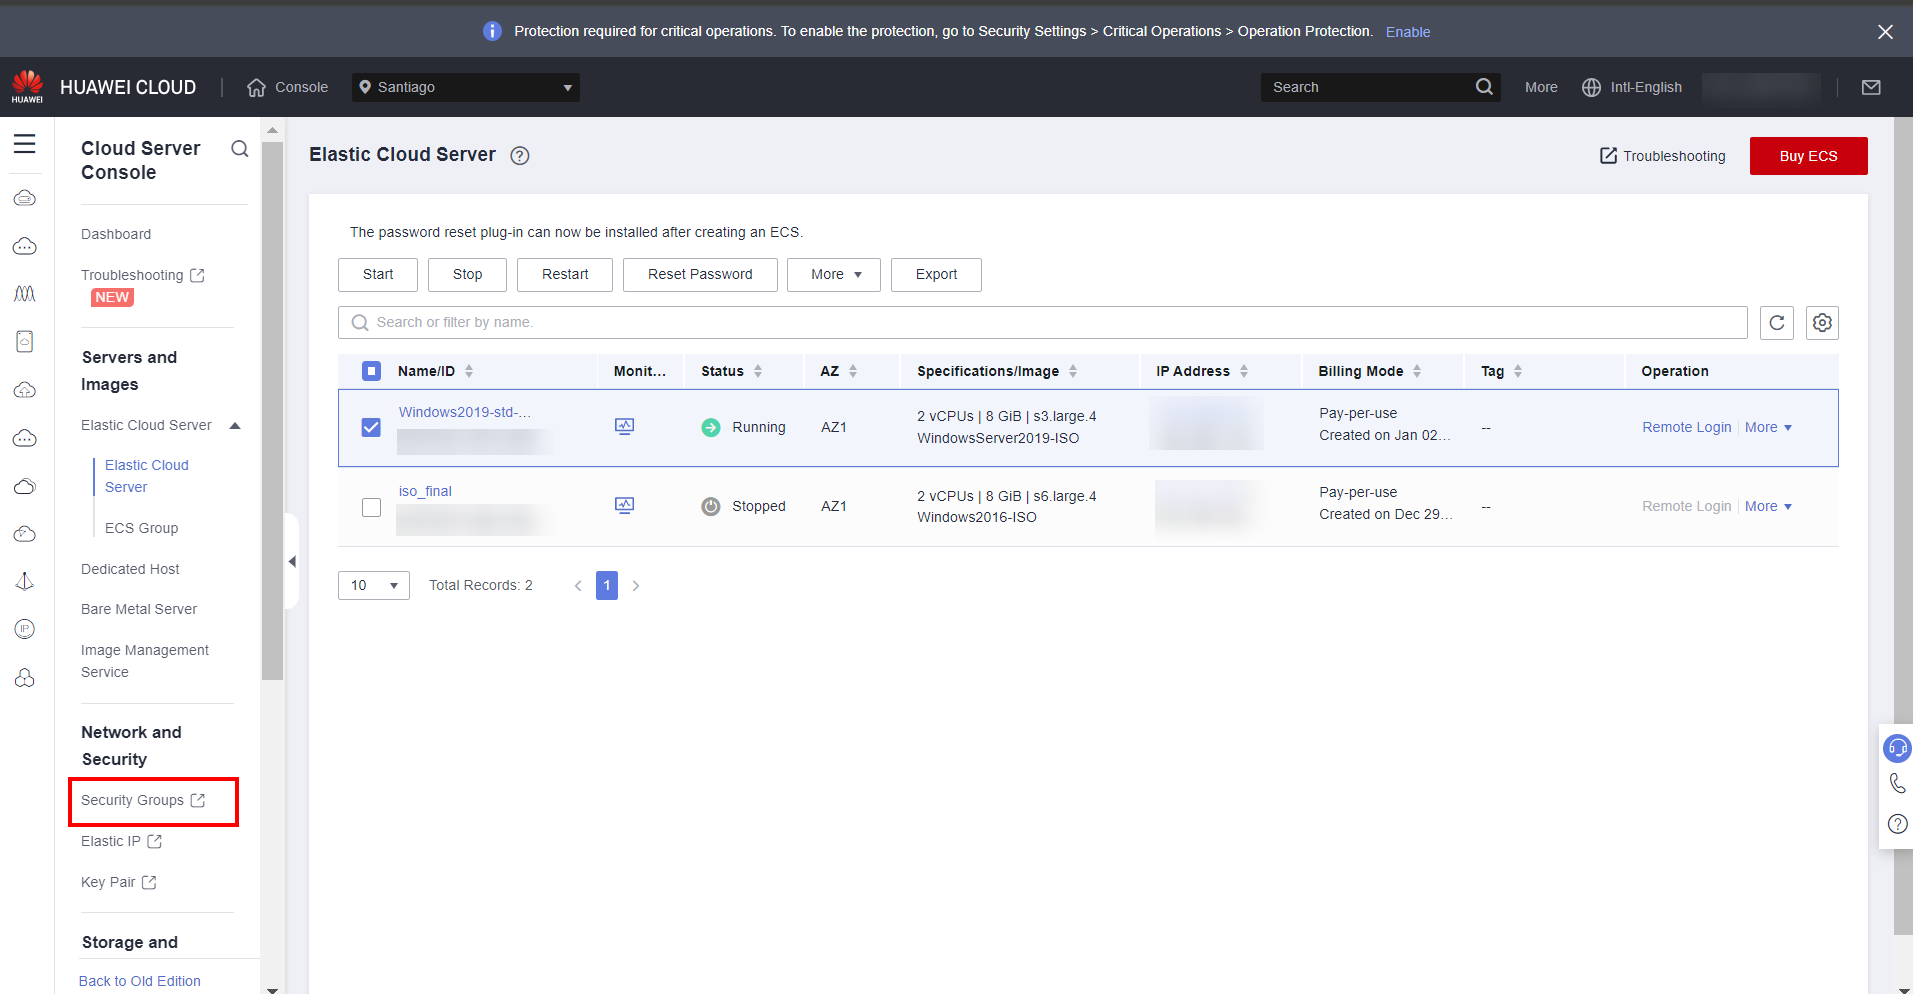
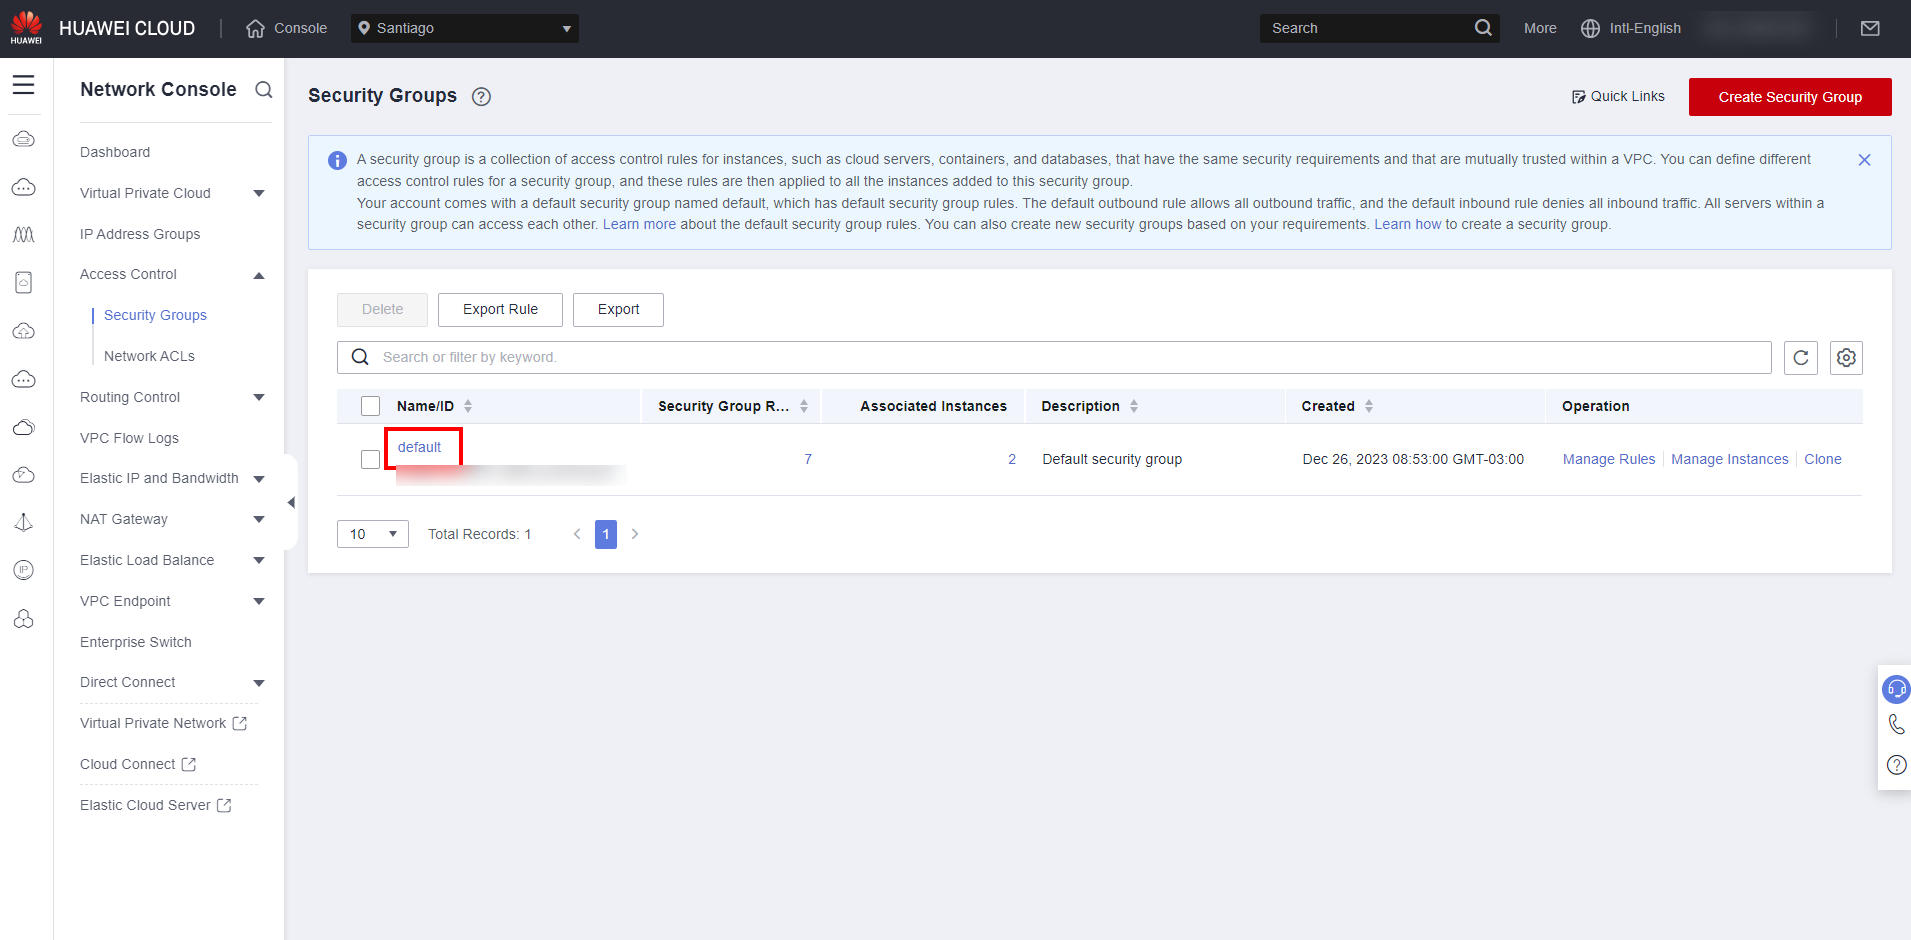
Select the security group to which the ECS instance is attached.
In “Outbound Rules”, add the rule to allow access to the TCP protocol to port 80 from the following destination: “169.254.0.0/16”.
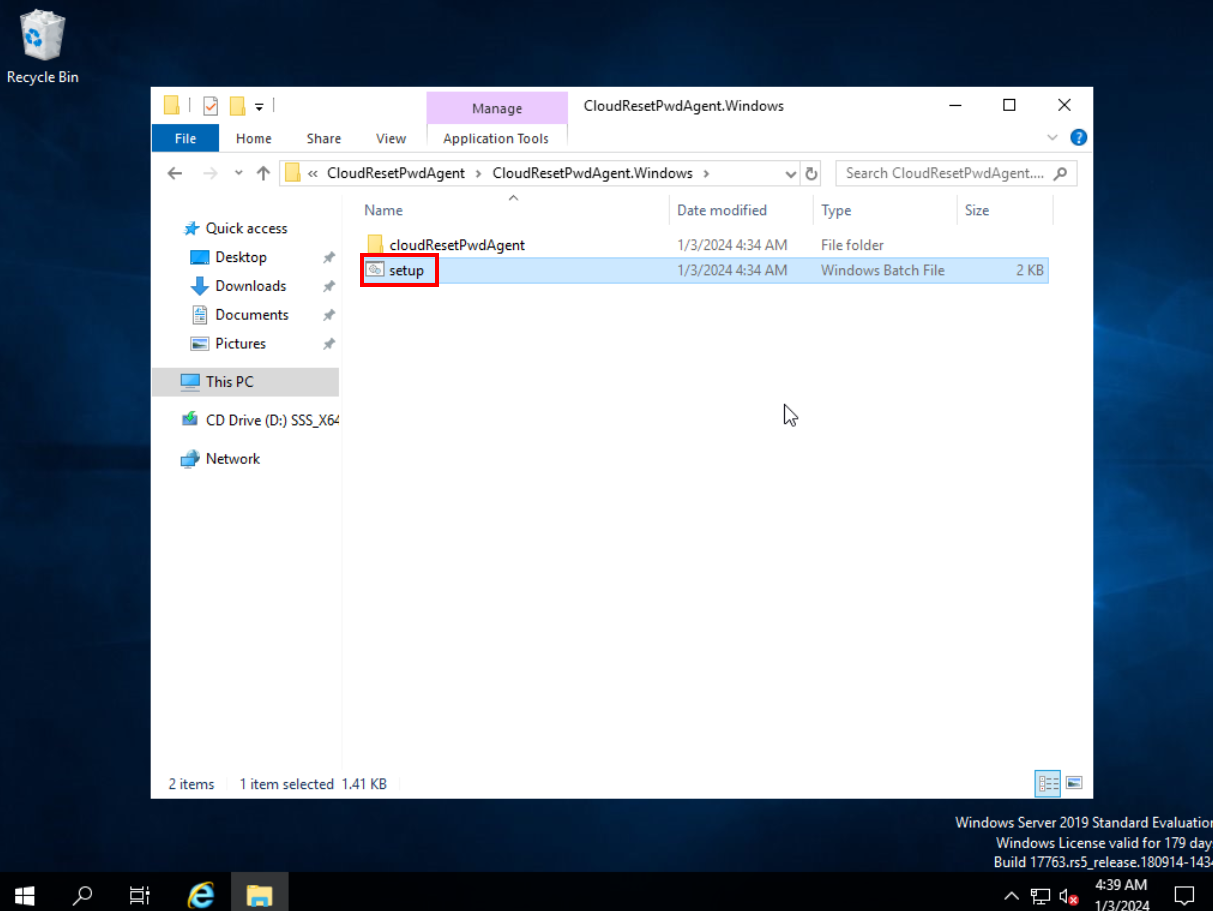
Return to ECS and run the “Setup” file present in the previously extracted folder.
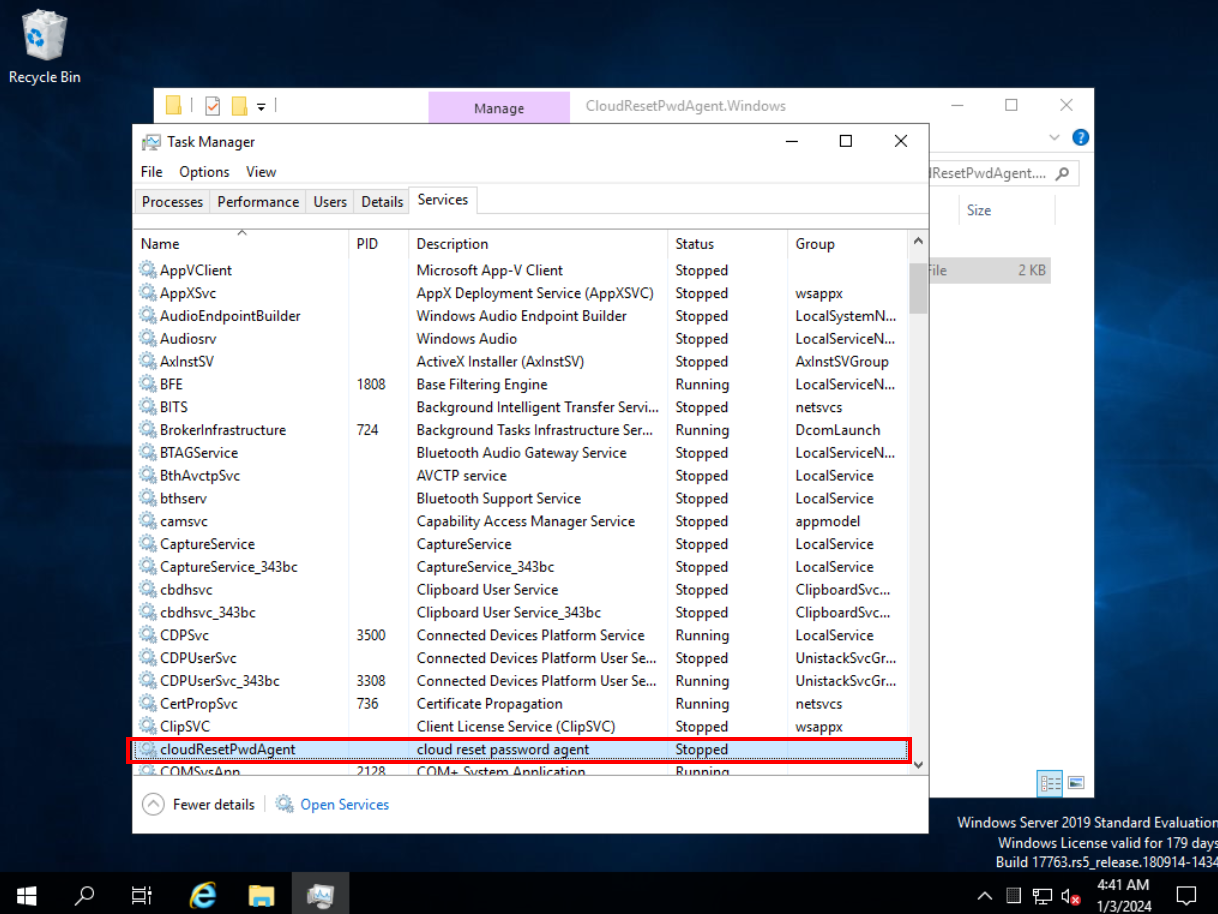
To verify the successful installation of the plugin, open the task manager in the services section and check if the “cloudResetPwdAgent” service is present.
Cloudbase-Init
Cloudbase-init is an important software that manages virtual machines. To download it, access the following link through the ECS browser: https://www.cloudbase.it/downloads/CloudbaseInitSetup_Stable_x64.msi.
After downloading it, open the “CloudbaseInitSetup” installer and click “Next” three times in a row until the user settings screen appears. 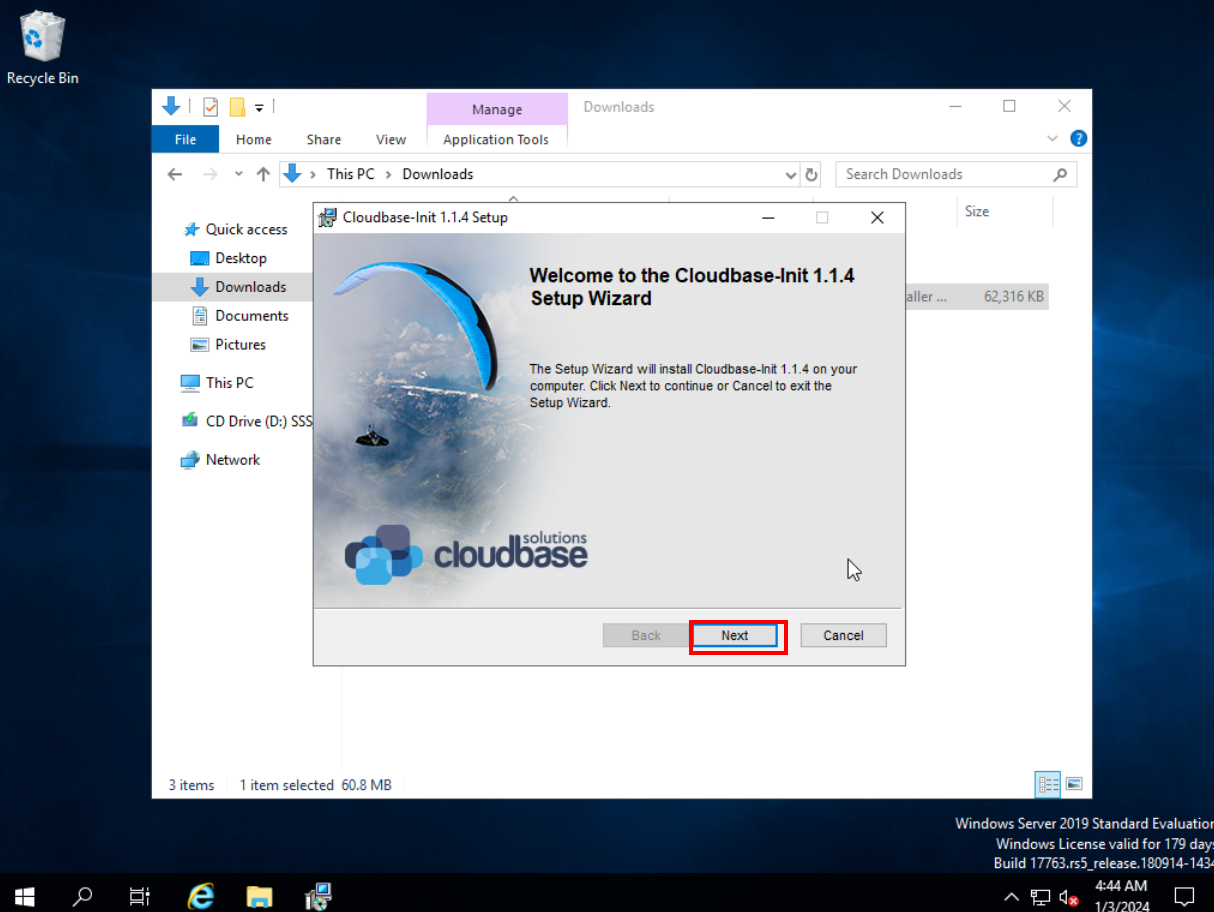 Set the “Username” to “Administrator” and select “COM1” in the “Serial port for logging” option. Click “Next” to continue and “Install” to install the software.
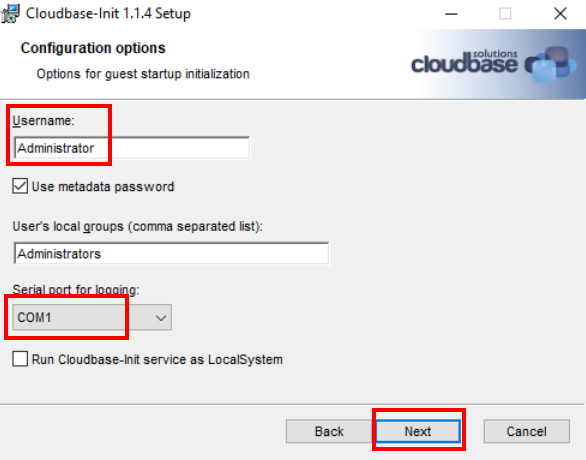
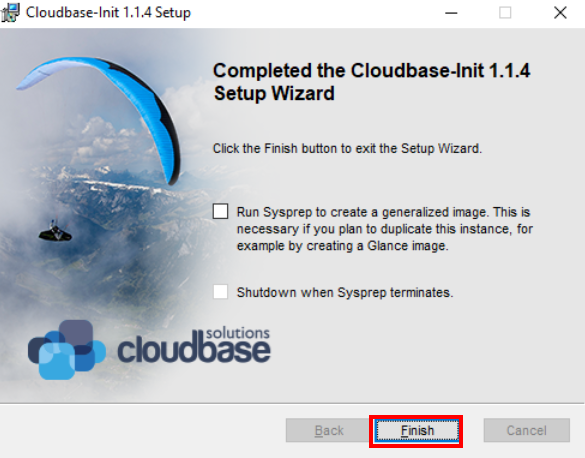
Finally, disable the two available options and click “Finish”.
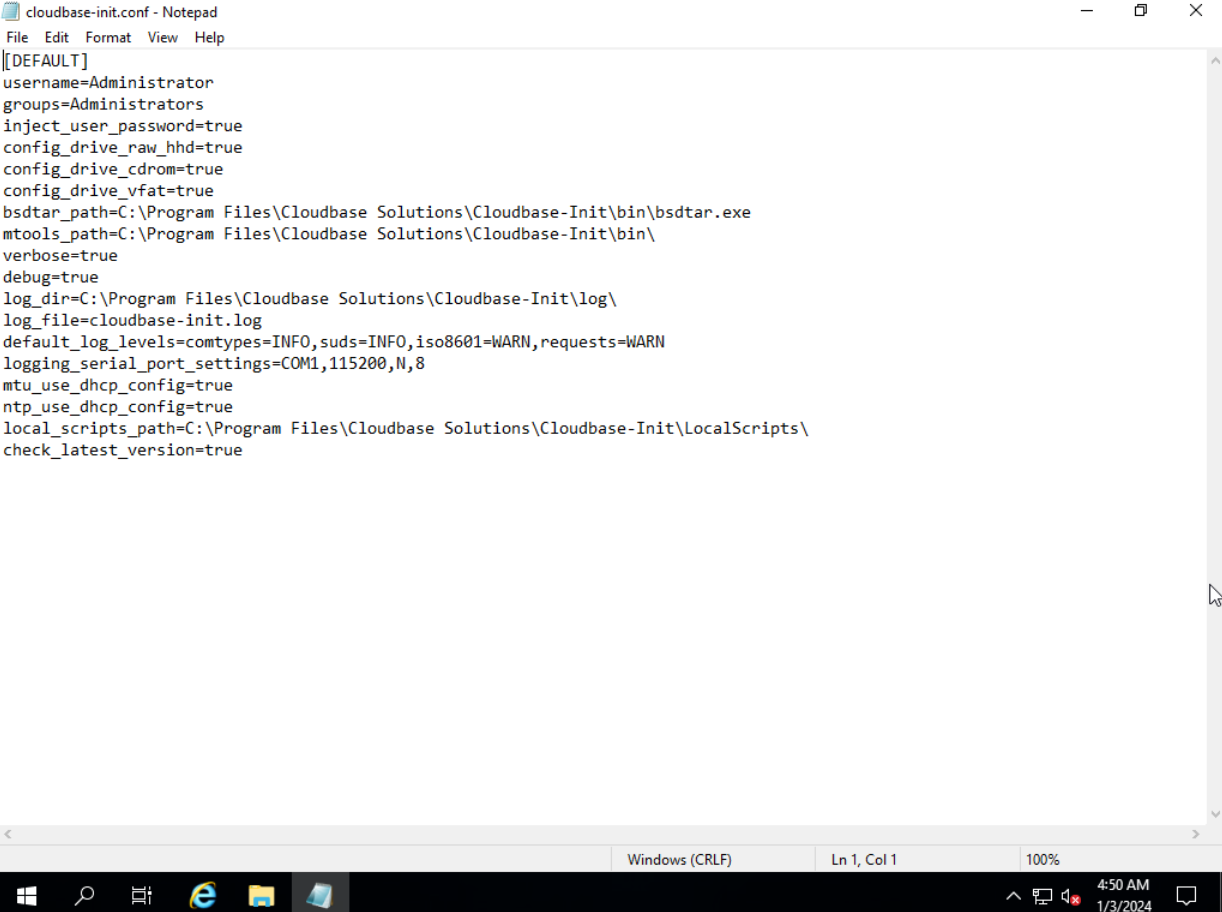
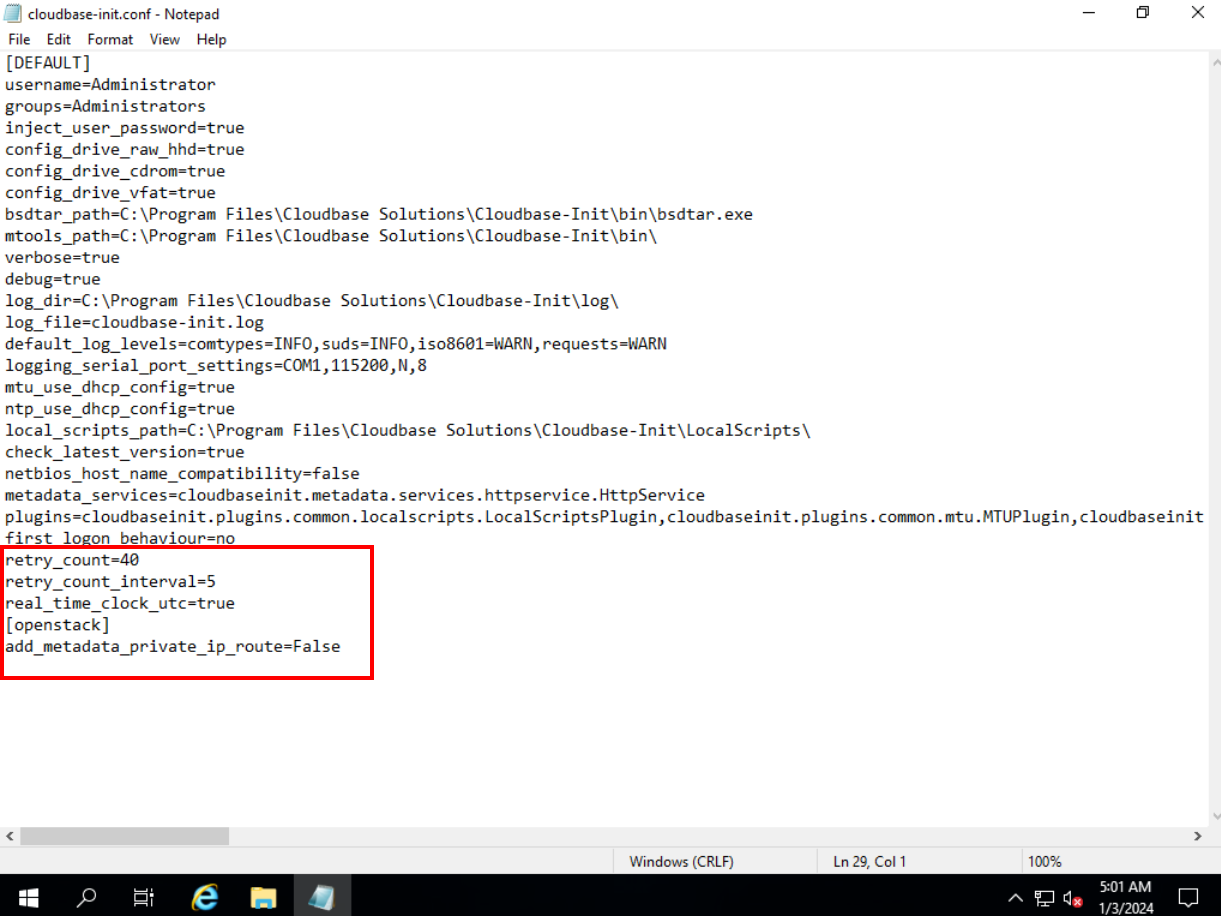
Finally, cloudbase-init needs to be configured. Navigate to the following path: “C:\Program Files\Cloudbase Solutions\Cloudbase-Init\conf” and open the “cloudbase-init.conf” file using notepad.
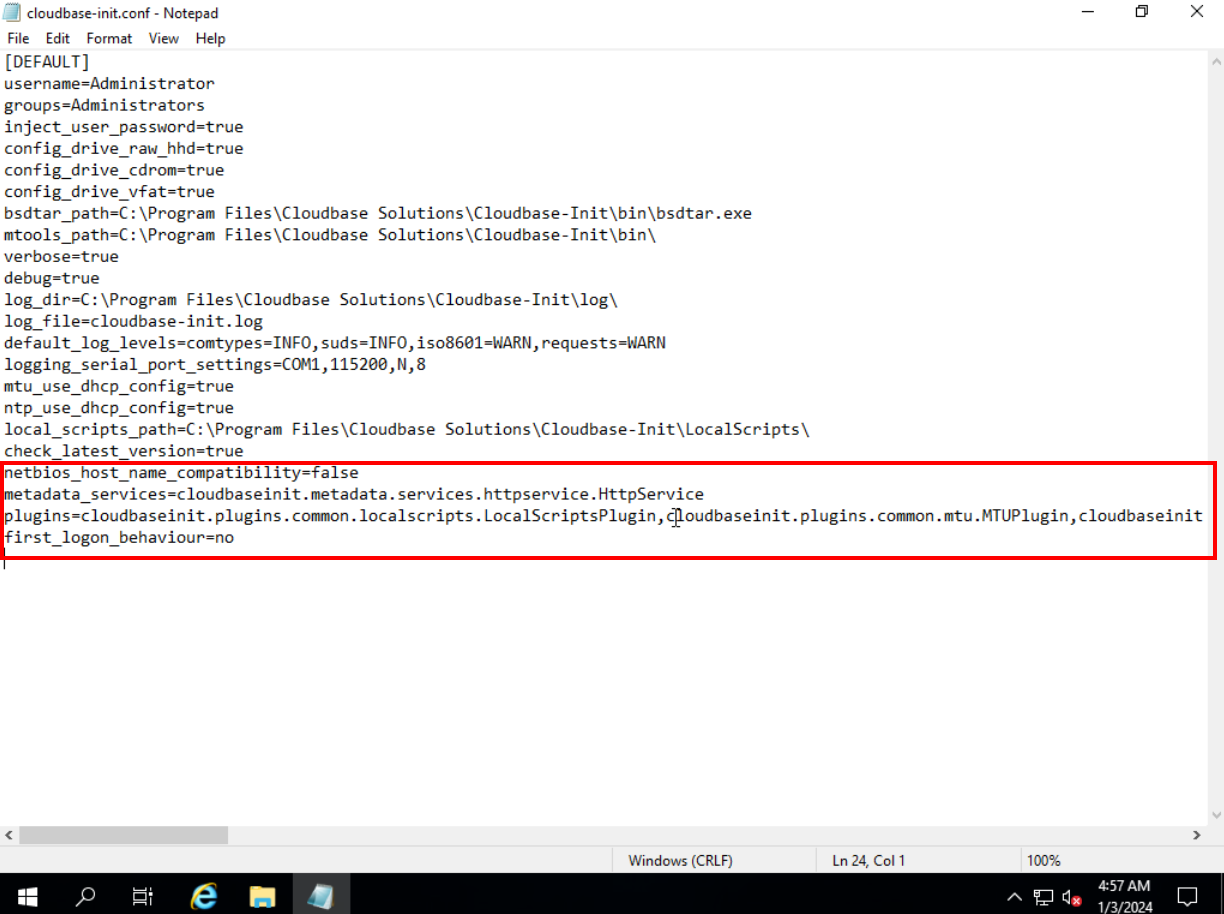
Add the following settings to the end of the file:
netbios_host_name_compatibility=false
metadata_services=cloudbaseinit.metadata.services.httpservice.HttpService
plugins=cloudbaseinit.plugins.common.localscripts.LocalScriptsPlugin,cloudbaseinit.plugins.common.mtu.MTUPlugin,cloudbaseinit.plugins.windows.createuser.CreateUserPlugin,cloudbaseinit.plugins.common.setuserpassword.SetUserPasswordPlugin,cloudbaseinit.plugins.common.sshpublickeys.SetUserSSHPublicKeysPlugin,cloudbaseinit.plugins.common.sethostname.SetHostNamePlugin,cloudbaseinit.plugins.windows.extendvolumes.ExtendVolumesPlugin,cloudbaseinit.plugins.common.userdata.UserDataPlugin,cloudbaseinit.plugins.windows.licensing.WindowsLicensingPlugin
first_logon_behaviour=no
Optionally, also add the following settings:
plugins=cloudbaseinit.plugins.windows.winrmlistener.ConfigWinRMListenerPlugin,cloudbaseinit.plugins.windows.winrmcertificateauth.ConfigWinRMCertificateAuthPlugin
retry_count=40
retry_count_interval=5
real_time_clock_utc=true
[openstack]
add_metadata_private_ip_route=False
For a better understanding of how each of the configurations performed here works, please refer to the official IMS documentation at the following link: https://support.huaweicloud.com/intl/en-us/usermanual-ims/en-us_topic_0030730602.html.
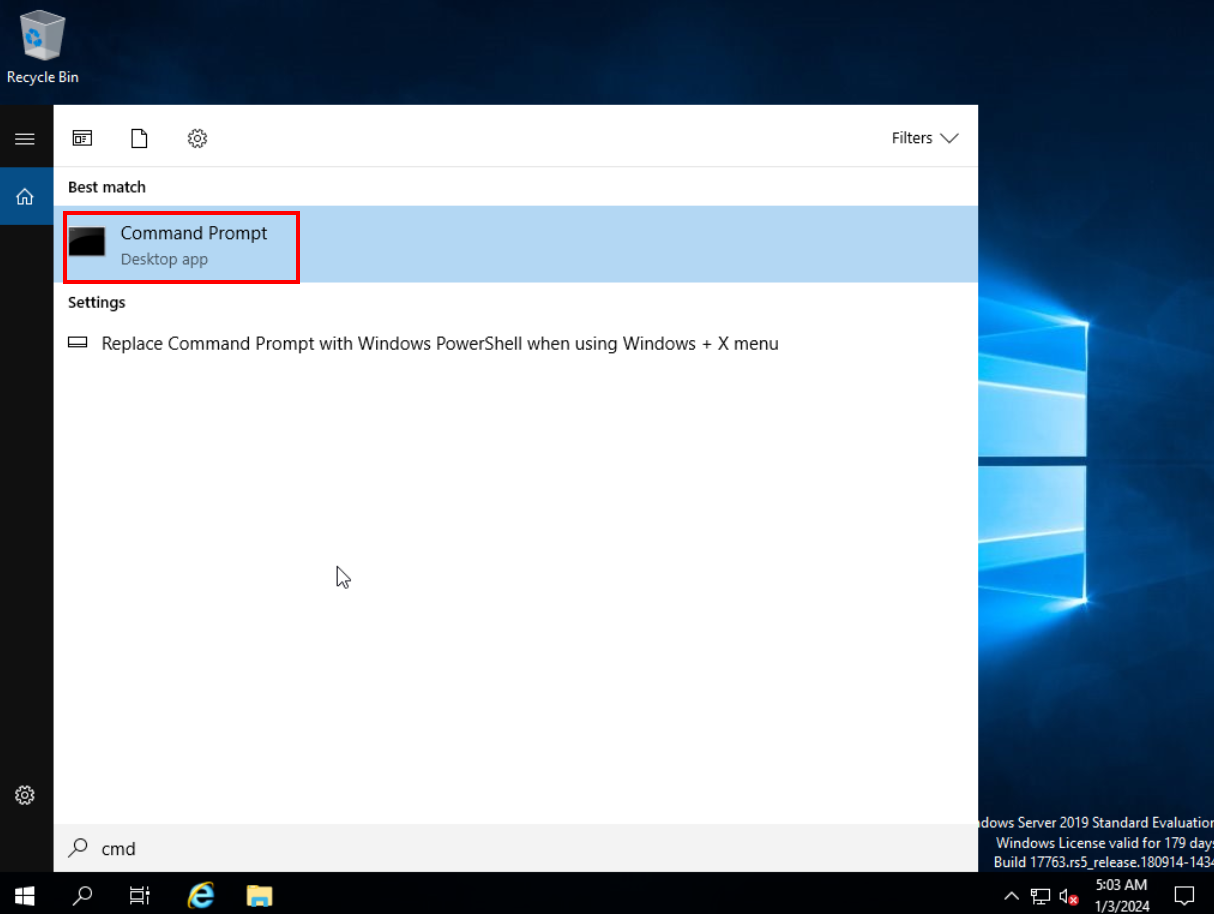
Open Windows cmd to clear the currently configured DHCP address. This step will limit the instance’s internet access until it is restarted. Open Windows Search and type “cmd”.
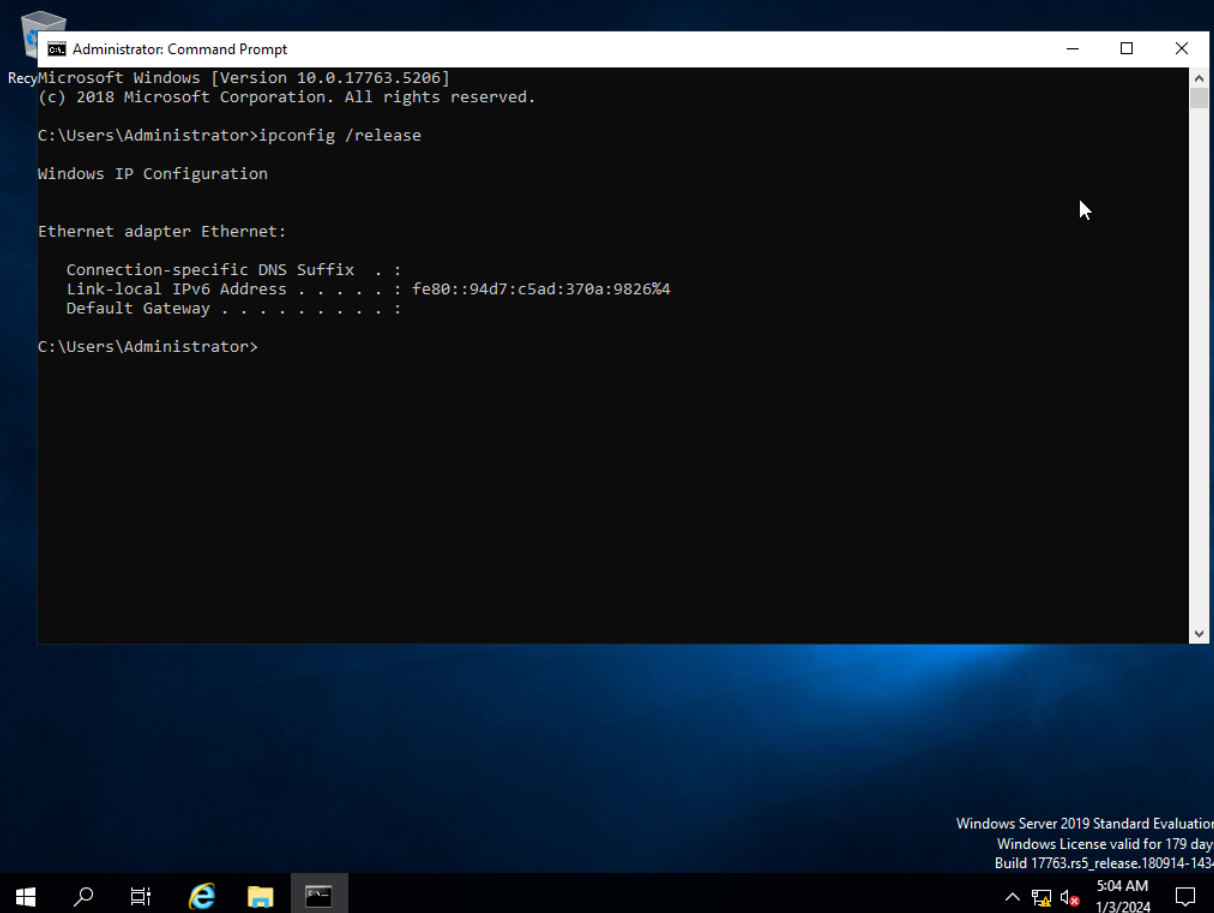
Type the following command: “ipconfig /release”.
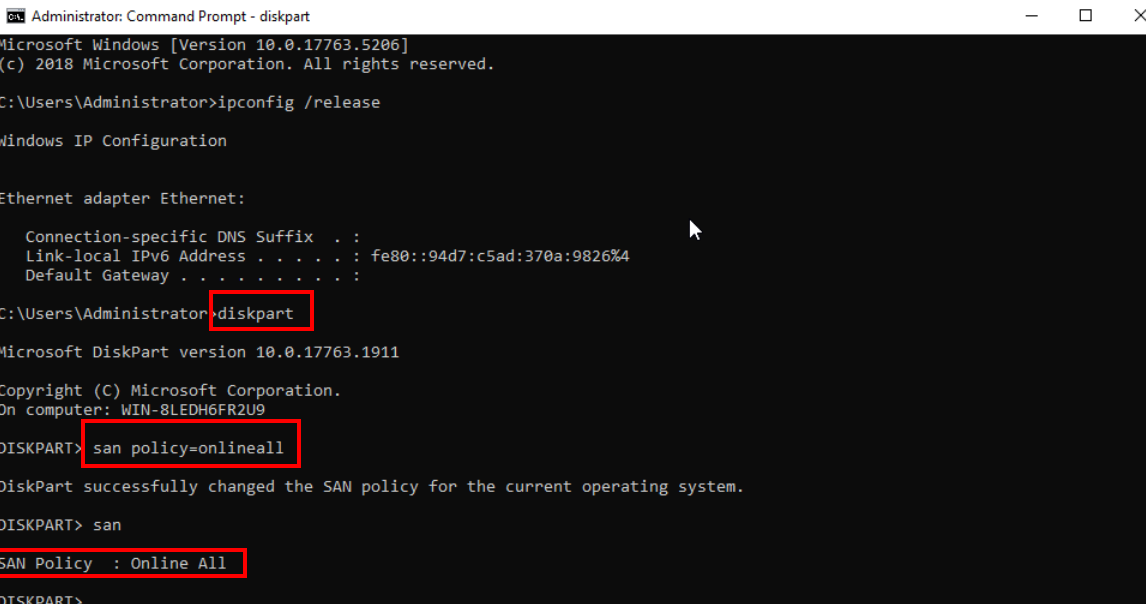
Also, type the following sequence of commands: “diskpart” and “san policy=onlineall”. Check if the configuration was applied by typing the “san” command.
Type “exit” twice consecutively to exit the cmd. Restart the instance so that the instance can resume internet access. Please note that when you log in to the Administrator account, ECS will automatically restart. After the second restart, you will notice that the password you previously set no longer works for the administrator profile. This is due to the installation of cloudbase-init, which will randomize the profile password after the first system restart after its installation. To set the password again, go to the Huawei Cloud console in the ECS section, click “More” and “Reset password” next to the desired instance. 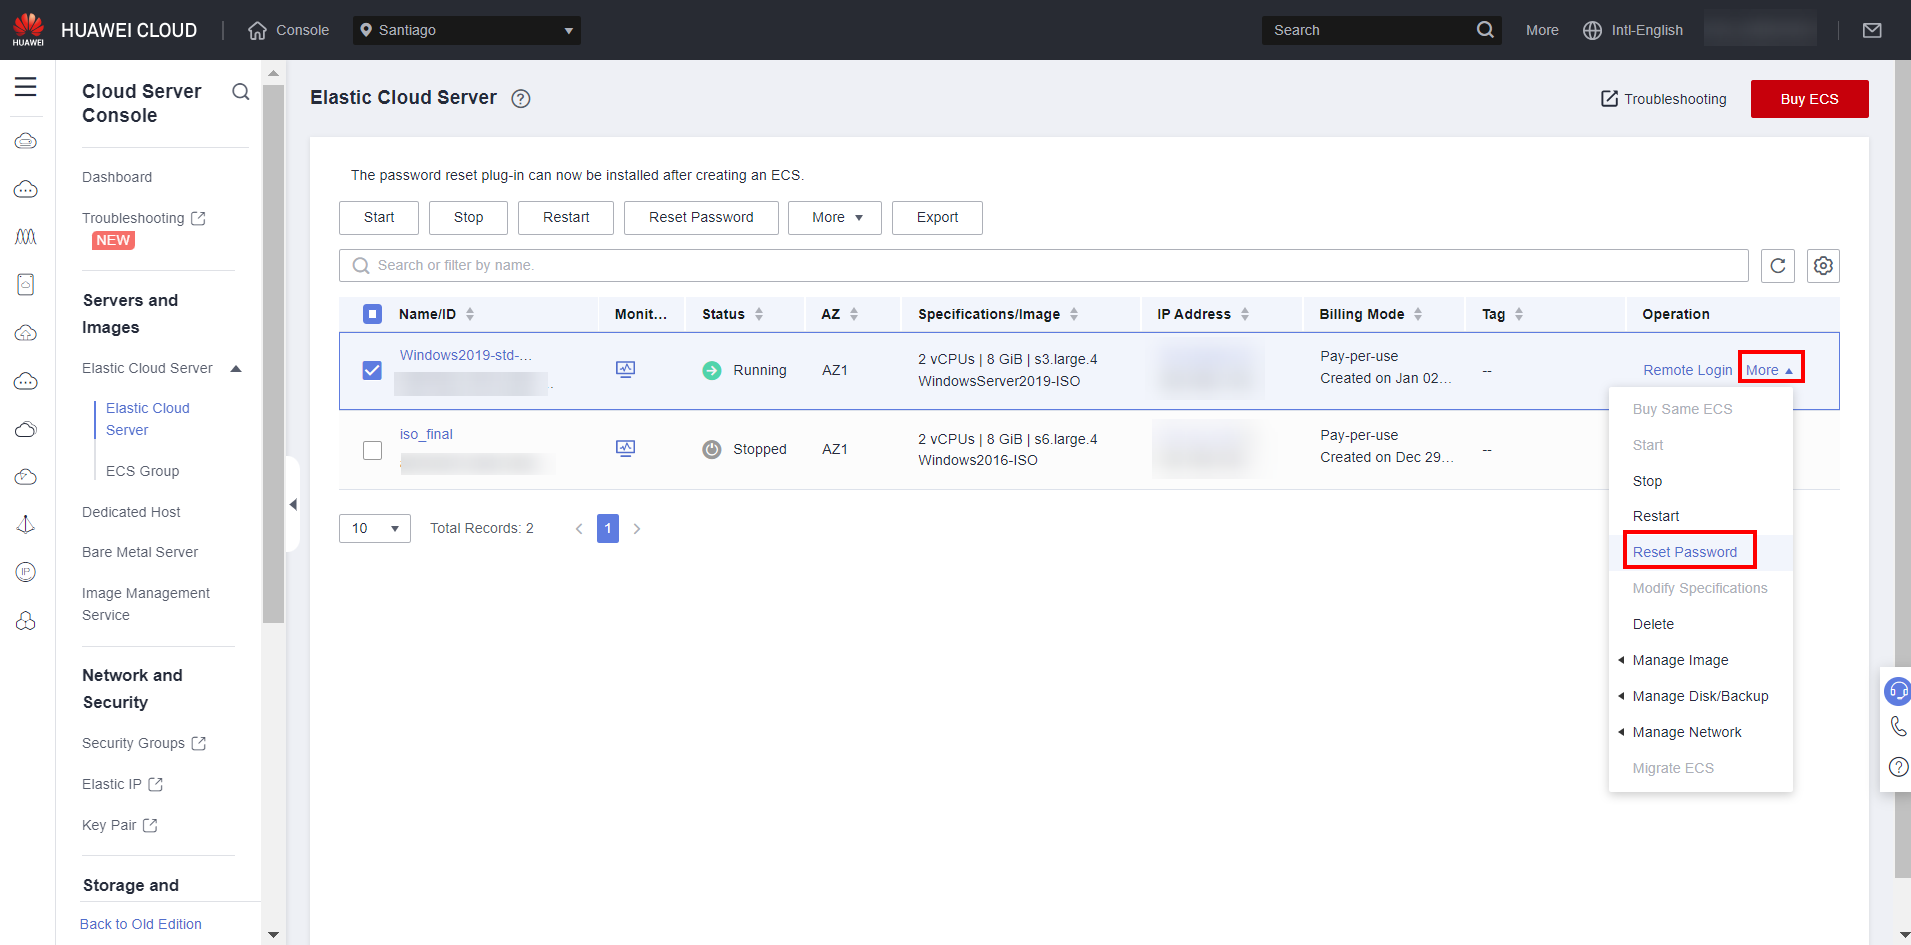 Set the password again, enable the “Auto Restart” box and click “OK”.
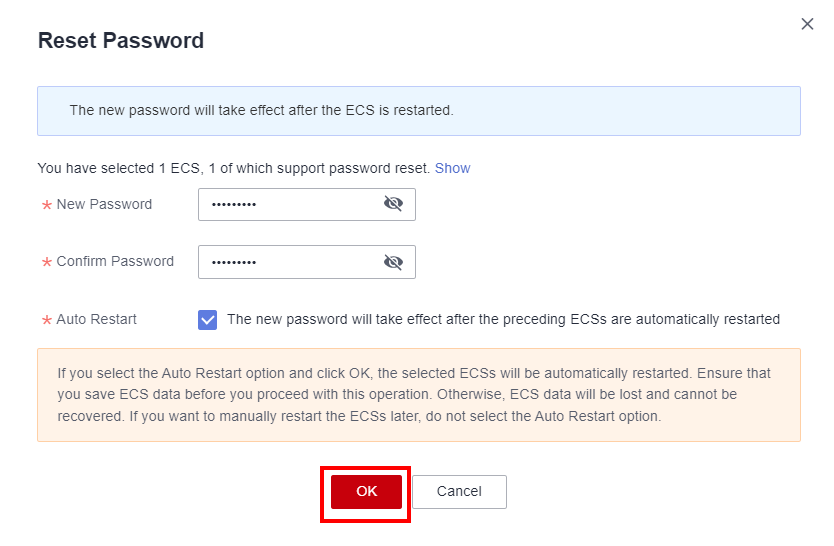
After the instance automatically restarts, you will notice how the Administrator profile password has been changed to the password defined in the console.
Now, perform the other desired configurations in ECS to generate the final instance image.
Creating the image
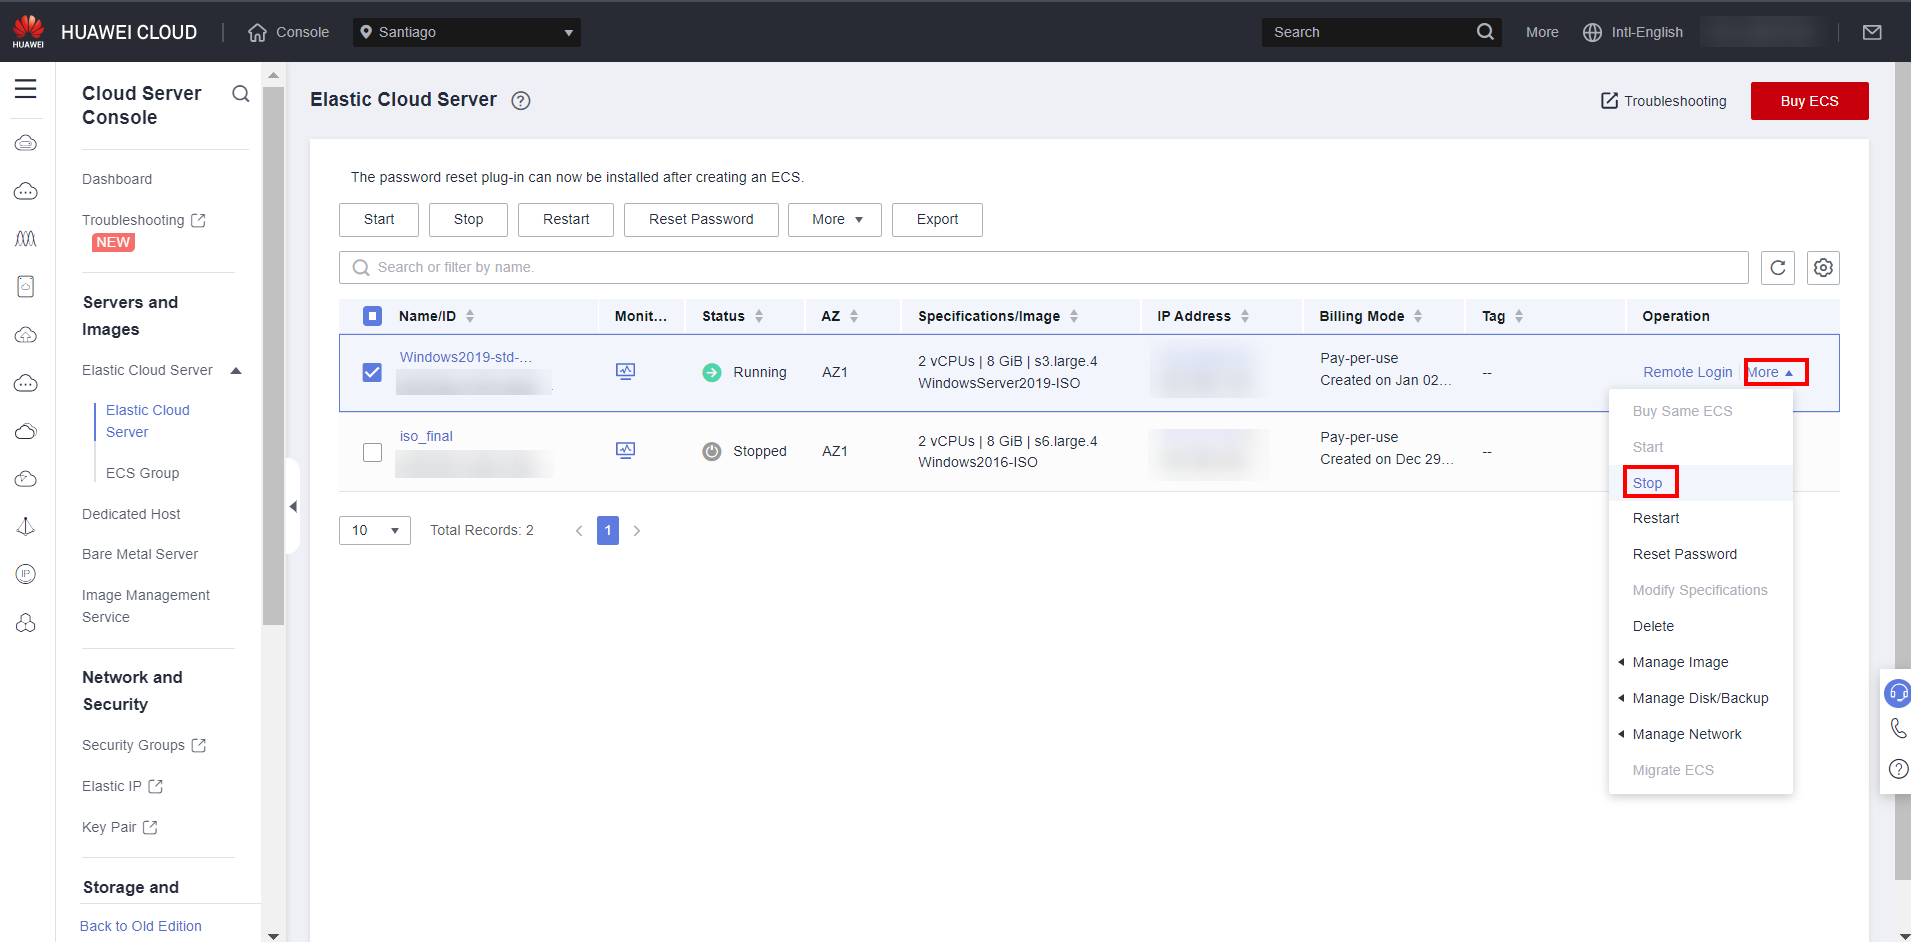
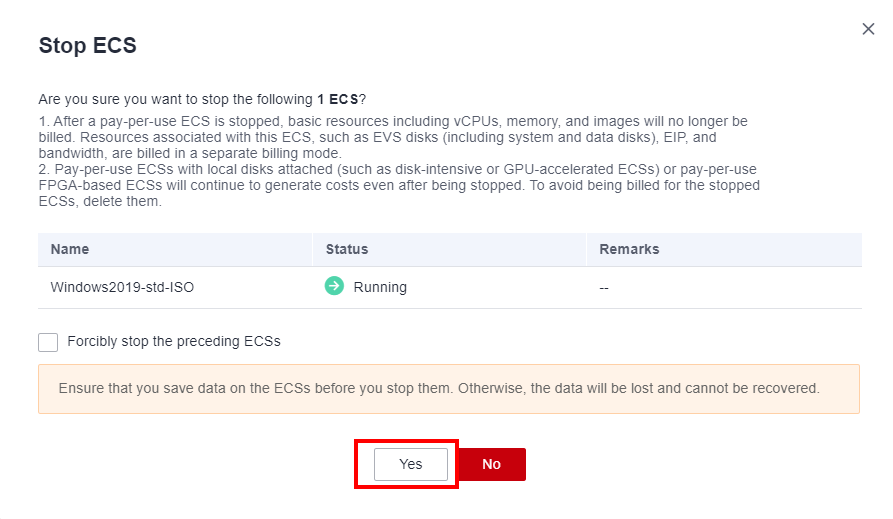
After performing all the above adjustments and those chosen by you, navigate to the ECS section in the Huawei Cloud console, click “More” next to the desired instance, and click “Stop” to shut down the instance.
Select “Yes”.
Navigate to the IMS section in the Huawei Cloud Console
Click “Create Now” under “Image creation”.
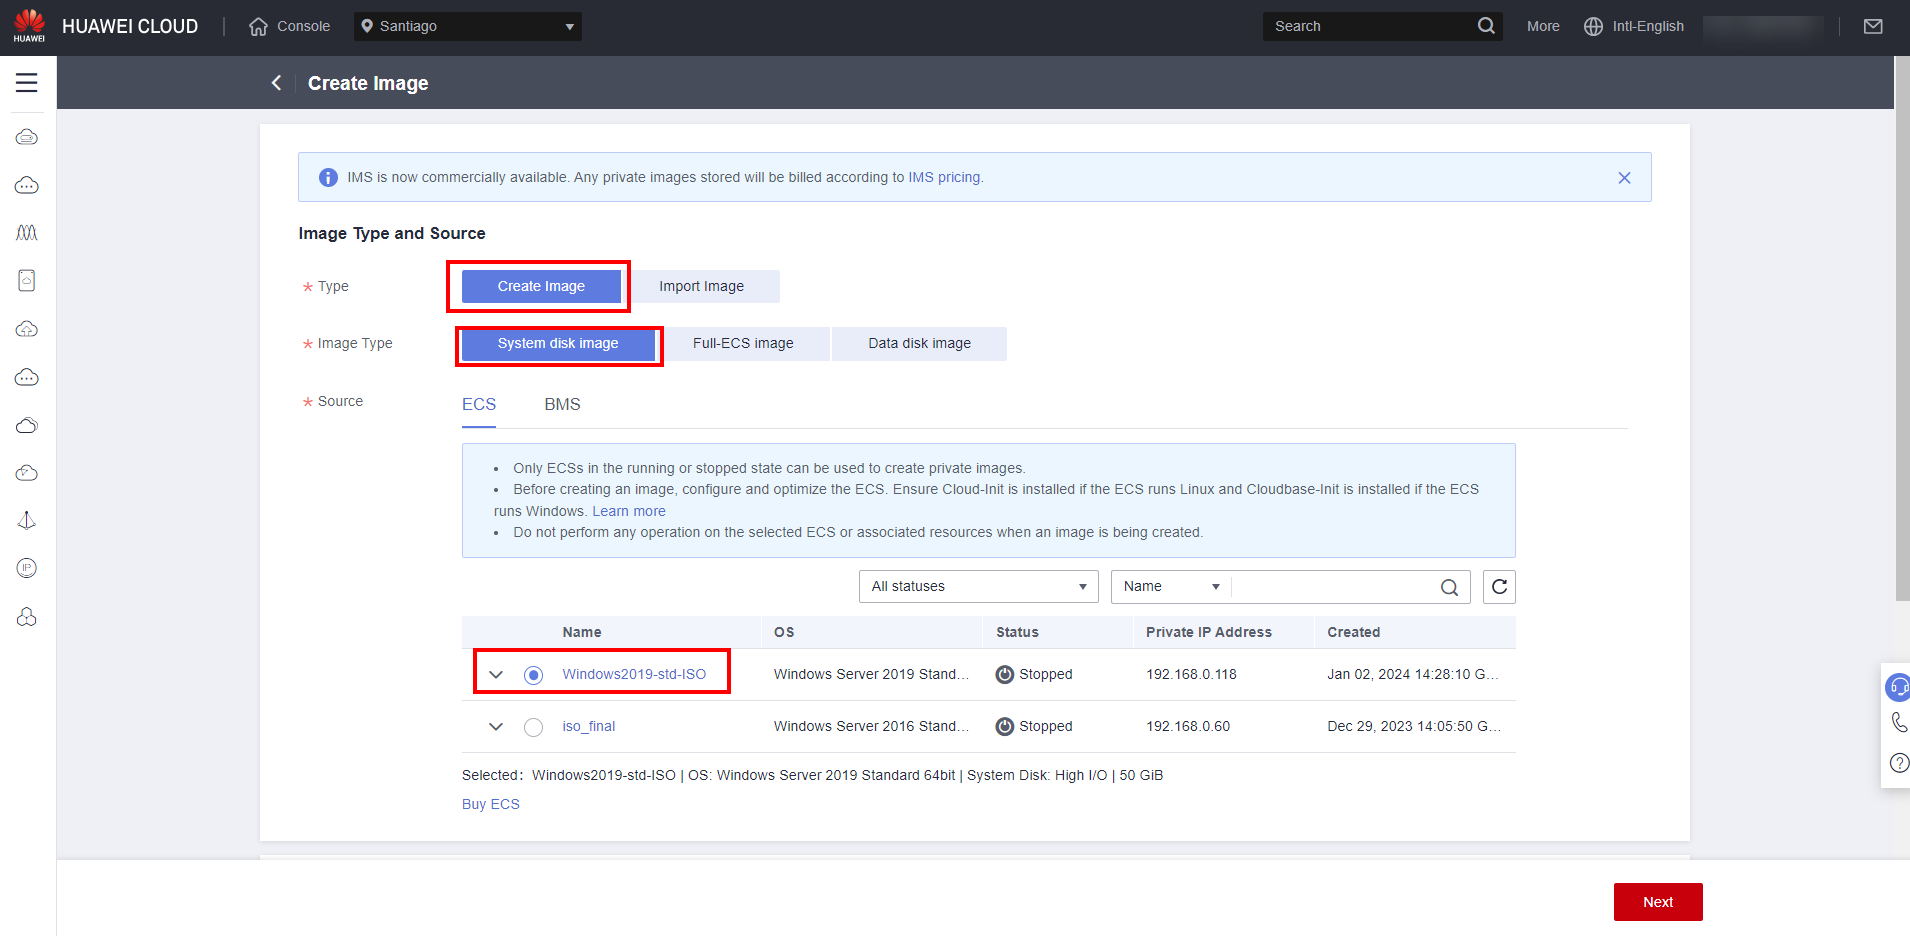
Select “Create Image” in “Type” and “System disk image” in “Image Type”. Select the desired ECS, give the image a name and click “Next”, after checking the box to accept the terms. Click “Submit”.
After the image creation is complete, new instances can now be created from the ISO file downloaded in step 2!
References:
- IMS documentation: https://support.huaweicloud.com/intl/en-us/usermanual-ims/ims_01_0220.html.
- Workspace documentation: https://support.huaweicloud.com/intl/en-us/usermanual-workspace/workspace_06_0510.html.