![]()
Migrating MySQL to GaussDB
V1.0 – April 2024
| Version | Author | Description |
|---|---|---|
| V1.0 – 2024-04-23 | Diogo Hatz 50037923 | Initial Version |
| V1.0 – 2024-04-24 | Wisley da Silva 00830850 | Document Review |
Introduction
Database and Application Migration (UGO) is a free tool available on Huawei Cloud for migrating heterogeneous database schemas. UGO can convert DDL statements to those compatible with the databases available on Huawei Cloud, such as GaussDB and RDS. In addition to schema migration and migration evaluation, UGO can automatically convert the source database syntax to be compatible with the target database.
This document aims to guide the reader to use the UGO tool for migrating heterogeneous databases to RDS or GaussDB instances on HWC through a scenario of migrating a MySQL database to GaussDB. The dataset used is one of the MySQL test datasets, Sakila, publicly available on the MySQL website.
UGO
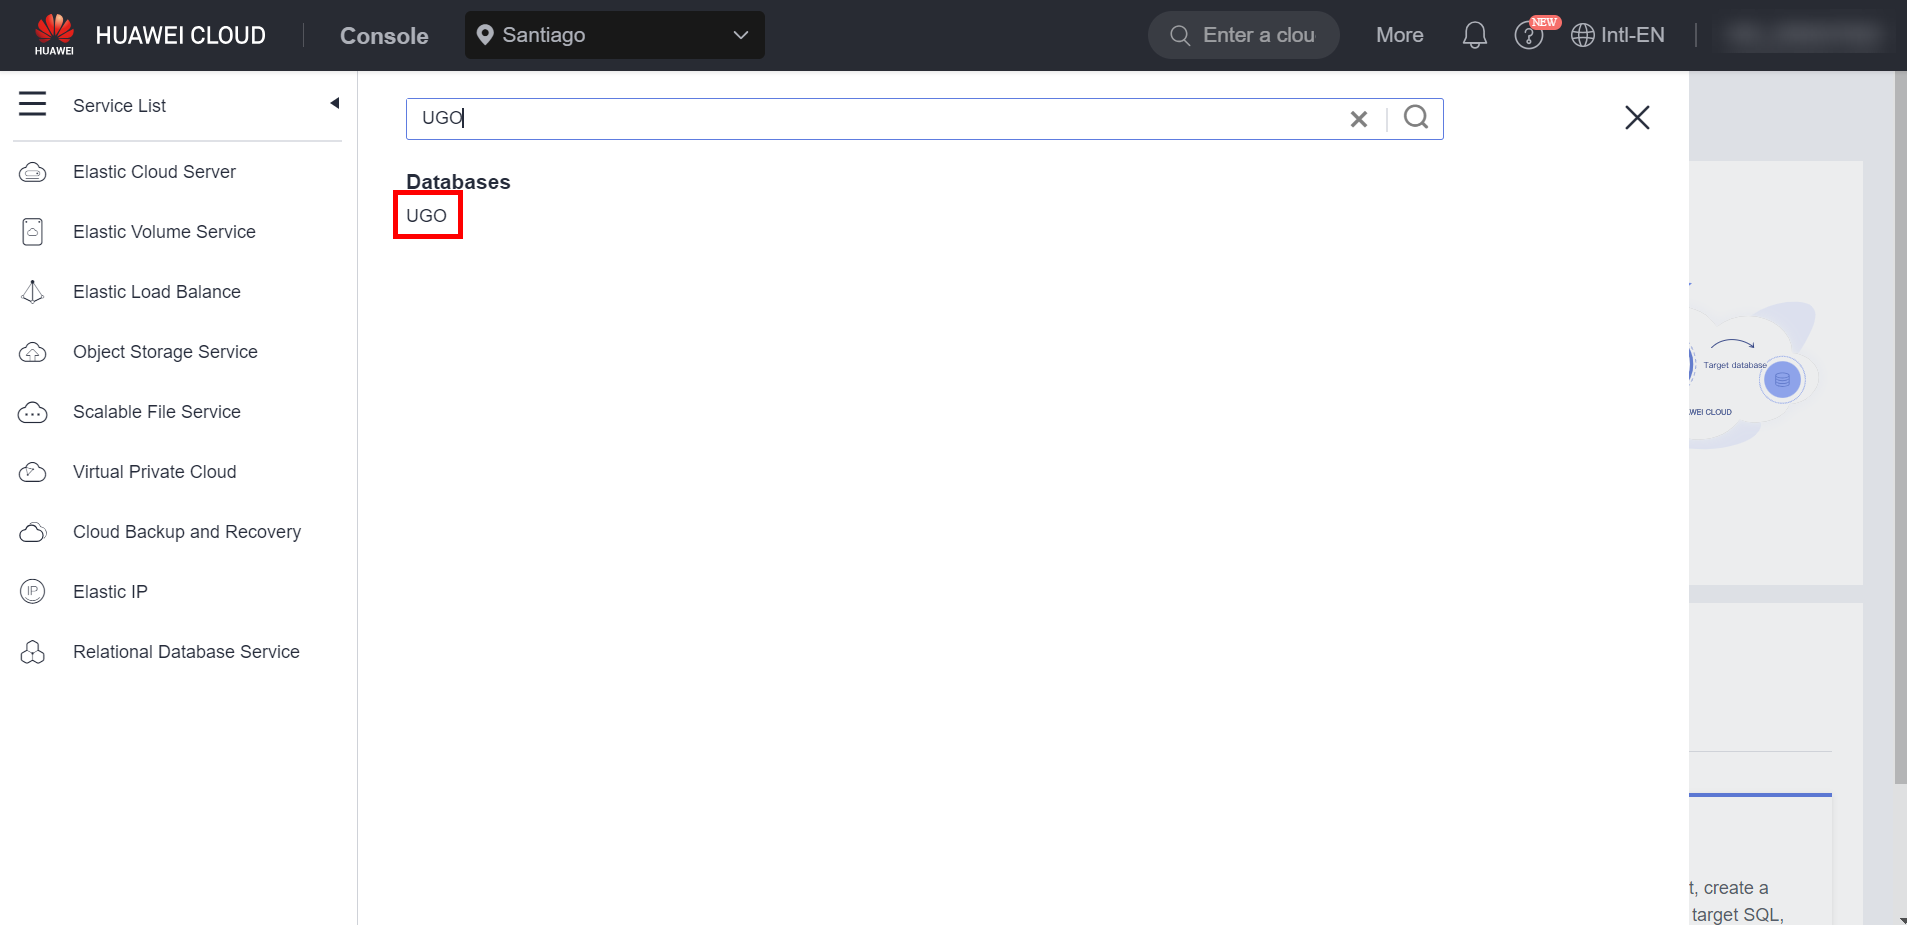
To migrate a MySQL database to GaussDB, it is necessary to use the UGO service available at HWC to evaluate the migration and convert the source database syntax to a syntax compatible with the target database, in addition to checking the compatibility of the source engine with the target engine. To access the UGO service, simply search for “UGO” in the list of services available in the HWC console. It is worth noting that the service is only available in the regions of Santiago and Singapore.
DB Evaluation
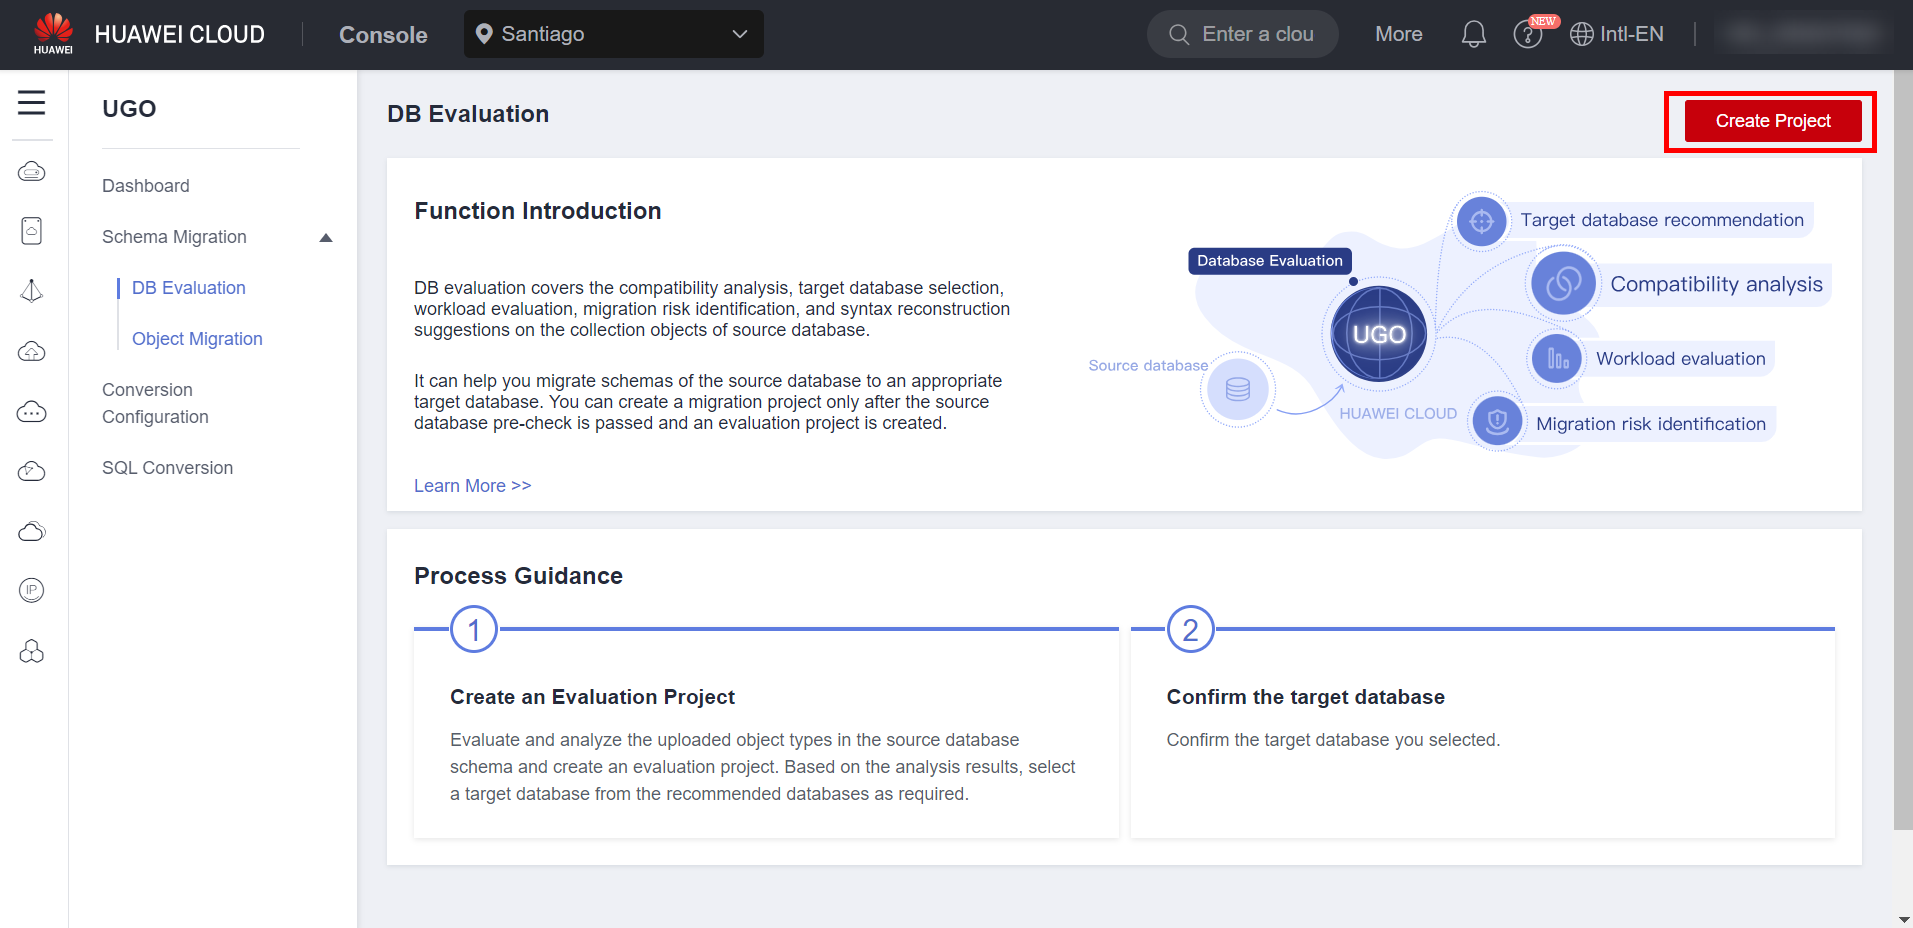
To perform the database migration, it is first necessary to evaluate the source and target databases to check their compatibility. To do this, access the “DB Evaluation” window, in the “Schema Migration” item, and select “Create Project”.
Fill in the information related to the source database, such as the public IP, port, user and password of the database. It is worth noting that, currently, the UGO tool does not allow database migration via VPN, therefore a public IP must be provided. Furthermore, the user entered into the tool must have DBA permissions on the source database. 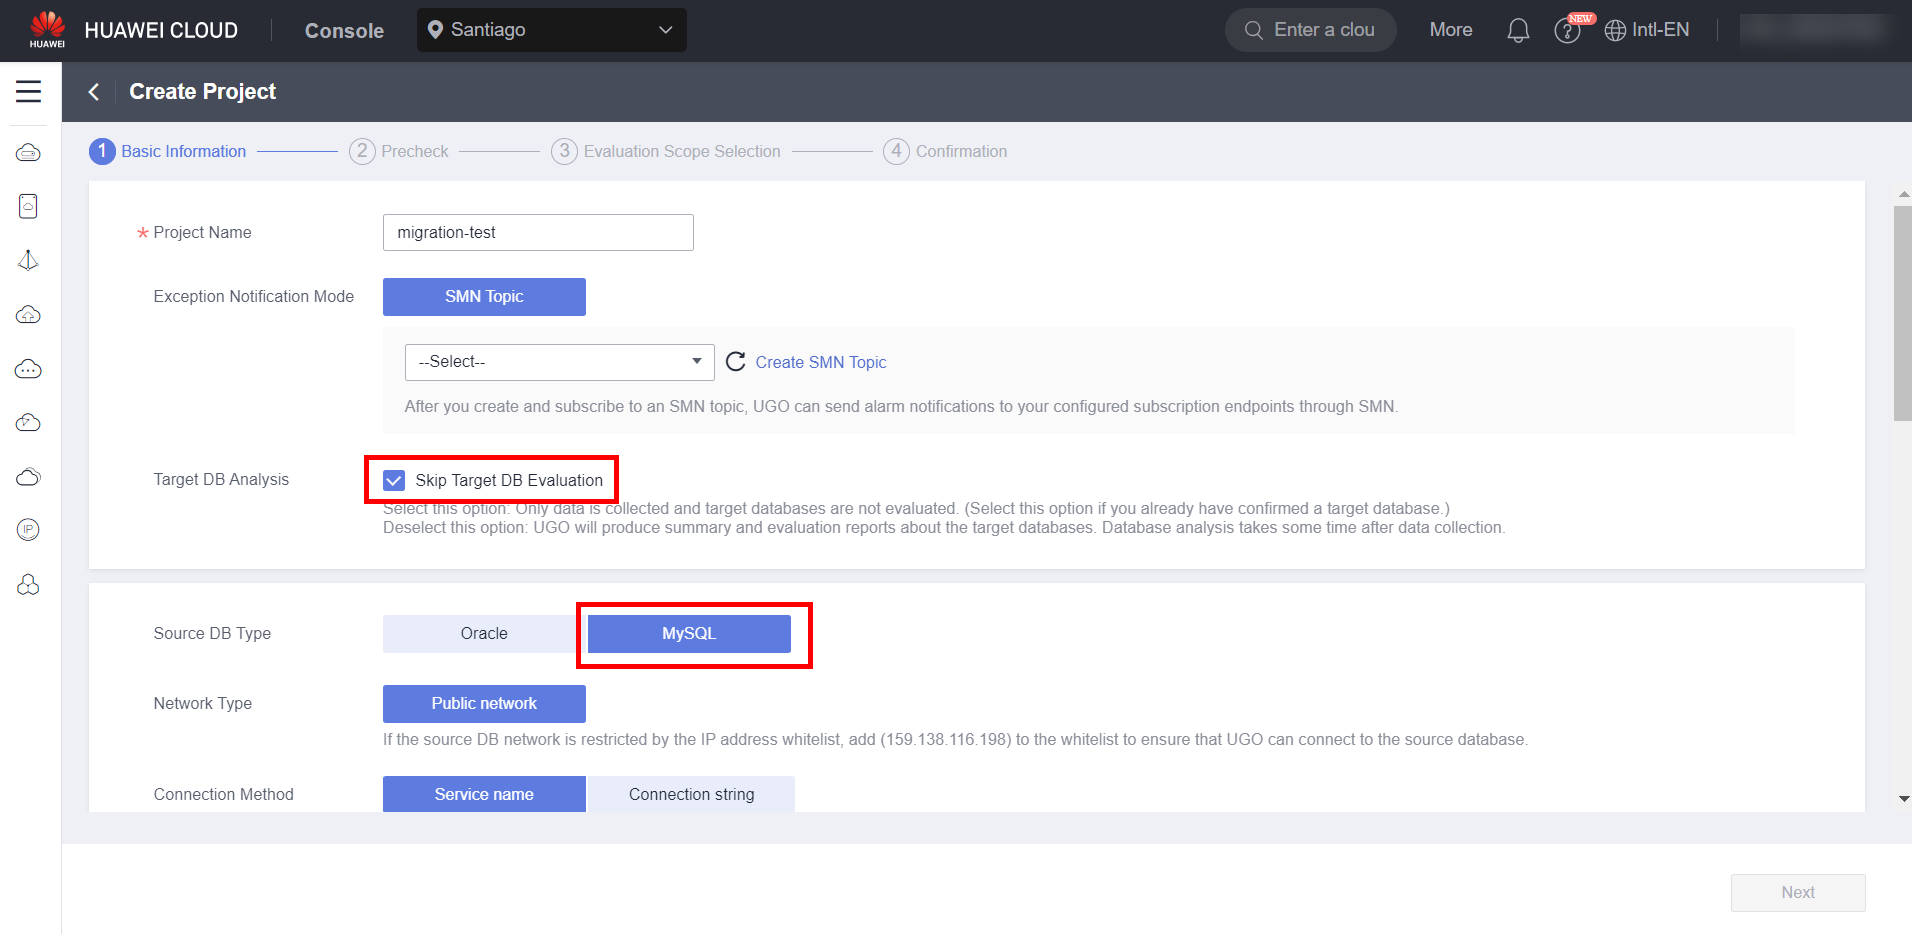 The “Skip Target DB Evaluation” checkbox must be selected if the target database has already been selected. Otherwise, leave this option disabled so that UGO can analyze the compatibility of the source database with the target database. After completing the fields, perform the connection test with the source database and click “Next”. If the connection test fails, check if port 3306 is open in the security group of the source database instance.
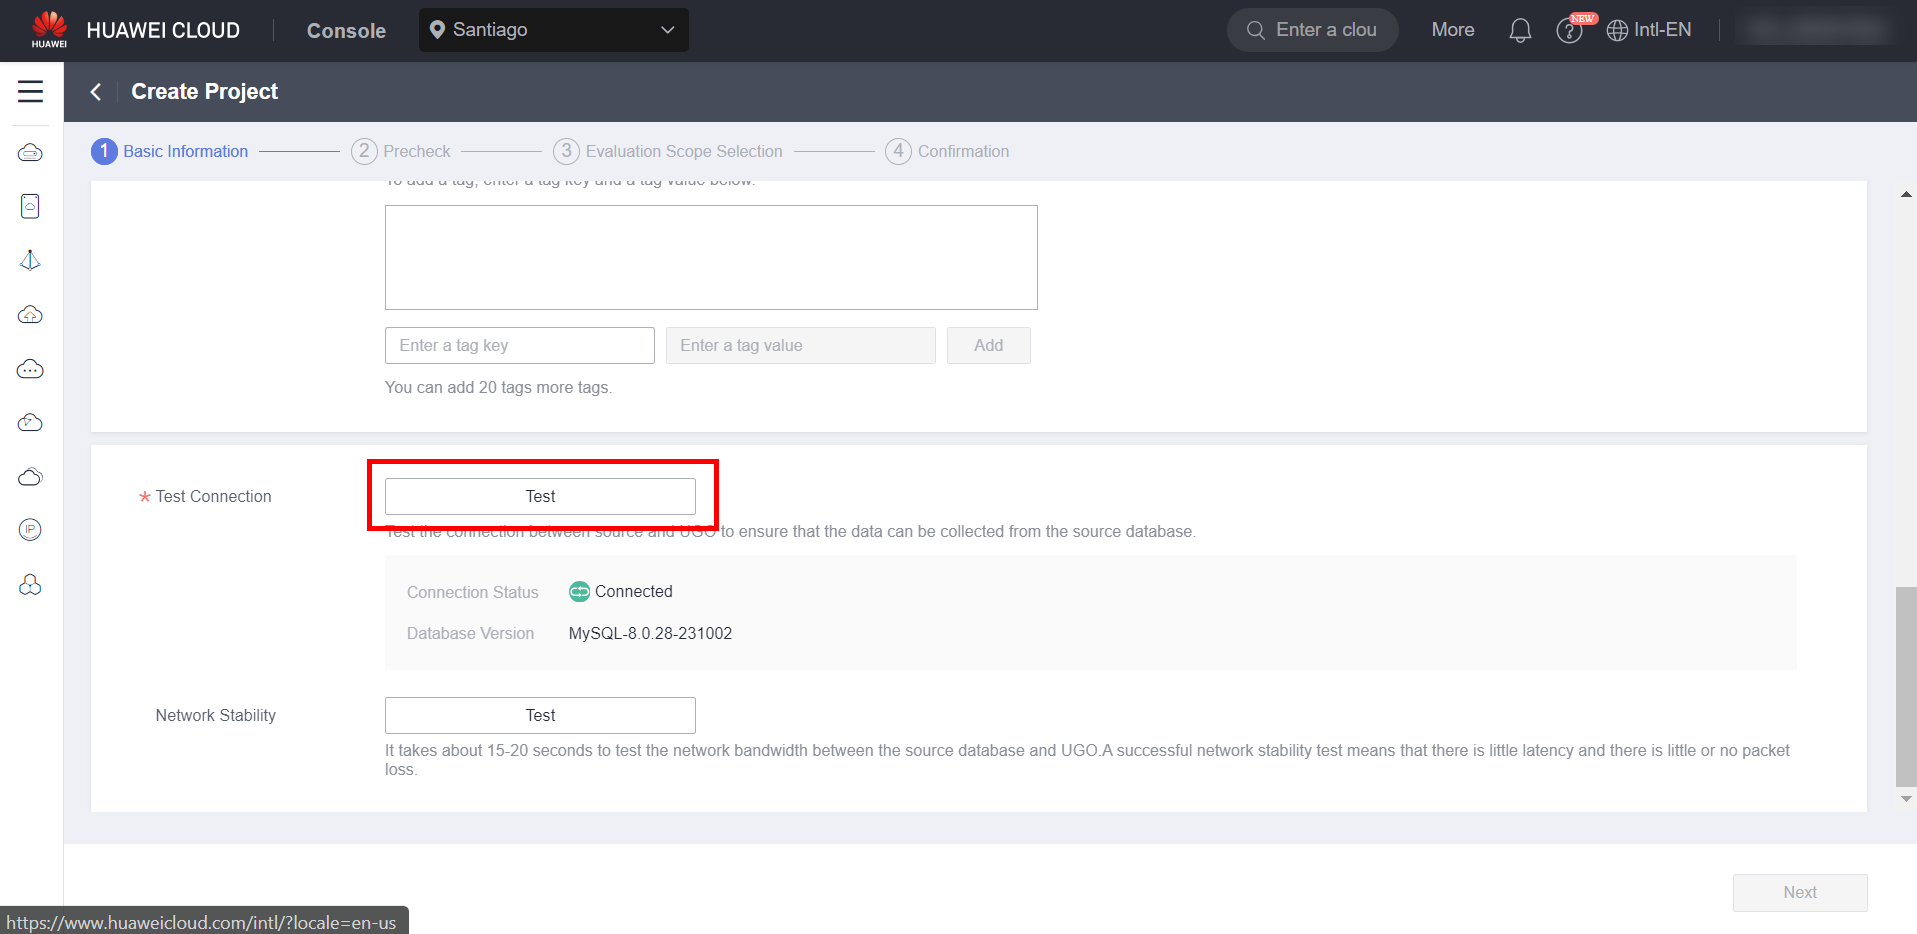
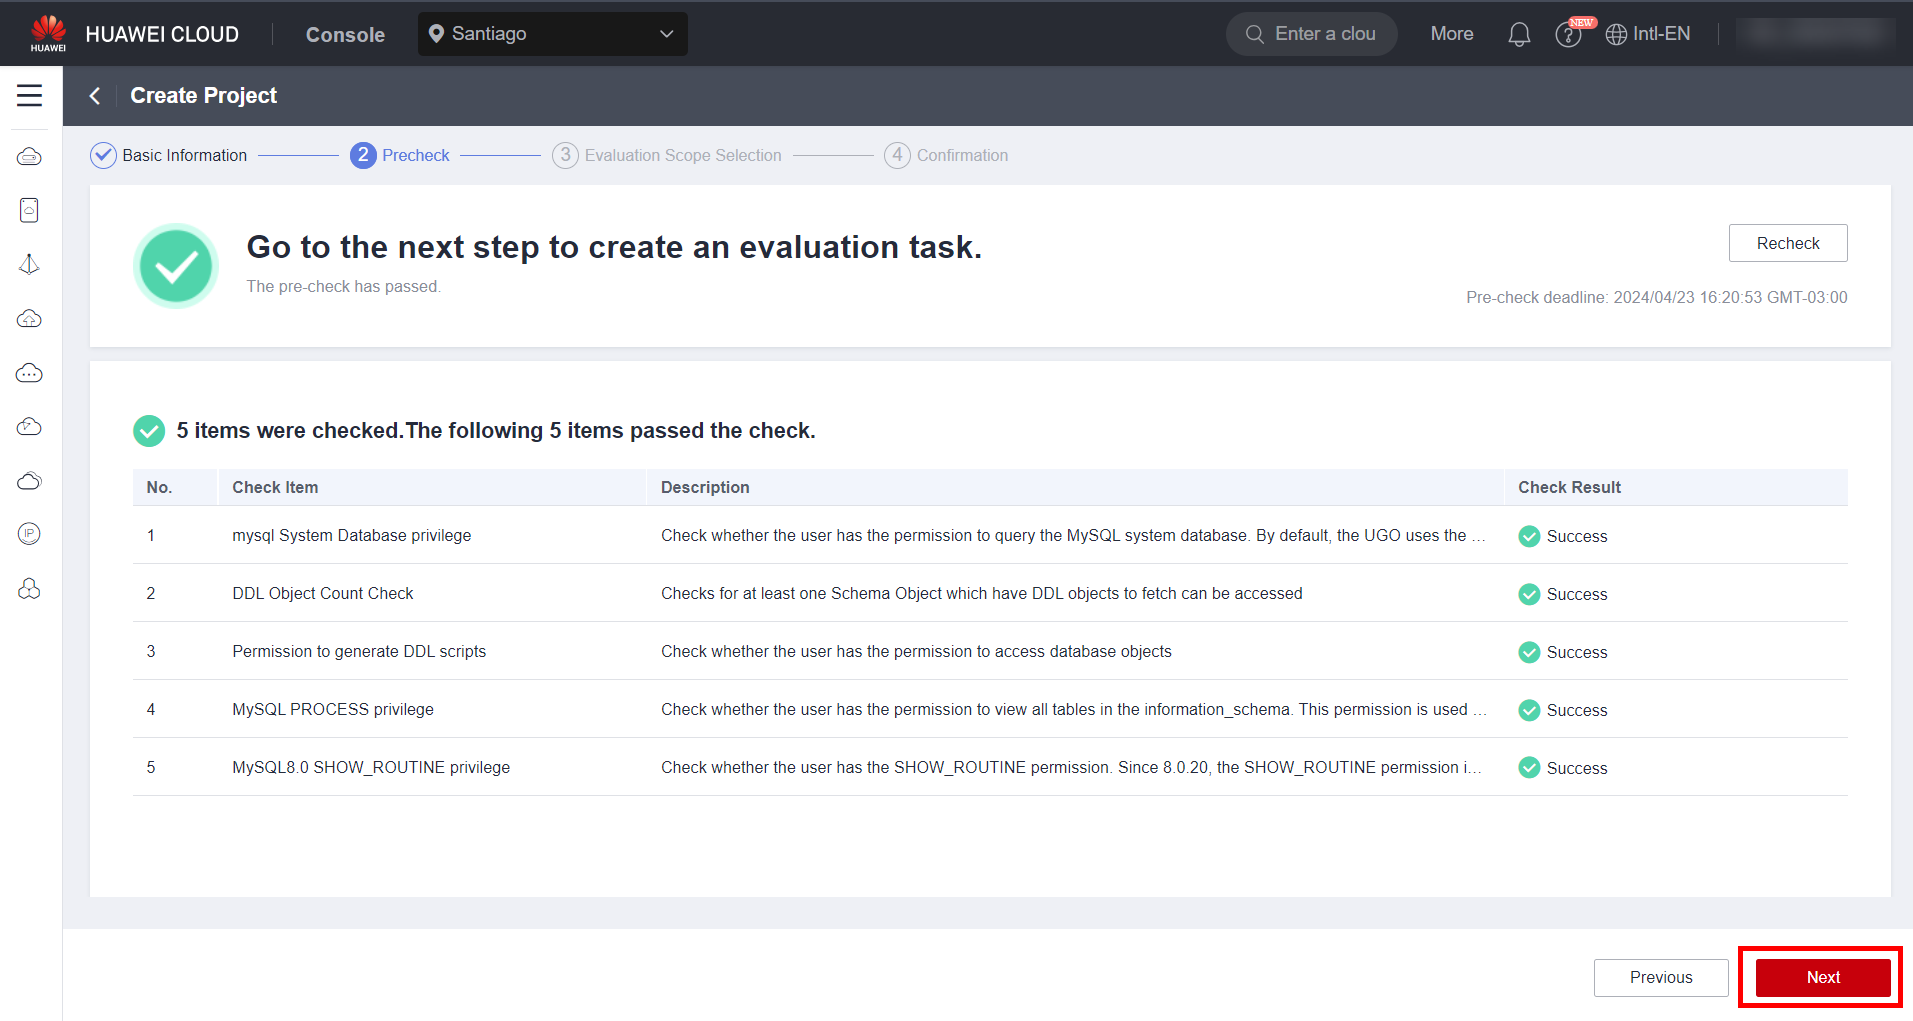
After the pre-check is done, click “Next” again.
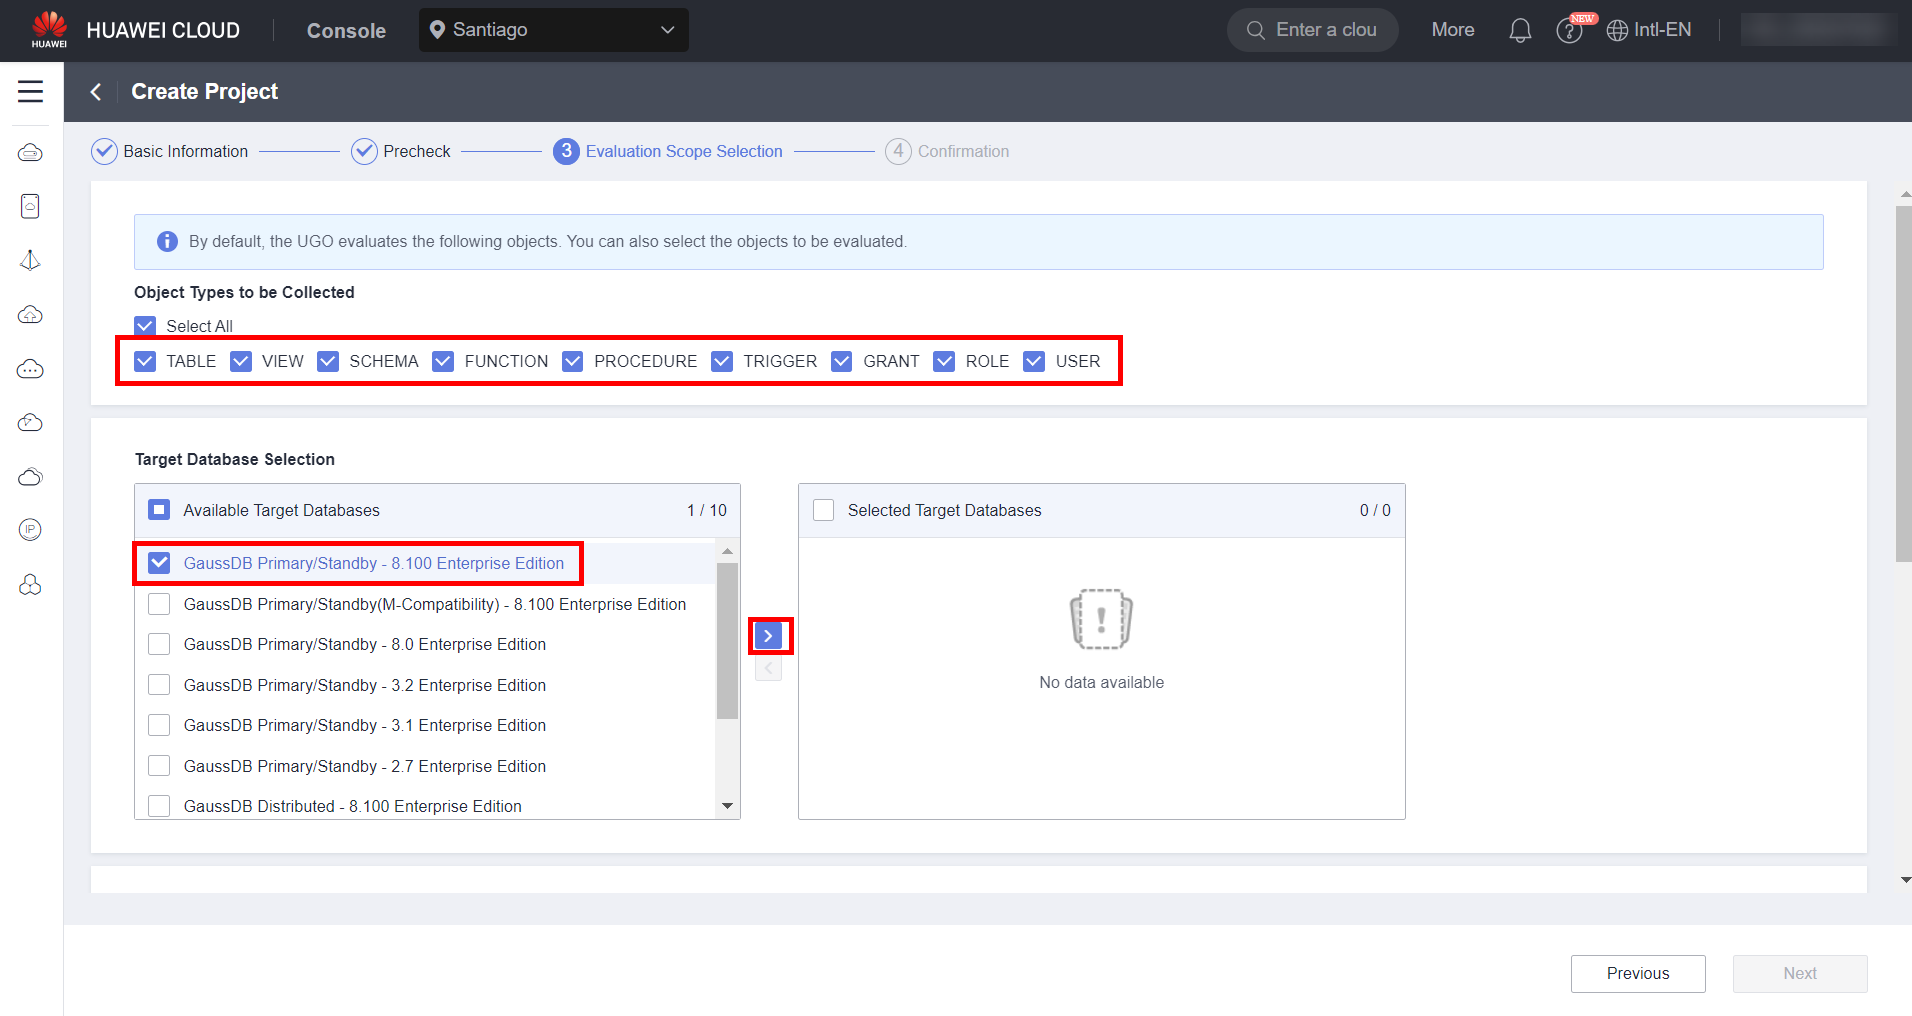
In this window, select the source database objects to be migrated, such as tables, schemas, triggers, procedures, etc. After that, select the target database engine, in this case GaussDB 8.1 Primary/Standby Enterprise Edition.
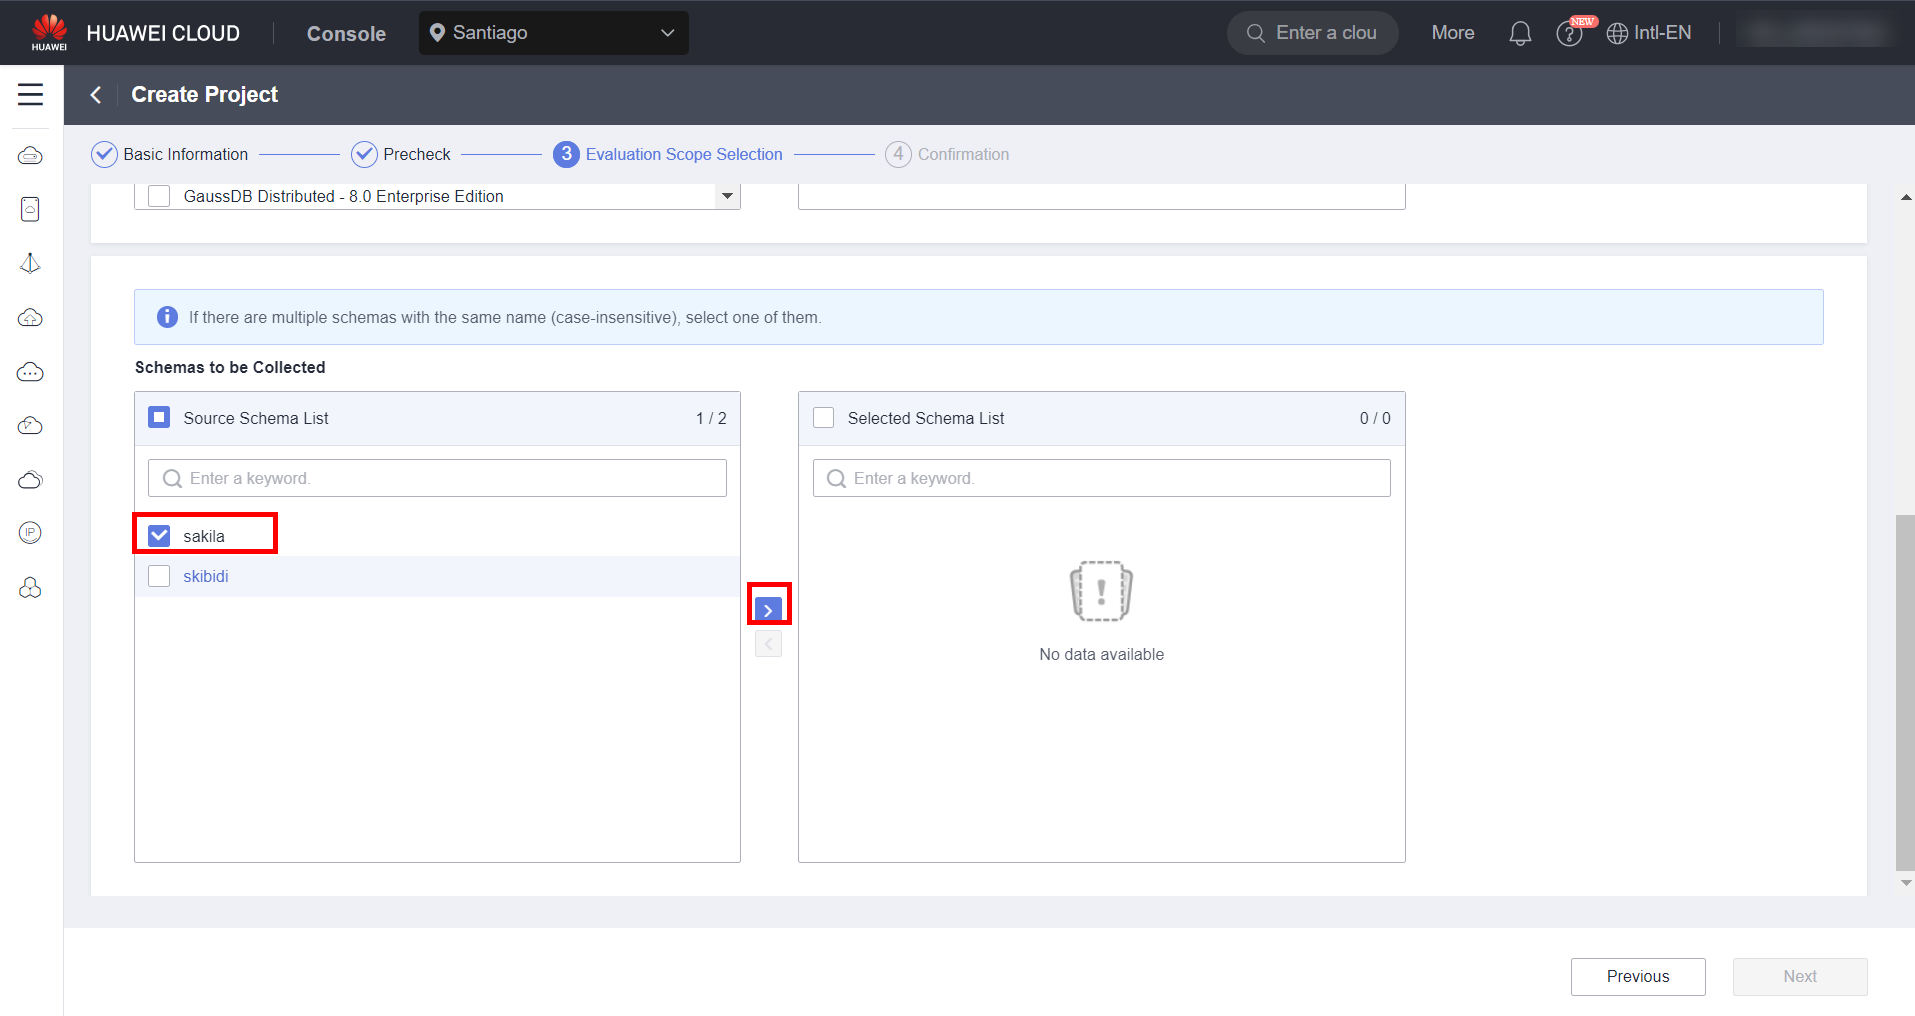
Select the dataset to be migrated. In this case, the Sakila dataset. Click “Next” to continue.
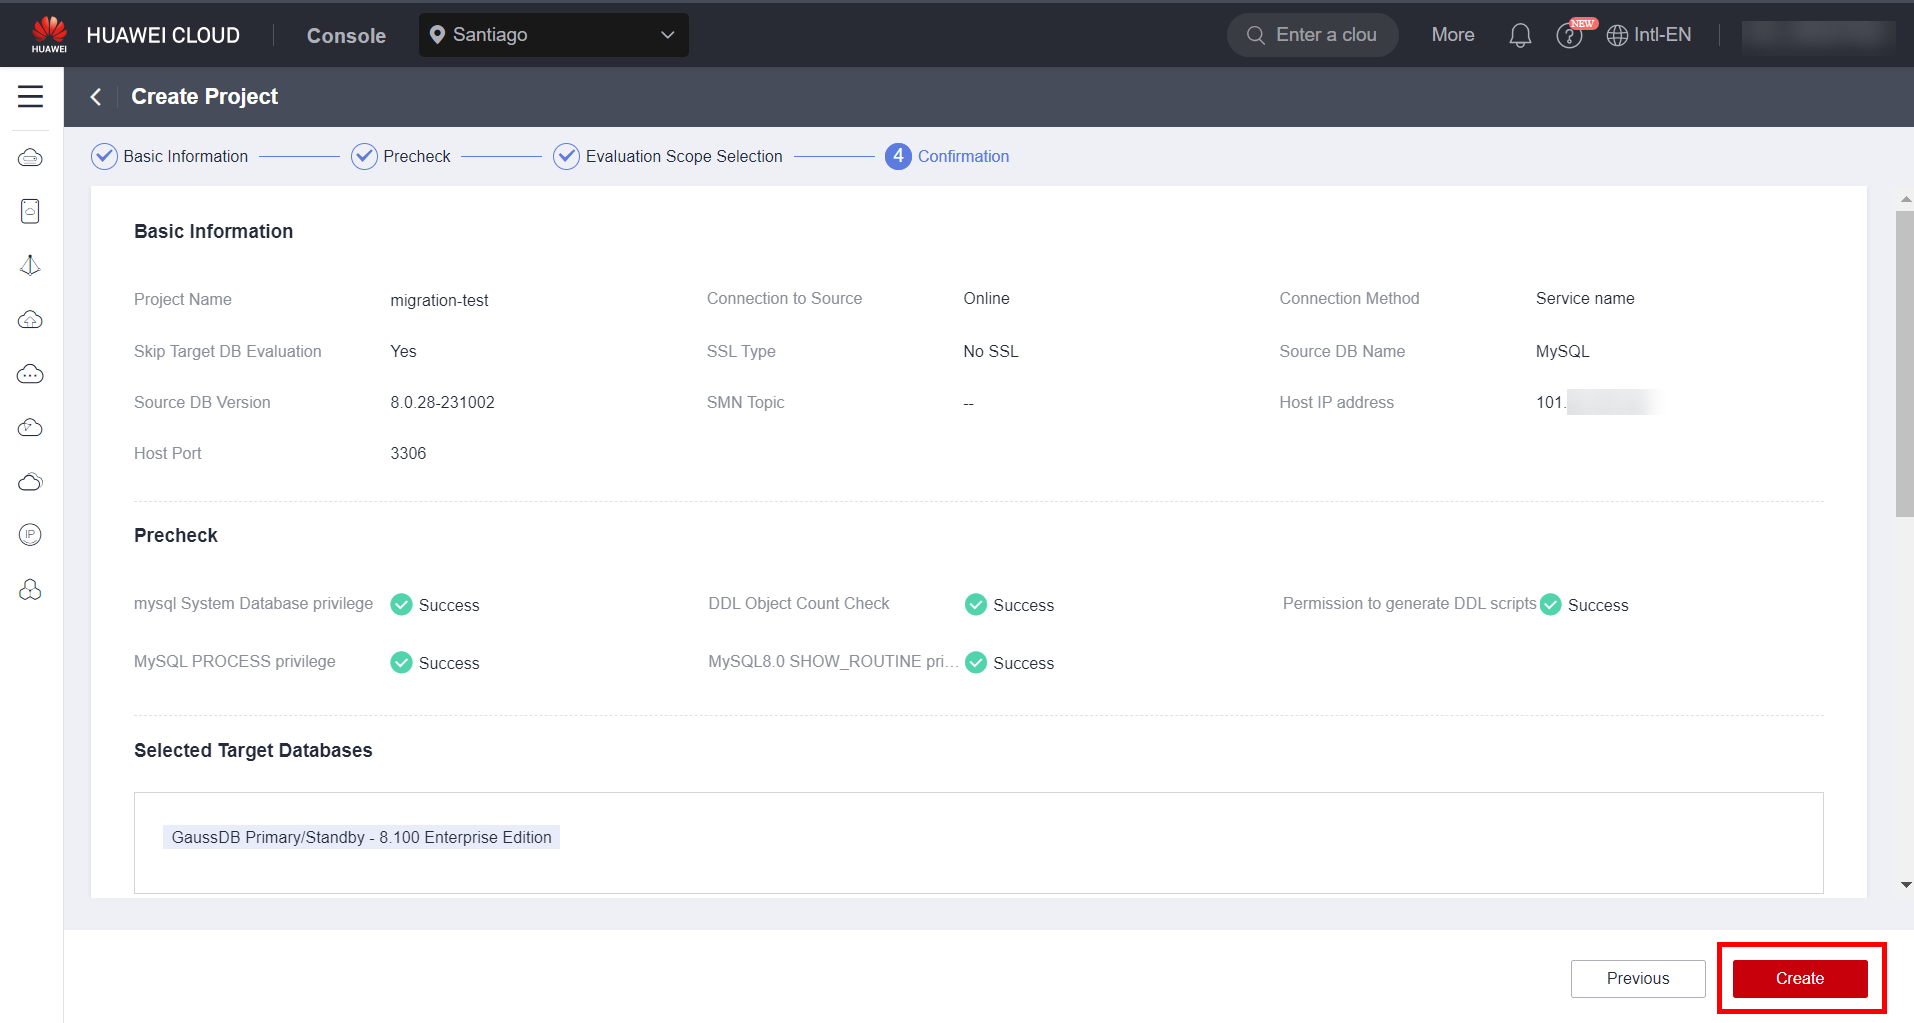
Confirm the source database assessment by clicking “Create”.
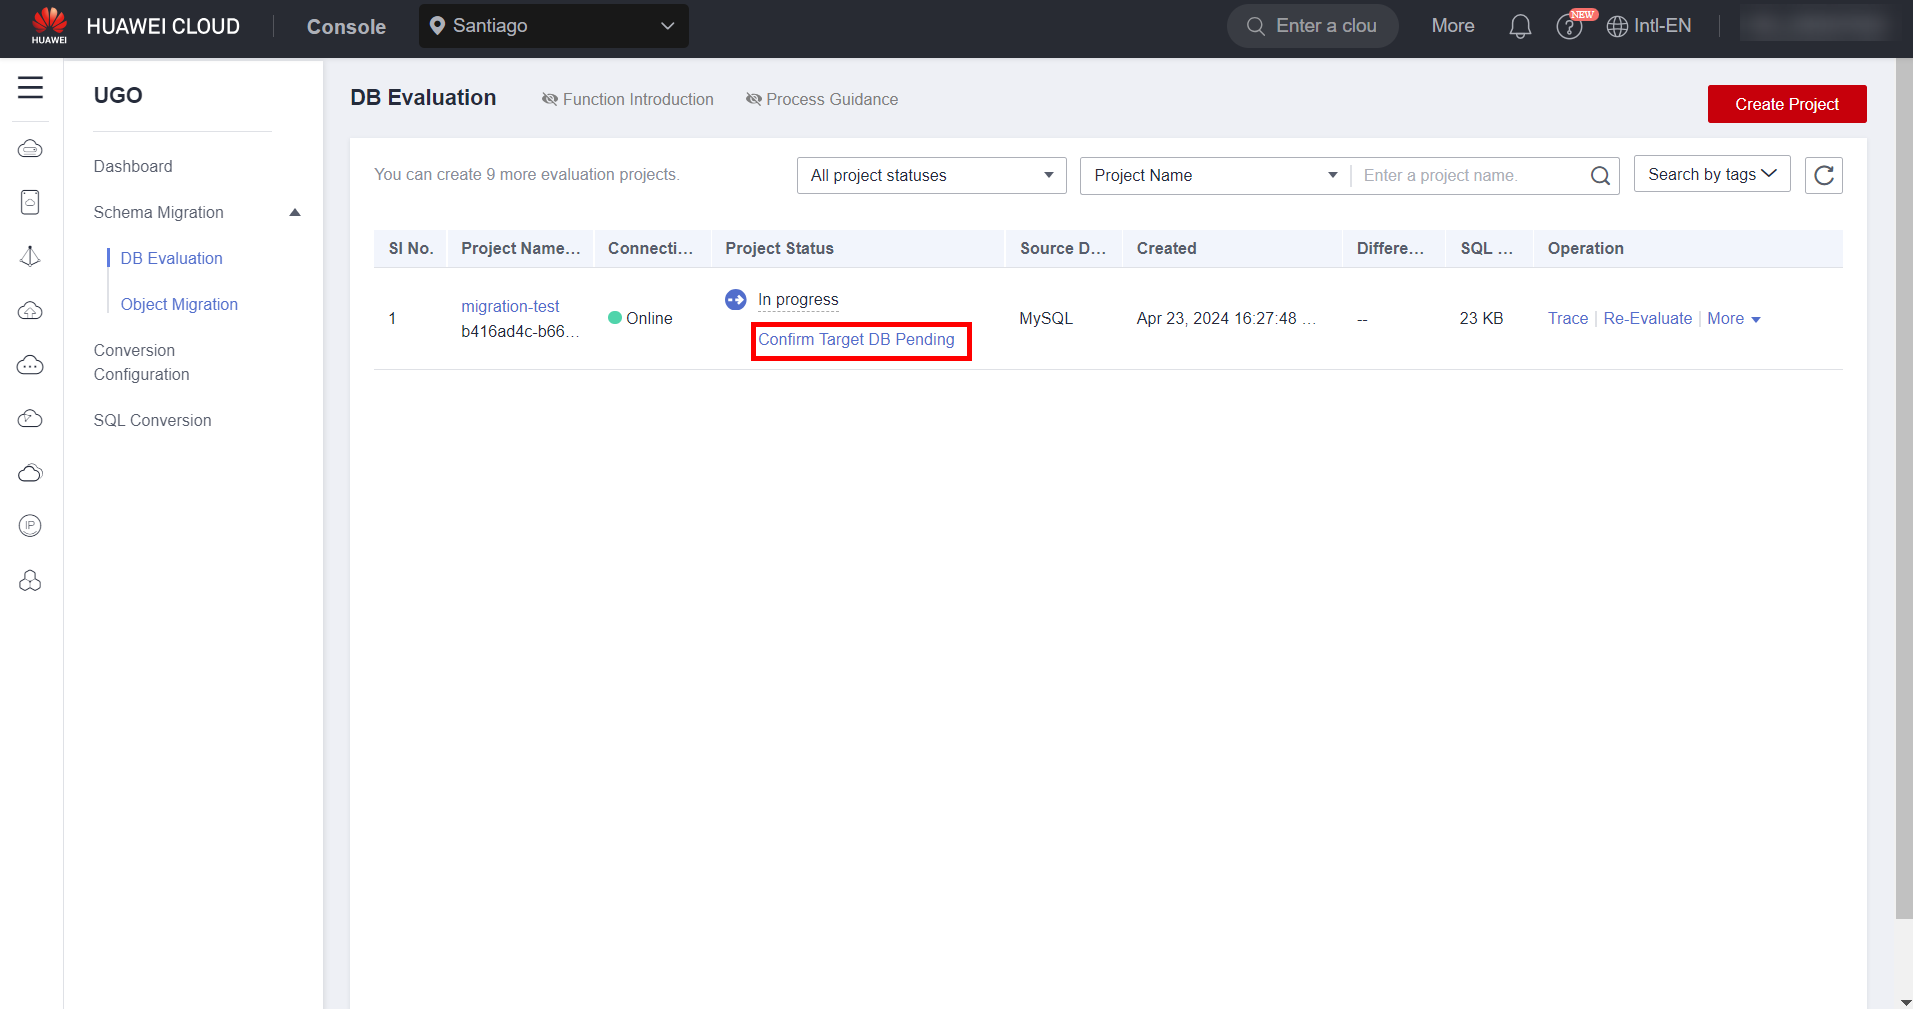
Wait for the source database assessment to finish and click “Confirm Target DB Pending”.
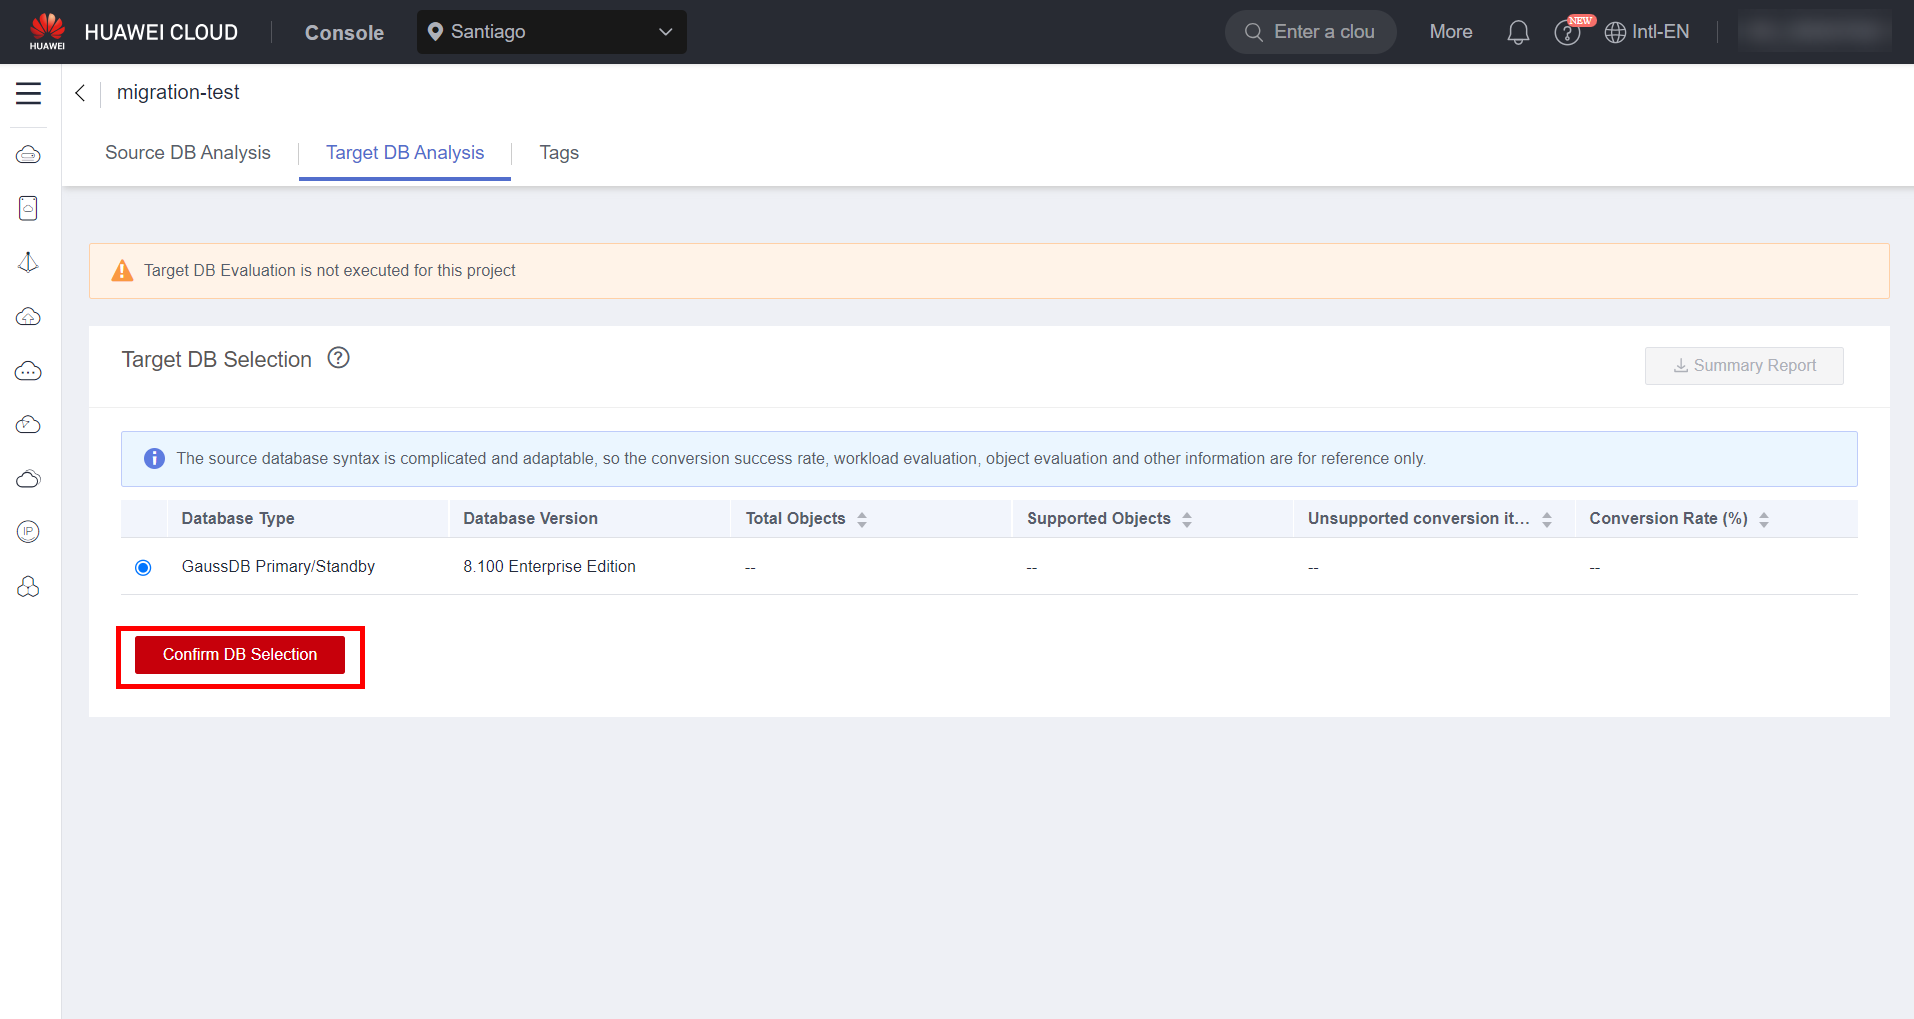
Confirm the target database engine and click “Confirm DB Selection”.
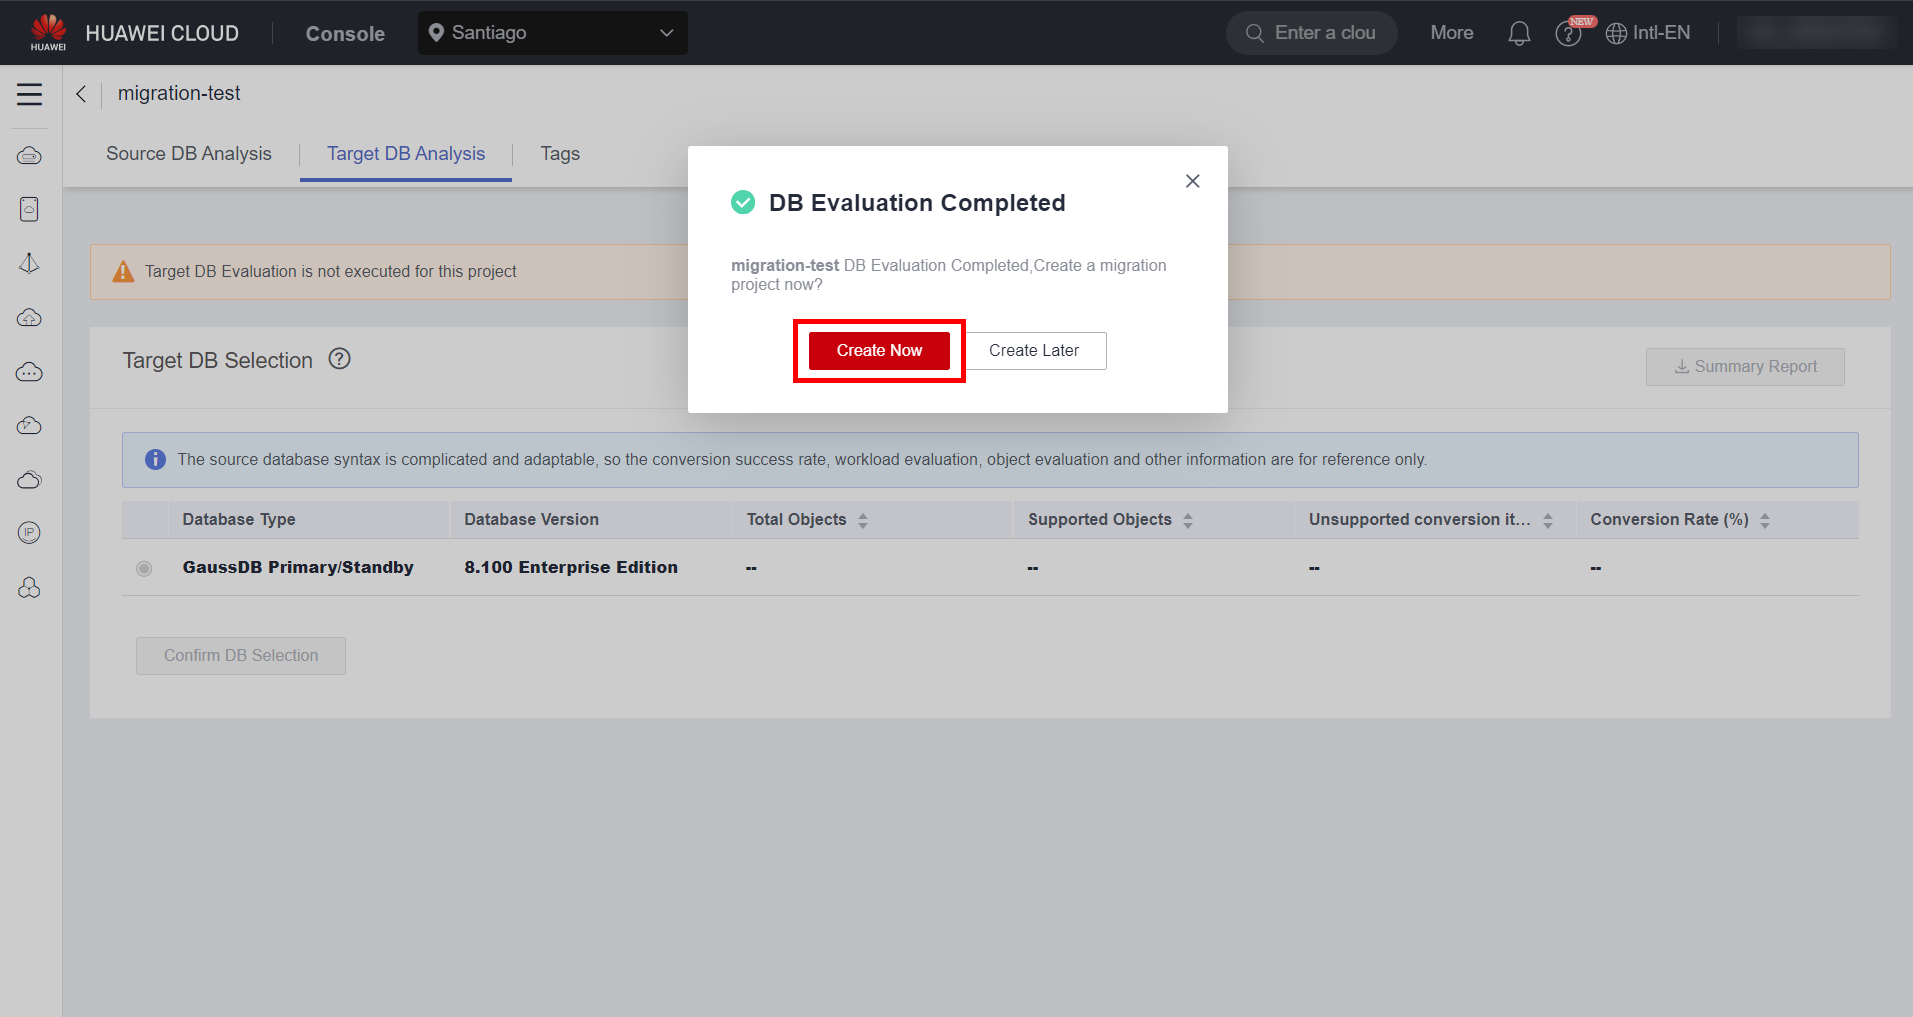
Click “Create Now” to create a migration project.
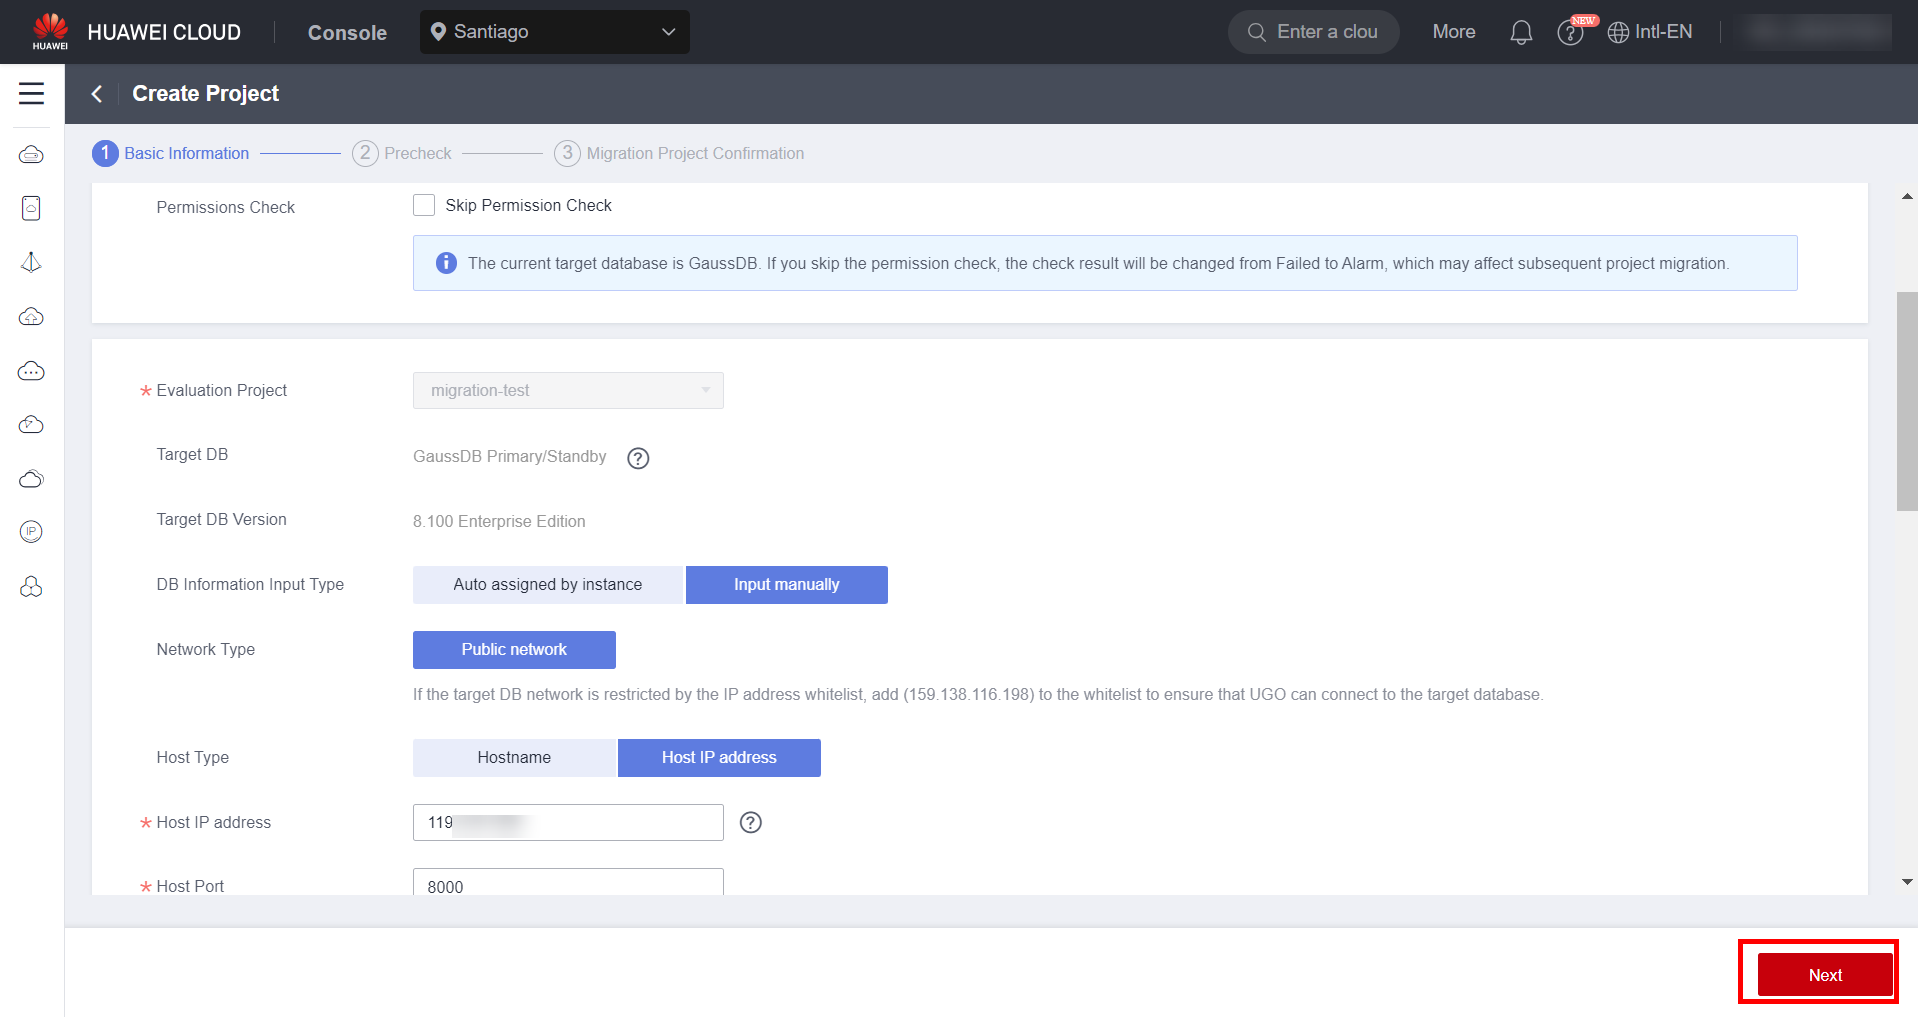
Fill in the information related to the target database, such as the database instance, database name, user and password; and click “Test Connection” to test connectivity with the target database. If the connection fails, check whether port 8000 is open in the target database security group. Click “Next” to continue.
In this window, some risk items for database migration are displayed. Click “View Details” to view the details of the risks found by UGO and confirm whether the risks are actually a risk or not. Click “Next” after confirming the risks.
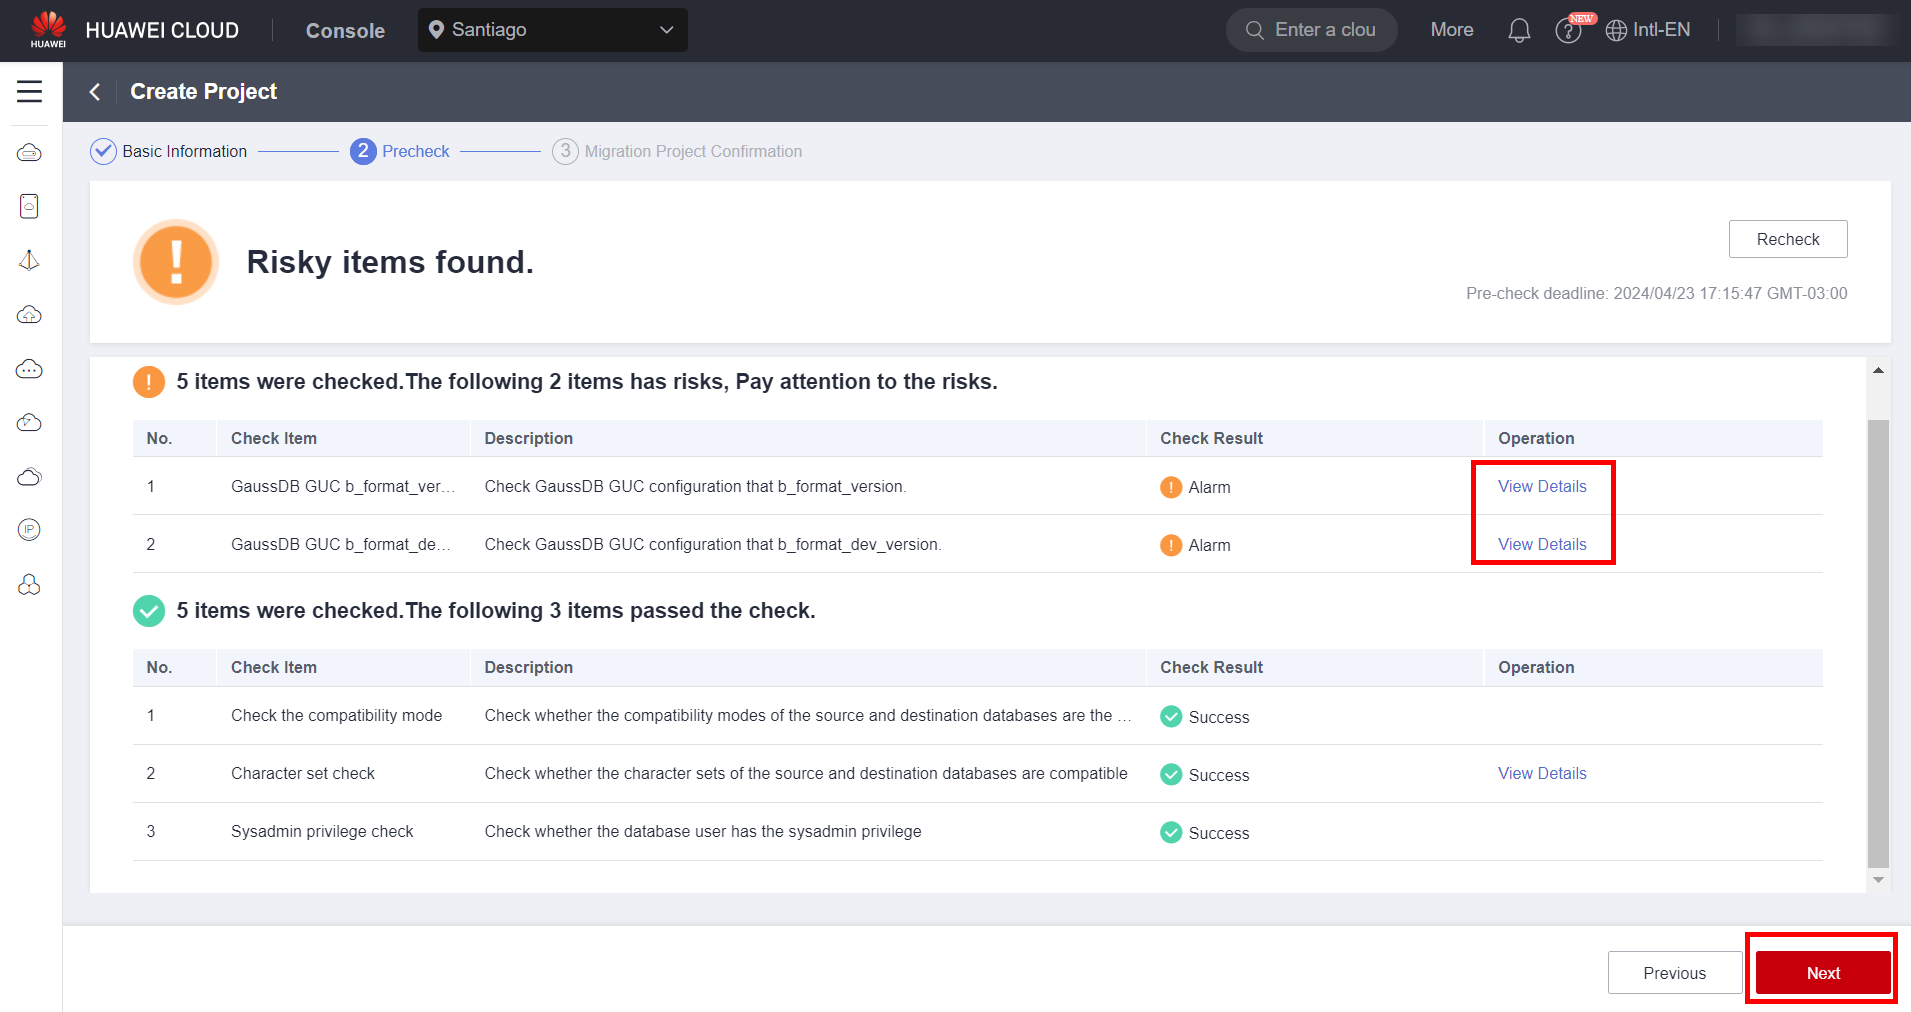
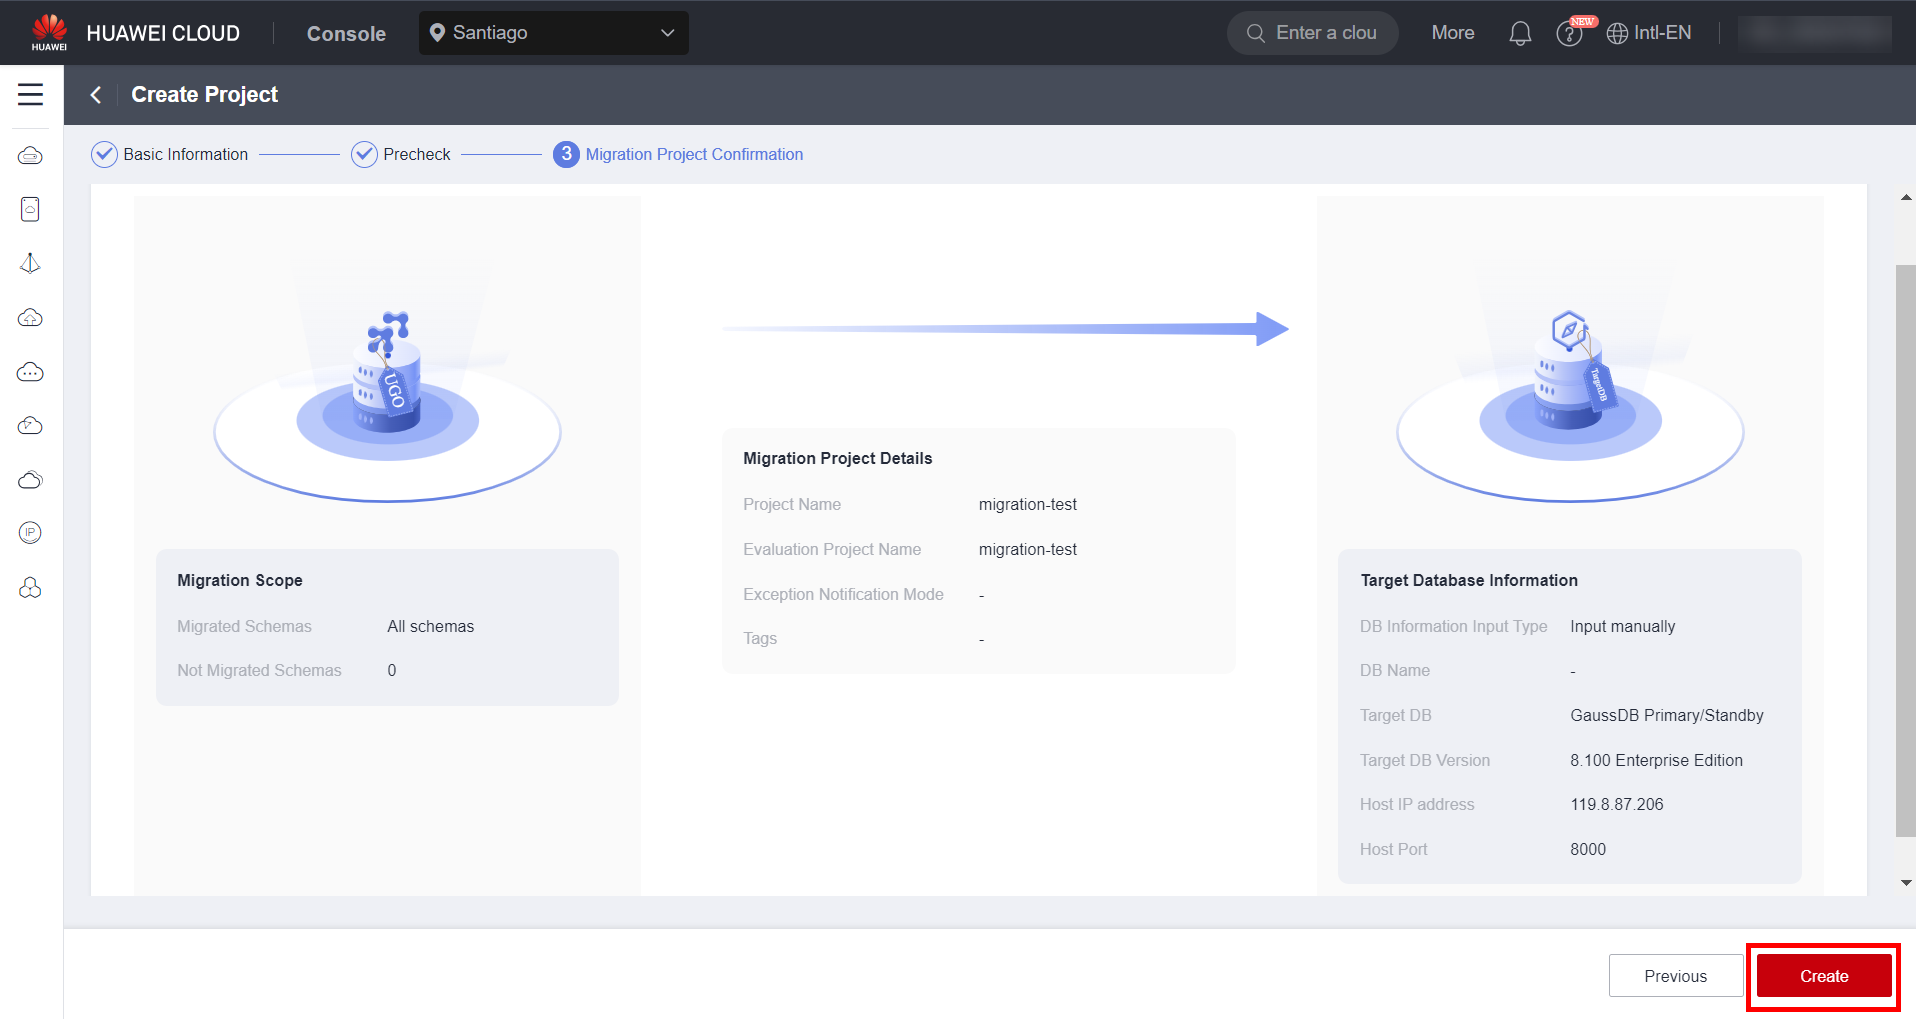
Click “Create” to confirm the database migration project.
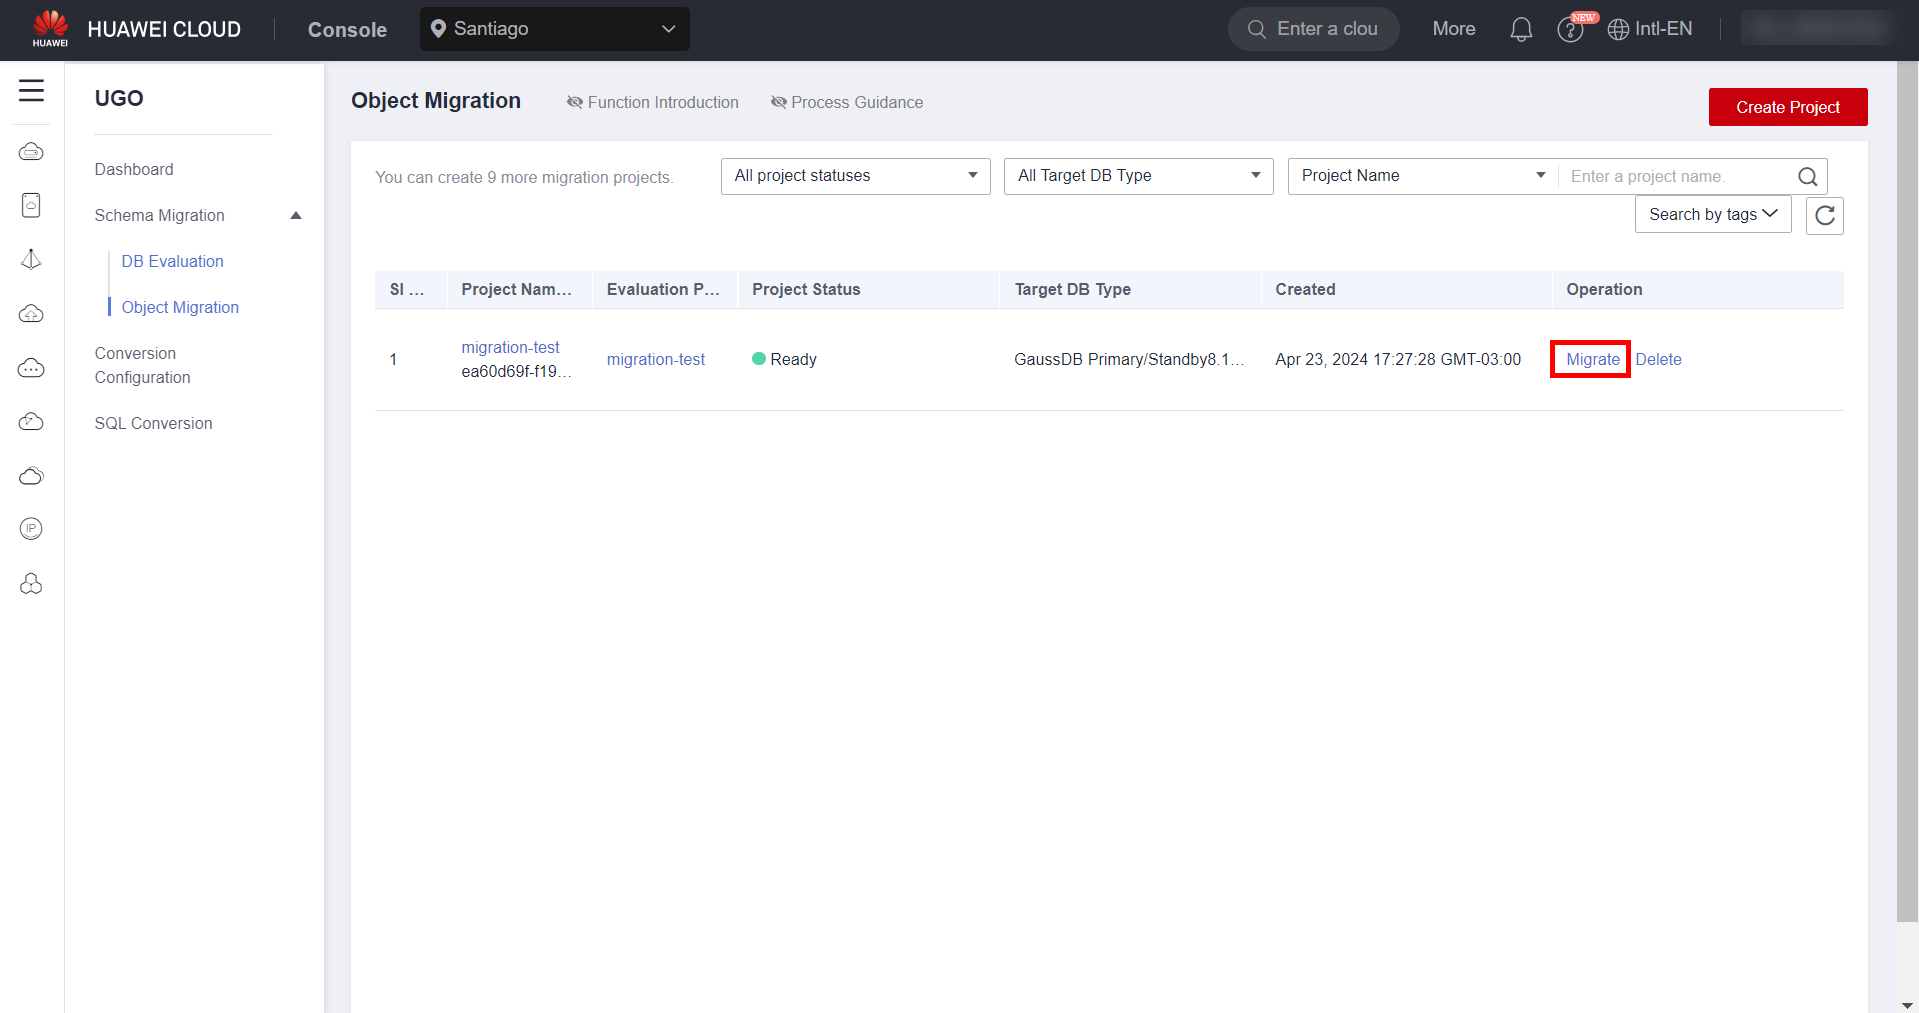
Object Migration
Click “Migrate” in the migration project created above to start migrating the database objects.
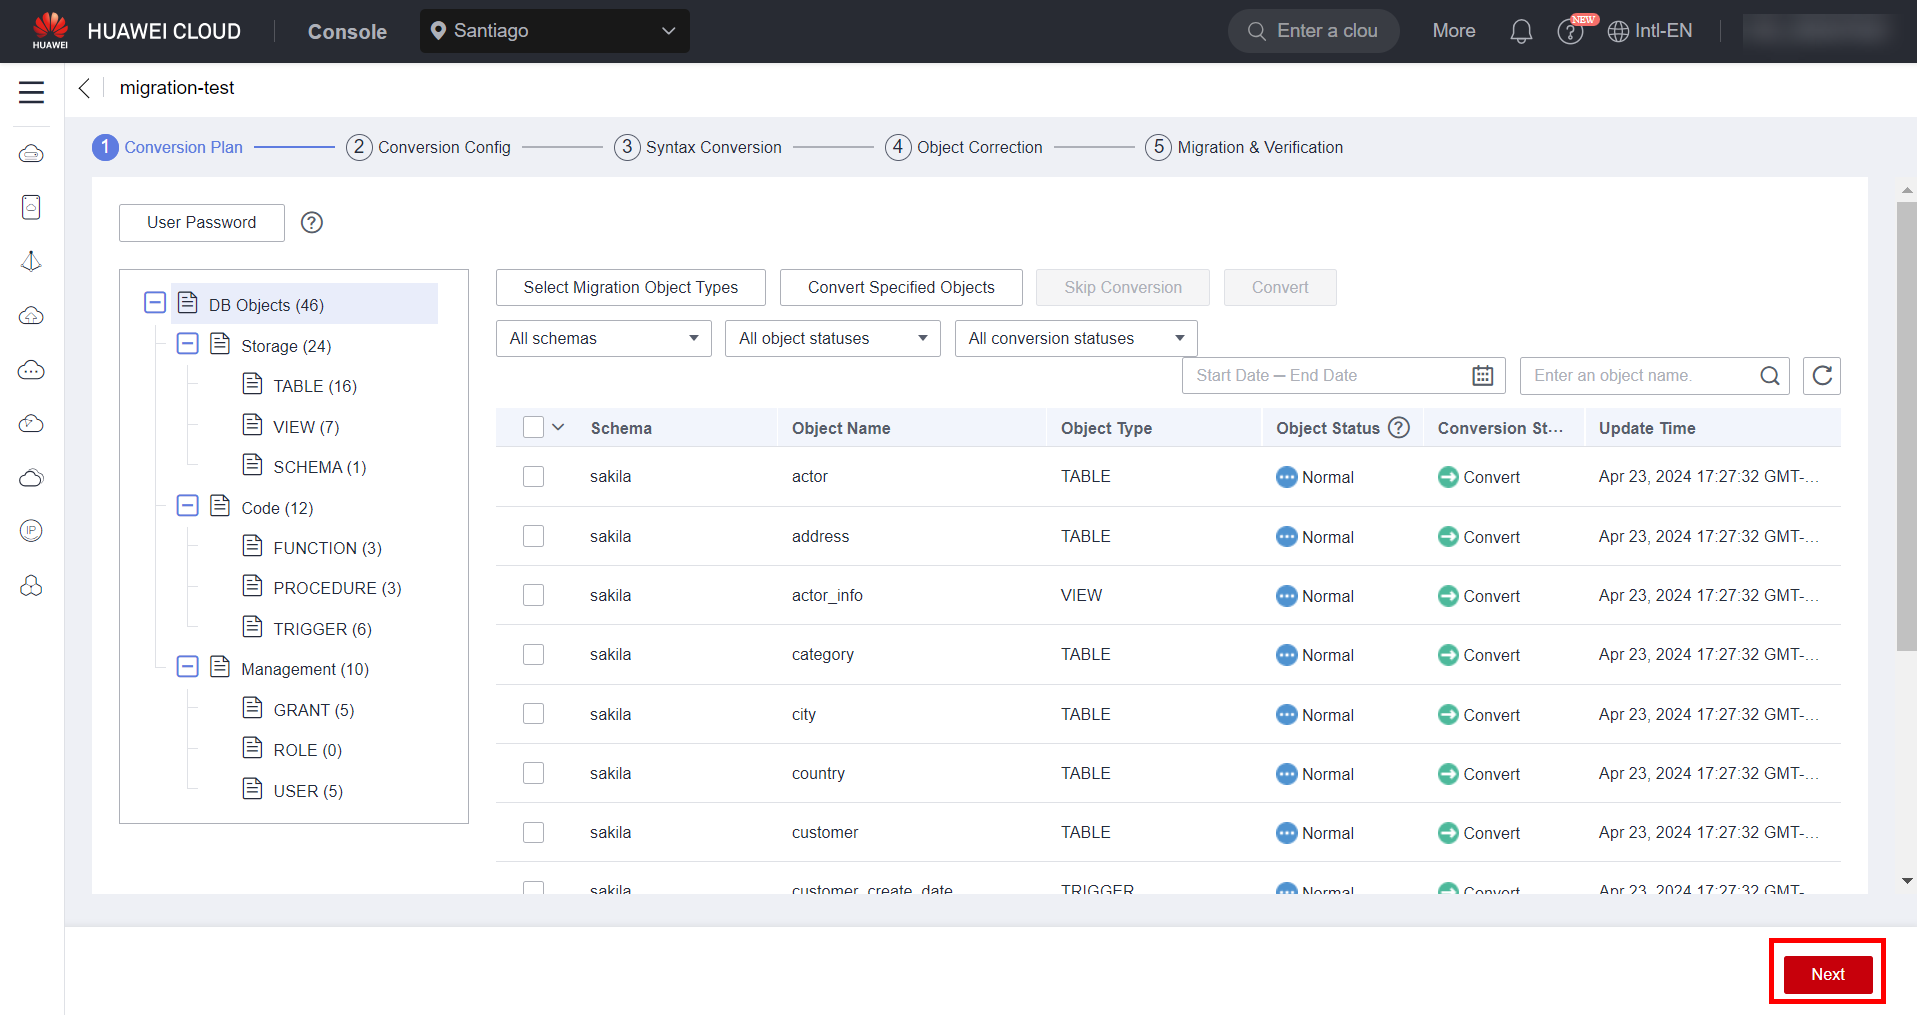
Confirm the objects to be migrated as well as the objects not to be migrated using the “Select Migration Object Types” and “Convert Specified Objects” buttons. Click “Next” to continue with the object conversion.
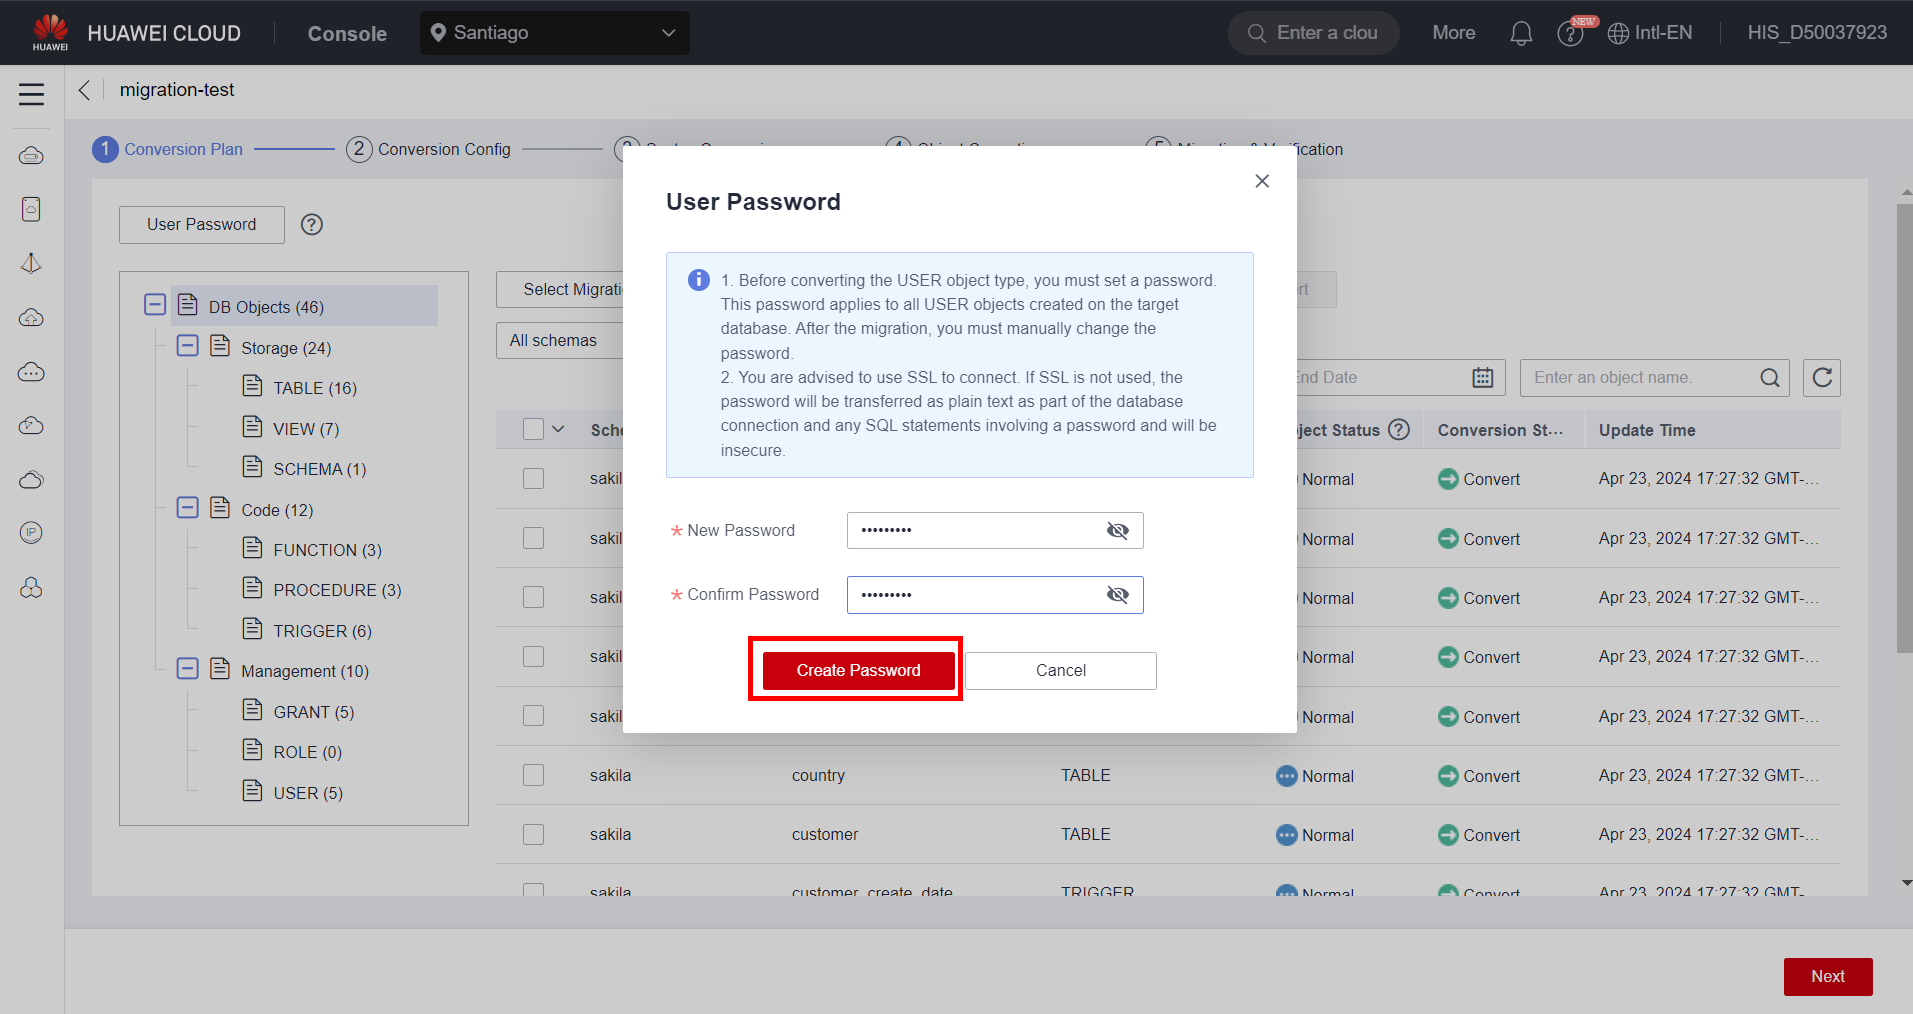
Create a temporary password so that user type objects can be migrated. Note that after migration, you need to manually change the password. Click “Create Password” after entering the password.
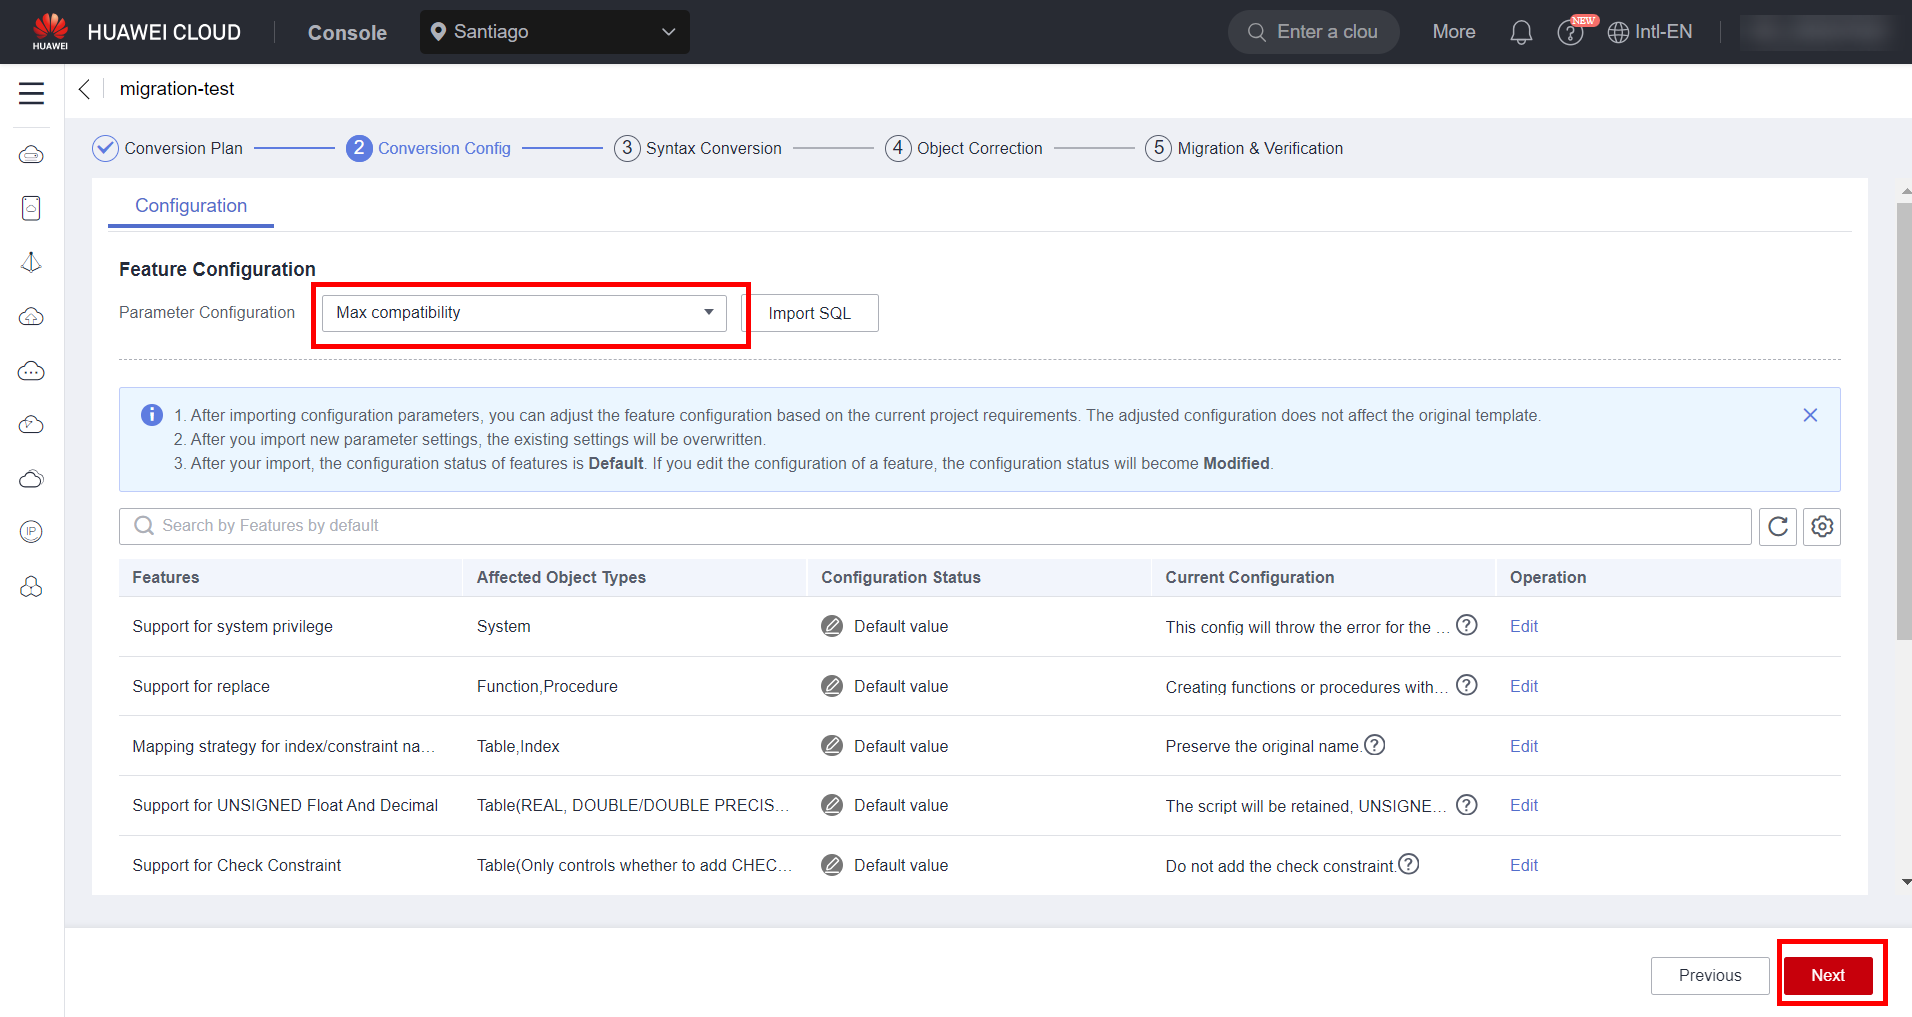
Adjust the parameter settings as needed by clicking “Edit”. After making the settings, confirm by clicking “Next”.
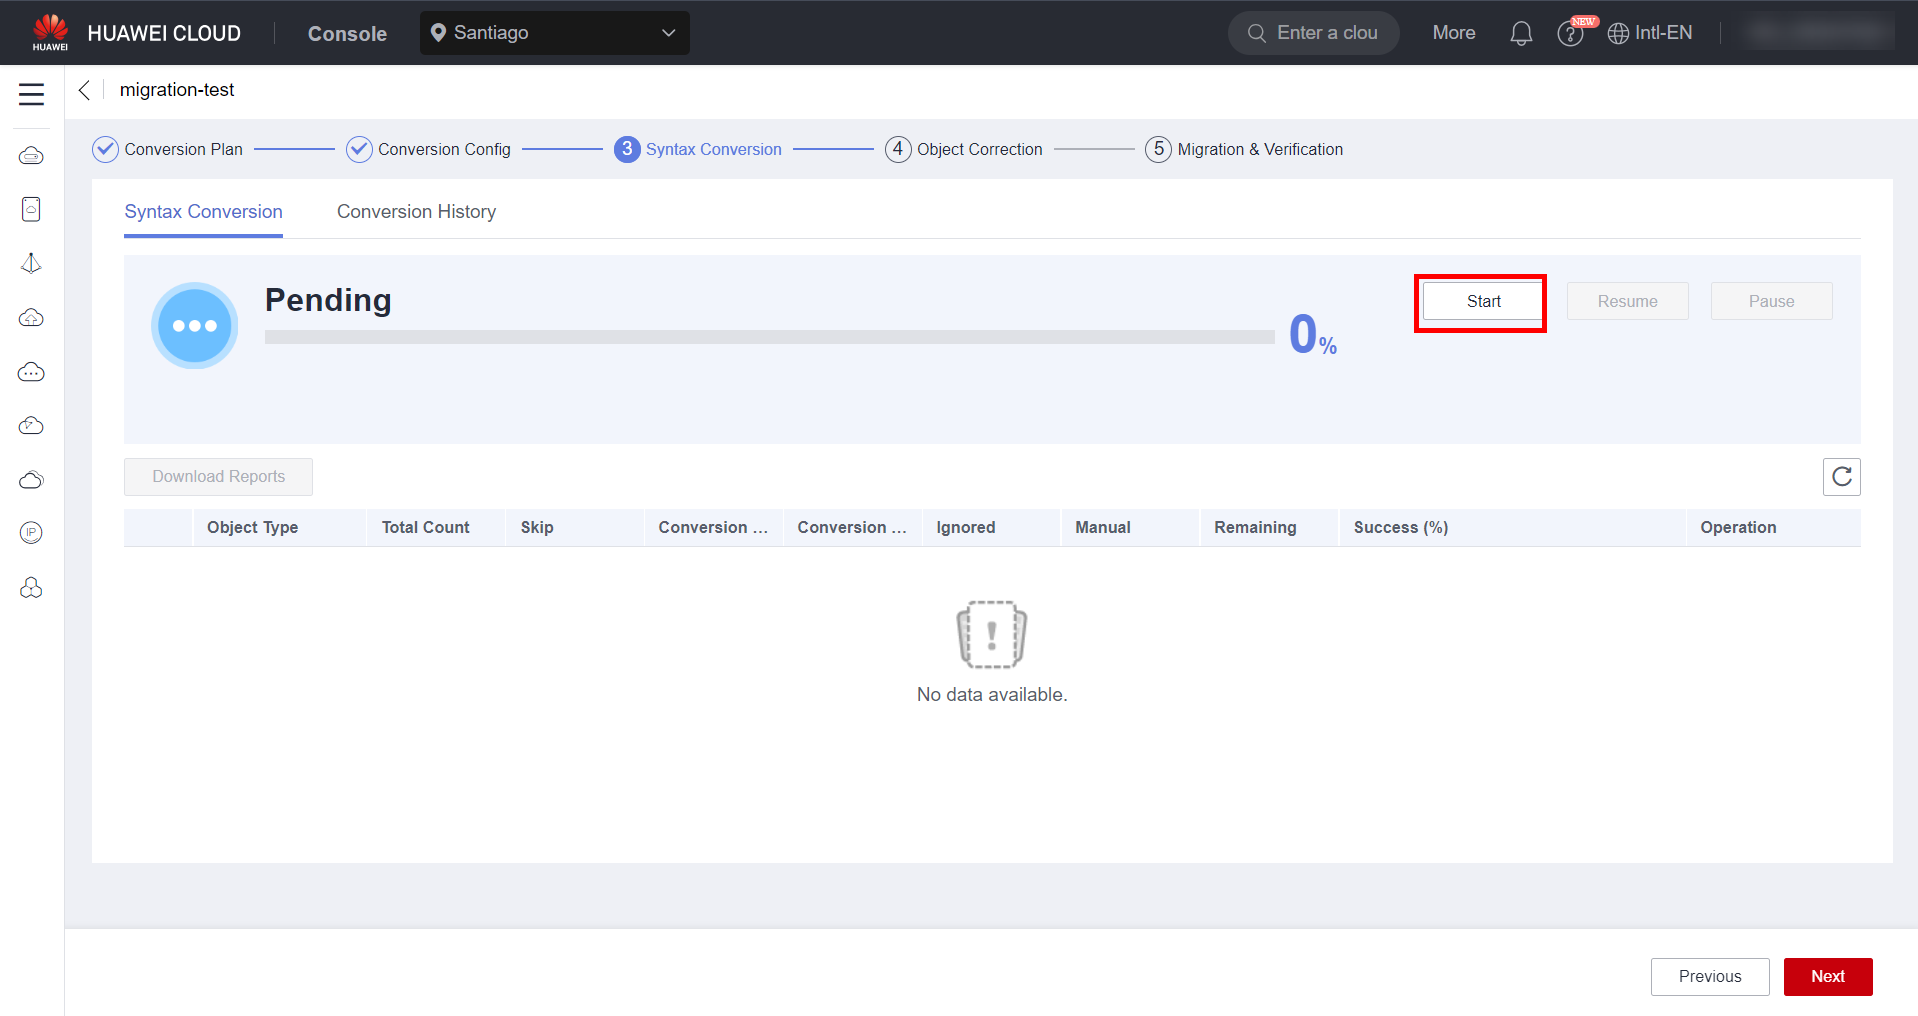
To start the syntax conversion process, click “Start” next to “Pending”. Wait until the syntax of all objects is converted to the syntax supported by the target database.
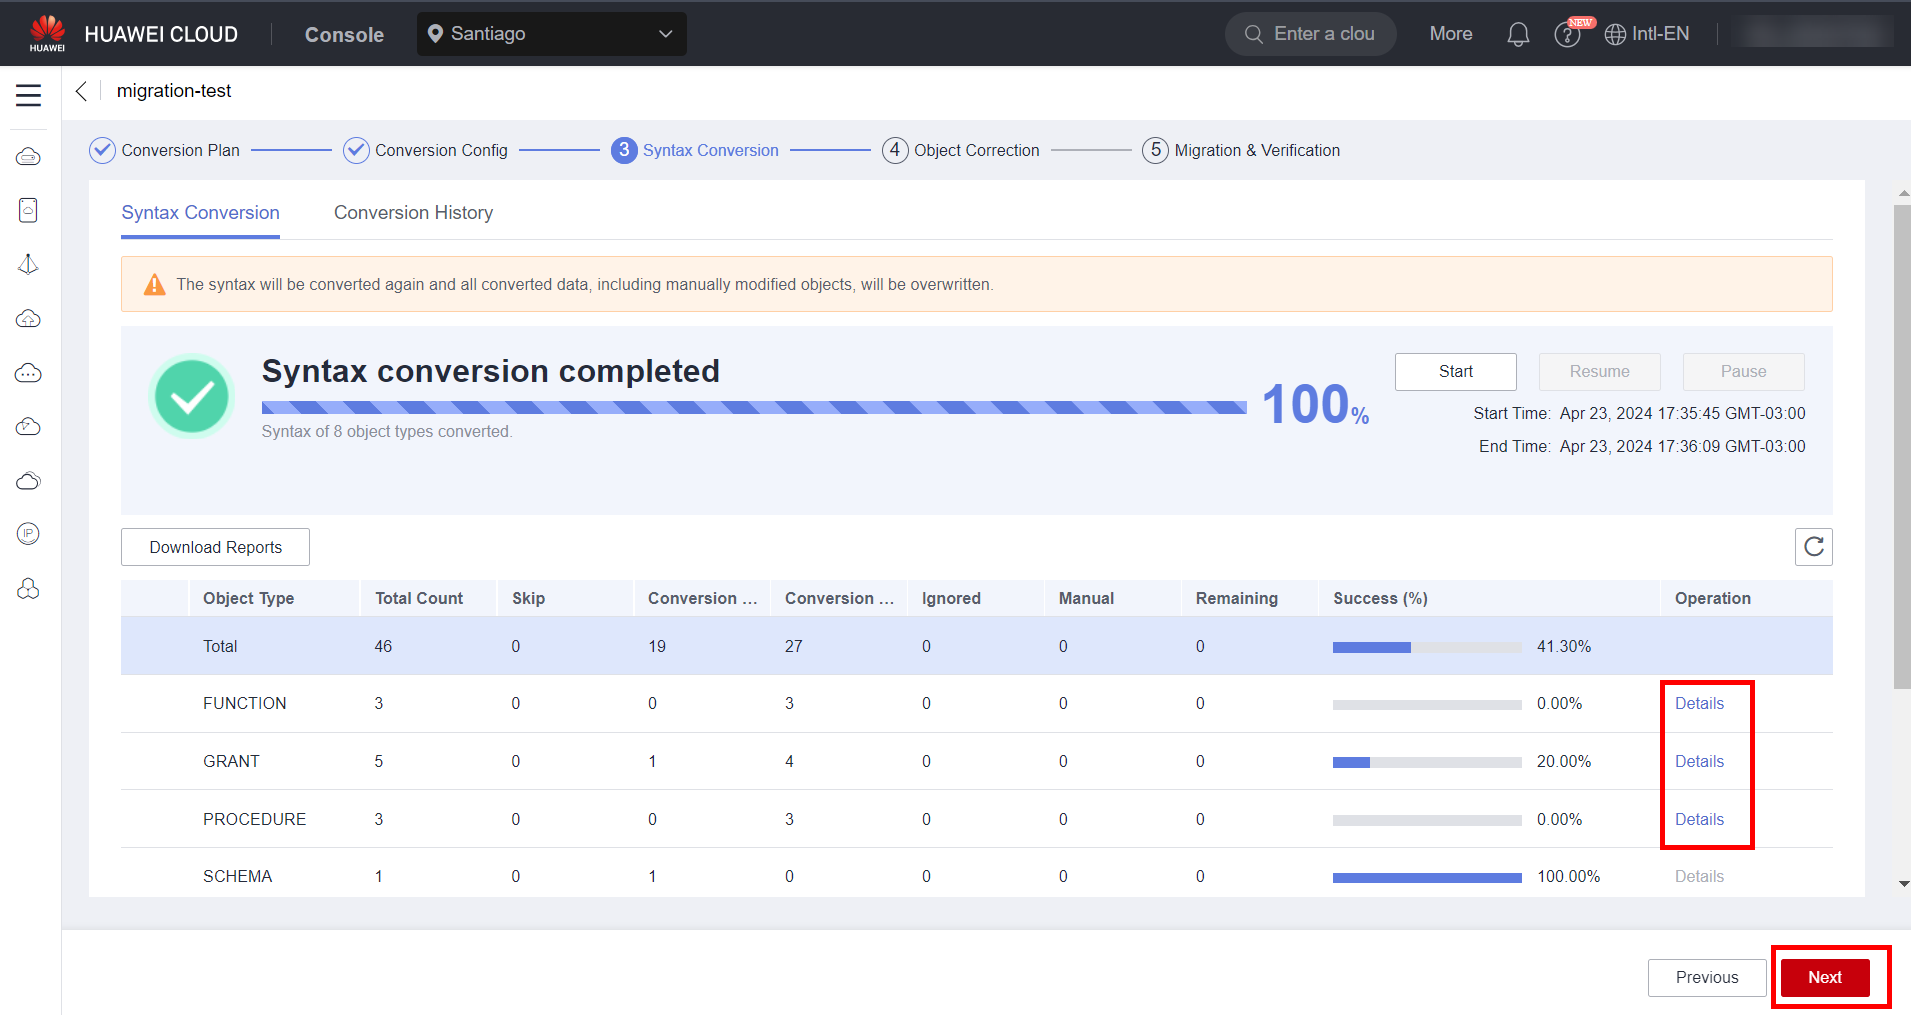
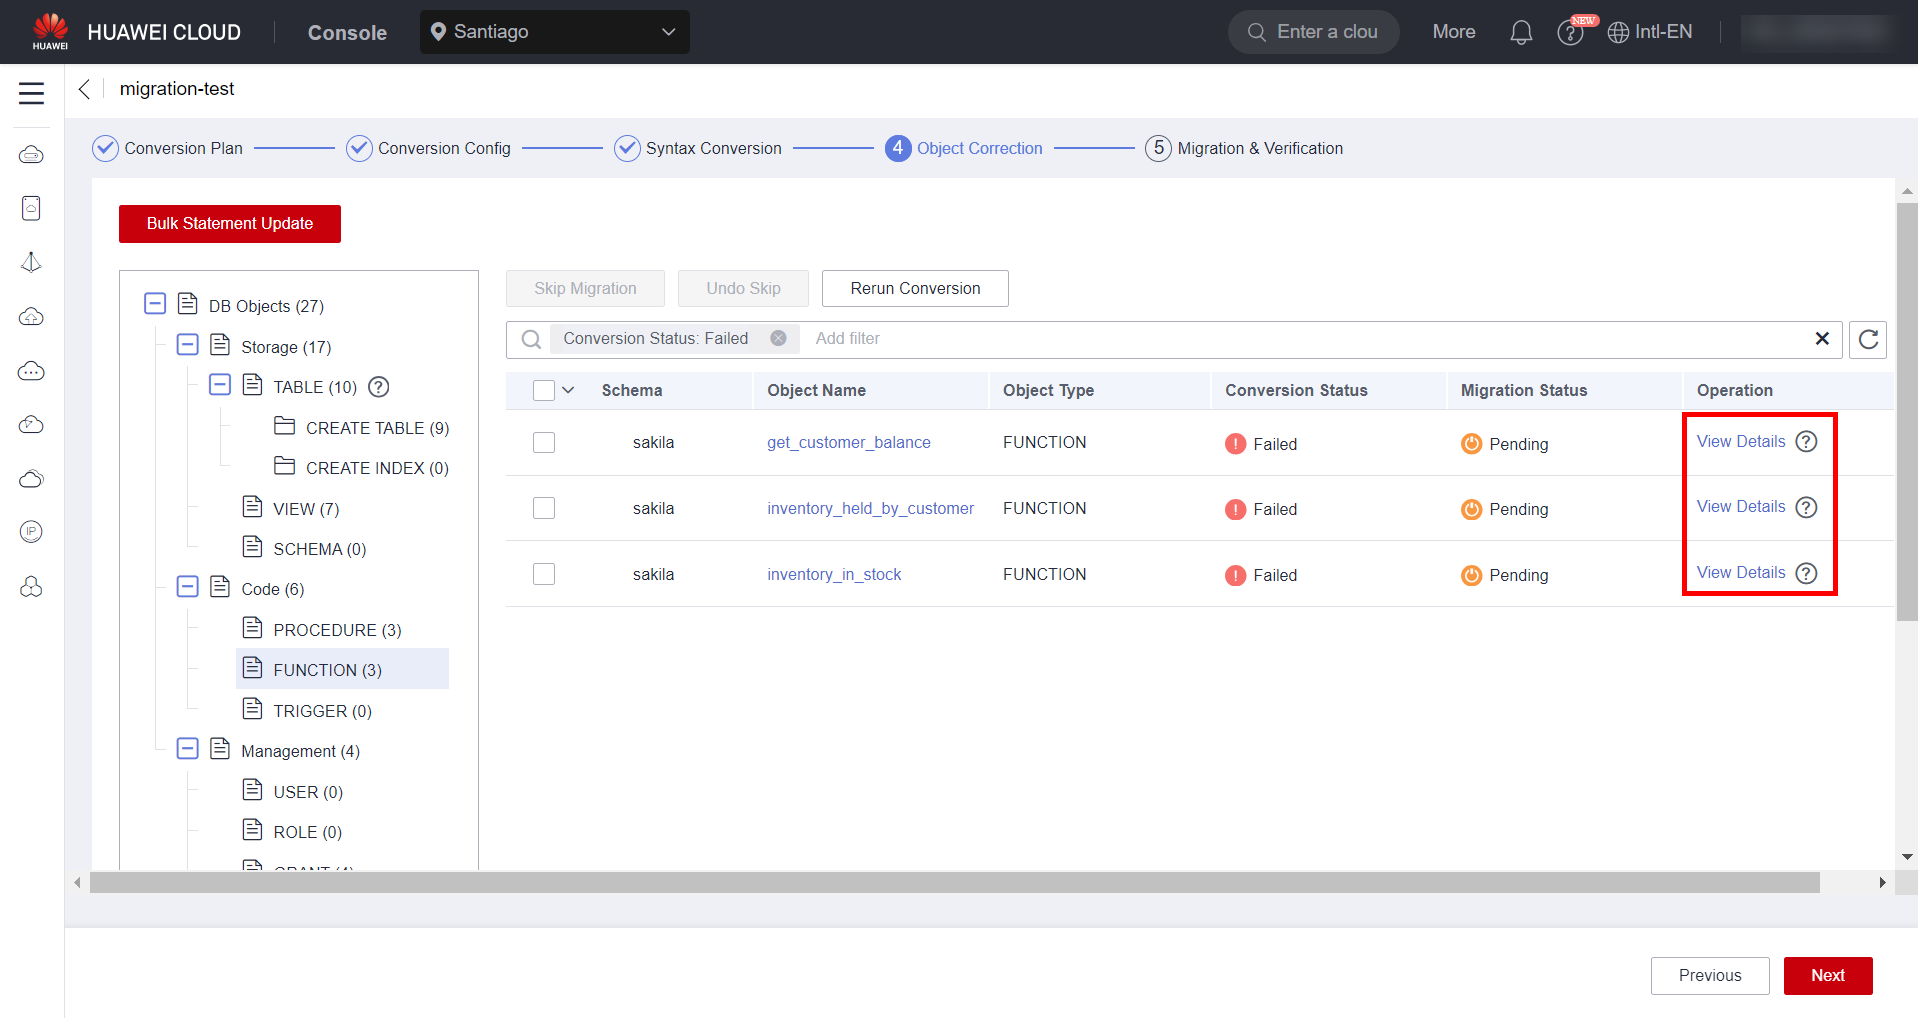
After the syntax conversion is complete, it will show which objects were dynamically converted without errors and which conversions were in error. For this part, it is necessary to manually check all syntax conversions, whether with or without errors, to ensure that no erroneous conversions were performed. To review the conversion details of each object type, click “Details” next to the objects.
Click “View Details” next to the objects that failed to be converted to analyze the reason for the errors and rectify those errors.
On this screen, make the necessary modifications in the right-hand window (Target) so that the migrated object is compatible with the target database. After making the necessary modifications, click “Save”.
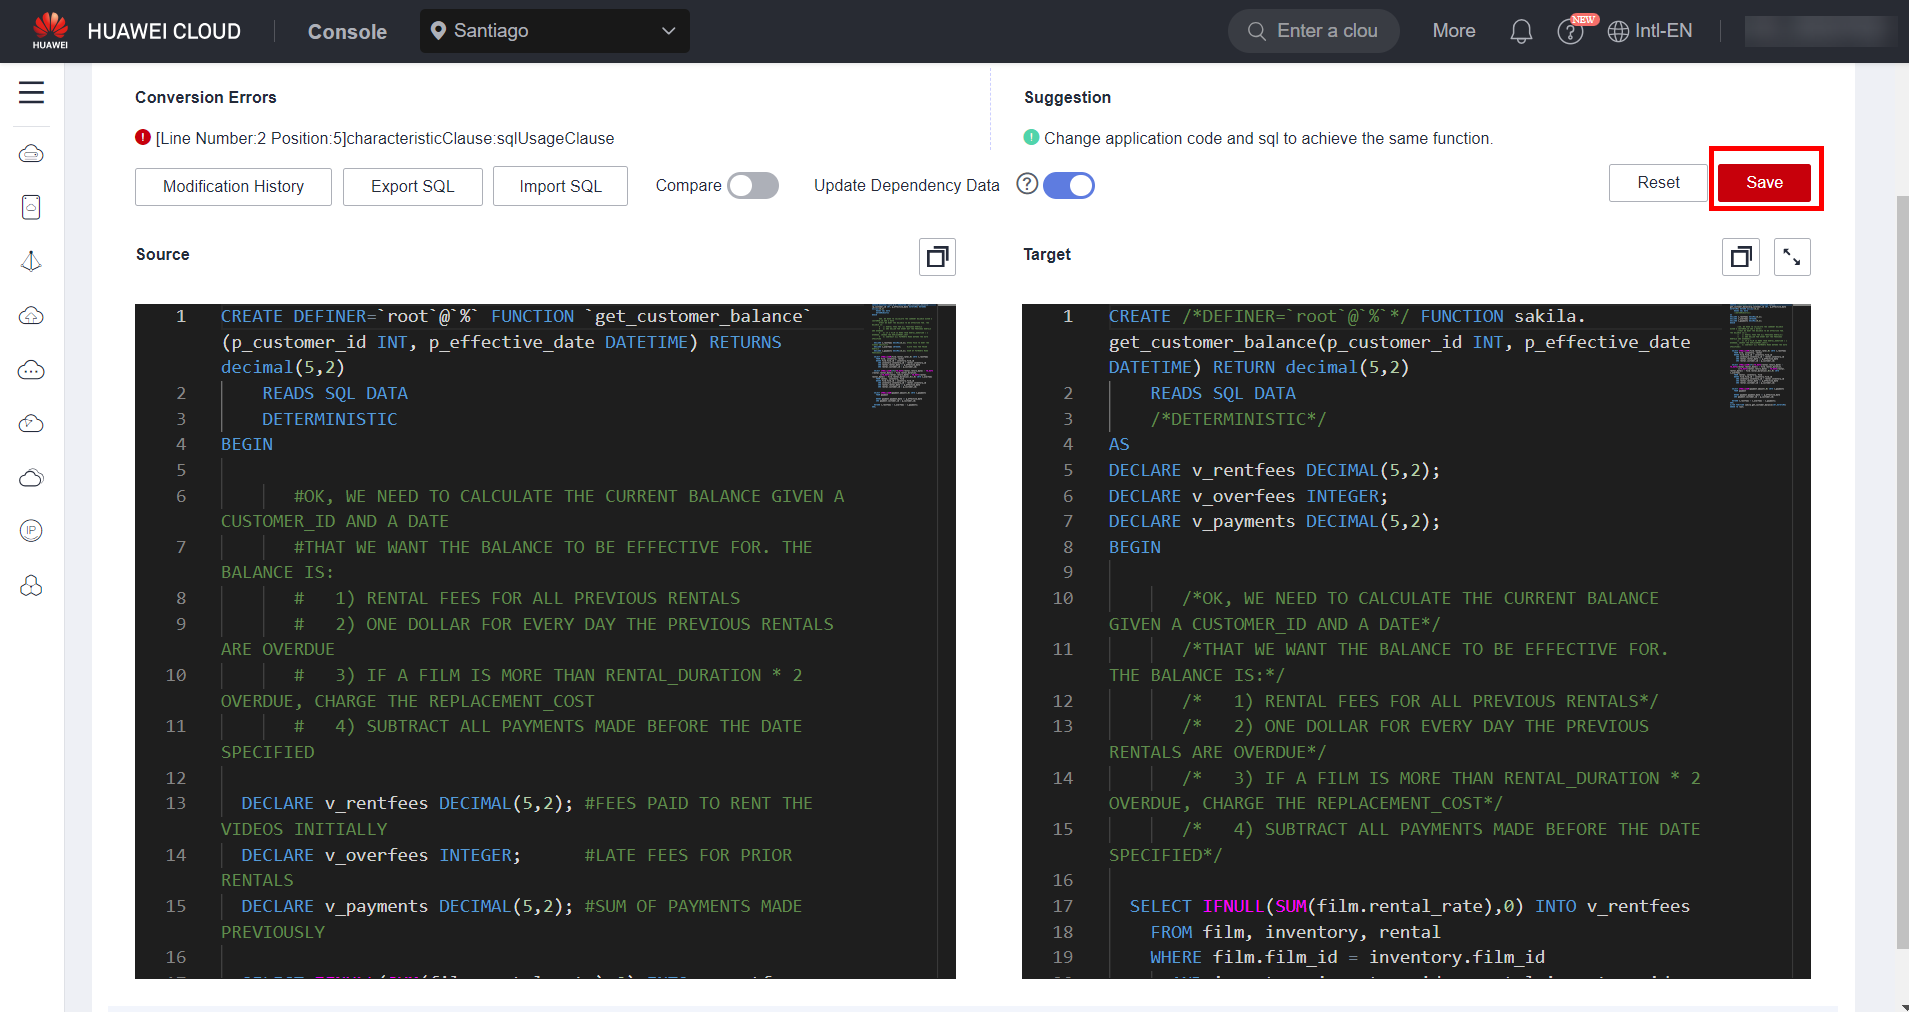
Make the necessary changes to all objects where the automatic syntax conversion returned errors. After this process, click “Next” to confirm the syntax conversion of the objects.
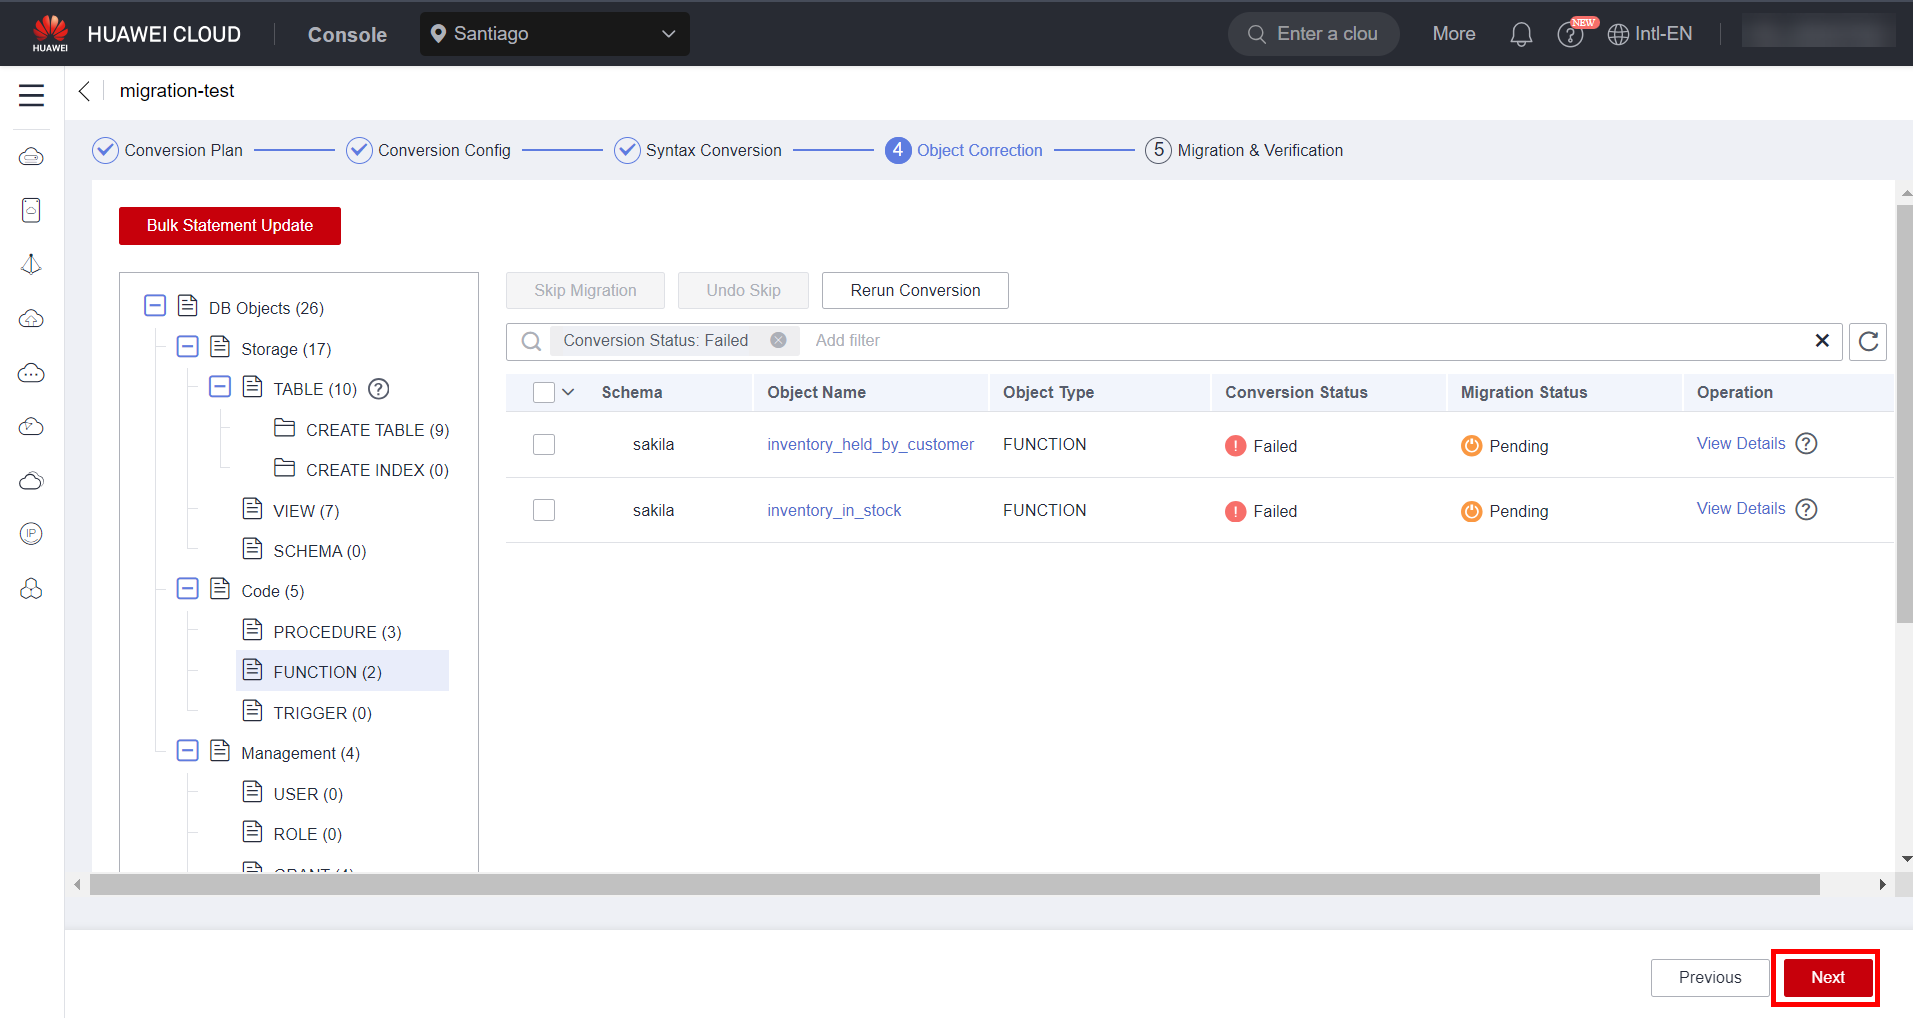
Click “Start” to begin migrating the converted objects and wait for the migration to complete.
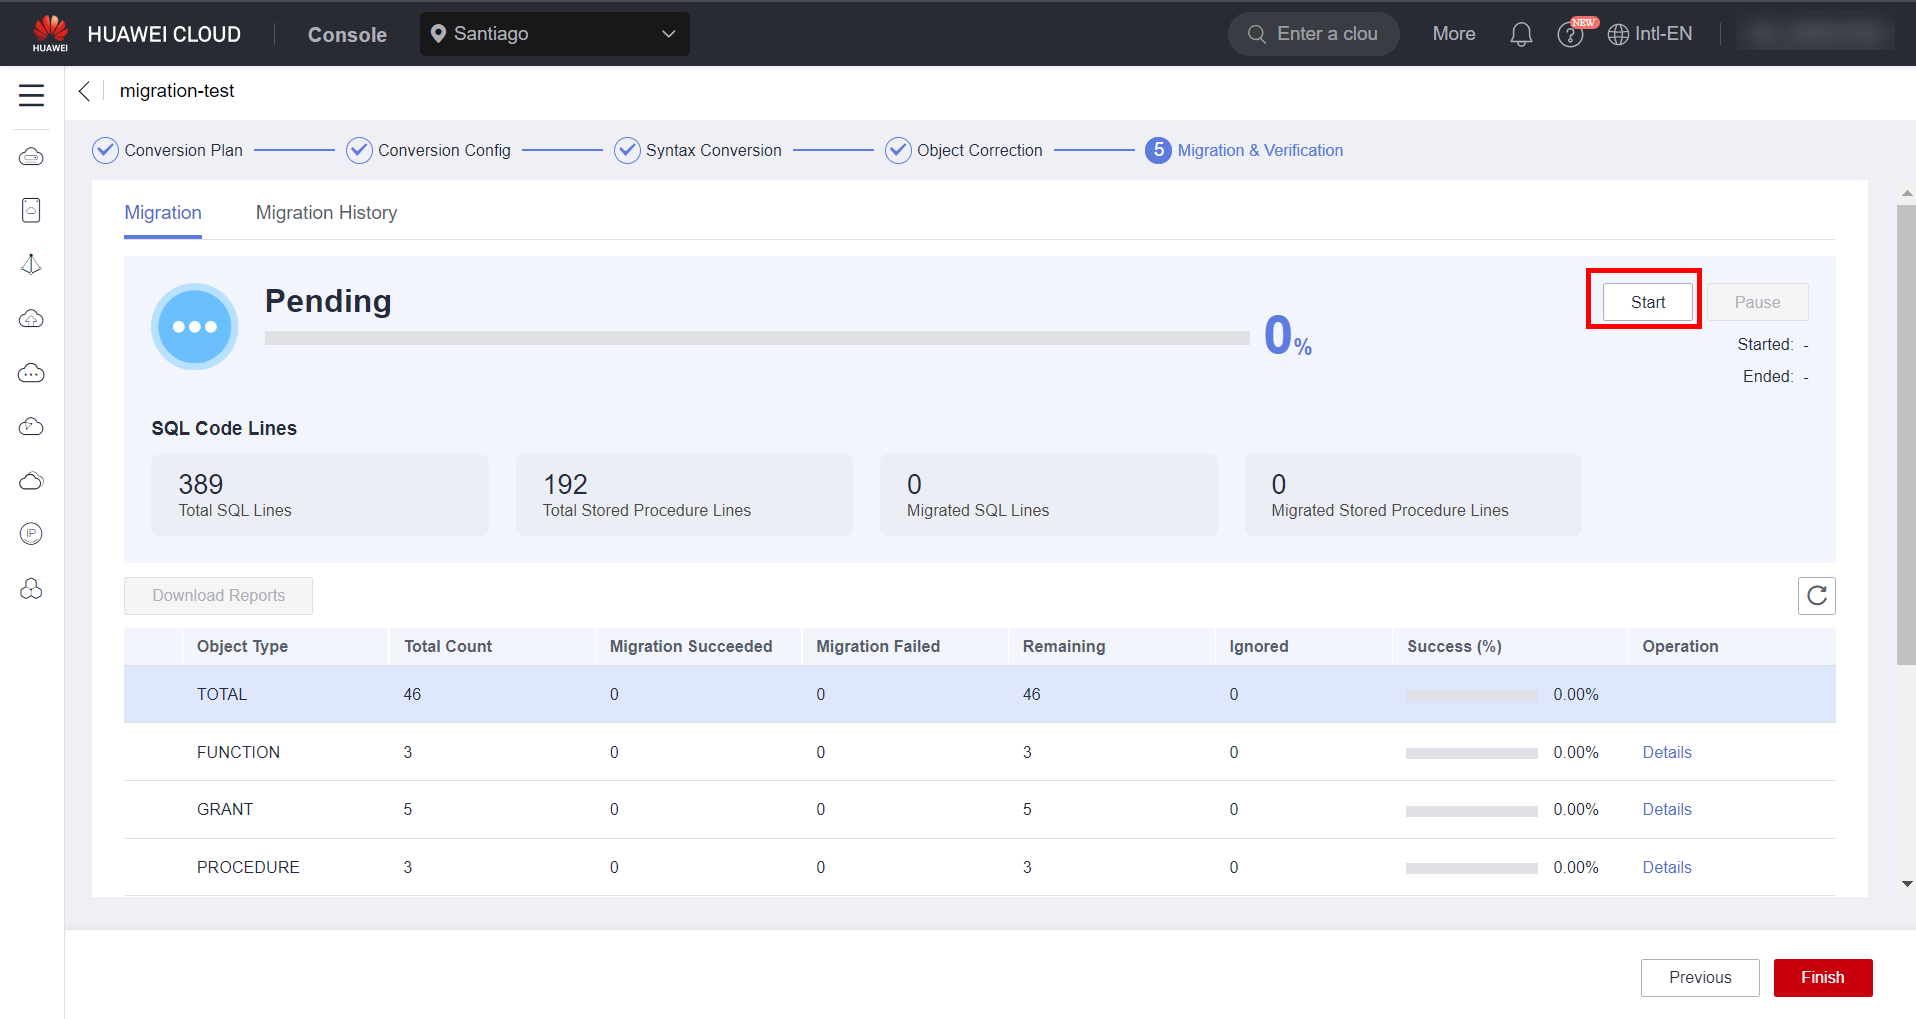
Check the migration results. After achieving a considerable success rate, click “Finish” to complete the migration of the database objects.

DRS
It is worth noting that in the previous steps only the objects from the source database were migrated to the database, such as tables, functions and schemas. To perform the migration of the database data, it is necessary to create a synchronization task between the two databases using the Data Replication Service (DRS) database migration tool. Navigate to the DRS service in the HWC console.

Syncronization Task
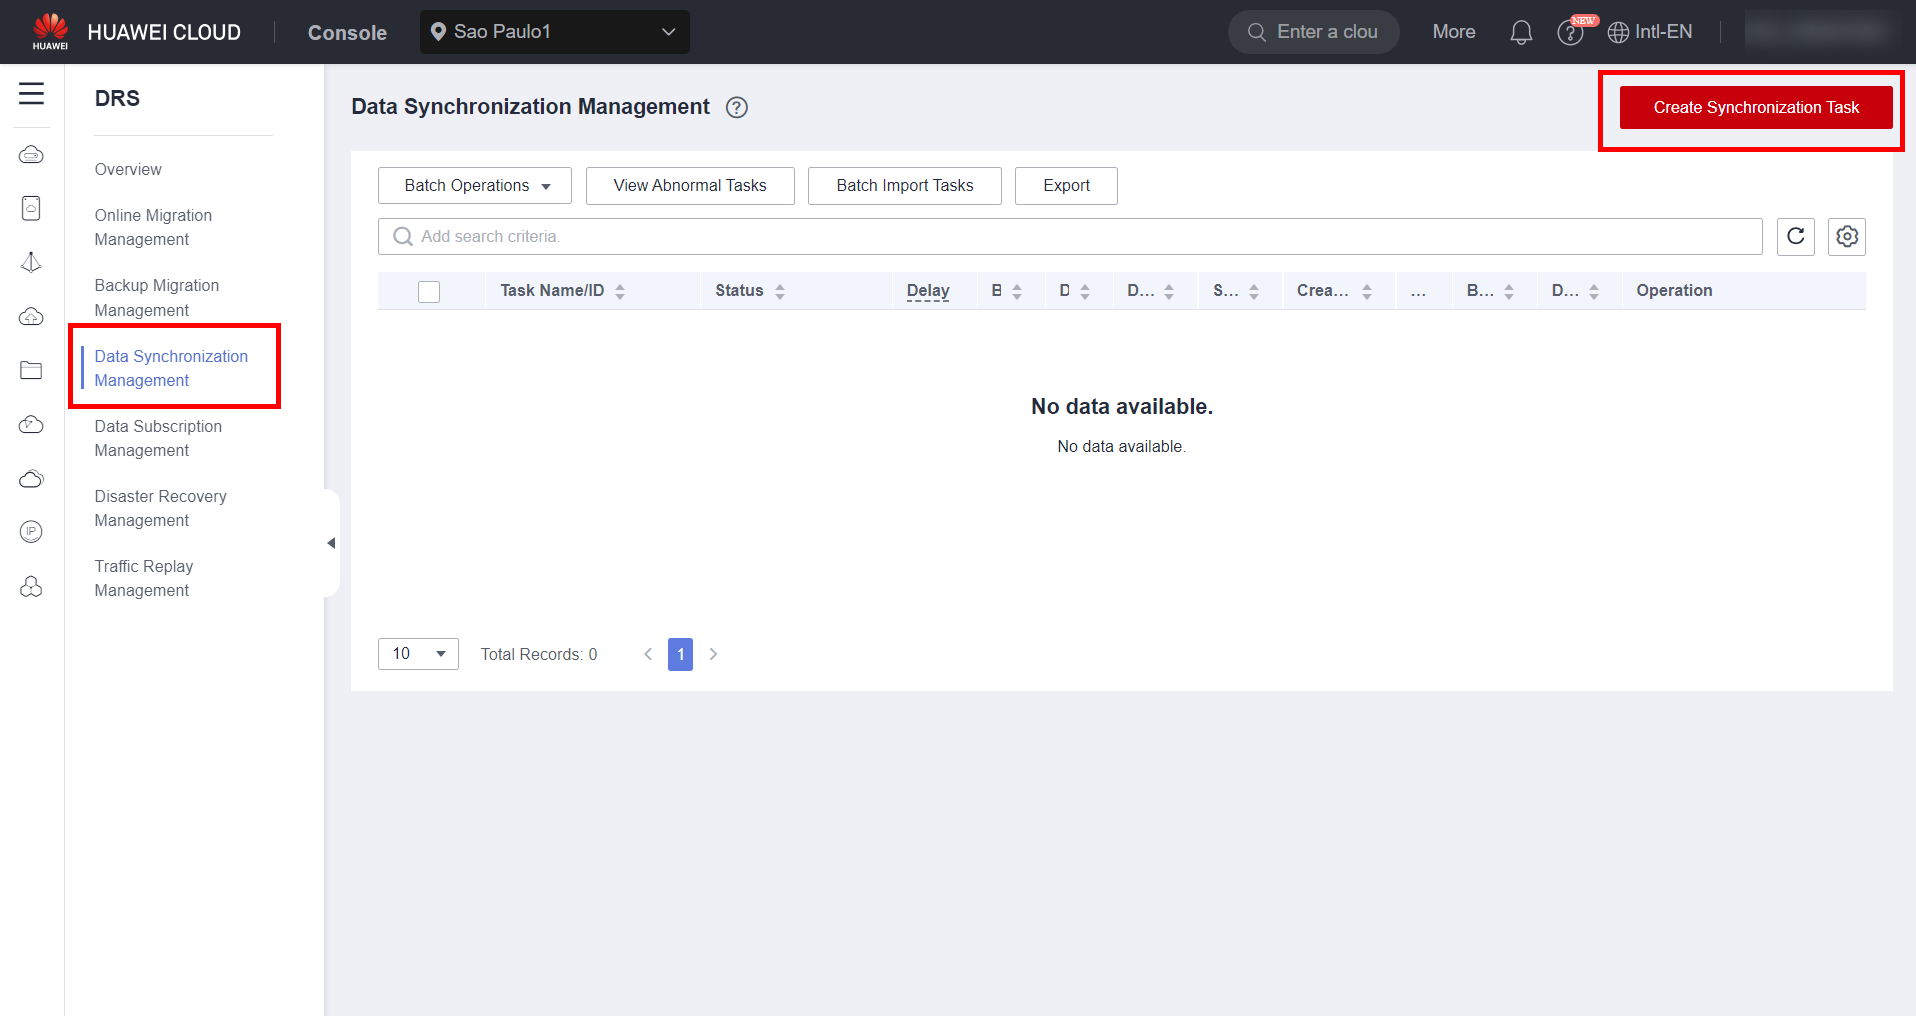
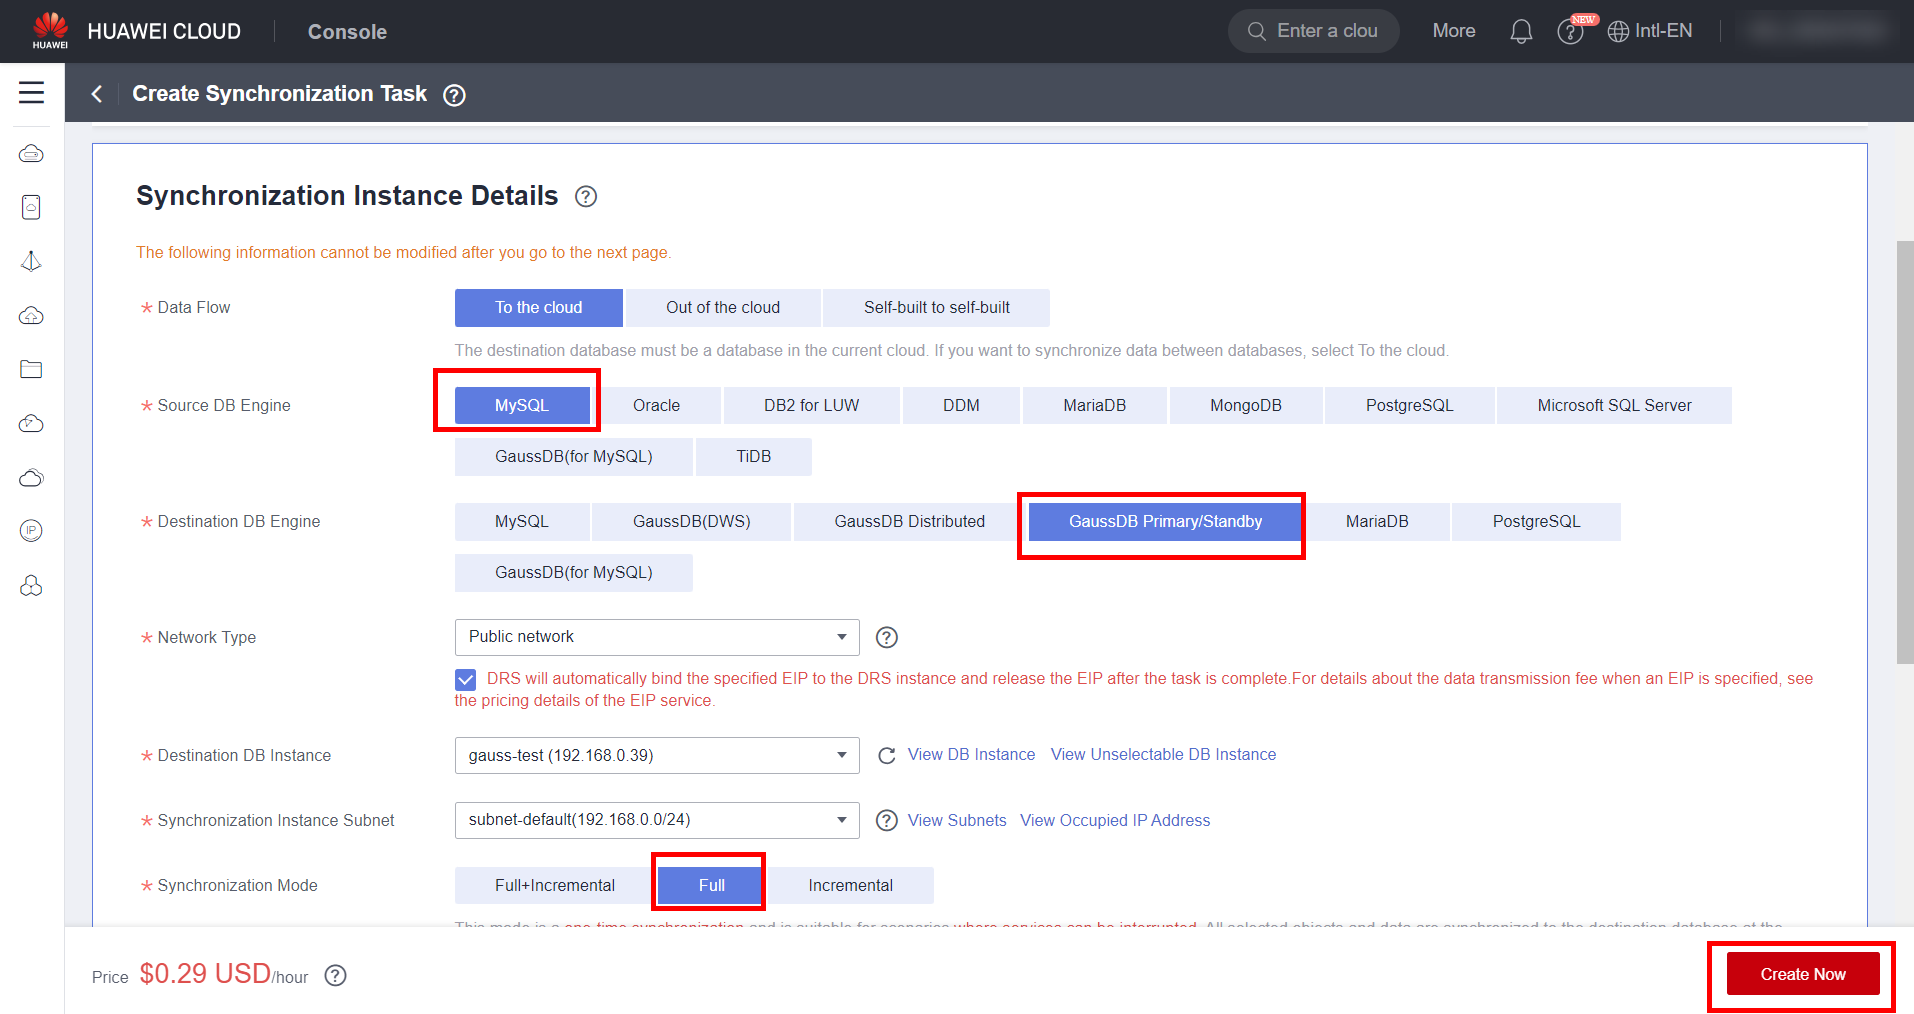
Navigate to the “Data Synchronization Management” subsection and click “Create Synchronization Task” to create a DRS task. Fill in the task fields as shown below:
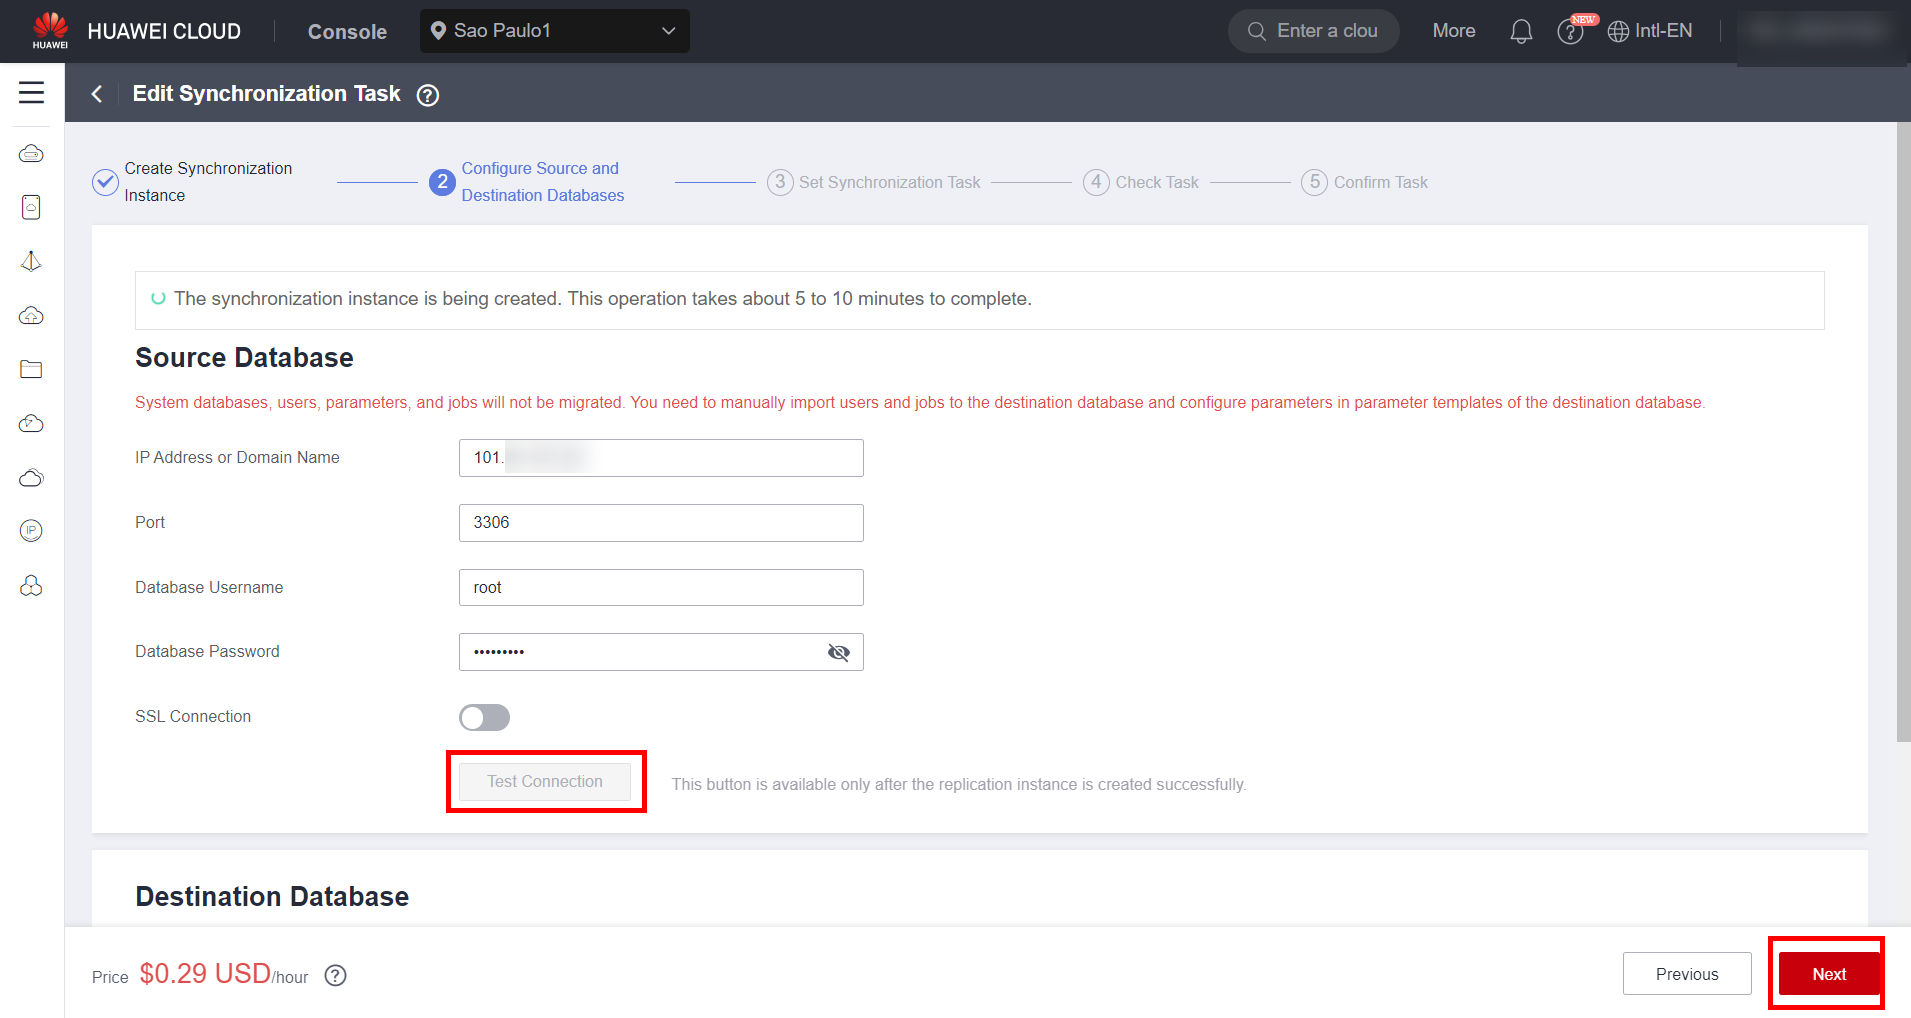
Wait until the synchronization instance is created, which may take a few minutes. After the instance is started, fill in the information related to the source database and the target database, such as username, password and public IP, and test the connection to both databases. After testing the connections, select the “Next” button to continue.
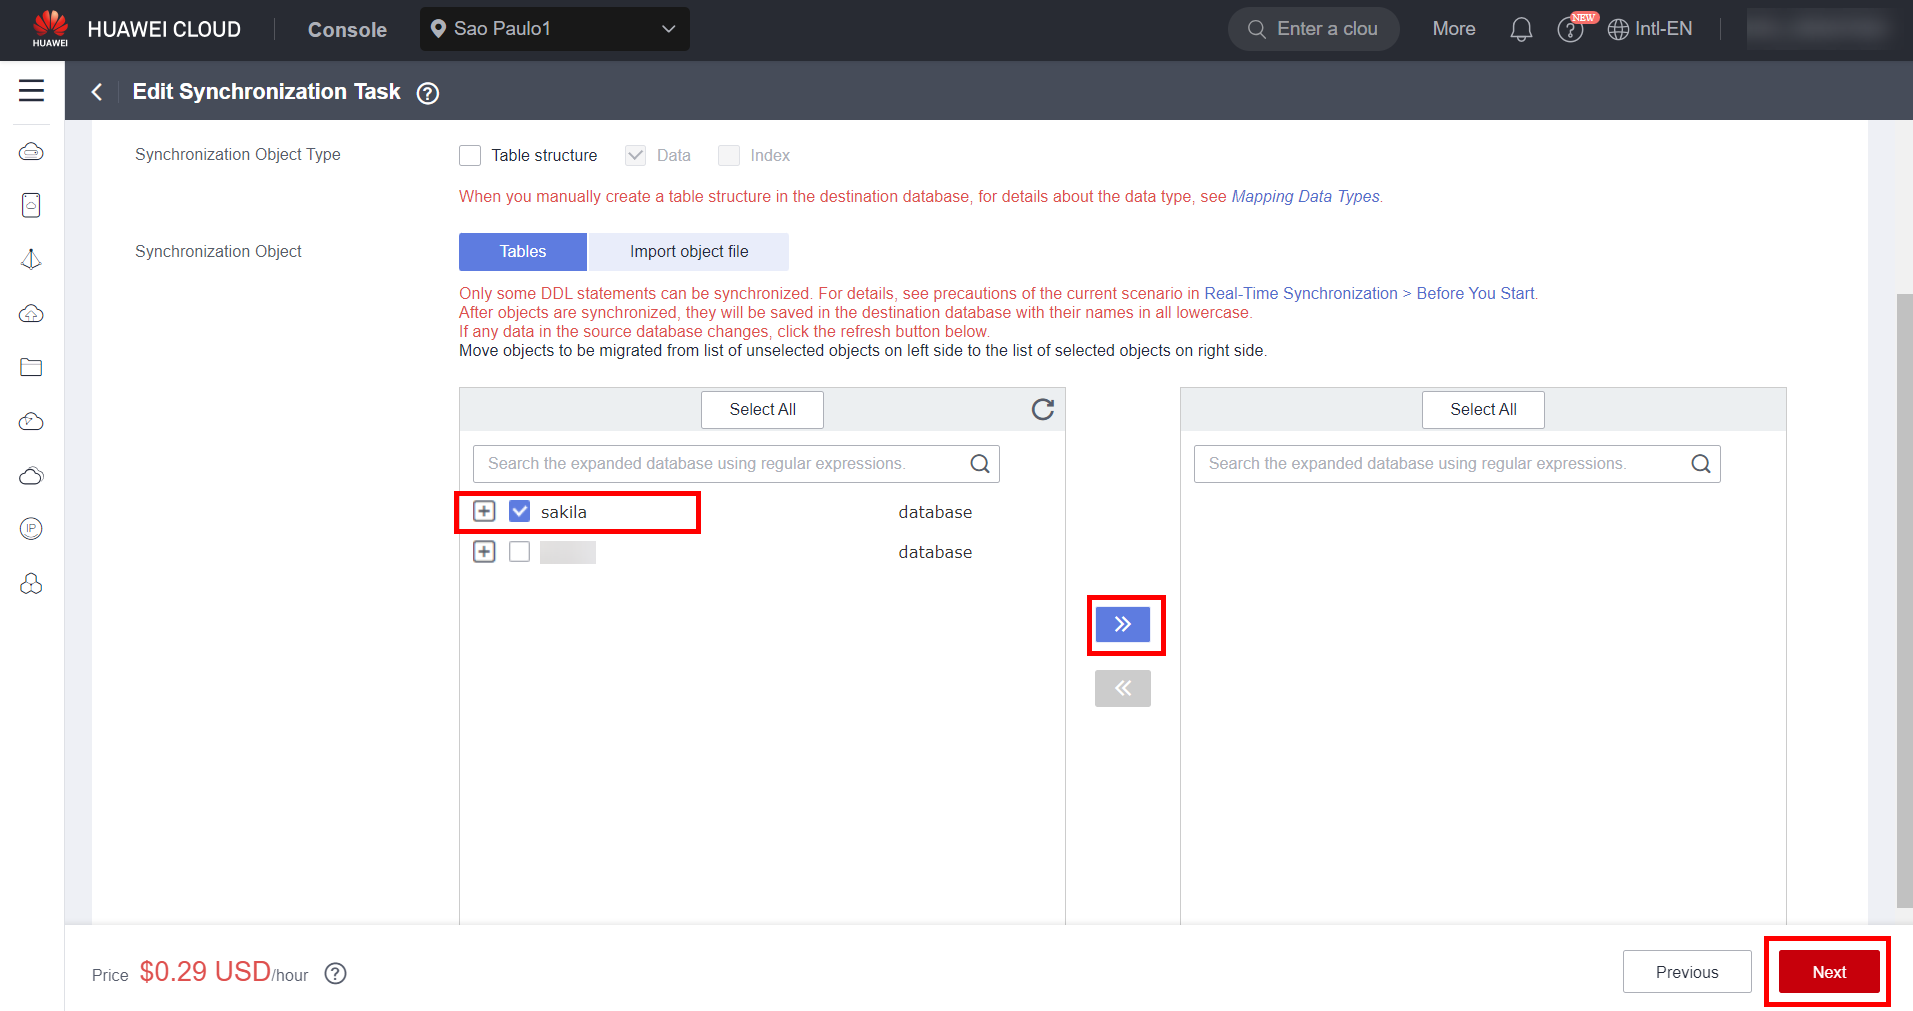
Select the tables to be synchronized
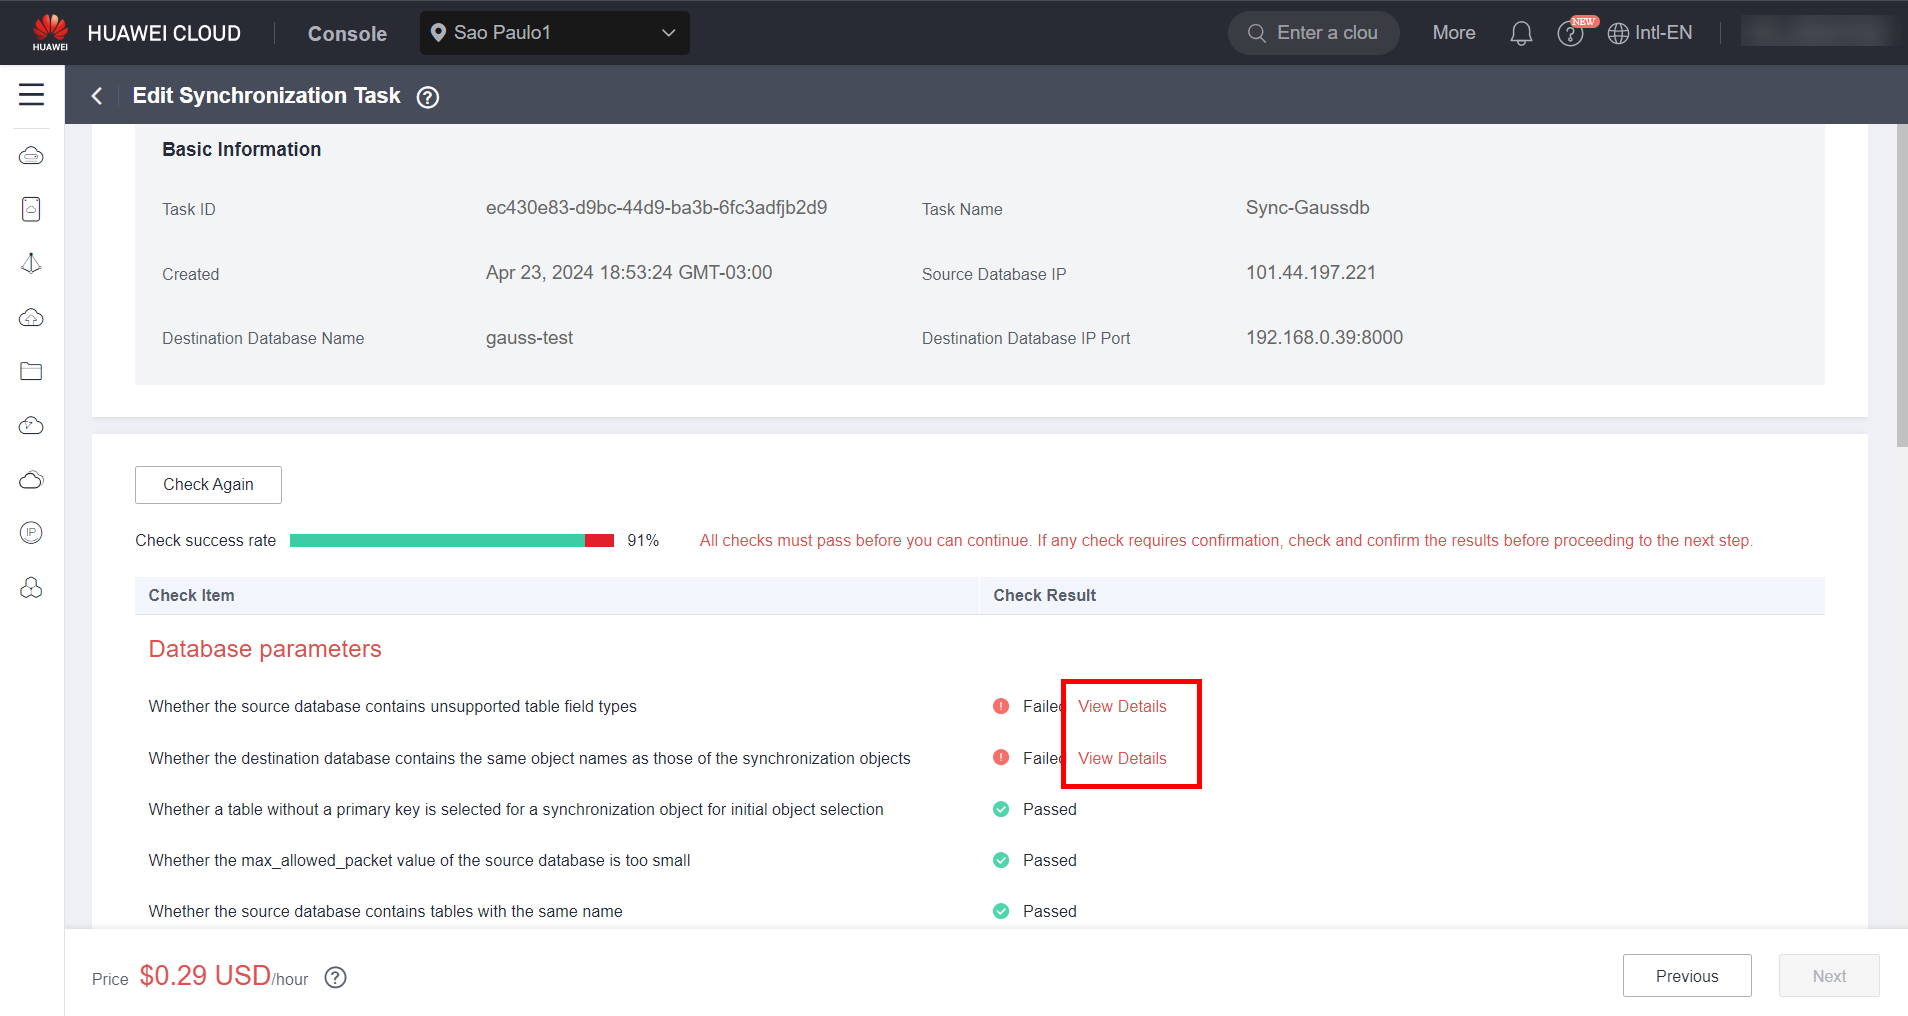
Wait for the synchronization pre-check to complete. If any of the parameters fails to sync, please confirm the reason for the failure
References
-
Sakila test dataset: https://dev.mysql.com/doc/sakila/en/sakila-preface.html;
-
UGO documentation: https://support.huaweicloud.com/intl/en-us/productdesc-ugo/ugo_01_0014.html;