![]()
Migrating Unsupported OSs
V1.0 – May 2024
| Version | Author | Description |
|---|---|---|
| V1.0 – 2024-05-17 | Diogo Hatz 50037923 | Initial Version |
| V1.0 – 2024-05-17 | Wisley da Silva 00830850 | Document Review |
Introduction
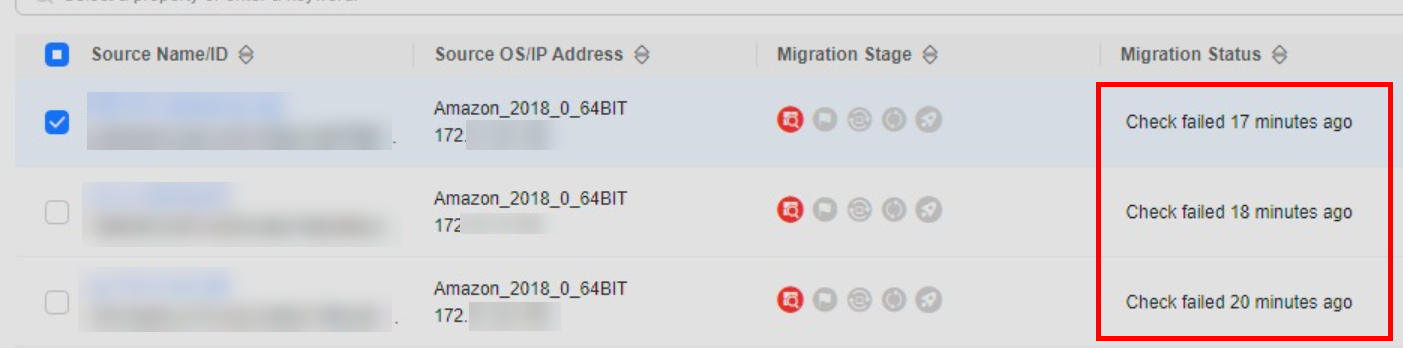
SMS is an online server migration tool available on Huawei Cloud. In addition to migrating servers from a variety of operating systems, it is also possible to perform synchronization between servers using the sync function. However, SMS has restrictions on certain specific operating systems, which can be found in the documentation in the references.
This document aims to describe the methodology for migrating servers whose OSes are not supported by the SMS tool using SMS. It is worth noting that this process is not guaranteed to work, since SMS is not compatible with certain operating systems and additional configuration may need to be done.
SMS-Agent
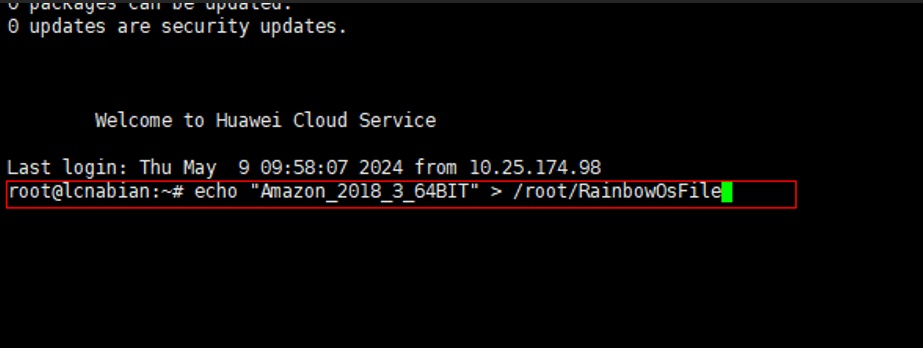
In order to migrate VMs that have an operating system not supported by SMS, it is first necessary to modify the file containing the name representing the operating system version to prevent SMS from failing during the migration precheck.
To perform this modification, log in to the source environment and enter the following command, where “Amazon_2018_3_64BIT” can be replaced with any supported SMS versions.
echo "Amazon_2018_3_64BIT" > /root/RainbowOsFile
Once the configuration is done, navigate to the SMS service section in the HWC console and delete the migration tasks that are in error. Then, enter the SMS agent installation directory on the source machine and restart the agent by running the “./restart.sh” script. Enter the AK/SK keys as well as the SMS endpoint to configure the SMS agent again.
Migrated ECS Initialization Error
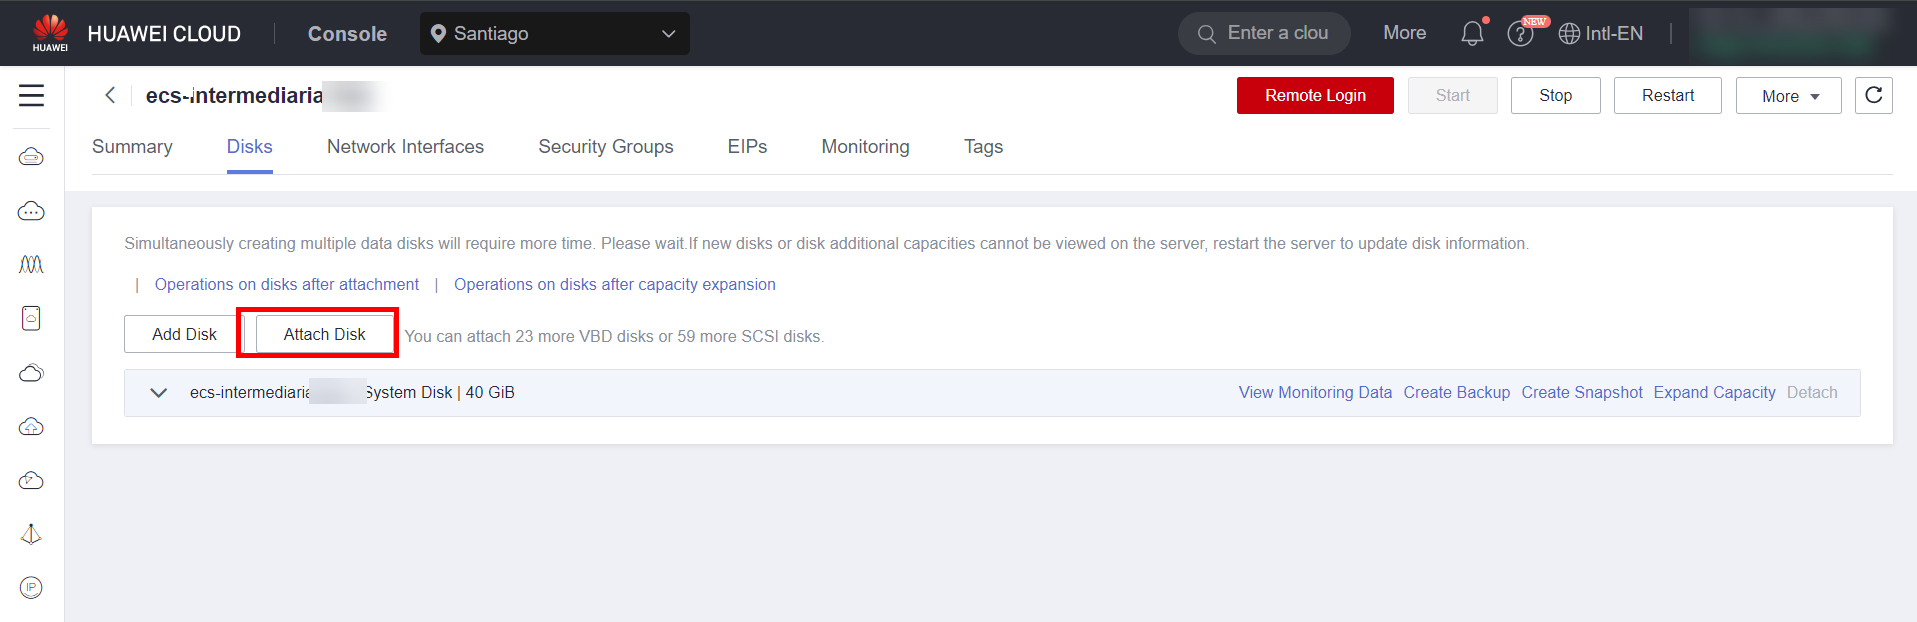
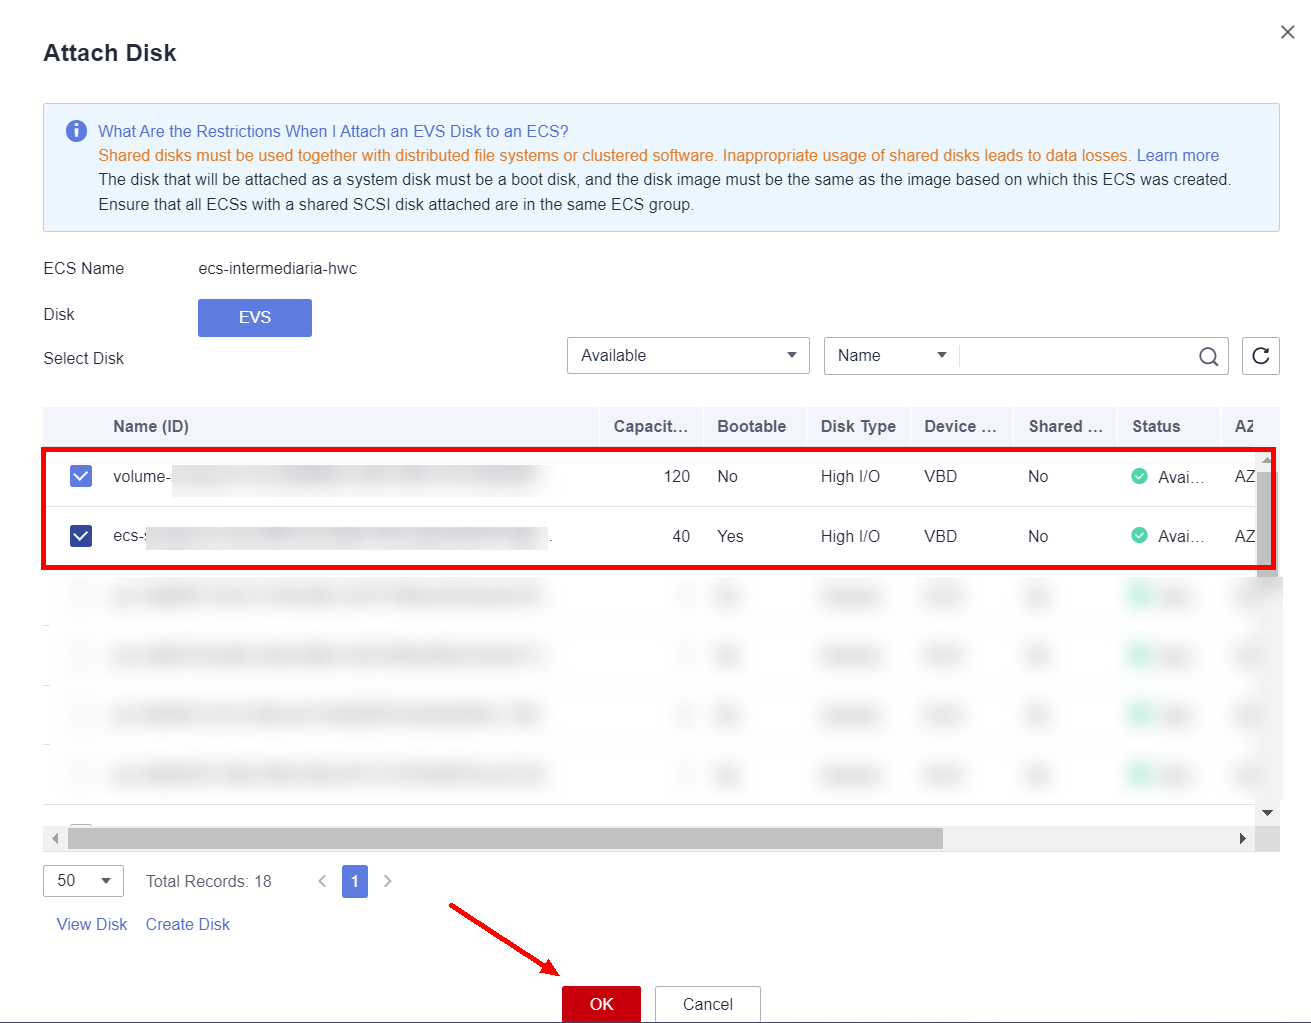
If the migrated machine presents problems during initialization, such as getting stuck in the boot process, it is possible that some adjustments need to be made to the migrated machine. Below is a list of some known errors. If none of the solutions below solve the problem, it is recommended that a ticket be opened so that the experts can investigate the problem more precisely. To perform the following configurations, it will be necessary to remove the system disk of the migrated machine as a data disk in an intermediate ECS as follows. After creating a new ECS in the HWC console, mount the disks on the intermediate machine. First, remove the damaged disks from the original ECS and then place them in the intermediate ECS.
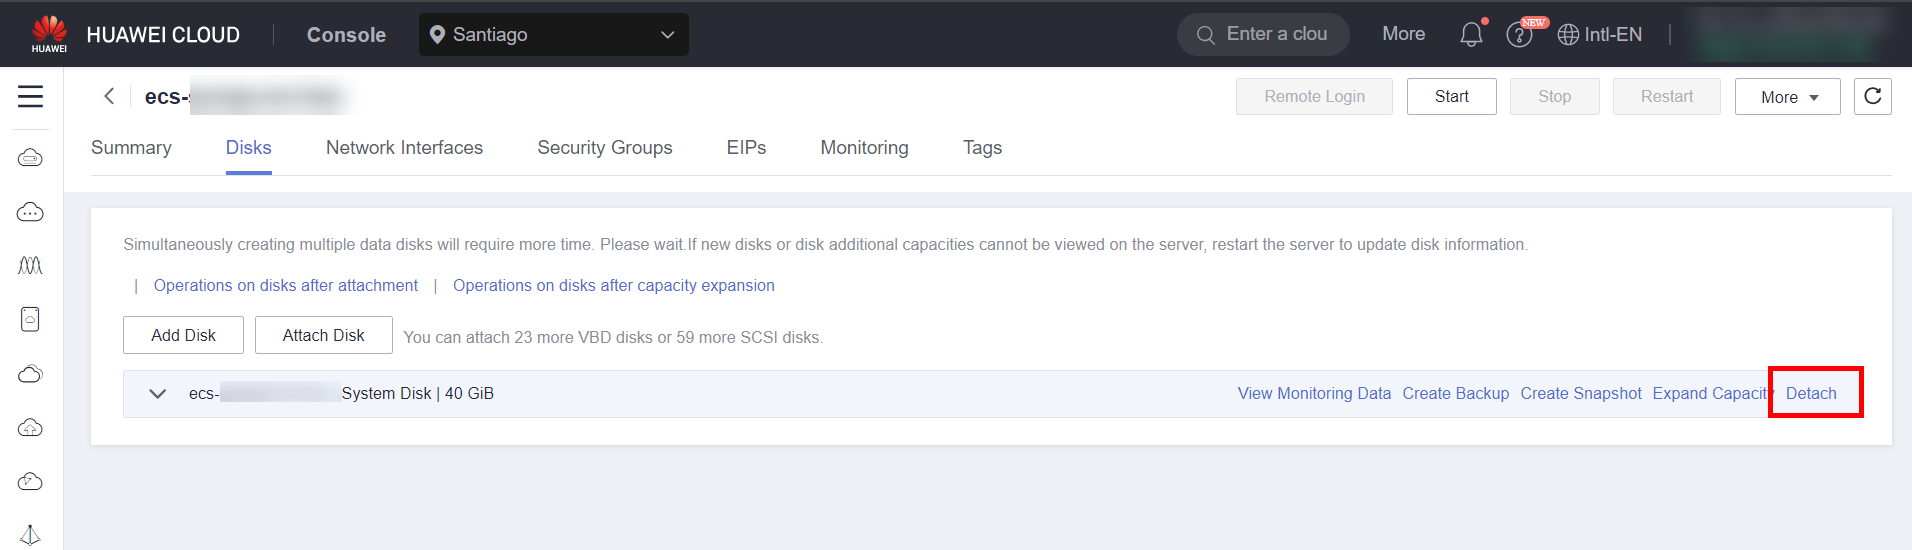
After removing the disks from the original ECS, mount them on the intermediate ECS

IPV6
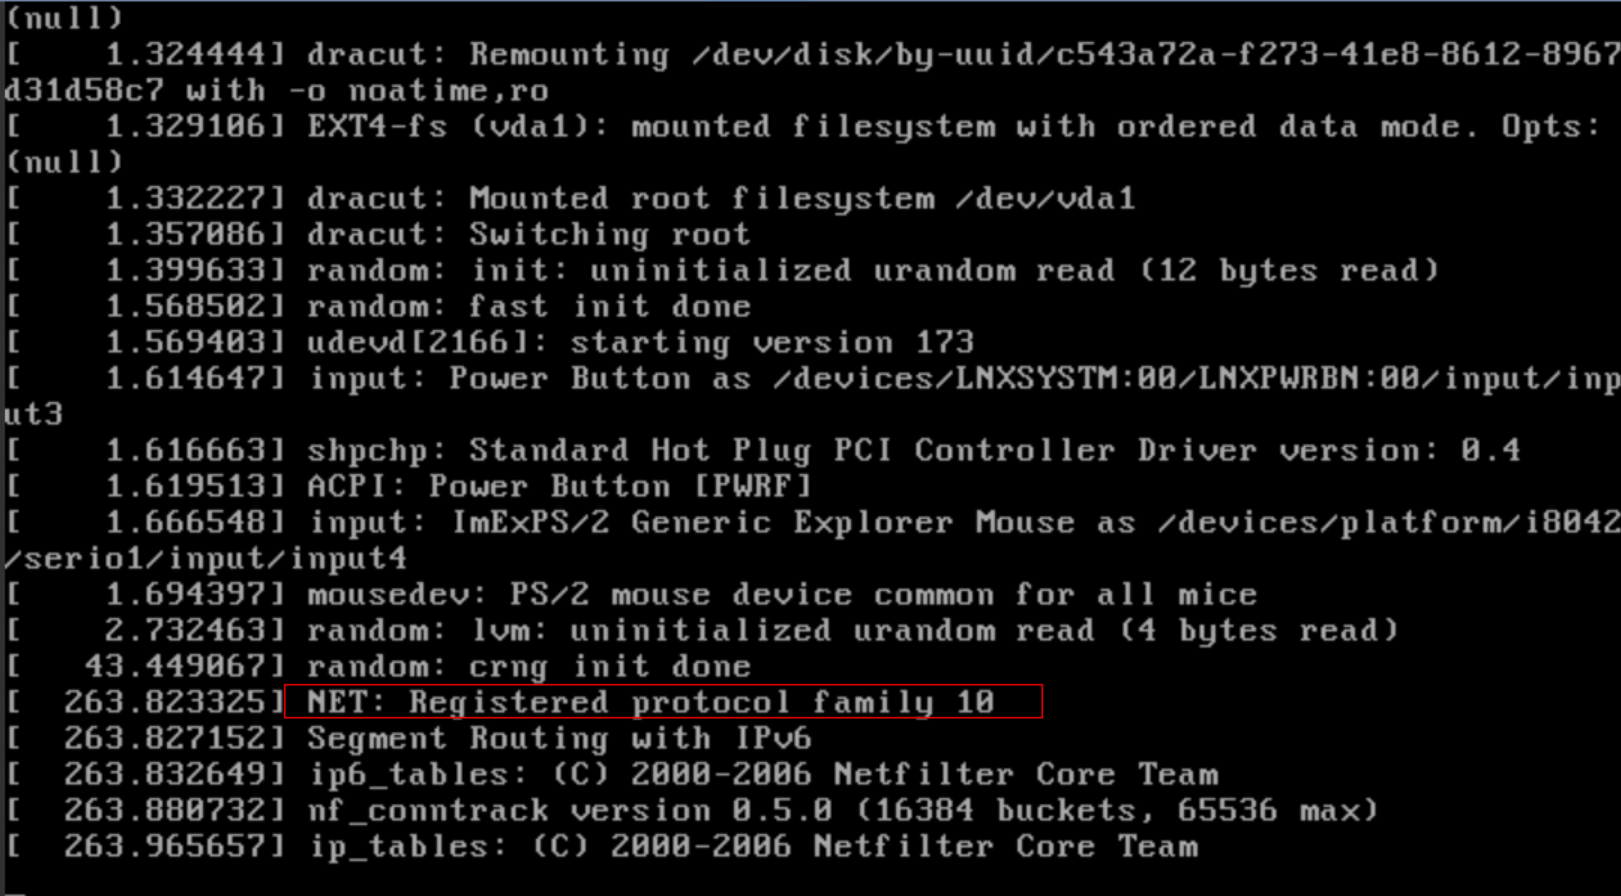
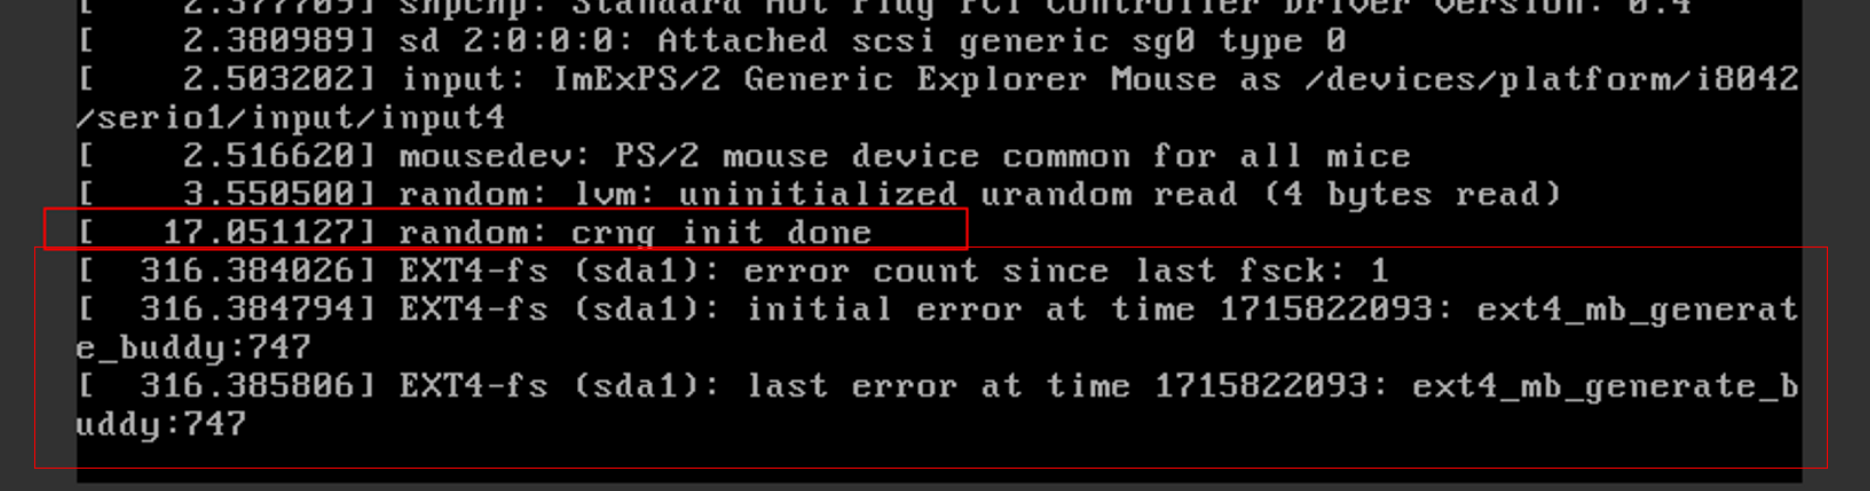
If the error during ECS initialization resembles the image below, it is possible that the error is related to an IPV6 configuration on the machine.
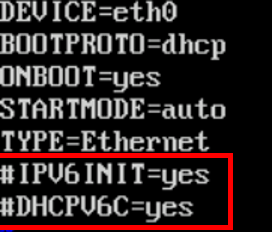
To resolve this error, unmount the system disk of the migrated machine and connect it to the intermediate ECS. Mount the system disk in a new directory (in this example it was mounted in the /mnt folder) with the “mount” command and access the following file: “vim /mnt/etc/sysconfig/network-scripts/ifcfg-eth0”. Comment out the following two lines in the file and save the file with “:wq”.
Note: If the error “Failed to Mount Wrong FS Type, Bad Option, Bad Superblock on Linux” appears while mounting the disk, skip to step 3.2 of this document.
Now unmount the mounted disk with the “umount” command, remove the system disk of the migrated machine from the intermediate ECS and reconnect it to the migrated ECS. Power it on and check if the machine boots without errors.
To ensure that the Sync functionality works without breaking the migrated machine, perform the following configuration in the SMS agent script on the source VM:

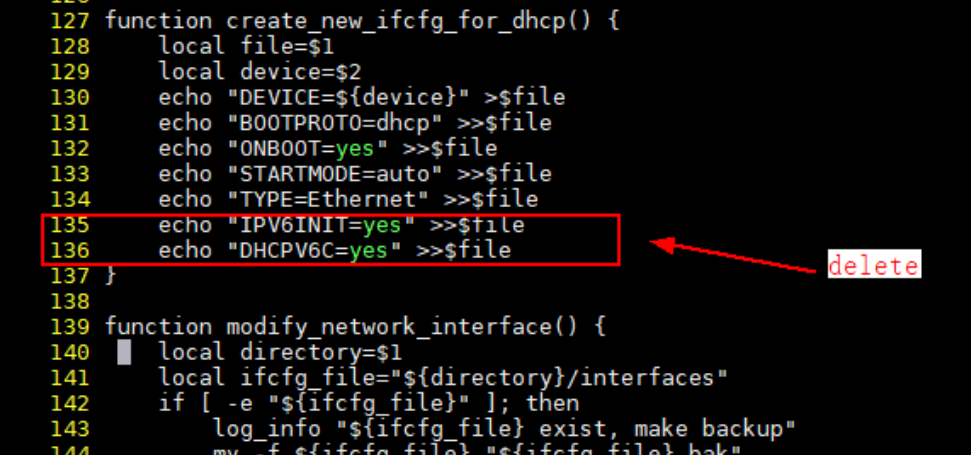
After this adjustment, the Sync functionality should work without any further problems.
File System
If the file system of the migrated machines is corrupted after the migration, it will be necessary to restore it through an intermediate VM.
To confirm that the file system of the system disk is corrupted, first wait until the following message appears during boot.
Wait for the following error appears before proceeding to the next steps is important for the process.
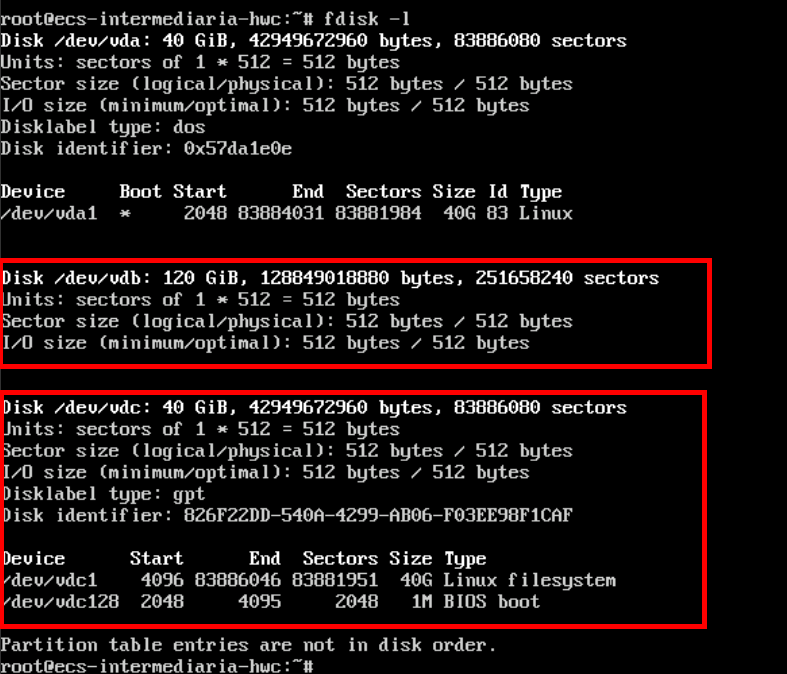
Log in to the intermediate ECS and enter the command “fdisk -l” to list the disks mounted on the ECS. Copy the path of the device whose filesystem is corrupted, such as “/dev/vdc” or “/dev/vdb1”.
To recover the corrupted filesystem, enter the command “fsck /dev/vdb”, where /dev/vdb will be replaced with the disk or partition that needs to be recovered. Press “a” to recover all corrupted inodes. It is worth noting that the disk does not need to be mounted in a directory for this process. 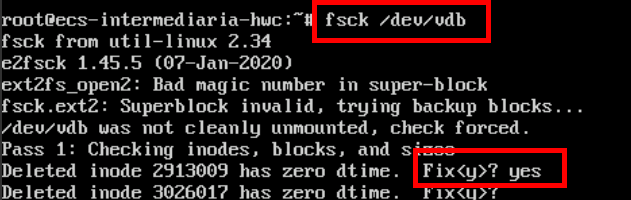 Wait until all inode recovery is complete, remove the system disk of the migrated machine from the intermediate ECS and connect it again to the migrated ECS. Turn it on and check if the machine boots without errors.
Fstab
If the ECS has problems during its initialization, follow the steps below to edit the system’s fstab disk table. It is worth noting that for this step it will also be necessary to use an intermediate ECS if the filesystem of the original ECS is set to read-only due to a bad initialization. First, mount the system disk in a directory.

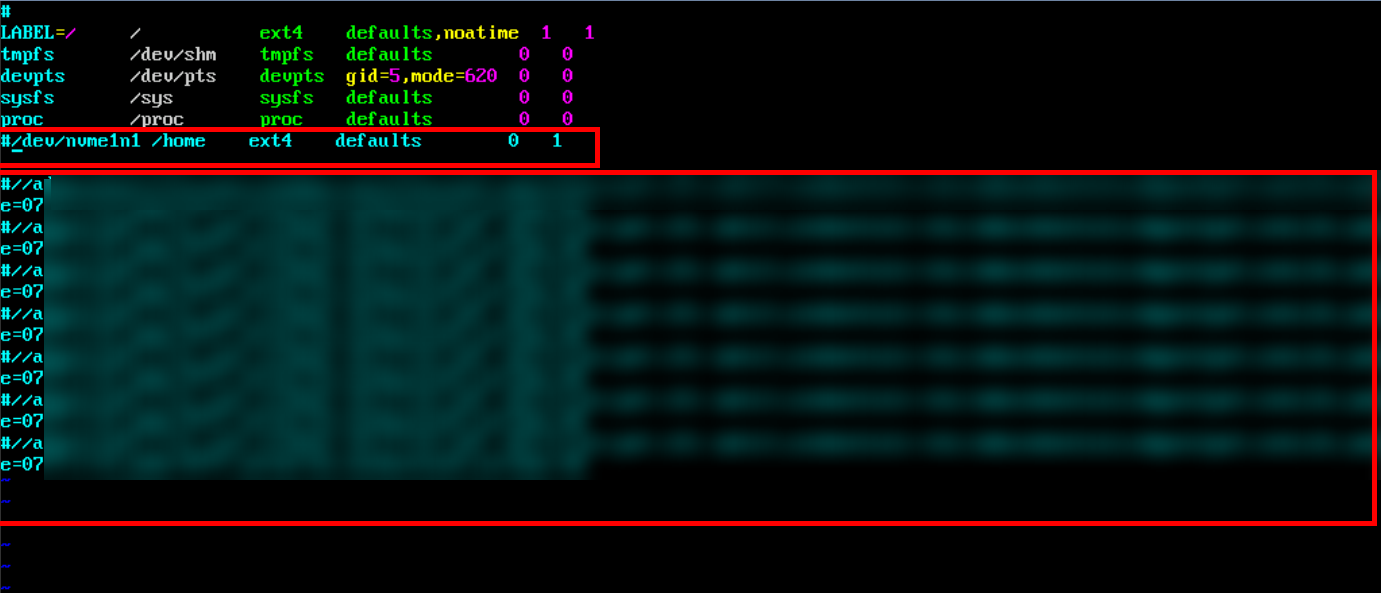
Edit the “/etc/fstab” file of the original ECS system disk.

Comment out all the old mounted disks in fstab.
After that, unmount the disk from the directory where it was mounted and remove the disks from the ECS to insert into the original ECS again

References
- SMS Documentation: https://support.huaweicloud.com/intl/en-us/productdesc-sms/sms3_01_0012.html.