![]()
Creating User, Group and Policy
V1.0 – March 2023
| Version | Author | Description |
|---|---|---|
| V1.0 – 2023-03 | Gabriel Gutierrez 00817435 | Initial Version |
Introduction
This document presents the procedures for creating a policy, group, and user. If you already have policies created or want to use existing policies in the console, you can skip the “Policy Creation” step and start by creating the groups and then the users.
Policy Creation
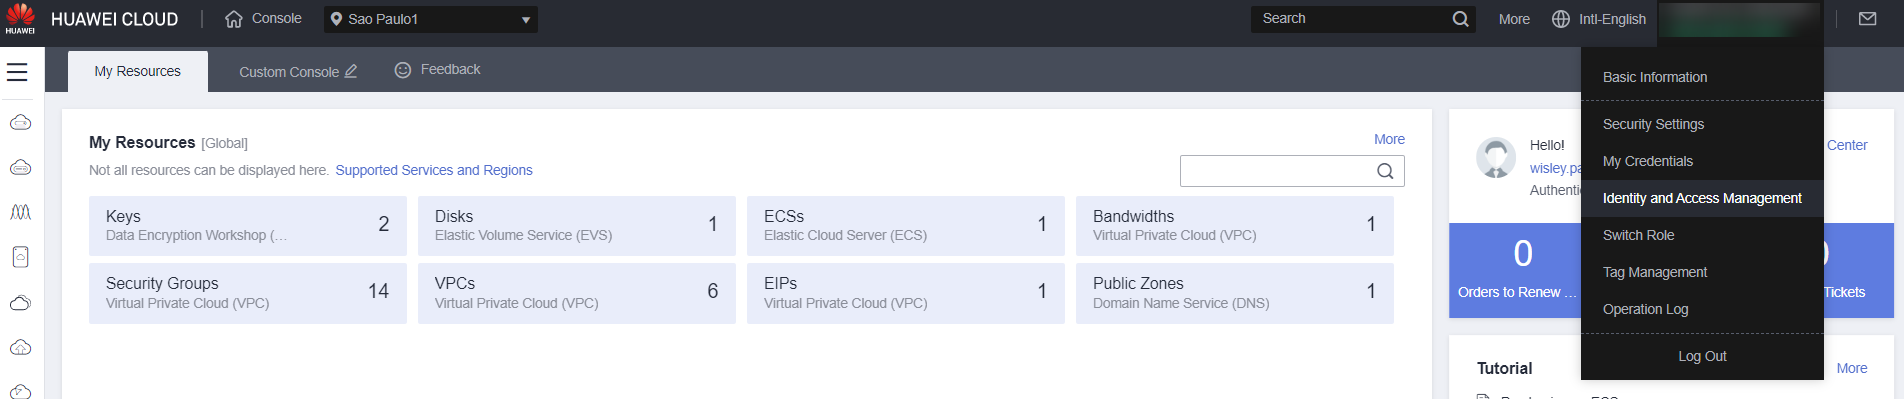
Access the IAM service:
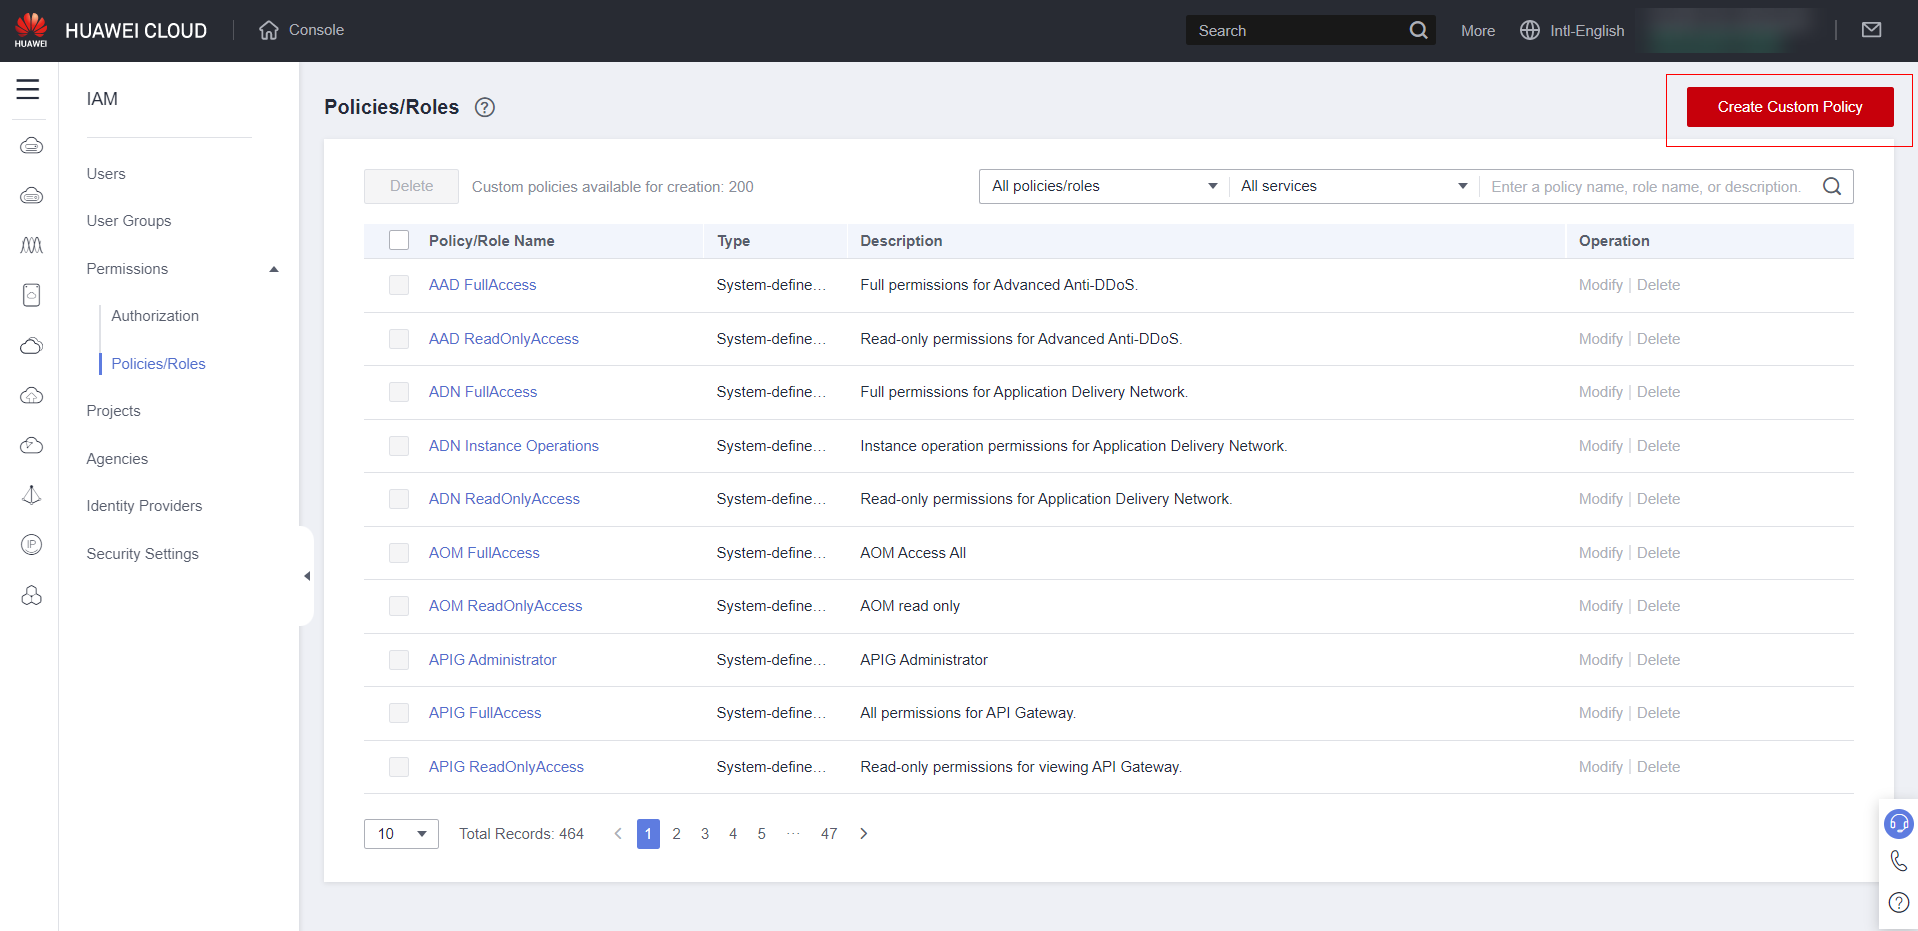
Click on “Permission” and then on “Policeis/Roles”

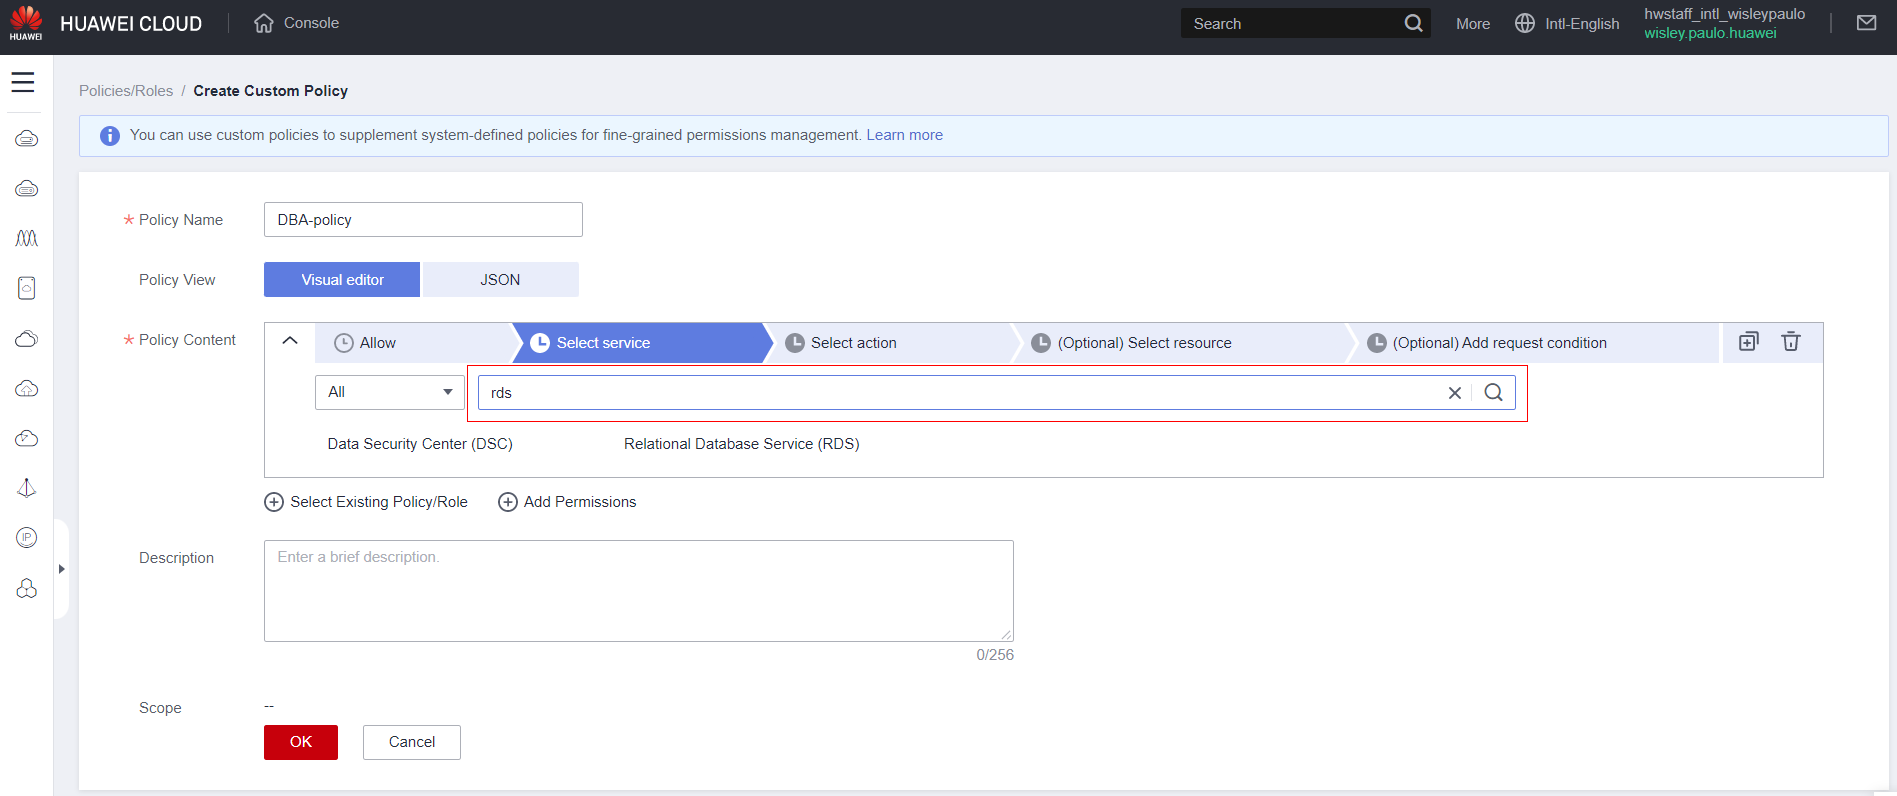
Click on “Create Custom Policy”
Set the name for the policy and start defining the policy content. Note: In the example below, we are defining permissions for a user/group with a DBA profile with exclusive access to the EDS service. But remember to adjust according to your needs.
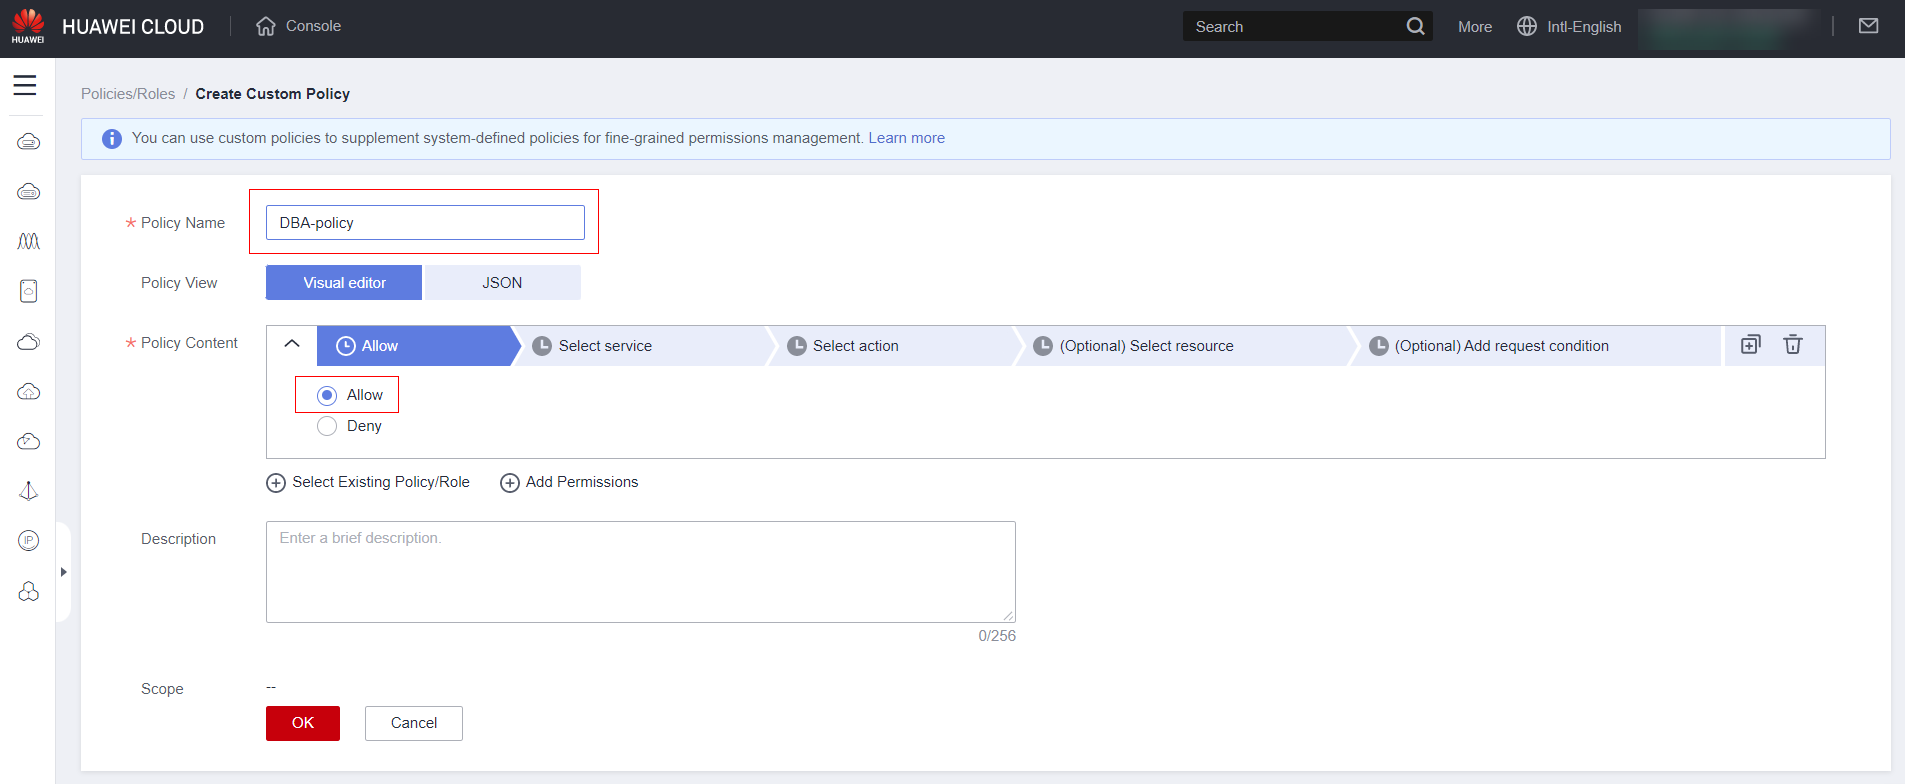
Select the service
Specify which service features you want to allow/deny, or if you want to grant full access to the service, click “Select All.”
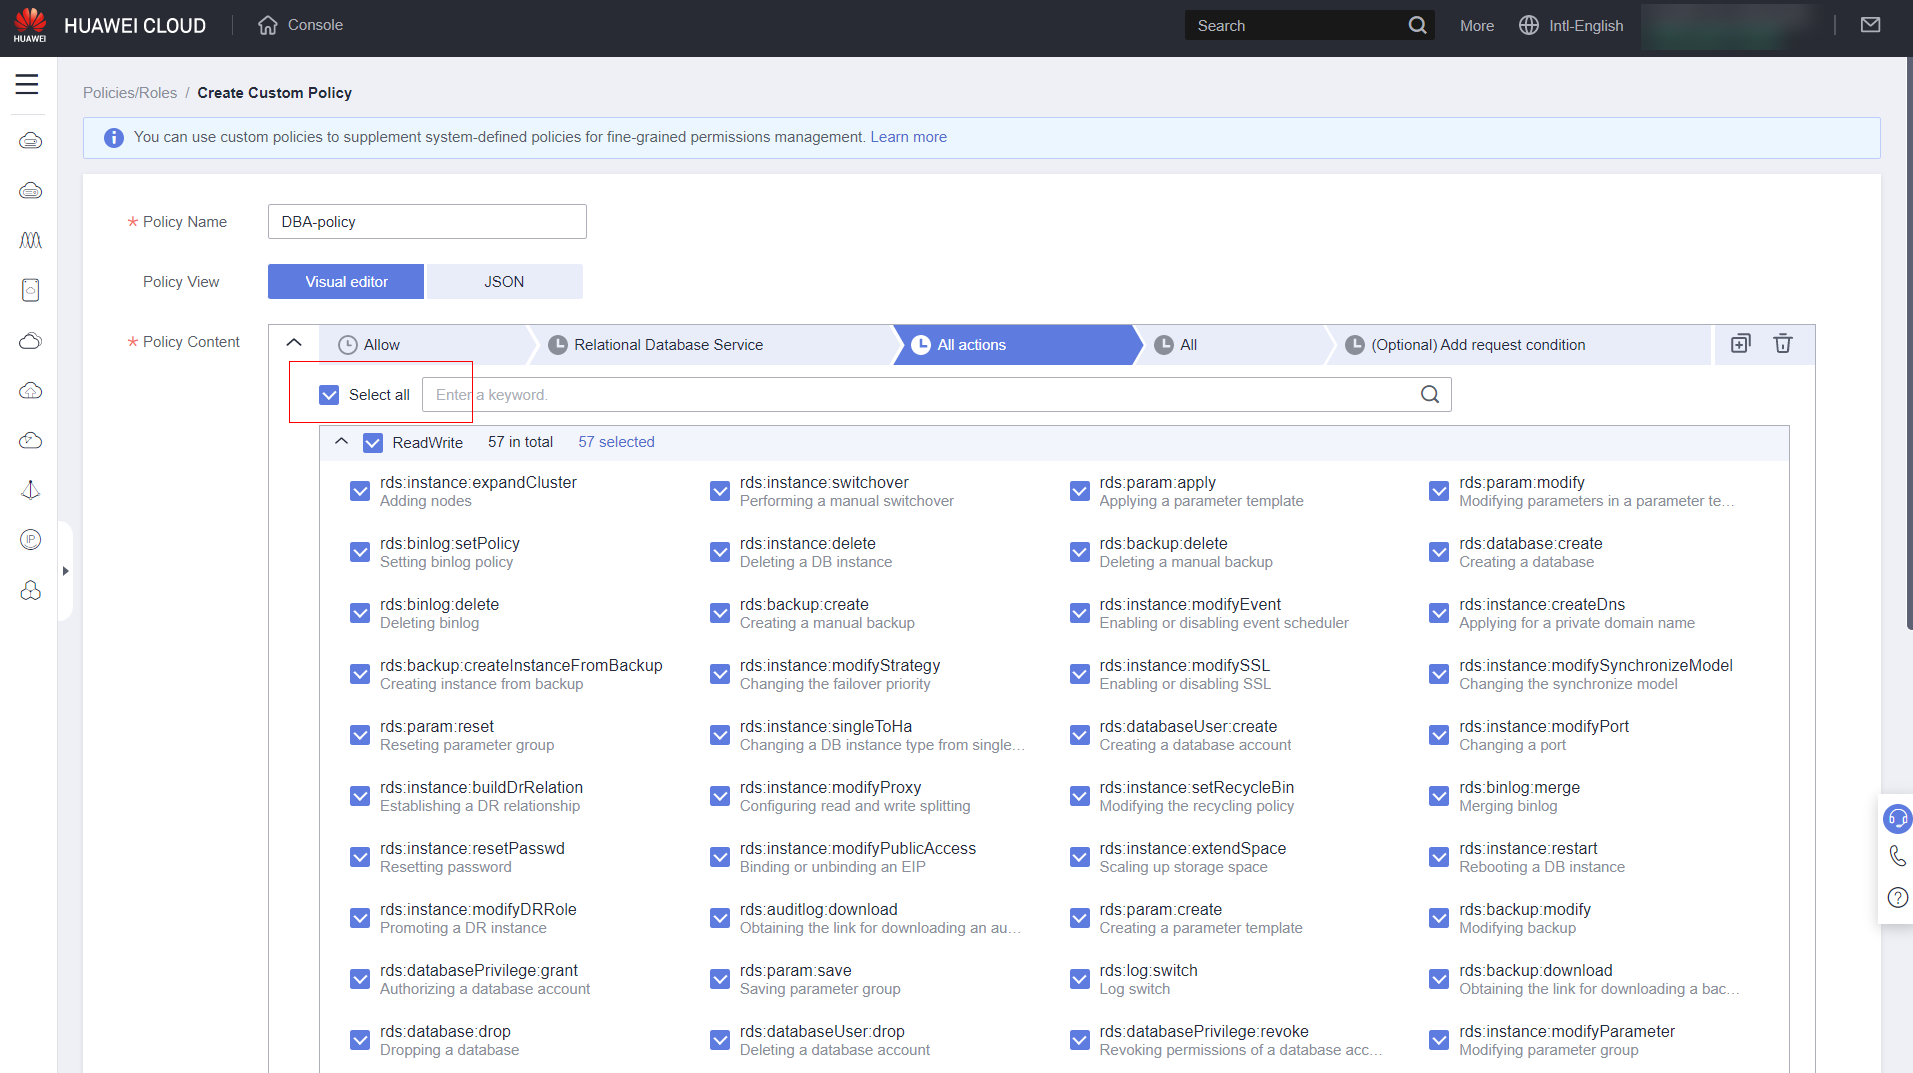
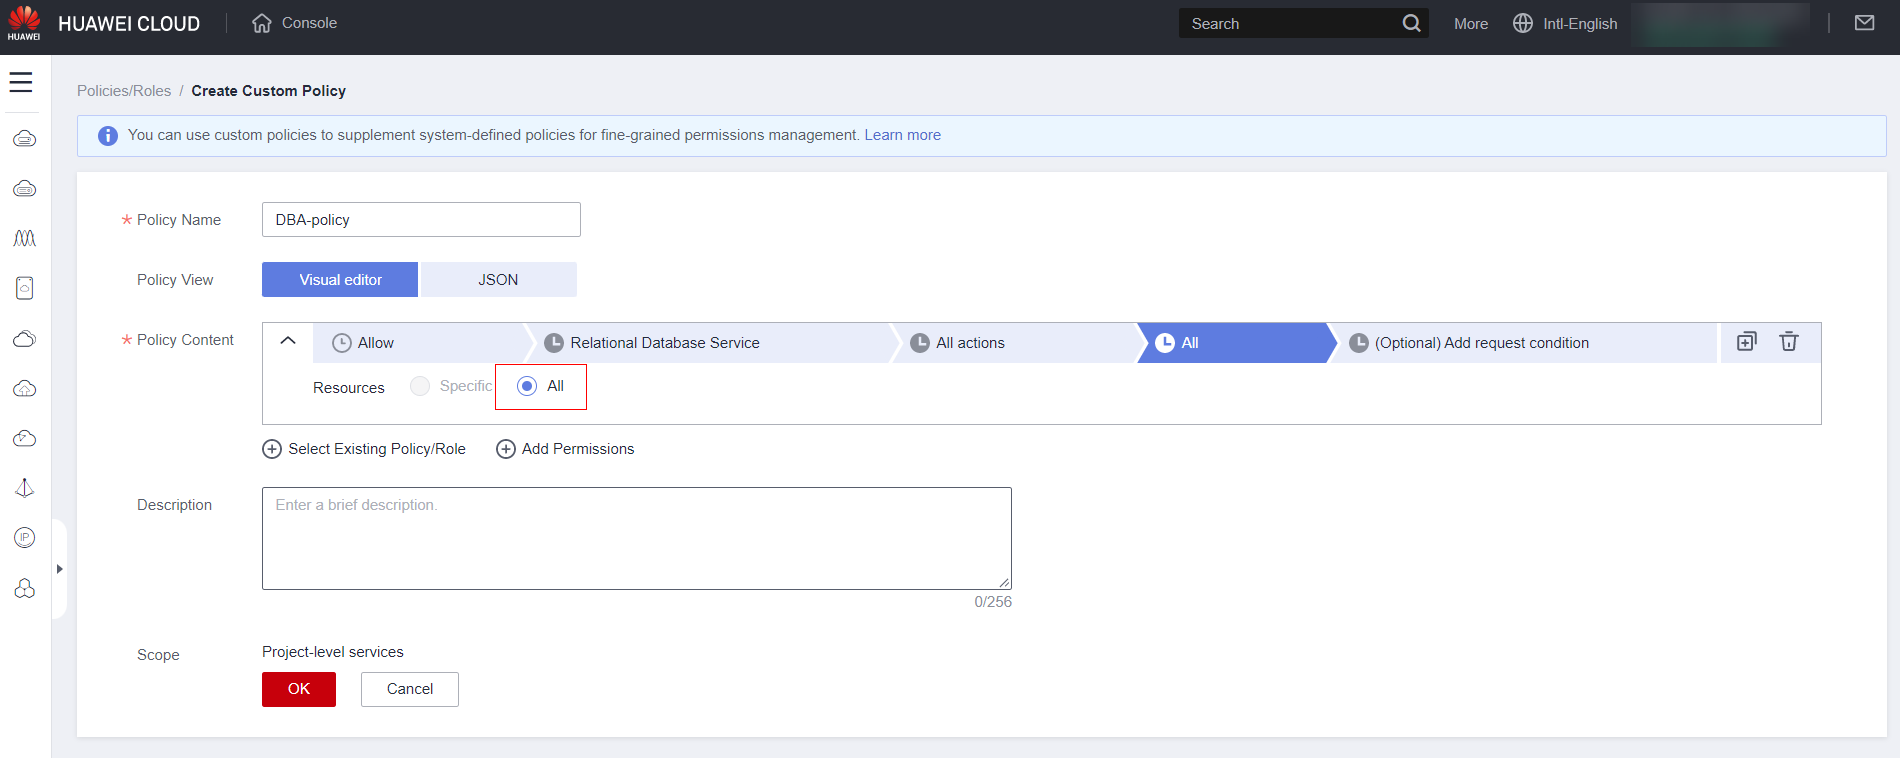
Keep the “All” option unless you have advanced knowledge to specify service features you want to limit.
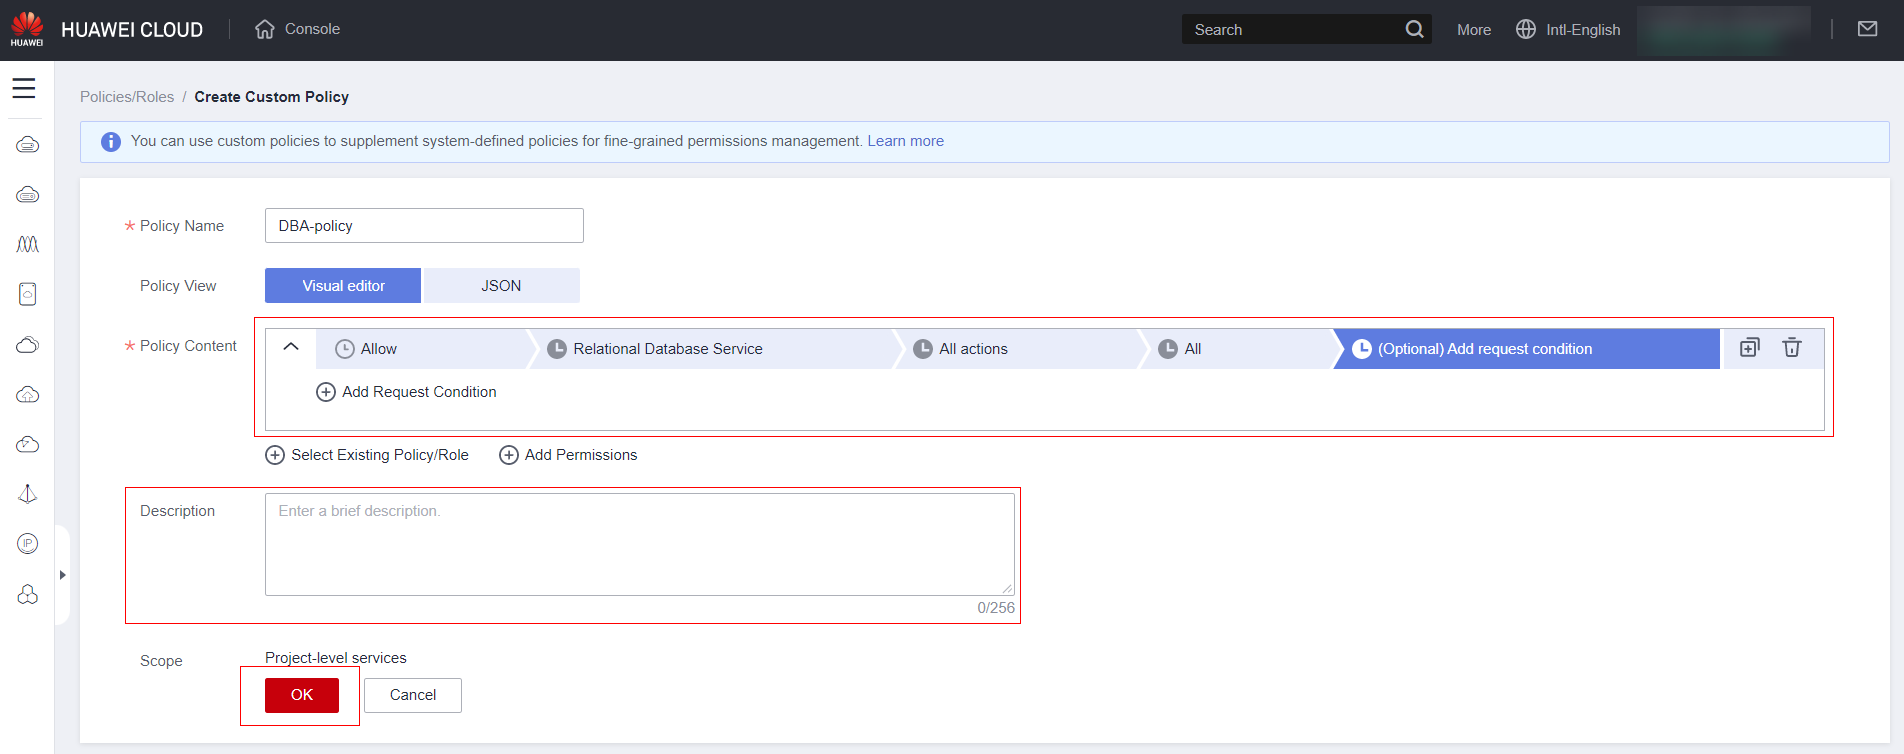
There is no need to add a condition except in very specific cases (if necessary, contact a partner for assistance). Fill out a description for the policy and finally click “OK.”
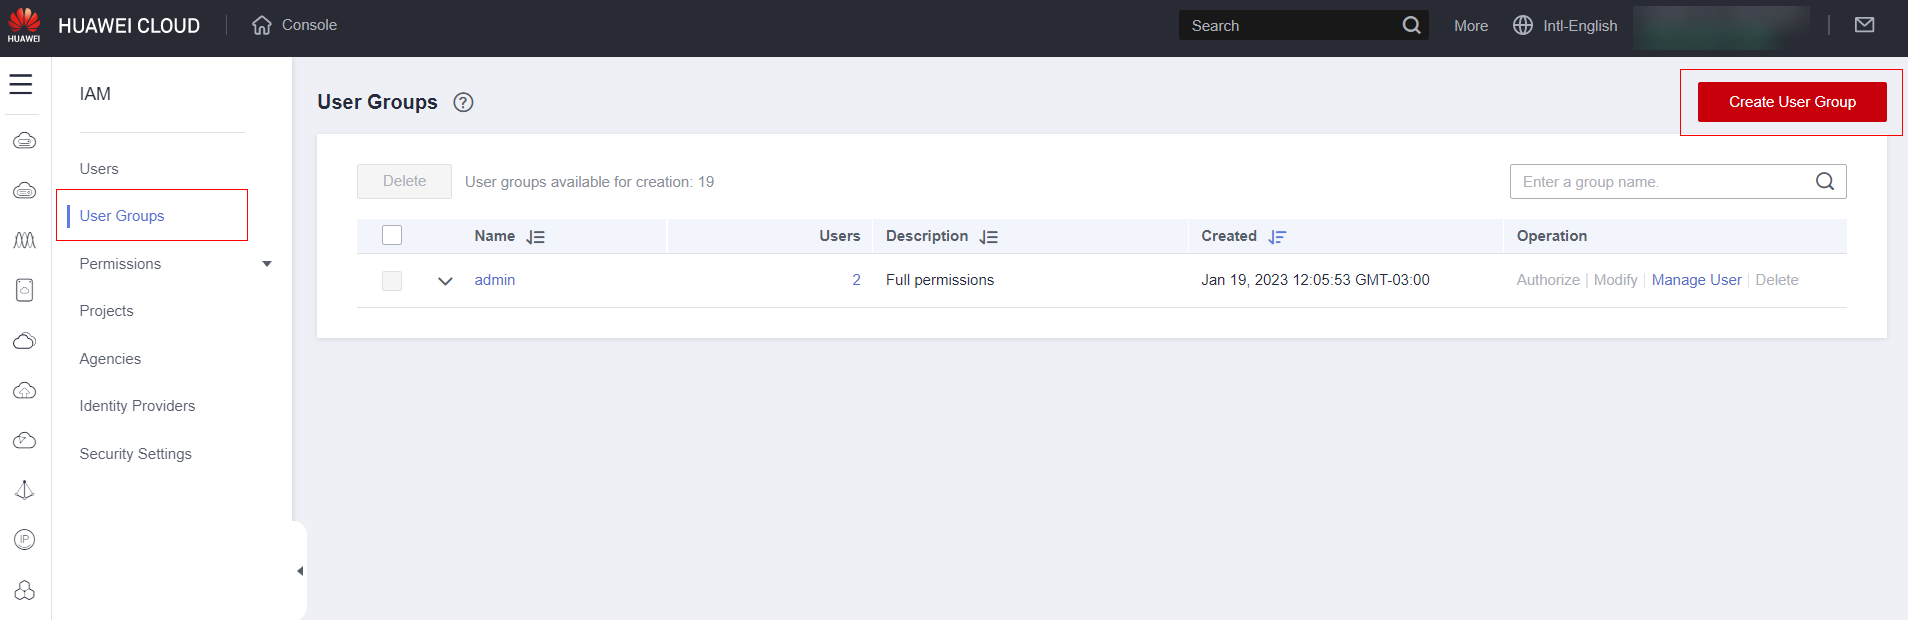
Group Creation
Access the IAM service:
Select “User Groups” and then “Create User Group”
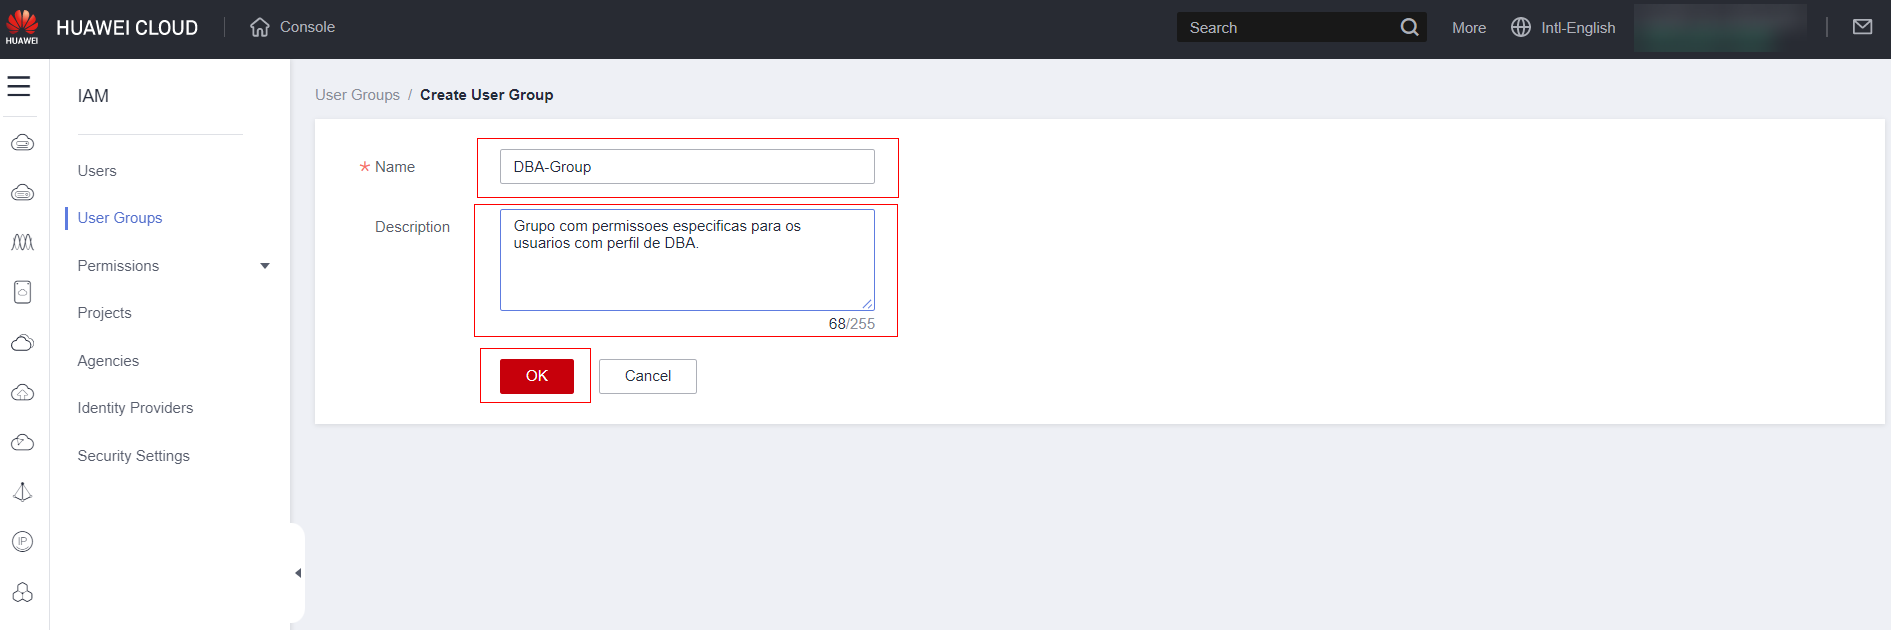
Set the group name, a description and click ok.
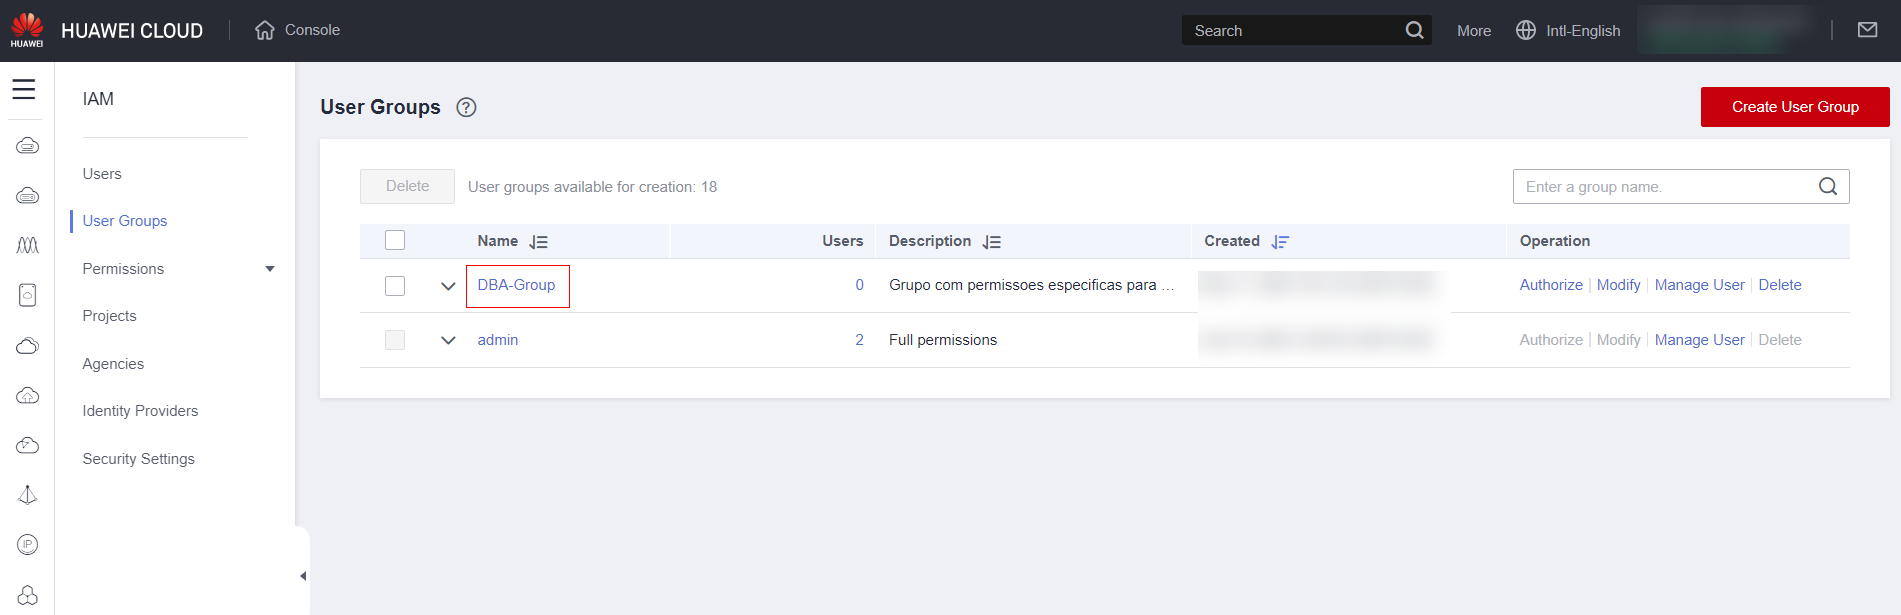
Click on the group.
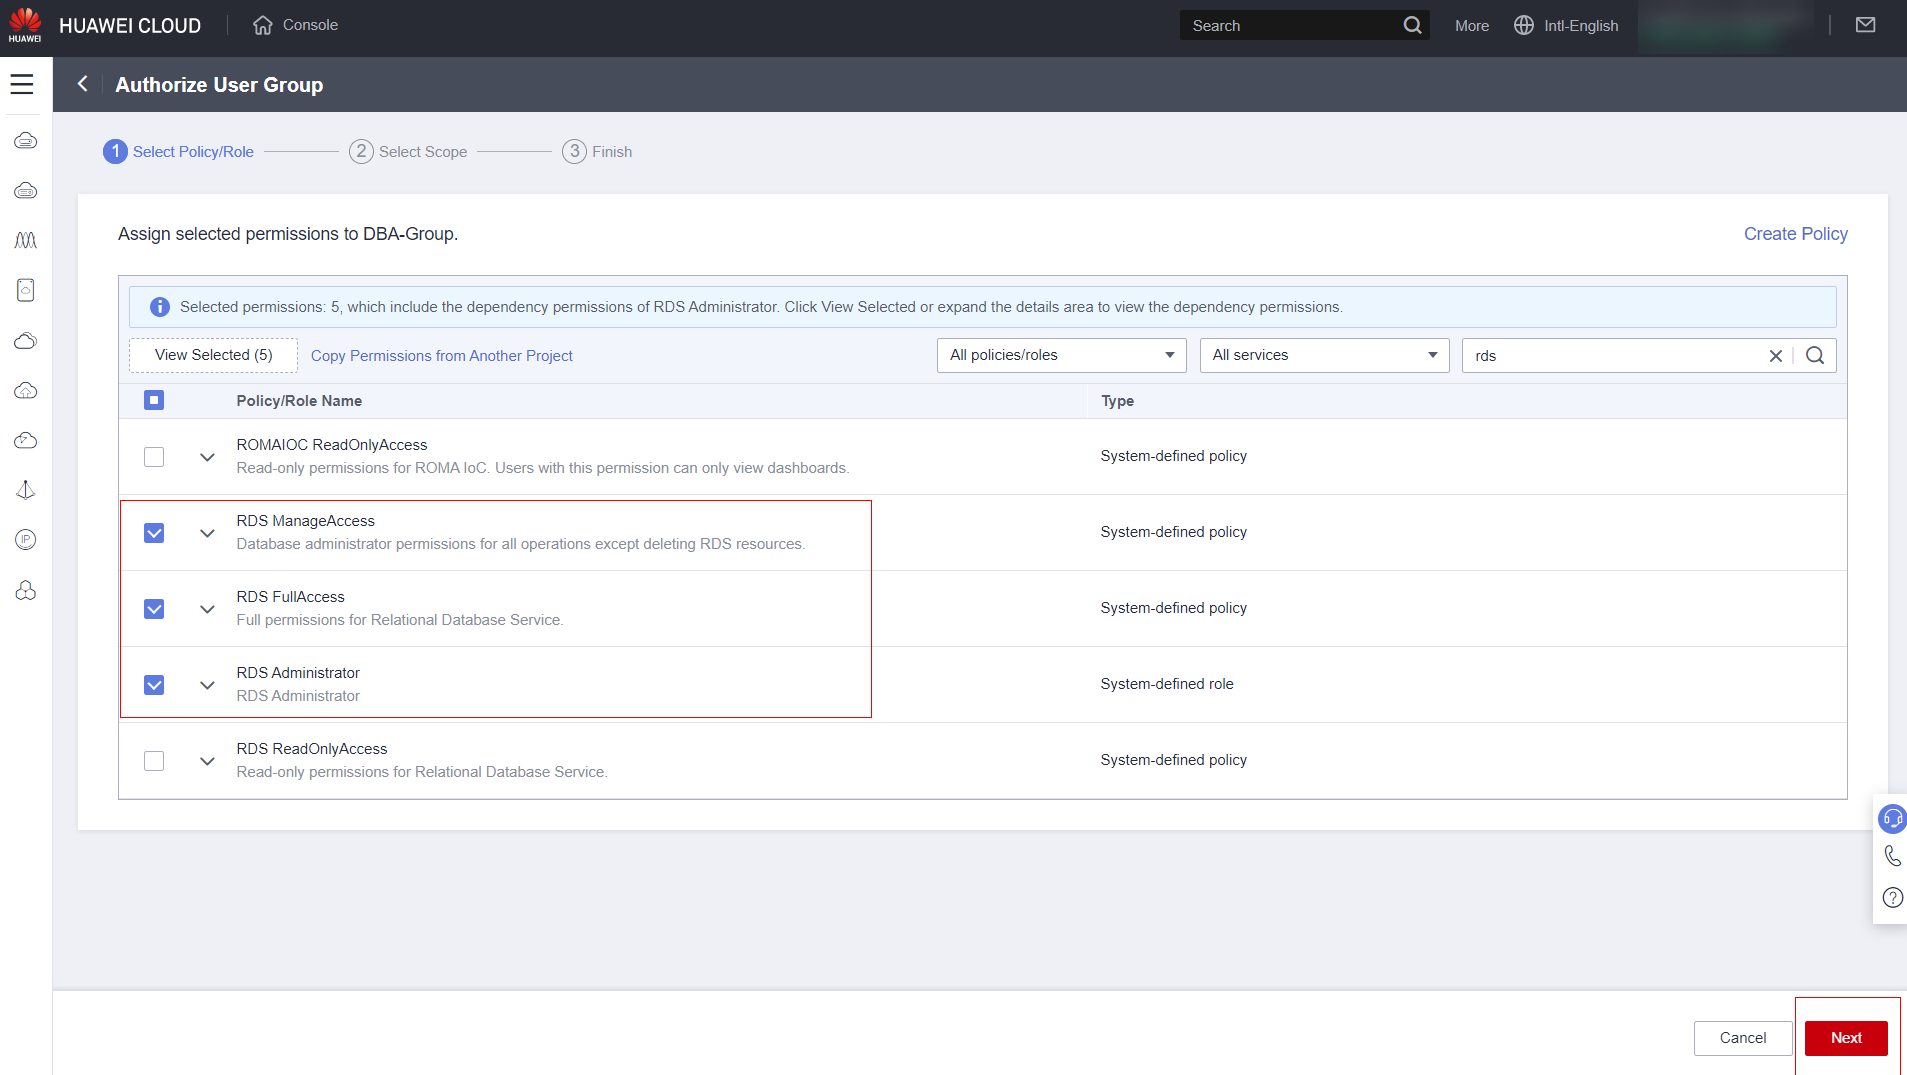
Click “Authorize”.
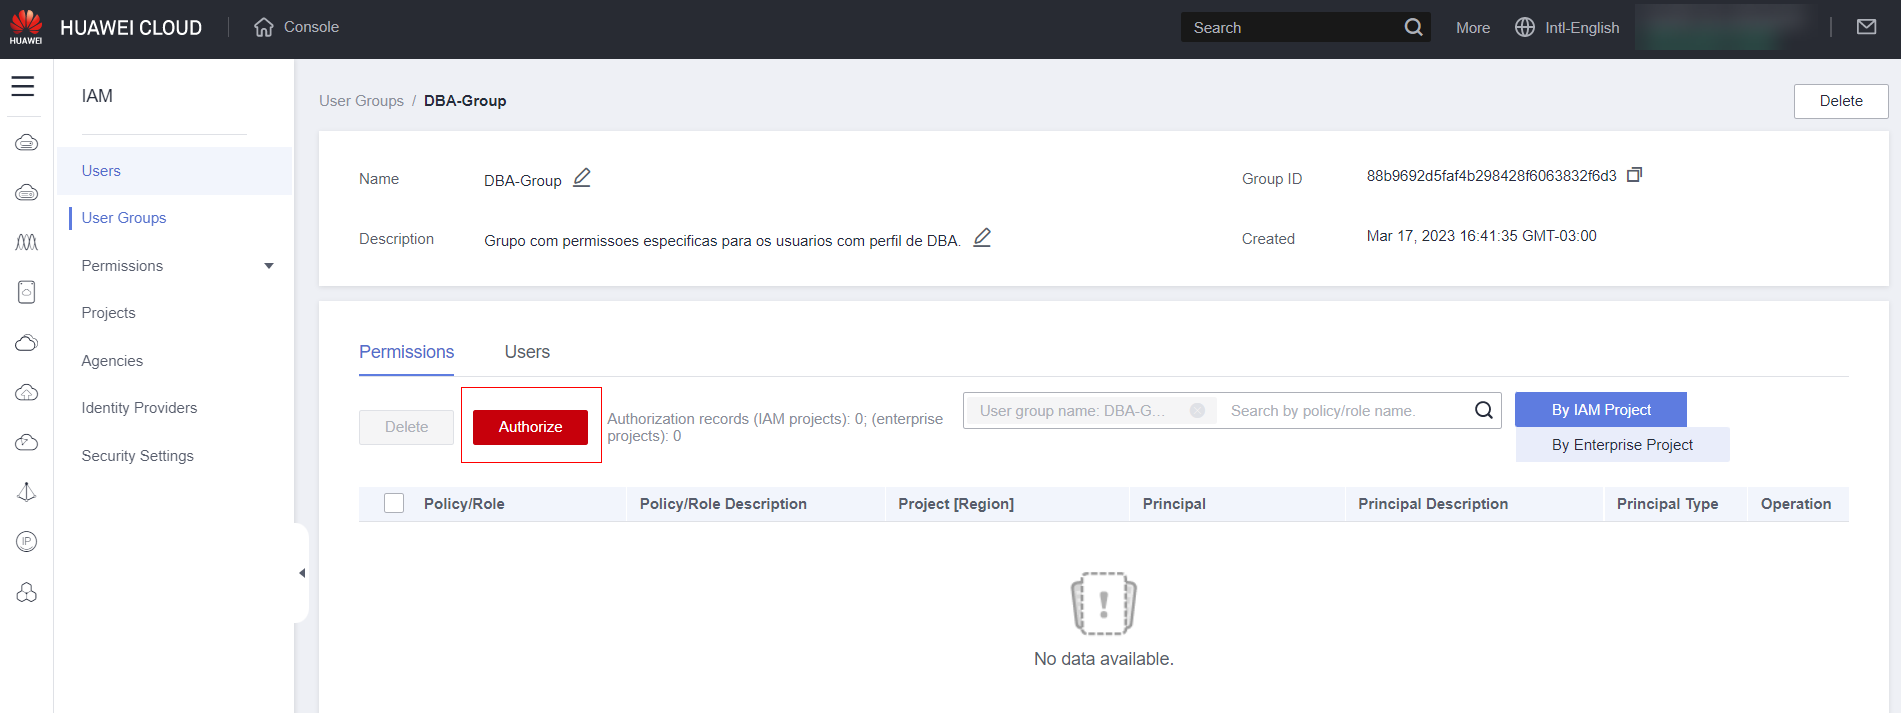
Select the policies you want to use in the group and click “Next.”
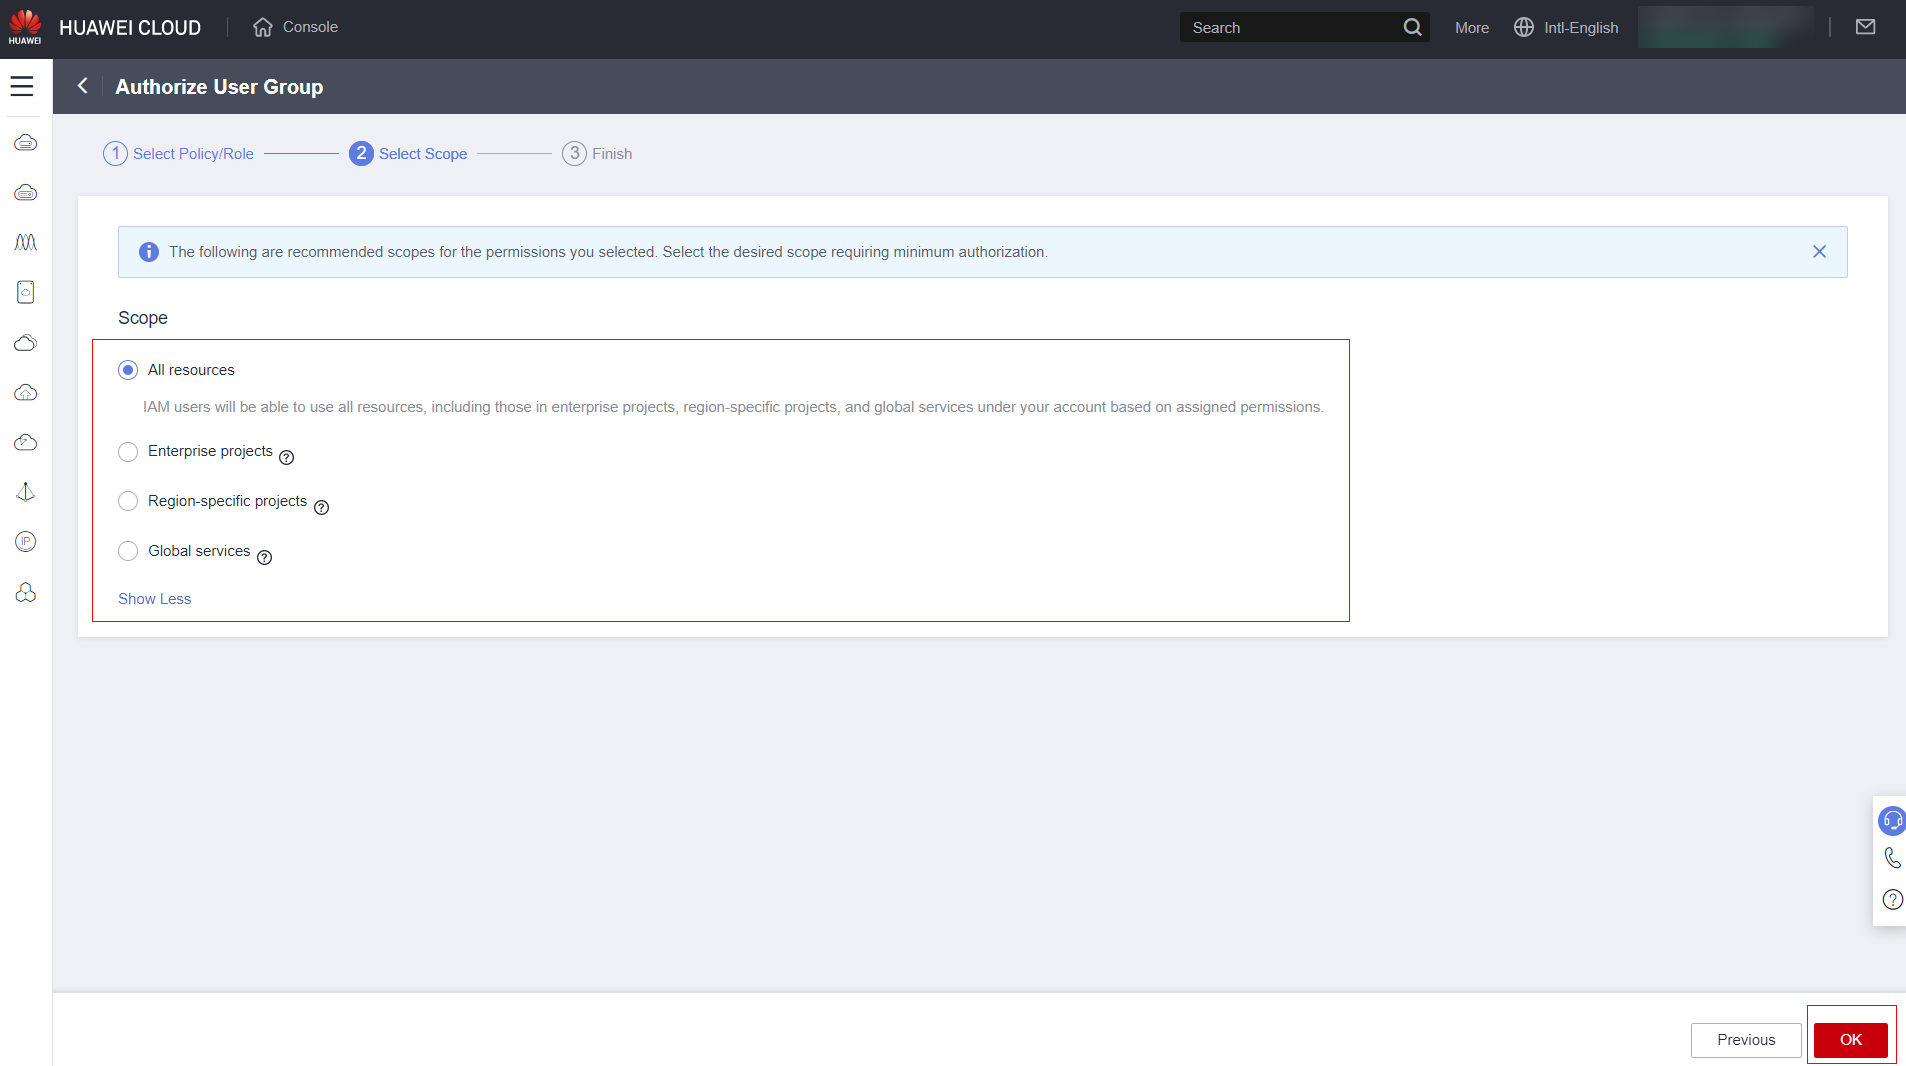
Select how the permission will be granted, for example, for a specific region or for resources deployed in a specific project. The more restrictive the permission granted, the more secure your account will be.
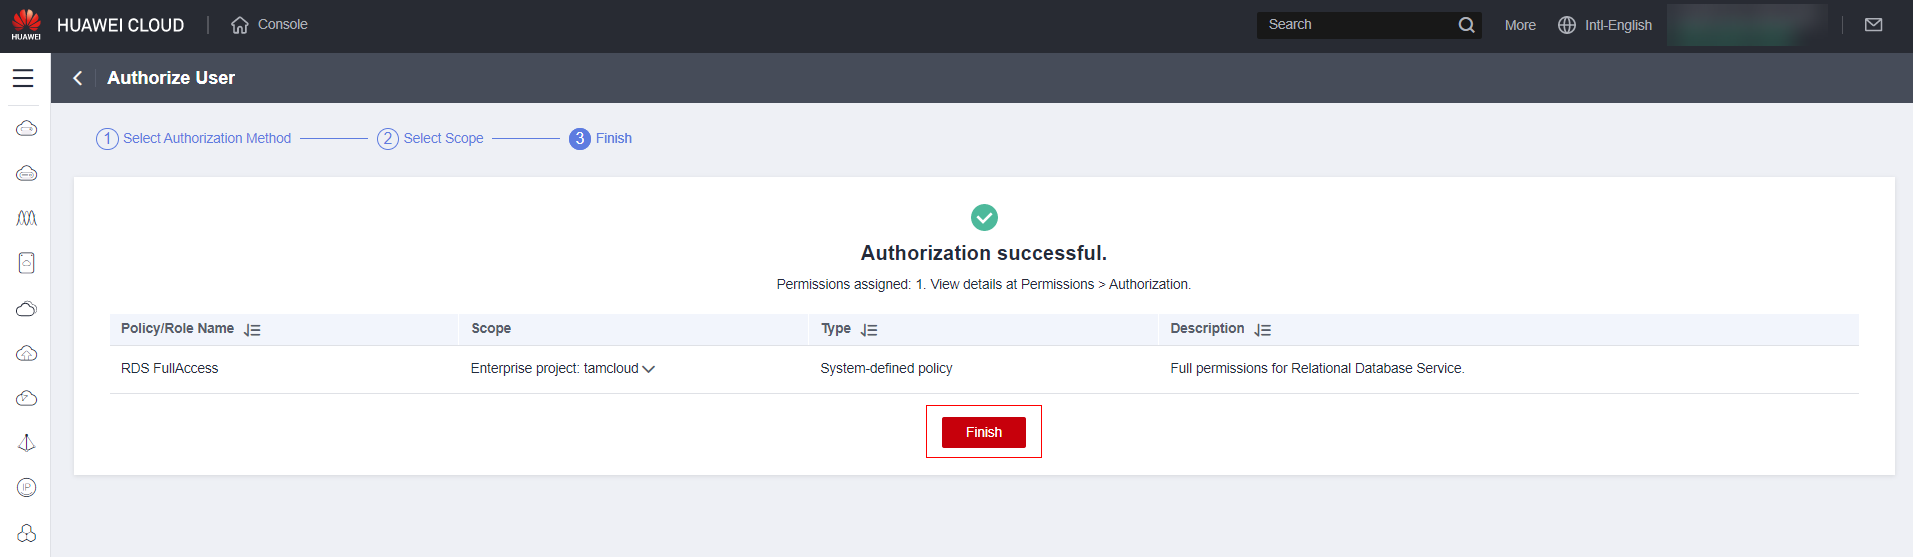
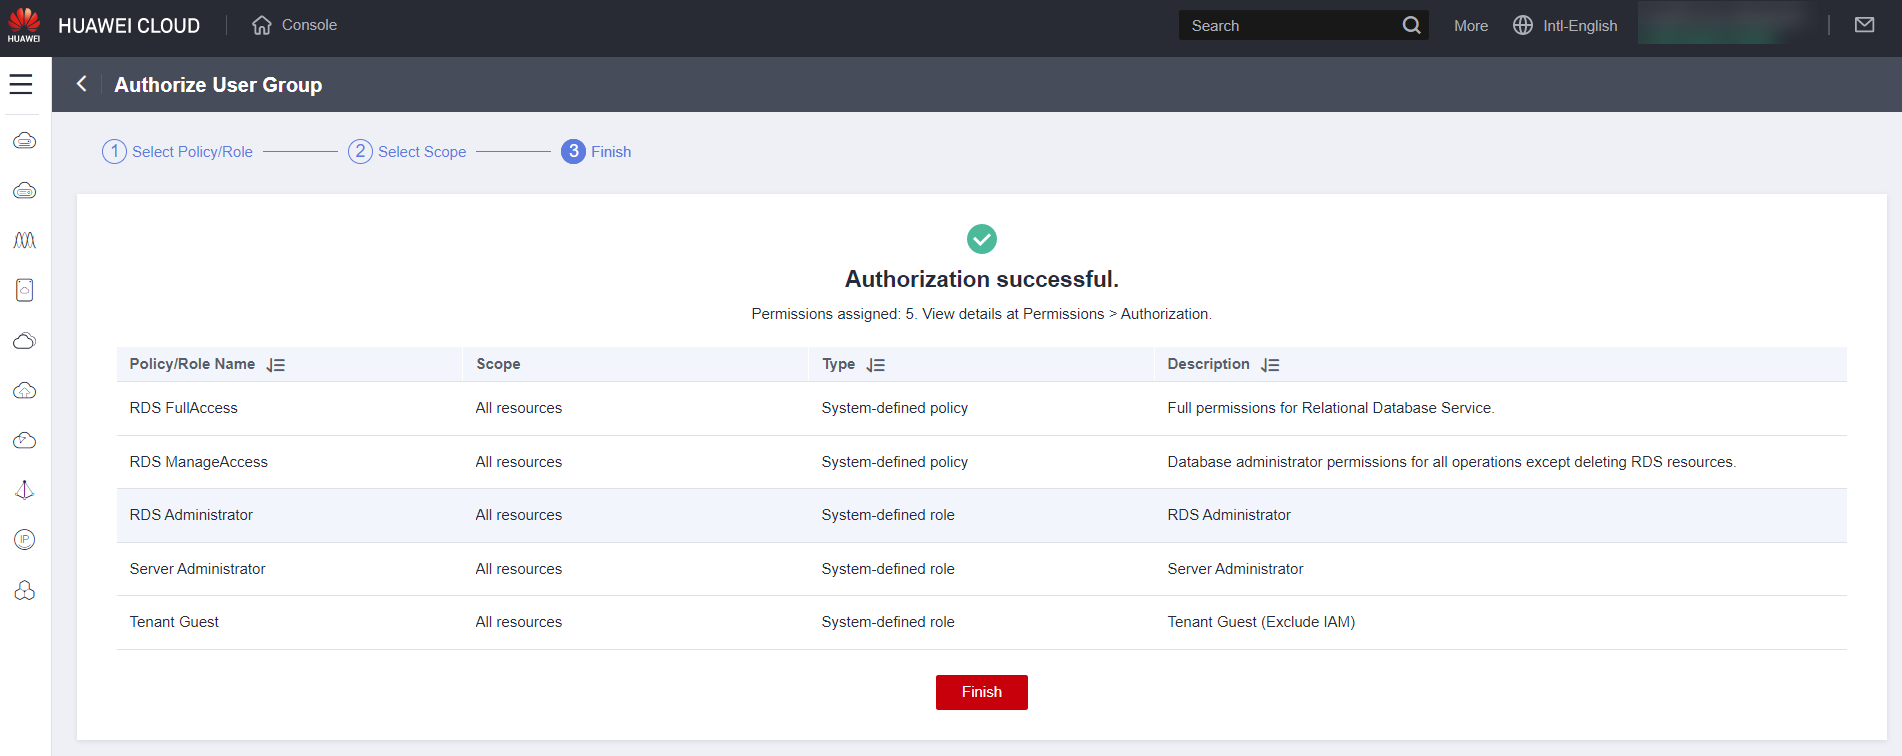
Click “Finish”
User Creation
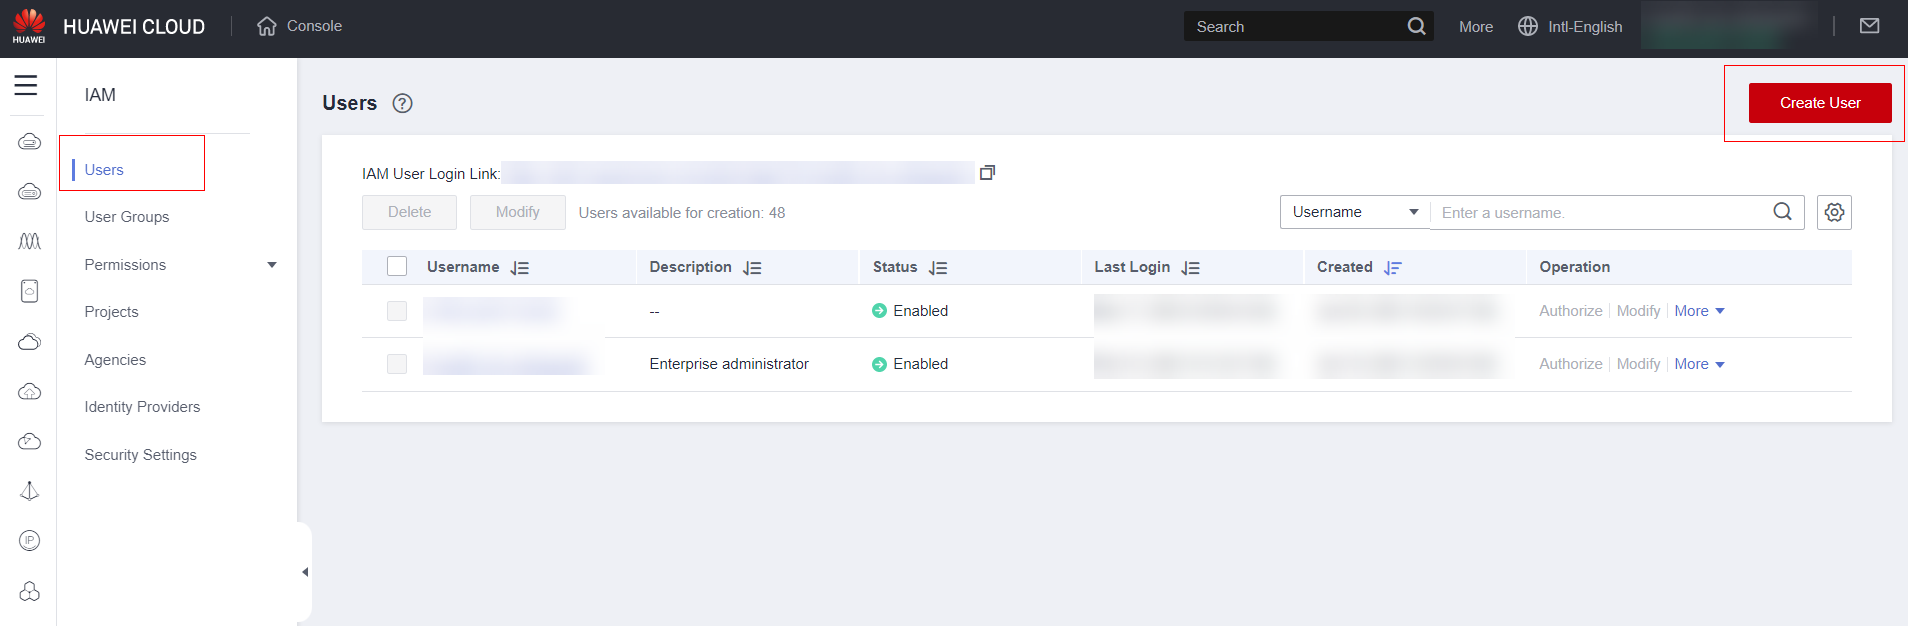
Access the service IAM:
Click on “Users” and then on “Create User”:
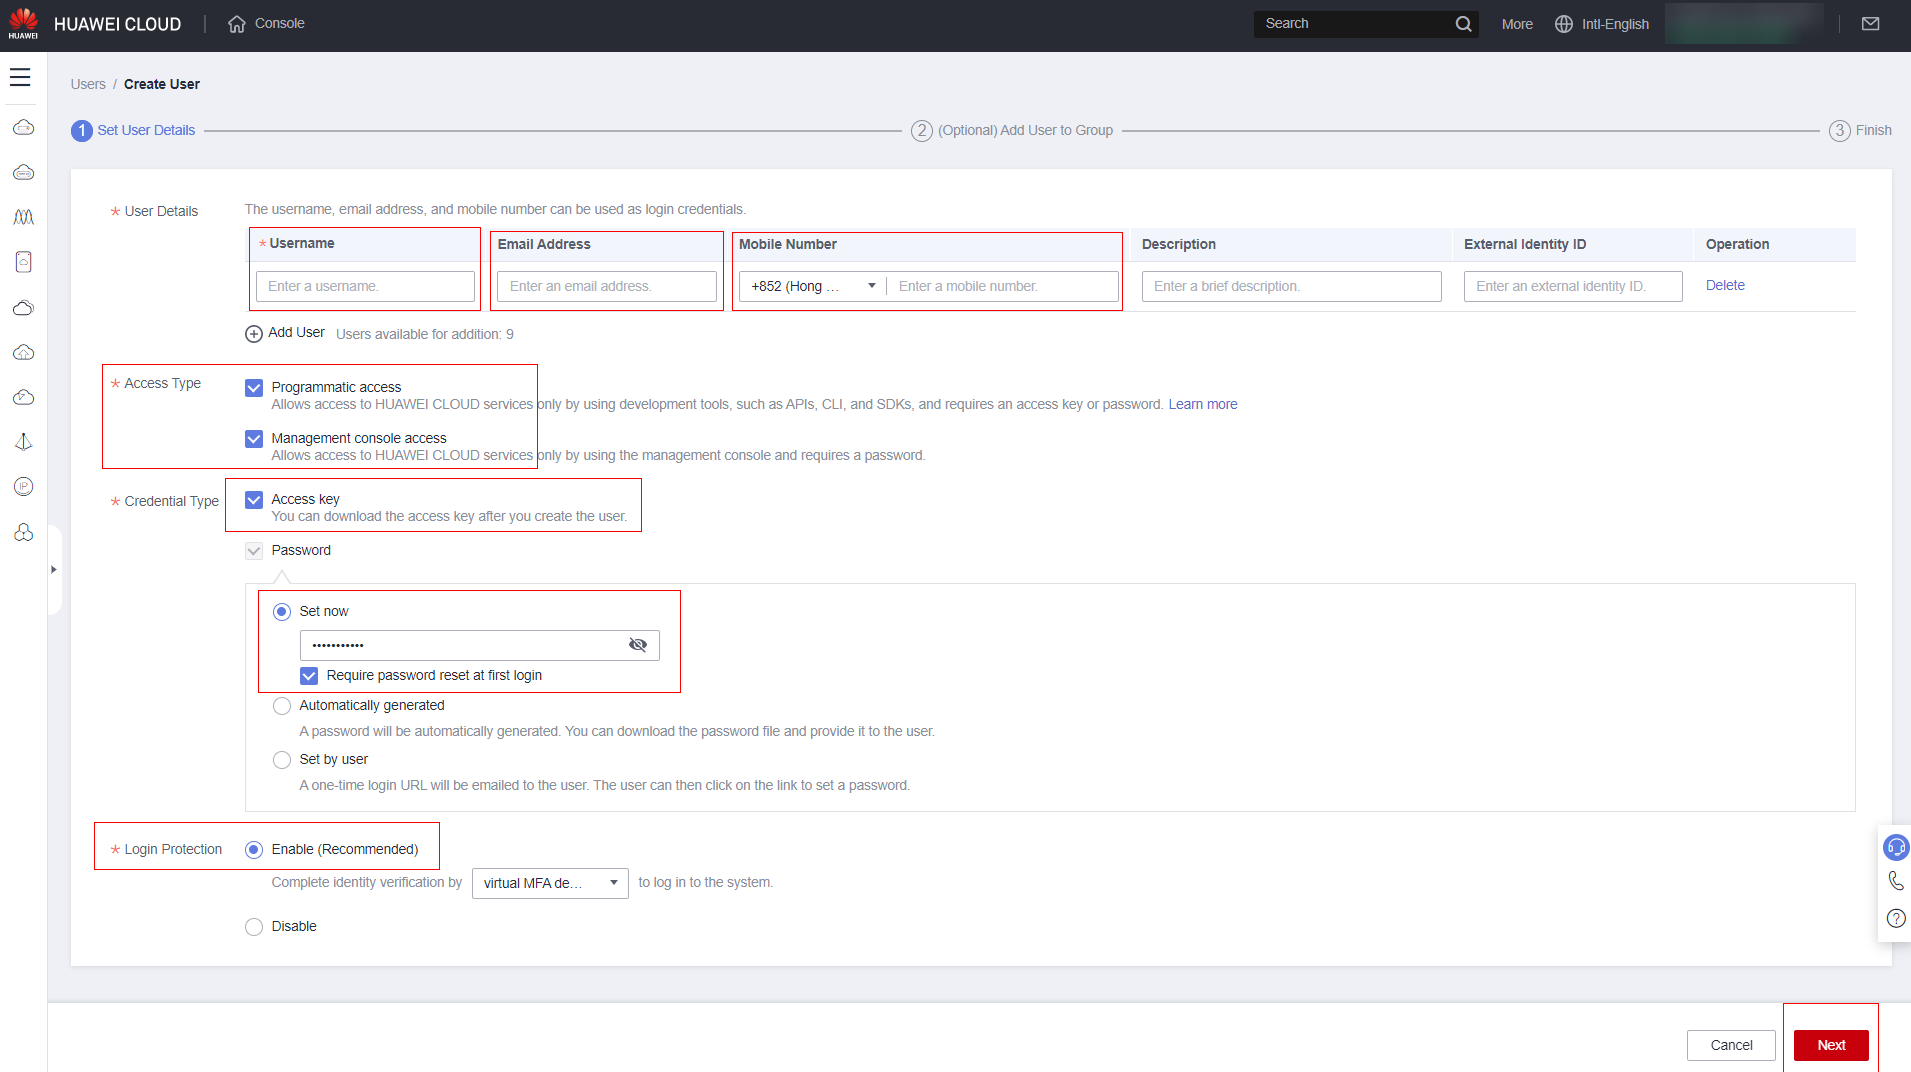
Fill in the fields as instructed in the following sub-items:
Fill in the “Username” field with the standard you want to use in the console or with a standard that already exists in your infrastructure, for example, nome.ultimo
Fill in the field “Email Address” with the user’s email, use corporate email, avoid using personal email. Note: On some networks, users have difficulty accessing information such as verification codes in their corporate email. If this occurs, contact your network/security team to investigate the issue.
Filling in the “Mobile Number” is not mandatory, but recommended in case of problems receiving verification codes by email.
Select the access type according to the user’s needs. However, for security reasons, avoid all users having programmatic access and the console with a standard one.
Select the “Credential Type” field to download programmatic access credentials.
Set the user’s initial password or let the system generate a random password and keep the option to change the password on first access selected for security reasons. Note: If rio has trouble changing the password the first time you log in due to the verification email, uncheck the option to change the password. The first time you grant access in person, rio will offer your terminal when the user enters the password.
STRONGLY recommended that you enable MFA to protect your logs.
Click “Next”.
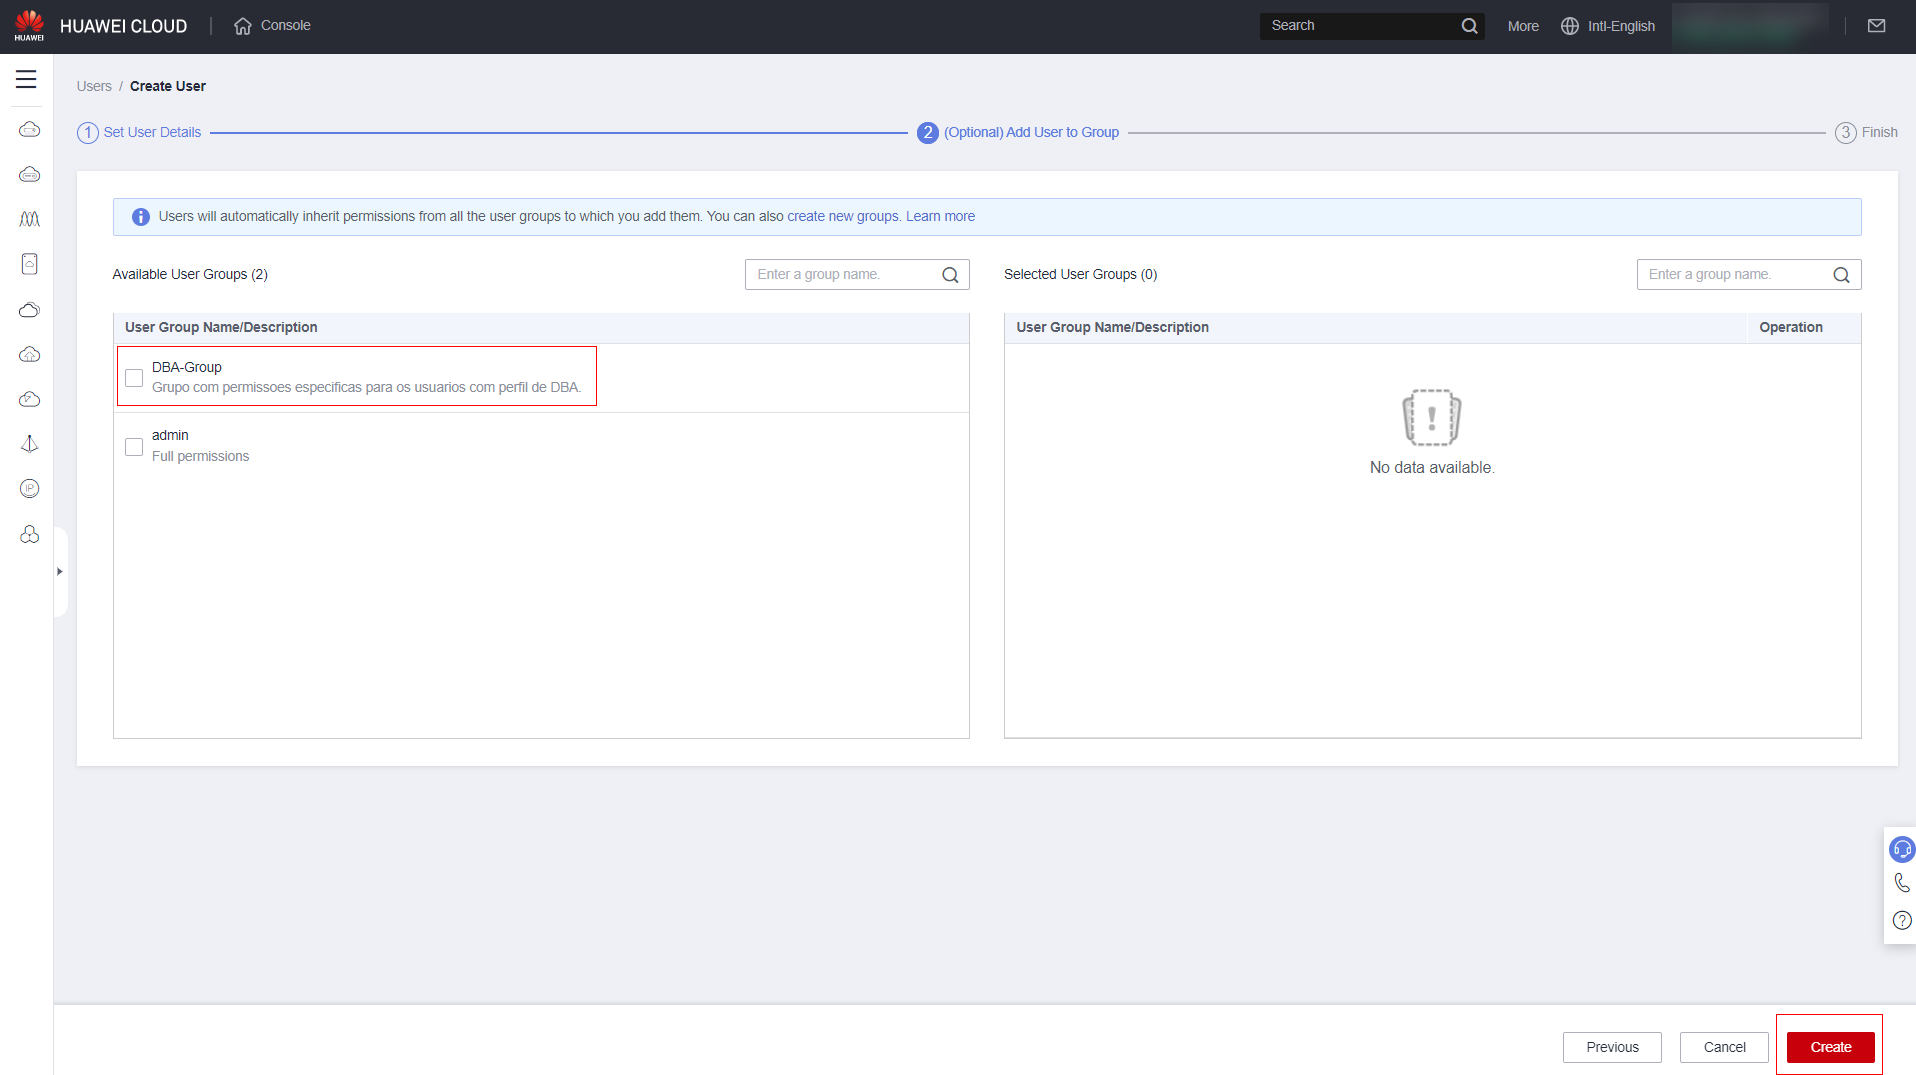
Select the group with the permission set you want for the user. Note: Users can be assigned to more than one group or no group at all. If they don’t belong to any group, permissions/policies must be assigned directly to the user, as shown in sections 3.4.1 to 3.4.
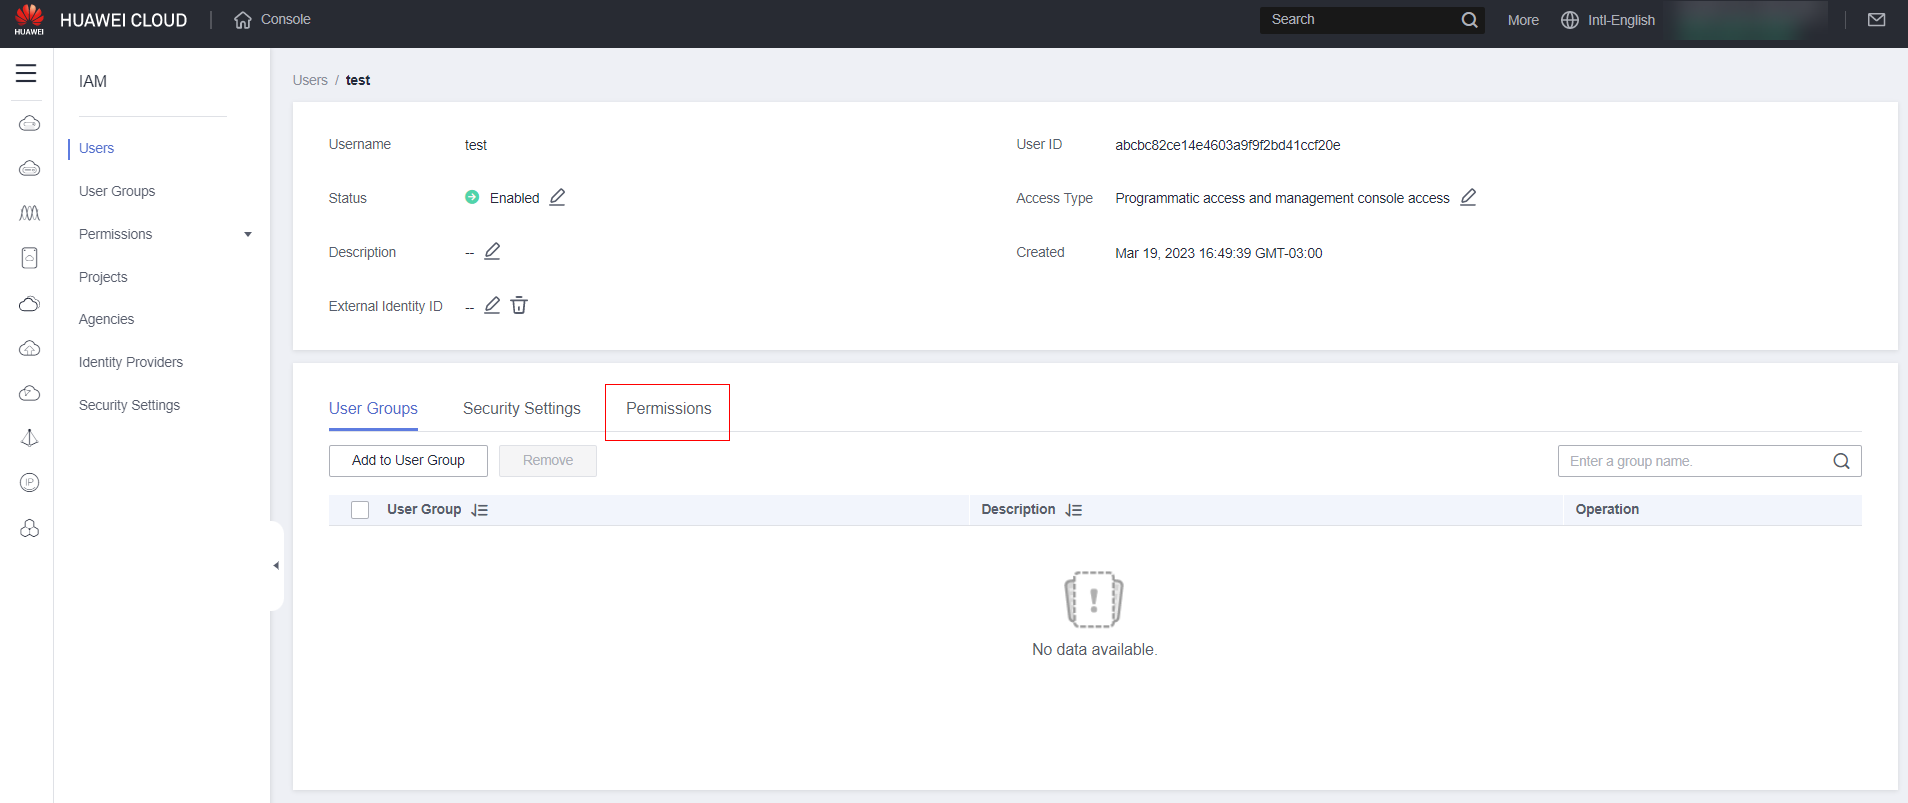
Click on the user you want to directly assign policies to:

Click “Permissions”:
Click “Authorize”:
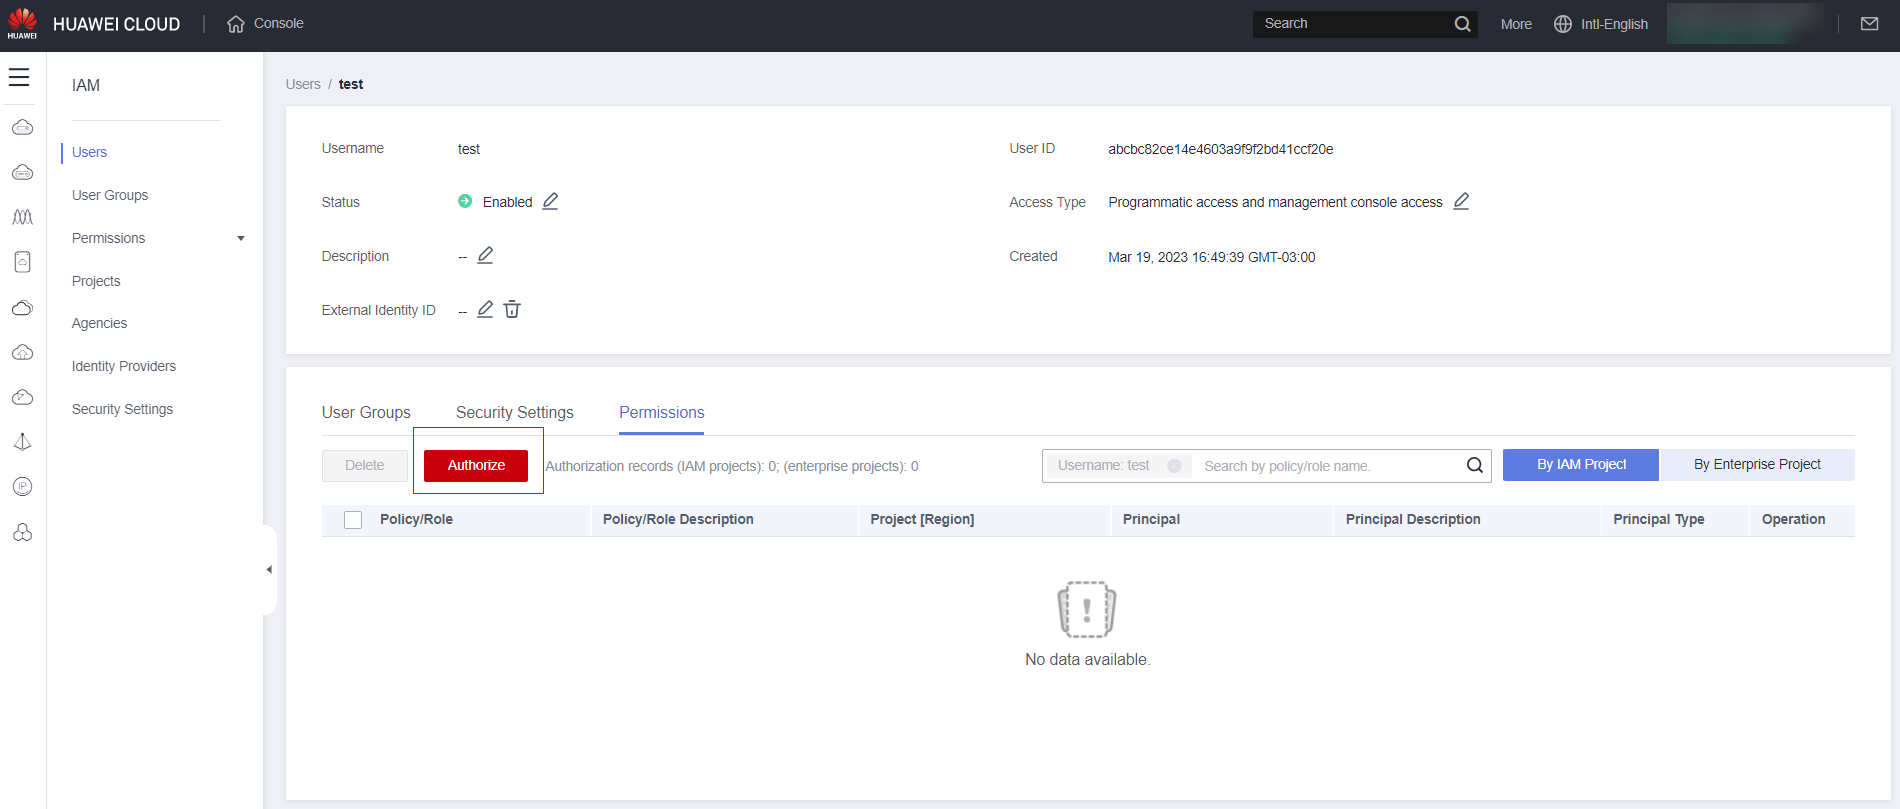
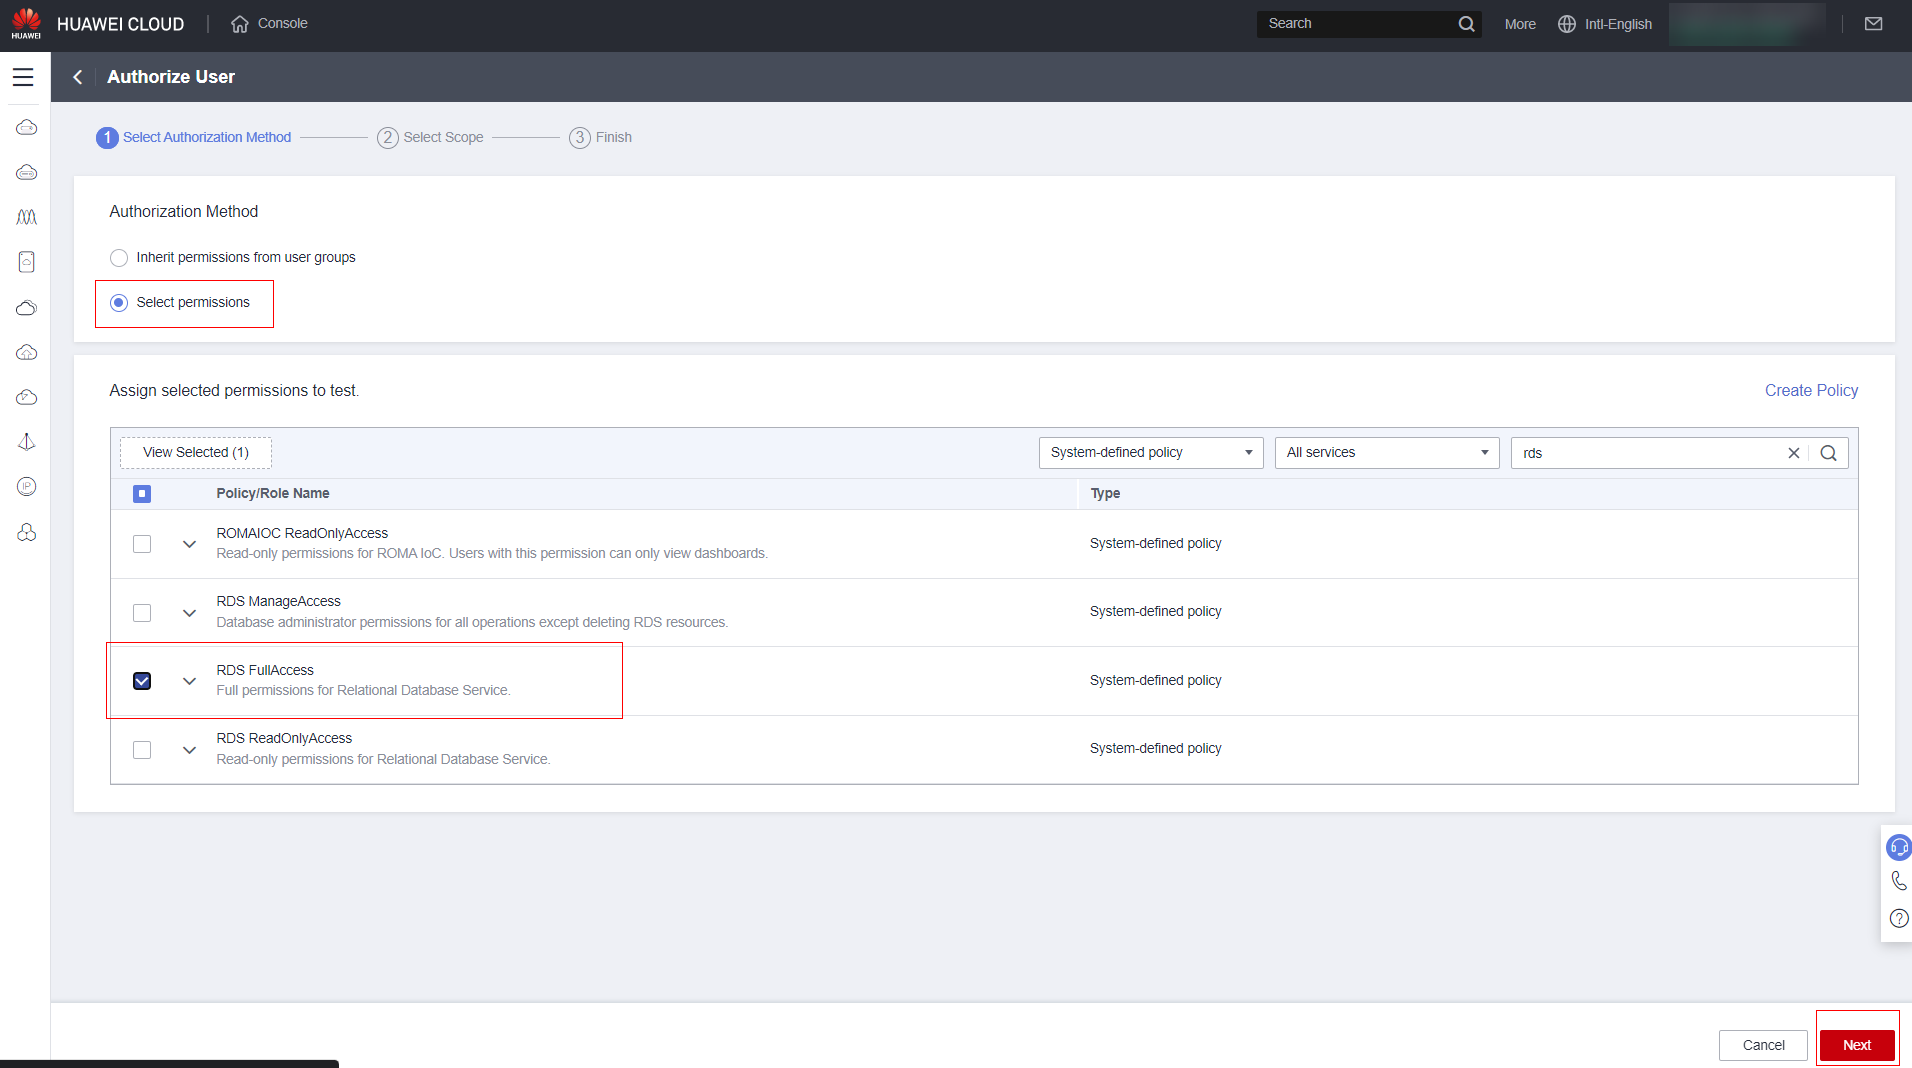
Select “Select permissions,” then select all the permissions you want for the user (Note: You can use the search function to make things easier) and then click “Next”:
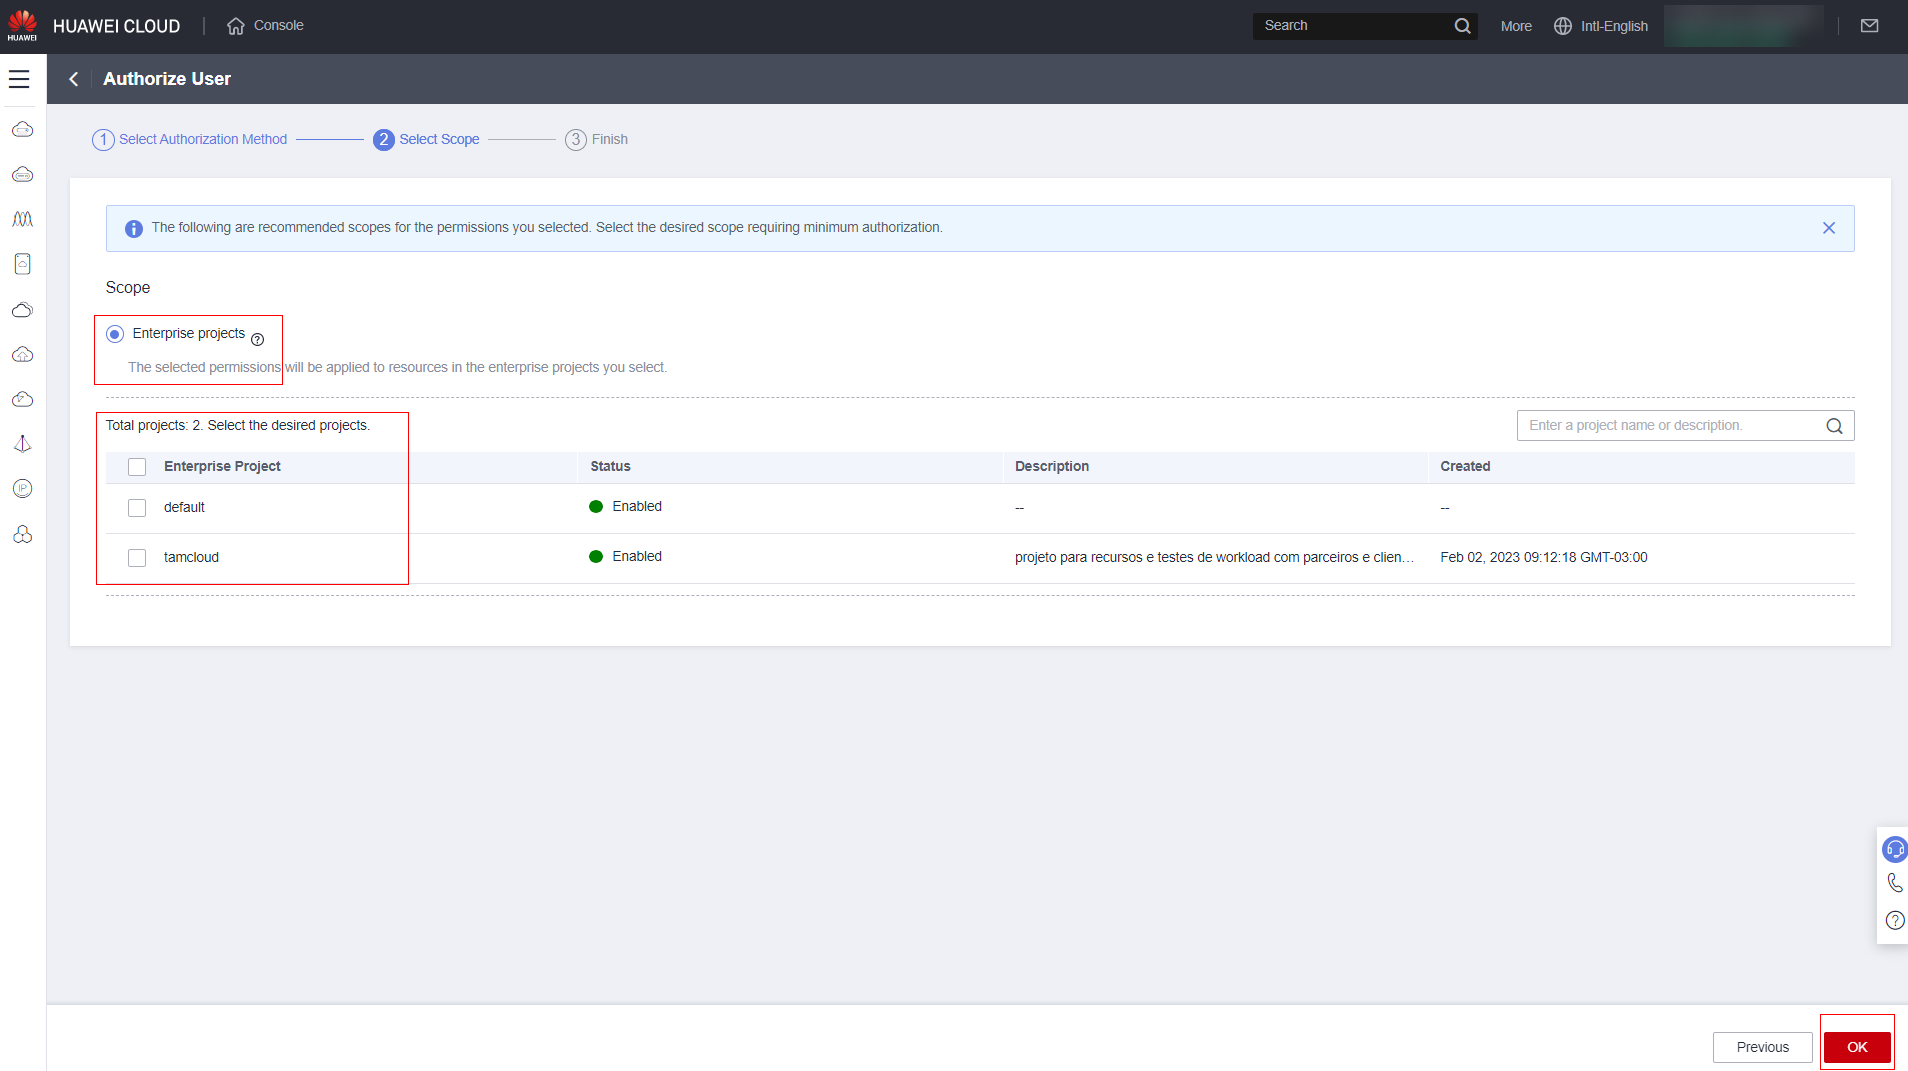
If “Enterprise projects” mode is enabled, select which project(s) the user will have permission to access.
Click “Finish.”